Air fryer chicken wings cook in about 20 to 25 minutes at 400°F, producing crispy skin and juicy meat without a pot of hot oil. You toss the raw wings with a small amount of oil and your chosen seasonings, arrange them in a single layer in the basket, and flip them halfway through. That is the basic process.
The rest comes down to technique. Drying the skin thoroughly before seasoning changes the texture completely. Picking the right temperature prevents burnt spices or undercooked joints.
Knowing when to add wet sauces keeps the crust intact. This guide covers how air fryer chicken wings work, the steps to get them right, and the variables that change the outcome depending on your machine and your ingredients.
Why circulating hot air crisps poultry skin so well
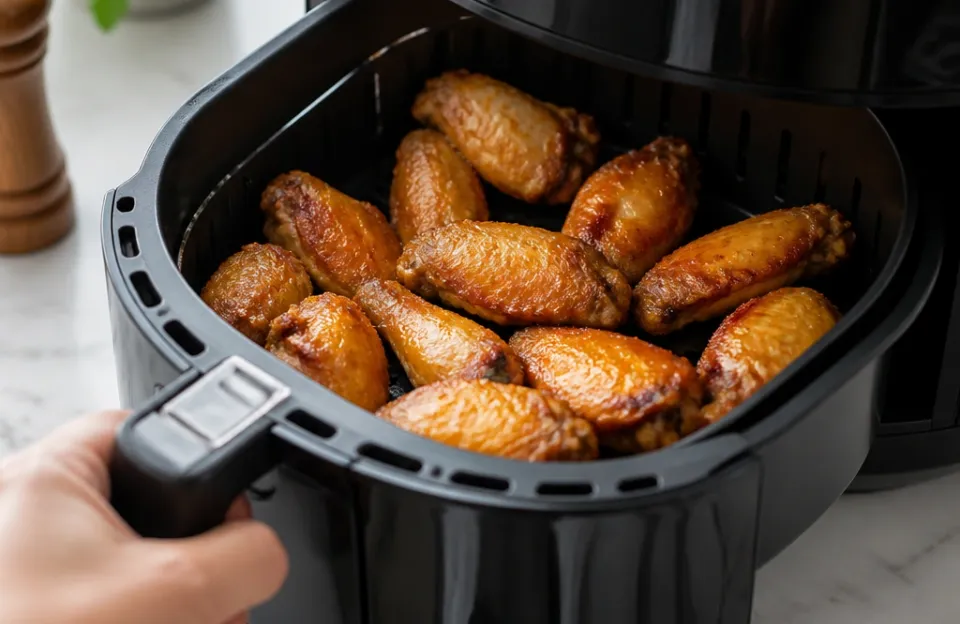
An air fryer works by pushing heated air rapidly around the food using a fan and a heating element located near the top of the unit. Chicken skin contains a high amount of fat and water. When the hot air hits the surface, it evaporates the moisture quickly.
Once the surface dries out, the fat underneath begins to render and fry the skin from the outside in.
This rapid air circulation mimics deep frying because the moving heat transfers energy faster than a standard oven. A conventional oven relies on radiant heat and natural convection, which takes longer to dry out the skin. The confined space of an air fryer basket forces the air directly against the chicken, speeding up the Maillard reaction.
That chemical process between amino acids and reducing sugars is what creates the brown color and savory flavor on the exterior.
Because you need very little added oil, the final product has less overall grease pooling at the bottom of the pan. The rendered fat drips away from the wings through the perforated basket. This separation keeps the bottoms from sitting in liquid, which would steam the skin instead of crisping it.
The role of surface moisture in browning
Water is the enemy of crispness. If the chicken goes into the basket wet, the air fryer spends its first several minutes boiling off that surface water. During that time, the skin stays soft.
Patting the wings completely dry with paper towels before adding any oil or spices cuts that steaming phase out entirely.
Some cooks leave uncovered wings on a wire rack in the refrigerator overnight. The cold, dry air of the fridge pulls additional moisture from the skin. This method takes more planning, but it produces a noticeably crisper bite after cooking.
Fat rendering differences between flats and drumettes
A whole chicken wing consists of three parts: the drumette, the flat (or wingette), and the tip. Most grocery stores sell party wings, which are drumettes and flats separated, with the tips removed. These two pieces behave differently under high heat.
Drumettes have a thicker layer of meat surrounding a single bone. They take slightly longer for the heat to penetrate to the center. Flats have thinner meat sandwiched between two small bones, and they tend to crisp faster.
Keeping this difference in mind helps when checking for doneness, as the flats might look finished while the thickest drumettes still need another minute or two.
Cooking air fryer chicken wings from start to finish
Making air fryer chicken wings requires minimal equipment and roughly half an hour of total time. The active work happens at the beginning and the end. The machine handles the middle.
Supplies needed:
- Raw chicken wings (flats and drumettes)
- Paper towels
- Neutral cooking oil (avocado, canola, or vegetable)
- Dry seasonings or spice rub
- Tongs
- Instant-read thermometer
- Dry the chicken. Remove the wings from their packaging and spread them on a plate lined with paper towels. Press more paper towels firmly against the top and sides of every piece. Discard the wet towels.
- Coat lightly with oil. Place the dried wings in a large bowl. Drizzle one to two teaspoons of neutral oil over them. Toss them with your hands until every piece has a faint sheen. Oil conducts heat and helps dry spices stick to the meat.
- Apply the seasoning. Sprinkle your dry rub evenly over the oiled wings. Toss again. Salt, black pepper, garlic powder, and smoked paprika form a reliable base. If your spice blend contains sugar, be aware that it will brown very fast at high temperatures.
- Preheat the machine. Turn your air fryer to 400°F and let it run empty for three to five minutes. Starting with a hot basket immediately sears the outside of the chicken.
- Arrange in a single layer. Place the wings in the basket. Leave a small gap between each piece. Overlapping blocks the airflow and causes uneven cooking. Cook in batches if your basket is small.
- Cook and flip. Set the timer for 20 minutes. At the 10-minute mark, open the basket and use tongs to turn every wing over. This exposes the underside to the direct heat source.
- Verify the internal temperature. Insert a fast-reading probe into the thickest part of a drumette, avoiding the bone. The USDA states that all poultry must reach a minimum internal temperature of 165°F to be safe to eat. Check their official poultry safety guidelines if you need exact handling standards.
- Sauce after cooking. If you want sauced wings, transfer the cooked pieces to a clean bowl. Pour your sauce over them and toss gently. Adding wet sauce before cooking causes burning and sticking.
Adjusting heat for sweet glazes versus dry rubs
Dry spice rubs handle 400°F perfectly. Sugar-heavy marinades or wet coatings burn at that temperature. If you are preparing a batch coated in a sweet mixture, dropping the heat to 375°F and extending the cook time by three to five minutes prevents charring.
You can find specific timing adjustments when making a sticky sweet garlic coating.
If you prefer soaking the raw chicken beforehand to build flavor deep into the meat, the added liquid means you must pat the exterior very dry before it goes into the basket. A wet marinade left on the surface will drip through the grate and smoke heavily. Review techniques for pre-soaking your poultry in seasoned liquids to balance flavor and texture.
Handling frozen wings straight from the freezer
You can cook frozen wings in an air fryer, though the method shifts slightly. Frozen pieces release a lot of water as they thaw under heat. Start them at 360°F for about 10 minutes to defrost the exterior.
Drain any pooled liquid from the bottom of the basket. Then increase the heat to 400°F, apply your oil and seasoning, and continue cooking for another 15 to 20 minutes. Seasoning won't stick to a frozen block of ice, which is why the two-stage temperature approach works better.
Variables that change the final texture
Every air fryer model circulates heat slightly differently, and chicken wings vary in size. These factors require minor adjustments to the baseline instructions.
Basket capacity dictates how many wings you can cook at once. A 4-quart machine fits about 10 to 12 pieces comfortably in a single layer. Forcing 20 wings into that same space stacks them on top of each other.
The ones trapped in the middle will steam rather than roast. Batch cooking takes more time, but it preserves the crunch. If you routinely feed a crowd, planning ahead for batch cooking and storage saves frustration during game day.
| Wing Type | Recommended Temp | Estimated Time | Texture Profile |
|---|---|---|---|
| Fresh, dry rubbed | 400°F | 20 to 25 mins | Very crispy skin, juicy meat |
| Fresh, sugary glaze | 375°F | 22 to 28 mins | Sticky exterior, tender meat |
| Frozen, unseasoned | 360°F then 400°F | 25 to 30 mins total | Crispy after second stage |
| Dust-coated (flour/starch) | 390°F | 20 to 25 mins | Crunchy, fried-style crust |
Wattage matters too. An 1800-watt unit recovers heat much faster after you open the basket to flip the meat than a 1400-watt model. If you notice your wings aren't browning at the 15-minute mark, your machine might run cooler than average.
Bumping the dial up by 10 degrees usually solves this.
Using a light dusting of starch alters the crust significantly. Tossing the dried wings in a tablespoon of cornstarch or rice flour before adding oil creates a micro-layer that shatters when bitten. Some people prefer a heavier batter approach, similar to traditional pub-style fried food.
Coating the raw pieces in a light flour dredge gives you that thicker, breaded exterior without submerging them in a vat of oil.
Chemical tricks for maximum crunch
Beyond drying the skin and managing heat, altering the pH of the chicken's surface accelerates browning. This is where baking soda enters the process.
Baking soda is alkaline. Raising the pH level on the surface of the chicken skin breaks down the proteins faster when exposed to heat. This speeds up the Maillard reaction mentioned earlier.
You only need a tiny amount. Half a teaspoon mixed into your dry rub for two pounds of wings is plenty. Too much leaves a metallic, soapy taste that ruins the batch.
Applying an alkaline powder correctly requires precision, so follow tested ratios when altering the skin chemistry to avoid ruining dinner.
Another factor is the type of oil used for the initial toss. Oils with low smoke points, like extra virgin olive oil or unrefined sesame oil, will break down and smoke inside the enclosed chamber at 400°F. Avocado oil, refined peanut oil, or standard vegetable oil handle high heat cleanly.
They coat the skin without burning or creating acrid smoke that settles on the food.
Common mistakes that ruin the batch
Even with a simple recipe, a few specific errors lead to soggy, burnt, or unsafe chicken.
- Skipping the paper towel step. Putting wet chicken directly into the basket guarantees a steamed, rubbery texture. Moisture must go first.
- Overcrowding the basket. Air needs physical space to move. Stacking wings blocks the fan's airflow, leaving pale, soft spots on the meat.
- Adding wet barbecue sauce before cooking. Tomato-based and sugar-heavy sauces scorch rapidly at 400°F. Always toss cooked wings in sauce immediately before serving. If you want a baked-on glaze, brush it on during the last two minutes of cooking and watch it closely.
- Guessing the internal temperature. Visual cues like golden-brown skin do not guarantee the meat near the bone reached 165°F. Drumettes are thick. Using a reliable digital thermometer prevents serving undercooked poultry.
- Ignoring the drip tray. Rendered chicken fat accumulates at the bottom of the machine. If the grease level gets too high, the heating element can cause it to smoke heavily or even ignite. Empty the drawer between large batches.
People often worry about the nutritional impact of eating wings frequently. Removing the deep-frying step drops the total fat content considerably compared to restaurant versions. Tracking the macros becomes easier when you control the oil volume, which helps if you are monitoring your overall dietary intake for fitness goals.
Choosing lighter preparation methods also supports those looking for a leaner protein snack without sacrificing the savory flavor profile.
Pairing the finished wings with the right dip
Once the wings are cooked and tossed, the accompaniments matter. A dry, salty wing pairs well with a rich, cooling dip like blue cheese or ranch. A spicy buffalo wing benefits from the dairy fat in those same dressings to neutralize the capsaicin burn.
Sweet-glazed wings often stand alone, but a sharp, acidic dipping sauce cuts through the sugar. Mustard-based dips or a thin vinegar slaw provide that contrast. Planning your condiments ahead of time ensures the meal feels complete.
Having a few prepared options ready to pour into ramekins makes serving guests much smoother, especially if you mix up a dedicated creamy or tangy side dip while the machine runs.
For those who find the standard 20-minute cook time leaves the skin slightly chewy rather than shattered-glass crisp, running the machine for an additional three to four minutes at the end dries out the outermost layer further. Just keep an eye on them, as the line between extra crunchy and burnt moves fast. Pushing the texture limit yields a deeply browned result for fans of intense crunch and snap.
If you lean toward heavy, aromatic flavors, tossing the freshly cooked hot wings in melted butter mixed with grated cheese and minced herbs creates a rich crust that clings to the rough surface. The residual heat melts the cheese slightly without burning it. Exploring savory, herb-forward combinations offers a distinct departure from traditional hot sauce.
A classic combination of roasted aromatics and hard cheese coats the hot meat beautifully, providing a rich alternative to standard buffalo styles.
Monitoring the ambient heat inside your kitchen setup also plays a minor role. If you are running multiple appliances simultaneously, verifying your machine's actual output temperature with an independent tool prevents undercooking. Sometimes the built-in digital display drifts from the real heat level inside the chamber.
Frequently asked questions
Can I stack chicken wings in the air fryer to save time?
No. Stacking blocks the forced air circulation that creates the crispy texture. The wings touching each other will steam in their own moisture, resulting in pale, soft skin.
Always arrange them in a single layer with space between each piece, and cook in multiple batches if necessary.
Do I need to spray the basket with nonstick cooking spray?
Usually, no. Chicken wings contain enough natural fat that they rarely stick to a nonstick basket, especially if you toss them in a small amount of oil first. Aerosol cooking sprays containing propellants can actually degrade the nonstick coating on some air fryer baskets over time.
Brushing a tiny amount of oil onto the grate is safer for the machine.
Why did my spice rub burn and turn bitter?
Most likely, your rub contained sugar, and your temperature was too high. Brown sugar, honey powder, or sweet paprika caramelize quickly and then carbonize at 400°F. Lower the heat to 375°F and extend the cooking time by a few minutes when using sweet seasonings.
How do I know when the wings are fully cooked?
The only reliable method is inserting an instant-read meat thermometer into the thickest part of a drumette, ensuring the probe does not touch the bone. The reading must hit 165°F. Color is a poor indicator, as smoked paprika or soy sauce in a marinade can make raw meat look fully cooked.
Can I reheat leftover wings in the air fryer?
Yes, and it is the best way to restore their texture. Microwaving makes them rubbery. Place the cold leftovers in the basket at 370°F for three to five minutes.
The circulating heat warms the meat while re-crisping the rendered fat in the skin.
Should I trim the wing tips before cooking?
Yes. Wing tips are mostly skin, cartilage, and bone with almost no meat. In the high heat of an air fryer, they burn to a crisp long before the thicker drumettes finish cooking.
Cut them off at the joint and save them in the freezer for making chicken stock later.
Before you serve
Air fryer chicken wings succeed because the appliance removes the mess of deep frying while keeping the high-heat environment required for crispy skin. The core rules remain constant across every recipe variation: dry the surface completely, leave room for the air to move, verify the internal temperature reaches 165°F, and apply wet sauces only after the cooking cycle ends. Master these mechanical steps, and the flavor variations become easy to swap in based on whatever you are craving that night.




