Coating chicken wings in flour before air frying gives them a dry, shatteringly crisp skin that rivals deep frying. The flour absorbs surface moisture, browns under the circulating hot air, and creates a textured crust without submerging the meat in oil. Making air fryer chicken wings with flour takes about 30 minutes from start to finish, requires no special equipment beyond the appliance itself, and works with any standard seasoning blend you keep in your pantry.
This guide covers why flour behaves differently than cornstarch or baking powder in an air fryer basket, how to prep the wings so the coating sticks, and the exact timing needed for fully cooked results. It also addresses the most common texture problems people run into when cooking air fryer chicken wings with flour at home.
Why flour creates a different crust in an air fryer
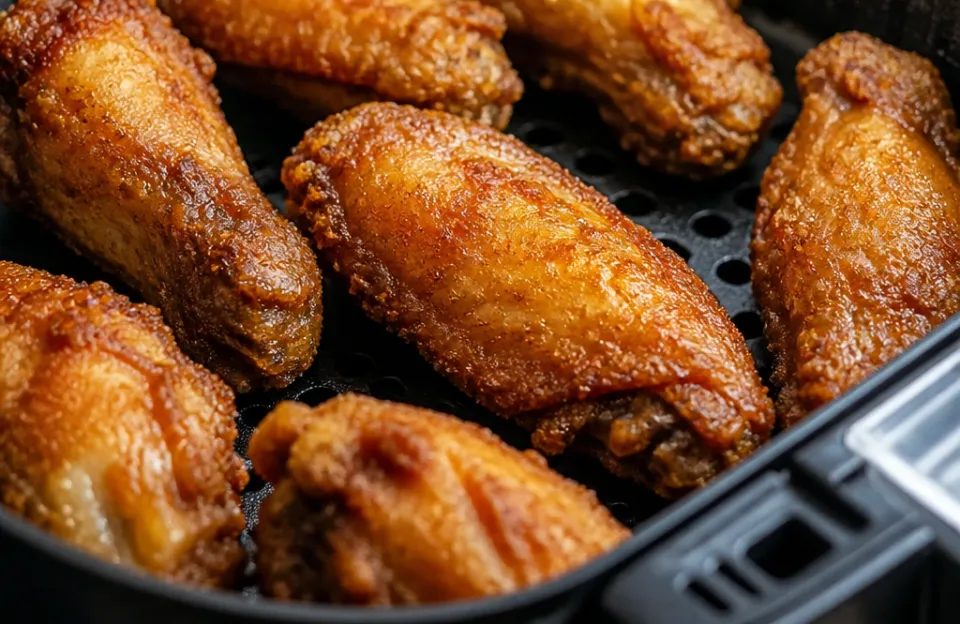
Wheat flour contains both starch and protein. When exposed to the high heat of an air fryer, the starches gelatinize and the proteins undergo the Maillard reaction. This chemical process is what turns the pale dusting into a golden brown, savory crust.
Because an air fryer circulates hot air rapidly around the food, the moisture on the outside of the wing evaporates quickly. The flour traps just enough fat rendering from the skin to fry itself in a thin layer.
Cornstarch produces a glassier, harder crunch because it lacks the gluten proteins found in wheat flour. Baking powder raises the pH of the chicken skin, which speeds up browning and breaks down proteins for a bubbly texture. Flour sits between these two extremes.
It gives you a traditional fried chicken feel without the heavy batter. All-purpose flour works best here. Bread flour has too much protein and can turn chewy, while cake flour lacks the structure to hold up against the rendered chicken fat.
The USDA requires all poultry to reach an internal temperature of 165°F to be safe to eat. You can verify this by checking the thickest part of the wing with a fast digital probe near the bone. Air fryers cook faster than conventional ovens, so the exterior flour crust can brown well before the interior hits that safety threshold if the temperature is set too high.
Prepping the wings so the flour actually sticks
Raw chicken wings are wet. If you toss damp wings directly into a bowl of flour, the coating turns into a thick, gummy paste. That paste will stick to the air fryer basket and tear off when you try to flip the pieces.
Drying the skin is the single most important step for getting a good result with air fryer chicken wings with flour.
Take the wings out of their packaging and spread them on a wire rack lined with paper towels. Pat every piece thoroughly with more paper towels. Press firmly against the skin around the joints where moisture collects.
Leave them uncovered on the counter for about ten minutes while you mix your seasonings. This brief rest allows the surface moisture to evaporate further.
Separate the flats from the drumettes if they are still connected. The joint between them traps steam during cooking, which softens the flour coating from the inside out. Cutting through the joint exposes more surface area to the hot air.
Discard the wing tips or save them for stock.
Once the wings feel tacky and mostly dry to the touch, place them in a large bowl. Drizzle a very small amount of neutral oil over them. Half a tablespoon for two pounds of wings is plenty.
Toss them until every piece has a faint sheen. This micro-layer of fat gives the flour something to bind to and helps conduct heat into the crust immediately when the cooking cycle starts.
Mixing the seasoned flour coating
Plain flour tastes bland. To build flavor directly into the crust, whisk your dry seasonings into the flour before coating the wings. A reliable base ratio for two pounds of chicken wings is half a cup of all-purpose flour mixed with one teaspoon of kosher salt, half a teaspoon of black pepper, one teaspoon of garlic powder, and one teaspoon of smoked paprika.
Put the flour and spices into a wide, shallow bowl or a large zip-top bag. Whisk or shake the mixture until the color is uniform. Clumps of seasoning trapped in pockets of flour will create unevenly spiced spots on the finished wings.
Add the dried, lightly oiled wings to the seasoned flour a few at a time. Toss them gently. You want a thin, even dusting on every surface.
Shake off the excess flour before transferring the wings to a plate. Thick clumps of raw flour will not cook through in the air fryer. They leave chalky, powdery patches on the skin that taste raw and look unappetizing.
If you prefer a thicker crust, let the coated wings sit on a wire rack for five minutes after dredging. The flour will hydrate slightly from the residual moisture and oil, forming a firmer shell. Do not stack the coated wings while they rest, or the bottom pieces will lose their coating.
Cooking times and temperatures for crispy results
Air fryers vary in wattage and basket size, but a temperature of 380°F works well for air fryer chicken wings with flour. This heat is high enough to brown the flour quickly without burning it before the meat cooks through. Higher temperatures, like 400°F, often scorch the seasoned flour while leaving the meat near the bone undercooked.
Arrange the floured wings in the air fryer basket in a single layer. Leave space between each piece. The hot air needs to flow freely around the entire surface of the wing to crisp the flour.
If the pieces touch, the trapped steam will make the coating soggy. Cook in batches if your basket is small. Overcrowding ruins the texture every time.
Cook the wings at 380°F for 12 minutes. Open the basket and flip each piece using tongs. Flipping exposes the bottom side to direct airflow and prevents the flour from sticking to the basket grate.
Cook for another 10 to 12 minutes. Check the largest drumette for doneness. Using a reliable wireless thermometer makes monitoring the internal heat simple without opening the drawer repeatedly.
The meat should read 165°F, and the juices should run clear.
For extra crunch, increase the temperature to 400°F for the final two minutes of cooking. Watch the wings closely during this step. Flour burns faster than bare skin, and the line between deeply golden and charred is very thin.
| Wing Size | Temperature | First Side Time | Second Side Time | Total Time |
|---|---|---|---|---|
| Small (party wings) | 380°F | 10 minutes | 8 minutes | 18 minutes |
| Large (whole split) | 380°F | 12 minutes | 12 minutes | 24 minutes |
| Extra large (jumbo) | 380°F | 14 minutes | 14 minutes | 28 minutes |
These times assume the basket was not preheated. If you run an empty three-minute preheat cycle, subtract two minutes from the total cooking time.
Tossing in sauce without ruining the crust
The main reason to coat wings in flour is to get a crunchy exterior. Dumping freshly cooked air fryer chicken wings with flour directly into a bowl of liquid sauce will soften that crust almost instantly. The flour acts as a sponge, absorbing the moisture and turning back into a paste.
If you want sauced wings, wait until right before serving. Place the hot, crispy wings in a large metal bowl. Pour the warmed sauce over the top.
Toss gently just once or twice to coat the surfaces. Serve them immediately on a platter. Do not return sauced floured wings to the air fryer.
The sugars in most wing sauces will burn rapidly at high temperatures, and the flour underneath will turn mushy.
Alternatively, serve the sauce on the side for dipping. This preserves the full crunch of the flour coating for the entire meal. Dry rubs work exceptionally well with flour-coated wings because they add zero moisture.
Toss the hot wings in a dry spice blend straight out of the basket. The residual surface fat will help the spices adhere to the crust.
What happens when the flour falls off in the basket
A common issue with air fryer chicken wings with flour is the coating sticking to the basket grate instead of the chicken. This usually happens for one of three reasons: the wings were too wet before dredging, the basket was not greased, or the wings were moved too early.
Always spray the air fryer basket lightly with cooking oil before adding the floured wings. Even non-stick baskets benefit from a quick spritz when working with dry flour coatings. Avoid aerosol non-stick sprays containing propellants, as they can degrade the non-stick coating on some air fryer baskets over time.
Use a pump-style oil mister or brush on a thin layer of oil manually.
When you open the basket to flip the wings at the halfway mark, use tongs and lift gently. If a wing resists, it means the flour crust has not fully set yet. Close the basket and give it another two minutes.
Forcing a stuck wing loose will tear the coating away entirely. Keeping your equipment clean also prevents buildup that causes sticking; learning how to maintain the appliance interior helps the basket release food properly over time.
Flour versus other dry coatings for air frying
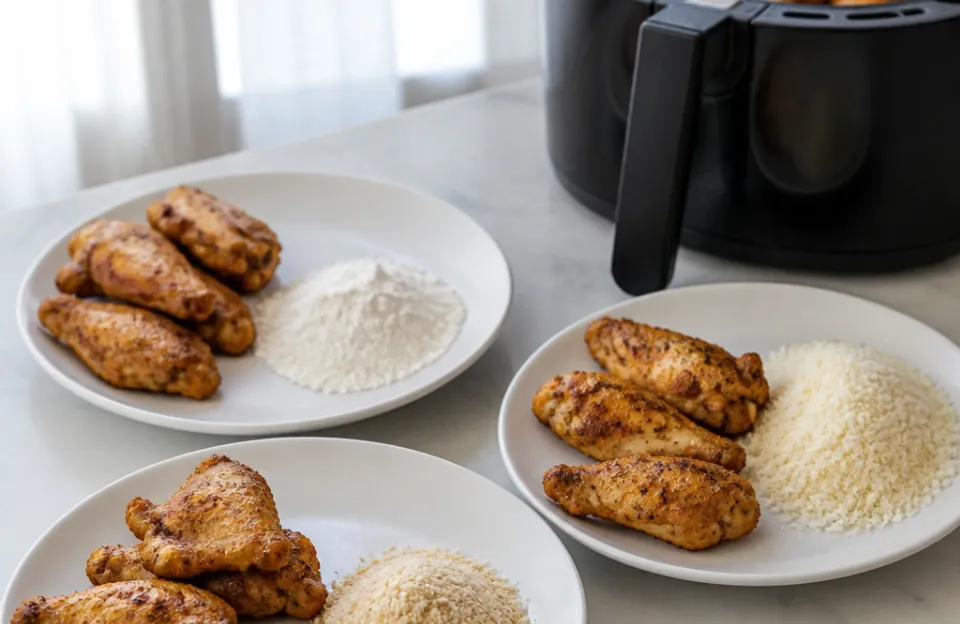
People often wonder if they should swap the flour for something else. Each dry coating behaves differently under the intense convection heat of an air fryer. Understanding these differences helps you decide if flour is the right choice for the texture you want.
Cornstarch yields a lighter, crisper, almost glass-like shell. It does not brown as deeply as flour and lacks the savory, toasted flavor that wheat proteins develop. Many recipes call for a fifty-fifty blend of flour and cornstarch to get the browning of the flour with the shatter-crisp texture of the starch.
Baking powder is technically a leavening agent, but when used in small amounts on chicken skin, its alkalinity changes the protein structure. It draws moisture to the surface and creates tiny bubbles as it reacts, resulting in a craggy, blistered texture. Baking powder alone leaves a slightly metallic taste if over-applied, so it is usually mixed with flour or salt rather than used as the sole coating.
Crushed pork rinds or almond flour are popular low-carb alternatives. Pork rinds provide immediate crunch but do not adhere as well as wheat flour without an egg wash binder. Almond flour burns much faster than all-purpose flour due to its high fat content, requiring lower cooking temperatures and closer monitoring.
If you are experimenting with different coatings, track the surface temperature closely. An infrared laser tool lets you check how hot the basket environment gets without interrupting the airflow.
Scaling the recipe for larger batches
Air fryers have limited capacity compared to a deep fryer or a sheet pan in a conventional oven. Cooking air fryer chicken wings with flour for a crowd requires batch cooking. The challenge with batch cooking is keeping the first rounds warm and crispy while the later rounds finish.
Do not stack the finished wings on a plate. The steam rising from the bottom layers will ruin the flour crust on everything above it. Instead, transfer cooked batches to a wire cooling rack set over a baking sheet.
Place the baking sheet in a regular oven set to its lowest warming temperature, usually around 170°F to 200°F. This keeps the meat hot while allowing air to circulate around the crust.
You will need to refresh the seasoned flour mixture between batches. As you dredge multiple rounds of wings, the flour picks up moisture and fat from the chicken. By the third batch, the flour in the bowl may look clumpy or pasty.
Discard the old mixture and whisk together a fresh half-cup of flour and spices to maintain a consistent, dry coating on every wing.
Using a dual-sensor thermometer allows you to monitor both the warming oven and the active air fryer simultaneously. This prevents the holding tray from getting too hot and continuing to cook the earlier batches.
Storing and reheating leftover floured wings
Leftover air fryer chicken wings with flour lose their crunch quickly in the refrigerator. Condensation forms inside the storage container, and the flour crust absorbs that moisture, turning soft and slightly chewy. How you store them dictates how well they reheat.
Let the wings cool completely on a wire rack before putting them away. Placing hot wings directly into a sealed container traps steam. Once they reach room temperature, arrange them in a single layer in an airtight container separated by parchment paper.
They will keep safely in the fridge for three to four days.
Reheating must happen in the air fryer. Microwaving floured wings turns the coating into a rubbery mess. Preheat the air fryer to 370°F.
Place the cold wings back in the basket in a single layer. Heat them for four to six minutes, flipping once. The dry circulating air will drive off the absorbed moisture and re-crisp the flour shell.
Checking the center temp with a quick-read device confirms they are heated through evenly without drying out the meat.
Freezing is possible, though the texture suffers slightly more than refrigeration. Flash freeze the cooled wings on a baking sheet for two hours, then transfer them to a freezer bag. Reheat from frozen in the air fryer at 360°F for about ten to twelve minutes.
Lower the temperature slightly compared to fresh cooking to prevent the flour from burning before the frozen center thaws.
Troubleshooting texture issues
Even with the right technique, things occasionally go wrong. Identifying the specific flaw in the crust points directly to the step that needs adjusting next time.
Chalky white spots on the skin. This means raw flour did not hydrate or cook. It happens when the wings are tossed in too much flour without shaking off the excess, or when the initial oil drizzle was skipped. The dry flour has nothing to bind to and stays powdery.
Next time, use less flour and ensure the light oil coating is applied first.
Soggy bottoms. Steam pooled under the wings because they sat flat on a solid surface or were overcrowded. The air fryer relies on vertical airflow. Always use the perforated basket or crisper plate that came with the machine.
Never line the bottom of the air fryer basket with solid foil or parchment paper when cooking floured items, as this blocks the air circulation required to crisp the underside.
Burnt seasoning before cooked meat. Paprika, garlic powder, and sugar-heavy spice blends scorch easily at 400°F. If your flour mixture includes sugar or delicate spices, drop the cooking temperature to 360°F and extend the time by a few minutes per side. Alternatively, use only salt and pepper in the flour, and apply the heavier spices after the wings come out of the basket.
Tough, chewy crust. Bread flour or self-rising flour was likely used by mistake. Self-rising flour contains baking powder and salt already, which alters the chemistry unpredictably. Stick strictly to standard all-purpose flour for the correct protein-to-starch ratio.
If you want to understand the broader science behind poultry temperatures, reviewing a detailed internal temperature chart explains how heat affects different meat proteins similarly across species.
Frequently asked questions
Can I use self-rising flour instead of all-purpose?
Self-rising flour contains added baking powder and salt. In an air fryer, the extra leavening agent can cause the coating to puff up excessively and then collapse into a spongy texture rather than staying crisp. It also makes it difficult to control the sodium level since salt is already mixed in.
Stick to plain all-purpose flour and add your own measured seasonings.
Do I need to spray the floured wings with oil before cooking?
A light mist of cooking oil sprayed directly onto the floured wings right before closing the air fryer basket helps the flour brown evenly. Without it, the flour can remain pale and dry-looking in spots where the chicken fat has not yet rendered out. Use a fine mist setting.
Heavy spraying will dissolve the flour into a wet batter.
Why does my flour coating blow off inside the air fryer?
Air fryers use a powerful fan to circulate heat. If the flour is not pressed onto a slightly tacky or oiled surface, the fan can literally blow the dry powder off the chicken and into the heating element. This creates smoke and leaves bare patches on the wings.
Always pat the wings dry, apply a thin layer of oil, press the flour on gently, and let them rest for a minute before placing them in the basket.
Is flour better than cornstarch for air fryer wings?
It depends on the texture you prefer. Flour provides a traditional, savory, golden-brown crust similar to pan-fried chicken. Cornstarch provides a lighter, louder crunch that stays crispy longer if you plan to sauce the wings afterward.
Many cooks mix equal parts of both to combine the flavor of flour with the structural crispness of cornstarch.
How do I know when the wings are done without cutting them open?
Cutting into a wing releases the juices and ruins the presentation. Insert a digital meat thermometer into the thickest part of a drumette, avoiding the bone. The reading must hit 165°F according to federal food safety standards.
The meat should also pull back slightly from the ends of the bone, and the joints should move loosely when twisted with tongs.
Can I put frozen wings directly into the air fryer with flour?
Coating frozen wings in flour does not work well. The ice crystals on the surface melt rapidly in the air fryer, turning the flour into a sticky paste that slides off the meat. Thaw the wings completely in the refrigerator overnight, pat them extremely dry, and then follow the standard flour coating process for proper adhesion.
Before you fire up the basket
Getting a genuinely crisp crust from air fryer chicken wings with flour comes down to managing moisture. Dry the skin thoroughly, use a minimal amount of oil as a binder, and never crowd the basket. All-purpose flour delivers the familiar savory crunch most people associate with fried chicken, provided you keep the temperature at 380°F to prevent the spices from scorching before the meat reaches 165°F.
Batch cooking takes patience, but keeping finished wings on a wire rack in a warm oven preserves the texture you worked to build.



1 thought on “Crispy Air Fryer Chicken Wings With Flour”