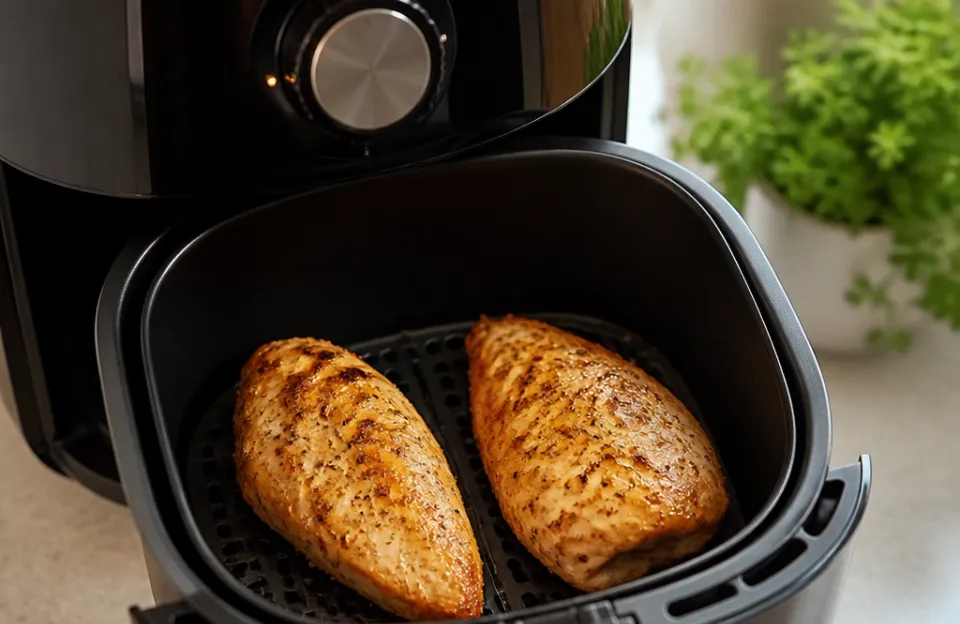
Air fryer chicken thighs cook in about 18 to 25 minutes at 380°F, producing crispy skin and juicy meat without a deep fryer. Bone-in pieces take closer to 25 minutes. Boneless cuts finish in roughly 15 to 18 minutes.
The circulating hot air renders the fat directly under the skin, which gives you that crackling texture people usually associate with pan-frying or roasting at much higher temperatures.
This article covers how to season them, how long to cook each cut, why they sometimes smoke, and what to do when the skin sticks to the basket. You will also find temperature guidelines so you don't end up with dry meat or an undercooked center.
Why the Air Fryer Works So Well for Chicken Thighs
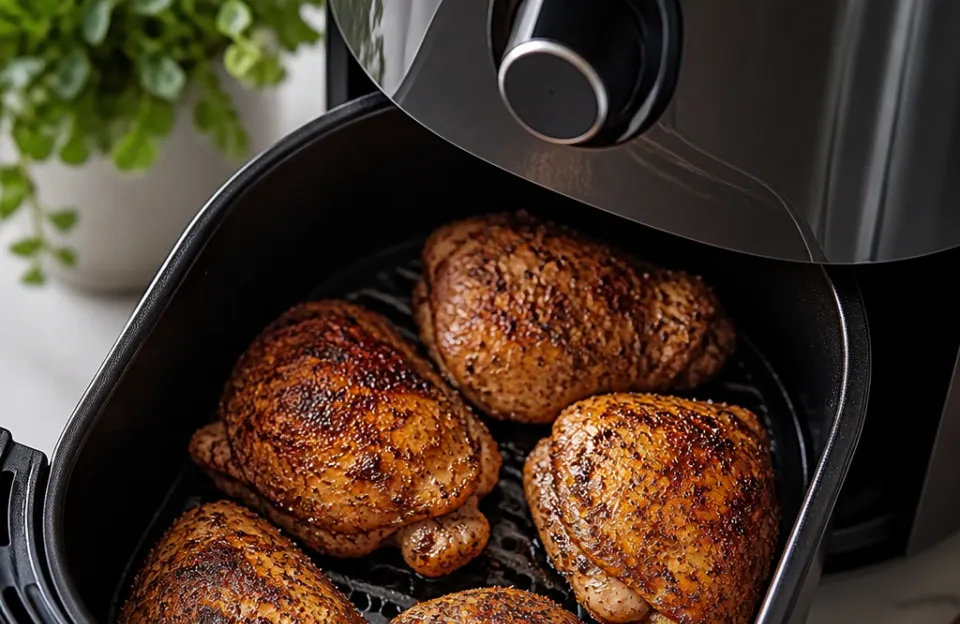
Chicken thighs have more intramuscular fat than breasts. That fat is exactly what makes the air fryer such a good tool for this specific cut. As the heating element warms the air and the fan pushes it around the basket, the fat under the skin melts.
It drips down into the bottom of the drawer. Meanwhile, the skin dries out and crisps up.
A standard oven does the same thing, but it takes longer to preheat and requires more energy to maintain the temperature in a large cavity. The compact space of an air fryer concentrates the heat. You get faster browning on the outside while the inside stays moist.
Bone-in, skin-on thighs are the most forgiving option. The bone slows down the cooking process near the center, which prevents the meat from drying out before the skin gets crunchy. Boneless, skinless thighs cook faster.
They need slightly less time and a watchful eye to keep them from turning tough.
| Cut Type | Temperature | Cook Time | Flip Timing |
|---|---|---|---|
| Bone-in, skin-on | 380°F | 22 to 25 minutes | Halfway through |
| Boneless, skin-on | 380°F | 16 to 19 minutes | Halfway through |
| Boneless, skinless | 370°F | 14 to 18 minutes | Halfway through |
Prepping the Meat Before It Hits the Basket
Moisture is the enemy of crispy skin. If your chicken goes into the basket wet, the water has to evaporate before any browning can happen. By the time the surface dries out, the meat underneath might overcook.
Take the thighs out of the package and lay them on a paper towel. Pat every side dry. Press firmly.
You want to pull as much surface moisture off as possible. If you have time, leave them uncovered on a wire rack in the fridge for an hour or two. Cold, moving air dries the skin further.
This step is optional, but it pays off if you care about crunch.
Once they are dry, coat them lightly in oil. You don't need much. Half a teaspoon per thigh is plenty.
Rub it in with your hands. The oil conducts heat from the air directly to the skin, helping it blister and brown evenly. Olive oil, avocado oil, or vegetable oil all work.
Pick one with a smoke point above 400°F if you plan to push the temperature higher later.
Building a Dry Rub That Sticks
A simple seasoning blend goes a long way here. Salt is mandatory. Use about half a teaspoon of kosher salt per pound of meat.
Kosher salt dissolves better on the surface than fine table salt, and it doesn't leave a gritty texture.
Add black pepper, garlic powder, and smoked paprika for a basic rub. If you want heat, toss in cayenne or chili powder. Dried herbs like oregano or thyme hold up well to the intense airflow.
Fresh herbs tend to blow around the basket and burn against the heating element, so save those for after cooking.
Press the spices into the oiled skin. Don't just sprinkle them on top. The oil acts as a binder.
If you skip the oil, the rub will fall off into the bottom of the drawer during the first few minutes of cooking. For saucy variations, applying a wet marinade works too, though you'll want to pat off the excess liquid first. We often use similar techniques when marinating poultry to keep flavors locked in without creating a soggy exterior.
Cooking Air Fryer Chicken Thighs Step by Step
Preheat the machine. Set it to 380°F for bone-in thighs or 370°F for boneless ones. Let it run empty for three to five minutes.
A hot basket prevents sticking. When you drop cold meat onto a cold grate, the proteins bond to the metal before they have a chance to sear.
Place the thighs in a single layer. Leave space between each piece. The fan needs to move air around all sides.
If they touch, the spots where they overlap will steam instead of roast. You will end up with pale, soft patches on the skin. If you have a small appliance, cook in batches.
Crowding the basket ruins the texture every time.
Set the timer based on the cut. For bone-in pieces, start with 22 minutes. For boneless, aim for 15.
When the timer hits the halfway mark, open the drawer. Use tongs to flip each thigh over. This exposes the bottom to the direct airflow and promotes even browning.
Close the drawer and let it finish.
During the last five minutes, keep an eye on the color. Air fryers vary wildly in power. Some run hot; others lag behind their displayed temperature.
If the skin looks dark enough at 20 minutes, pull them out early. If they look pale at 25 minutes, add another two or three.
Checking the Internal Temperature Safely
Visual cues only tell part of the story. You need a thermometer to know when the meat is safe and perfectly cooked. Insert the probe into the thickest part of the thigh.
Avoid touching the bone. Bones conduct heat differently and will give you a false high reading.
The USDA states that all poultry must reach a minimum internal temperature of 165°F to destroy harmful bacteria. Pull the chicken out right when it hits 165°F. The residual heat will carry it up another degree or two while it rests.
If you eat chicken thighs cooked strictly to 165°F, you might notice the texture is slightly chewy. Dark meat contains more connective tissue than white meat. Collagen breaks down better at slightly higher temperatures.
Many cooks prefer pulling thighs at 170°F or even 175°F. At that range, the meat becomes noticeably more tender, and the texture near the bone improves. Using a fast-reading probe helps you check the heat quickly without leaving the drawer open long enough to drop the cooking temperature.
Dealing With Smoke From Rendered Fat
Chicken thighs release a lot of grease. That fat drips through the basket and pools in the bottom drawer. When the puddle of oil gets hot enough, it smokes.
Your kitchen fills with haze, and the smoke alarm starts screaming.
There are a few ways to handle this. The easiest method is putting a small amount of water in the bottom drawer, beneath the basket. Just a tablespoon or two.
The water keeps the pooled fat below its smoke point. It won't affect the crispiness of the skin because the water is trapped under the grate, away from the food.
Another option is placing a slice of bread in the bottom of the drawer. The bread absorbs the dripping grease before it can burn. Throw the bread away after cooking.
You can also clean the drawer between batches if you are cooking a large amount of meat. Dumping out the hot grease halfway through stops the smoking problem entirely.
Lowering the temperature by 10 degrees also reduces smoke, though it extends the cook time slightly. If your kitchen has poor ventilation, the water trick is usually the most reliable fix. Managing grease buildup matters just as much when you're cooking extra crispy cuts since the higher fat content creates the same smoke risk.
Why the Skin Sticks to the Grate (And How to Stop It)
Sticking happens for three reasons: a cold basket, no oil, or flipping too soon.
We covered preheating. Always start with a hot grate. Next, make sure the skin itself has a light coating of oil.
Even if you patted the meat dry, bare skin pressed against bare metal will fuse together as the proteins tighten. A thin layer of fat creates a barrier.
Finally, don't force the flip. When you open the drawer at the halfway point, try lifting a thigh gently with your tongs. If it resists, it isn't ready to turn.
The skin releases naturally once it forms a crust. Give it another two minutes and try again. Yanking it loose tears the skin off, leaving it stuck to the wire while the meat flips over naked.
Some people spray the basket with aerosol cooking spray. Be careful with this. Many commercial sprays contain propellants and soy lecithin that build up a sticky residue on nonstick coatings over time.
This residue eventually causes worse sticking. Rubbing a paper towel dipped in oil across the grate is safer for the appliance's finish.
Adjusting for Different Sizes and Brands
Not all chicken thighs weigh the same. A pack from the grocery store might contain pieces ranging from four ounces to seven ounces each. That size difference changes the cooking time significantly.
Sort your thighs by size before cooking. Put the large ones in together and the small ones in together. If you mix them, the small pieces will dry out while you wait for the thick ones to hit 165°F.
Appliance wattage matters too. A 1700-watt unit cooks faster than a 1400-watt model. The shape of the basket also affects airflow.
Square baskets sometimes have dead zones in the corners where the air doesn't circulate well. Round baskets tend to distribute heat more evenly. If you notice uneven browning, rotate the positions of the thighs when you flip them.
Move the ones on the edges to the center, and vice versa.
If you track macros closely, remember that the rendered fat drips away during cooking. This means the final calorie count drops compared to pan-frying, where the meat sits in its own grease. We break down how these numbers shift depending on the exact preparation method used.
Resting the Meat Before Serving
Pulling the thighs out of the basket and eating them immediately is a mistake. The juices inside are boiling hot and under pressure from the muscle fibers contracting. If you bite in right away, that liquid runs out onto your plate.
The meat ends up dry.
Transfer the cooked thighs to a cutting board or a warm plate. Leave them alone for five minutes. During this rest period, the muscle fibers relax.
The juices redistribute evenly throughout the meat instead of pooling in the center. The skin stays crispy because it is exposed to the room air rather than steaming inside a closed container.
Don't cover them tightly with foil. Trapping the steam softens the skin you just worked hard to crisp. If you need to keep them warm while finishing side dishes, tent the foil loosely so air can escape.
Pairing the finished thighs with a bright, acidic condiment balances the rich dark meat perfectly. A tangy homemade dipping sauce cuts through the fat and rounds out the plate.
Flavor Variations Worth Trying
Once you master the basic salt, pepper, and garlic powder routine, changing the flavor profile takes almost no extra effort.
For an Asian-inspired version, skip the dry rub. Toss the dried thighs in a mixture of soy sauce, grated ginger, minced garlic, and a pinch of sugar. Let them sit for twenty minutes.
Wipe off the excess liquid before air frying so the sugars don't burn too quickly against the heating element.
A Mediterranean approach uses dried oregano, lemon zest, and a heavier hand with olive oil. Add crumbled feta cheese during the last two minutes of cooking just to soften it.
If you want a spicy kick, mix cayenne pepper and brown sugar into your dry rub. The sugar caramelizes in the high heat, creating a sweet-and-hot crust. Watch the browning closely, though.
Sugar burns faster than spices. You might need to lower the temperature to 365°F to prevent charring before the inside finishes cooking.
You can apply many of these same spice blends to other poultry cuts. The technique transfers easily when making garlic parmesan variations or tossing the cooked meat in a sticky glaze right after it comes out of the basket.
Batch Cooking and Reheating Leftovers
Air fryer chicken thighs hold up remarkably well in the fridge. They are dense enough to avoid drying out overnight, making them a solid option for weekday lunches.
Cook a double batch if your basket fits them without crowding. If not, run two cycles back-to-back. Let the cooked thighs cool completely on a wire rack before putting them in an airtight container.
Cooling them on a flat plate traps steam underneath and ruins the skin texture before it even reaches the fridge.
When reheating, skip the microwave. Microwaves excite water molecules, which turns the crispy skin into rubber. Put the cold thighs back into the air fryer at 350°F for four to six minutes.
This rewarmes the meat gently while re-crisping the exterior. The fat solidifies in the fridge, so the second round of hot air melts it again and restores the crunch.
If you plan meals ahead regularly, keeping a stash of seasoned, uncooked thighs in the freezer saves time. Thaw them in the fridge overnight, pat them dry again to remove condensation, and cook them exactly as you would fresh ones. Planning these protein-heavy batches fits neatly into a broader weekly prep routine without adding much active cooking time to your day.
Frequently Asked Questions
Can I stack chicken thighs in the air fryer to fit more?
No. Stacking blocks the airflow. The fan relies on open space to circulate hot air around every surface of the meat.
If you pile them up, the hidden sides will steam and remain raw while the exposed tops burn. Always arrange them in a single layer with gaps between each piece.
Should I remove the skin before cooking thighs in an air fryer?
You can, but you lose the main advantage of the appliance. The skin protects the meat from drying out and provides the crispy texture the machine is designed to create. If you remove it, lower the temperature to 370°F and check the internal temperature earlier, around the 12-minute mark, to prevent toughness.
Is it safe to put frozen chicken thighs straight into the basket?
It is safe, but the results suffer. Frozen meat lowers the air temperature drastically when added. The outside thaws and cooks while the inside remains icy.
You end up with overdone exteriors and undercooked centers. Thaw them in the refrigerator first. If you must cook from frozen, drop the heat to 360°F and add 10 to 15 minutes to the total time, checking the internal temperature frequently.
Why did my chicken thighs come out rubbery?
Rubbery texture usually means undercooking or overcrowding. Dark meat needs to reach at least 165°F, but it actually feels more tender closer to 175°F because the collagen breaks down fully. Overcrowding causes steaming instead of roasting, which leaves the skin chewy rather than crisp.
Do I need to use oil if the thighs already have skin?
Yes, a small amount helps. While the skin contains its own fat, rubbing a tiny bit of oil on the surface ensures the dry spices stick and promotes immediate, even browning when the meat hits the hot grate. Without it, the initial blast of air can blow loose seasoning off the meat.
How do I stop the white smoke coming from the machine?
White smoke means fat is burning in the bottom drawer. Pour a tablespoon of water into the base of the drawer before cooking, or place a small piece of bread under the basket to absorb the grease. Both methods keep the dripping fat below its smoke point.
Getting the Most Out of Your Next Batch
Air fryer chicken thighs reward attention to small details. Drying the skin thoroughly, spacing the pieces apart, and using a thermometer instead of guessing are the habits that separate a great result from a mediocre one. The appliance does the heavy lifting with airflow and heat, but the prep work dictates the final texture.
Keep a close eye on the rendered fat pooling at the bottom, adjust your timing based on the specific size of the meat you bought, and always let the pieces rest before serving. Once you dial in the basic method, swapping out spices and sauces keeps the rotation interesting without changing the core technique.