Air fryer chicken breast is one of the fastest ways to cook lean poultry without drying it out. A standard boneless, skinless piece takes about 15 to 20 minutes at 375°F, and you only need a few pantry staples to get a browned exterior and a juicy center.
This guide covers the exact temperatures, timing, and prep steps that keep the meat tender. You'll also find seasoning ideas, storage details, and fixes for the most common problems people run into when cooking this cut in a countertop appliance.
Why rapid air circulation changes how chicken cooks
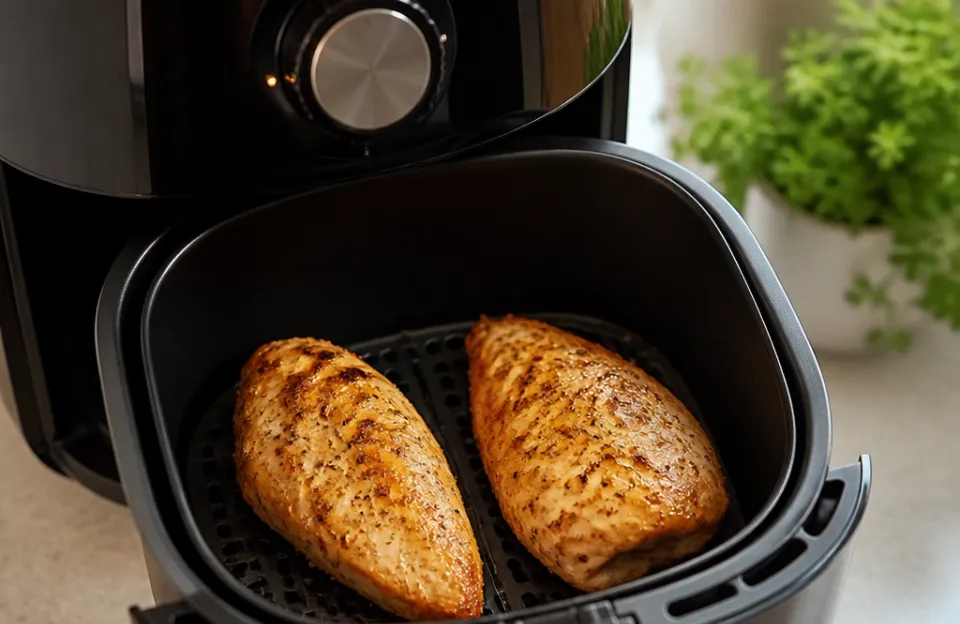
A countertop convection appliance pushes hot air around the food at high speed. That constant movement evaporates surface moisture much faster than a standard oven. The outside browns quickly while the inside stays moist, as long as you pull the meat out at the right time.
Chicken breast has very little fat compared to dark meat or crispy coated wings. Fat insulates meat. Without it, the muscle fibers tighten up fast if the temperature gets too high or the cooking runs too long.
The rapid air flow gives you a narrow window where the outside looks done and the inside is still holding its juices.
The USDA requires all poultry to reach an internal temperature of 165°F before eating. Hitting that number exactly is the whole goal. Going past it by even ten degrees turns the texture chalky.
Checking the temperature early prevents overcooking.
Getting your chicken ready for the basket
Prep work dictates how evenly the meat cooks. If you throw two uneven pieces into the basket, the thin ends will dry out before the thick centers are safe to eat. Taking two minutes to fix the shape solves this.
Place the meat between two sheets of plastic wrap or parchment paper. Use a heavy pan or a rolling pin to pound the thickest part until the whole piece is roughly the same height. Half an inch to three-quarters of an inch thick works well.
You don't need to smash it flat. Just level out the thick end so heat travels through the meat at the same rate.
Pat the surface completely dry with paper towels before adding oil. Water creates steam. Steam blocks browning.
A dry surface lets the oil and spices stick directly to the protein, which builds a better crust during those first few minutes of cooking.
Rubbing on oil and seasonings
You need a small amount of fat to conduct heat across the surface and help spices adhere. One to two teaspoons of olive oil or avocado oil per breast is plenty. Rub it over every side.
Salt is mandatory for flavor. Beyond that, the spice blend depends on what you plan to serve it with. Garlic powder, smoked paprika, and black pepper make a solid everyday mix.
If you want something closer to a sweet sticky glaze, toss the cooked meat in sauce after it comes out of the basket rather than before. Sugary sauces burn under direct high heat.
For a basic dry rub, combine these:
- 1 teaspoon kosher salt
- 1/2 teaspoon garlic powder
- 1/2 teaspoon smoked paprika
- 1/4 teaspoon black pepper
- 1/4 teaspoon onion powder
Press the mixture into the oiled meat. Don't just sprinkle it on top. Pressing helps the spices stay put when the fan kicks on.
Cooking times and temperatures for air fryer chicken breast
Heat settings and timing depend on the size of the meat. Most recipes call for a temperature between 360°F and 400°F. I prefer 375°F.
It's hot enough to brown the outside without scorching the spices before the center finishes.
Always preheat the machine for three to five minutes. Dropping raw meat into a cold basket delays the searing process. The meat ends up steaming in its own released juices for the first few minutes, resulting in a pale, rubbery exterior.
Here is a baseline for boneless, skinless pieces cooked at 375°F.
| Meat Size | Cook Time | Flip Point | Target Temp |
|---|---|---|---|
| Small (5 to 6 oz) | 12 to 15 minutes | 7 minutes | 165°F |
| Medium (7 to 8 oz) | 15 to 18 minutes | 9 minutes | 165°F |
| Large (9 to 12 oz) | 18 to 22 minutes | 11 minutes | 165°F |
Flip the meat halfway through the total time. This exposes both sides to the direct heating element. If your specific model has a top and bottom heating element, flipping is less critical, but it still promotes even browning.
Start checking the internal temperature two or three minutes before the recipe says it should be done. Pull the meat out when your thermometer reads 160°F. The residual heat will carry it the final five degrees while it rests.
If you wait until it hits 165°F inside the machine, it will overshoot while sitting on the cutting board. Using a fast reading probe makes this step quick so you don't lose too much heat opening the basket repeatedly.
Letting the meat rest before slicing
Resting allows the muscle fibers to relax and reabsorb the juices pushed toward the center during cooking. Skip this step, and the liquid spills out onto your cutting board the second you make a cut.
Transfer the cooked chicken to a plate or cutting board. Tent it loosely with aluminum foil. Leave it alone for five to seven minutes.
Don't poke it. Don't slice it early. Five minutes is usually enough for a medium-sized breast.
Thicker pieces might need seven.
After resting, slice against the grain. Look at the direction the muscle fibers run, and cut perpendicular to them. This shortens the fibers, making each bite easier to chew.
Adjusting for bone-in or frozen cuts
Everything above applies to fresh, boneless, skinless meat. Bone-in breasts or frozen pieces require different handling.
Bone-in, skin-on breasts take longer because the bone acts as an insulator. Expect to add 5 to 10 minutes to the total cook time. Start at 375°F.
Place them skin-side down first, then flip them skin-side up for the second half so the skin crisps directly under the heating element. Check the temperature near the bone, as that area cooks last.
Cooking from frozen is possible, though starting with thawed meat yields better texture. If you must use frozen chicken breast, lower the temperature to 360°F. Cook for 10 minutes to start thawing the exterior.
Then pull the basket out, brush on your oil and seasonings, and return it to the machine at 375°F for another 15 to 20 minutes. Seasonings won't stick to a solid block of ice, which is why you wait for that initial warm-up phase. Always verify the final temperature reaches 165°F according to USDA safety guidelines.
Storing leftovers and reheating without drying them out
Cooked chicken breast keeps in the refrigerator for three to four days. Store it in an airtight container. If you know you're going to use it for meal prep, consider leaving it unsliced.
Whole pieces retain moisture much better in the fridge than pre-sliced strips. For more ideas on planning ahead, batch cooking poultry alongside other proteins can save time, much like organizing a weekly wing prep routine.
Reheating is where most leftover chicken gets ruined. Microwaves excite water molecules rapidly, turning the meat tough and rubbery. The microwave is fine if you're in a rush, but covering the meat with a damp paper towel helps trap some steam.
The best way to reheat is back in the machine. Set it to 320°F. Warm the meat for three to four minutes.
The lower temperature warms the center without continuing to cook the outside. You can also slice the cold chicken and toss it straight into salads or wraps without reheating it at all. Cold chicken holds up well when paired with a flavorful dipping sauce or dressing.
If you made a large batch, freeze individual portions wrapped tightly in plastic wrap, then placed in a freezer bag. They last up to three months. Thaw them overnight in the refrigerator before using.
Fixing dry, undercooked, or pale results
Even with exact times, things go wrong. Chicken varies in thickness, water content, and starting temperature. Appliance wattages differ wildly between brands.
Here is how to handle the three most common issues.
Dry, stringy meat. This means the internal temperature went too high. Next time, pull the chicken out earlier. Rely entirely on a digital thermometer rather than the clock.
If you don't have one, picking up a reliable kitchen thermometer is the single biggest upgrade you can make for cooking lean proteins. Pounding the meat thinner before cooking also reduces the time it needs to spend in the heat.
Pink center or low temperature. If you cut into the meat and it's translucent or pink, it hasn't reached 165°F. Put it back in the basket for two to three minutes. To prevent this, make sure you aren't overcrowding the basket.
Air needs to circulate around every side of the meat. If the pieces are touching, they block the airflow and act as a single large mass, slowing down the cooking process significantly.
Pale, unappetizing exterior. Browning requires a dry surface and fat. If the chicken looks gray or boiled, you likely skipped the patting step or didn't use enough oil. Sugar also promotes browning.
Adding a pinch of brown sugar to your dry rub encourages caramelization. Just watch it closely, as sugar burns fast at high temperatures.
Tracking macros and keeping meals light
Many people choose this cooking method specifically for dietary reasons. Because you're circulating hot air instead of submerging the meat in oil, the fat content stays extremely low. A plain six-ounce cooked chicken breast contains roughly 280 calories and over 50 grams of protein, depending on the exact trim.
If you are tracking your intake, remember that the oil and rubs add to the total count. One tablespoon of olive oil adds about 120 calories. Measuring your oil rather than pouring it freely keeps the math accurate.
Comparing the nutritional profile of breasts to darker cuts or lighter wing options can help you decide which fits your daily targets best.
Seasonings themselves rarely add significant calories unless they contain sugar. Salt-free blends, dried herbs, and spices give you flavor without altering the macro profile.
Frequently asked questions
Do I need to spray the basket with oil first?
Most modern baskets have a non-stick coating, but a light spray of cooking oil prevents sticking, especially if your marinade contains sugar or honey. Avoid aerosol cooking sprays that contain propellants, as they can degrade the non-stick finish over time. Use a pump sprayer filled with regular oil, or just brush the basket lightly.
Can I stack the chicken breasts on top of each other?
No. Stacking blocks the airflow that cooks the food. The pieces on the bottom will steam instead of roast, and the ones on top will cook unevenly.
Arrange them in a single layer with at least half an inch of space between each piece. If you have a lot to cook, do it in batches.
Should I marinate the meat before cooking?
Marinating works well, but you must pat the surface dry before putting it in the basket. A wet marinade drips off and pools at the bottom, creating smoke and preventing browning. Marinate for 30 minutes to a few hours, remove the meat, wipe off the excess liquid, and then apply a light coat of oil and dry spices.
Why does my appliance smoke when I cook chicken breast?
Smoke usually happens when fat or juices drip onto the heating element or the hot base plate. Chicken breast doesn't release much fat, but any oil you applied can drip down. Placing a small piece of bread or a tablespoon of water at the very bottom of the drawer, beneath the crisper plate, catches grease and stops it from burning.
Is 400°F better for getting a crust?
Higher heat creates a crust faster, but it also shrinks the window between perfectly cooked and dried out. At 400°F, the outside might look done in 10 minutes while the inside is still raw. Stick to 375°F for even cooking.
If you really want a harder crust, cook at 375°F until the meat hits 155°F internally, then crank the heat to 400°F for the final two minutes.
How do I know if my thermometer is reading correctly?
Test it in a glass of ice water. It should read 32°F. If it's off by several degrees, adjust your target cooking temperature accordingly, or calibrate the device if the manufacturer provides instructions.
An inaccurate probe leads to either unsafe food or overcooked meat. Some cooks prefer a wireless dual probe setup so they can monitor the temperature continuously without opening the basket.
Keeping your chicken tender every time
Cooking air fryer chicken breast comes down to managing moisture and temperature. Pound the meat even, dry the surface, use a little oil, and pull it out the moment it hits 160°F. Rest it before you cut it.
Those four steps eliminate the dry, rubbery texture most people associate with lean poultry. Once you dial in the timing for your specific machine, you can produce consistent results without thinking about it.