Maintaining an air fryer takes about ten minutes after each use, plus a deeper clean every few weeks. You need warm water, dish soap, and a soft sponge. Knowing how to maintain an air fryer keeps the nonstick coating intact and stops old grease from smoking during your next meal.
The routine covers wiping down the basket, washing removable parts, and clearing debris from the heating element. Skipping these steps causes food to stick, smoke to fill the kitchen, and the fan motor to wear out faster. This guide walks through daily wipe downs, deep cleaning methods, and specific fixes for stubborn baked-on grease.
Daily Cleanup After Cooking Hot Food
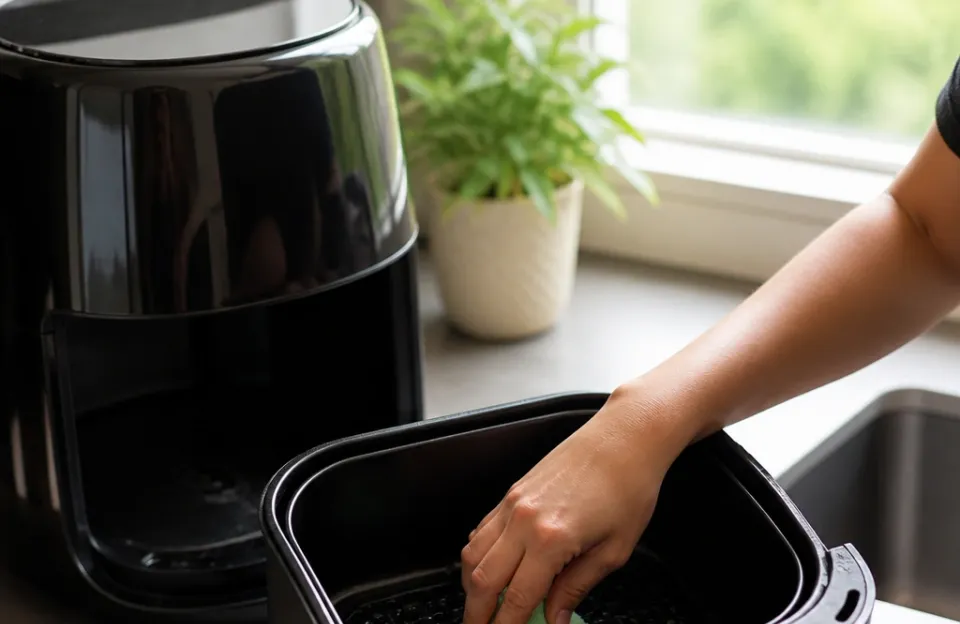
Let the appliance cool down completely before touching any part of it. The heating coil and the metal basket retain intense heat long after you pull the plug. Waiting thirty minutes prevents burns and protects the nonstick surface from thermal shock.
Cold water on a hot basket can warp the metal or crack the coating.
Once the unit is cool, pull out the basket and the crisper plate. Wash both in warm soapy water using a soft sponge or a nylon brush. Avoid steel wool or abrasive scouring pads.
Those scratch the nonstick layer, which leads to peeling and sticking later on. Rinse everything thoroughly and dry it with a clean towel before sliding it back into the base.
Wipe the inside of the main chamber with a damp microfiber cloth. Pay attention to the walls where oil splatters during cooking. If you cooked something fatty, like getting chicken skin perfectly crisp, there will be visible grease spots.
A quick wipe while the residue is fresh saves you from scrubbing hardened carbon later.
Dry the interior completely. Moisture left inside the cooking chamber causes rust on exposed metal screws and creates a breeding ground for mold. Leave the basket out for a few extra minutes if your kitchen is humid.
Removing Baked-On Grease From the Basket
Sometimes a standard wash with dish soap leaves behind sticky brown patches. These happen when sugary marinades or rendered fat bake directly onto the metal at high temperatures. Soaking is the safest way to remove them without damaging the finish.
Fill your sink or a large bowl with very hot water and a generous squirt of grease-cutting dish soap. Submerge the basket and the crisper tray. Let them sit for fifteen to twenty minutes.
The hot soapy water softens the polymerized fat, making it easy to wipe away.
After soaking, use a soft-bristled brush to gently scrub the problem areas. Circular motions work best. Rinse under warm running water and check your progress.
If the grease remains, repeat the soak. Never use a butter knife or metal spatula to scrape off stuck food. Metal tools gouge the coating instantly.
For particularly stubborn spots, make a thick paste using baking soda and a few drops of water. Apply it directly to the burnt patch and let it sit for ten minutes. Baking soda is mildly abrasive.
It lifts grime without scratching the nonstick surface the way harsh chemical cleaners do. Wipe it away with a damp cloth afterward.
If you frequently cook heavy meals, like prepping batches of protein ahead of time, expect to deal with more baked-on residue. Batch cooking pushes more fat and juices through the basket, so a deeper weekly soak becomes necessary rather than optional.
Clearing Debris From the Heating Element
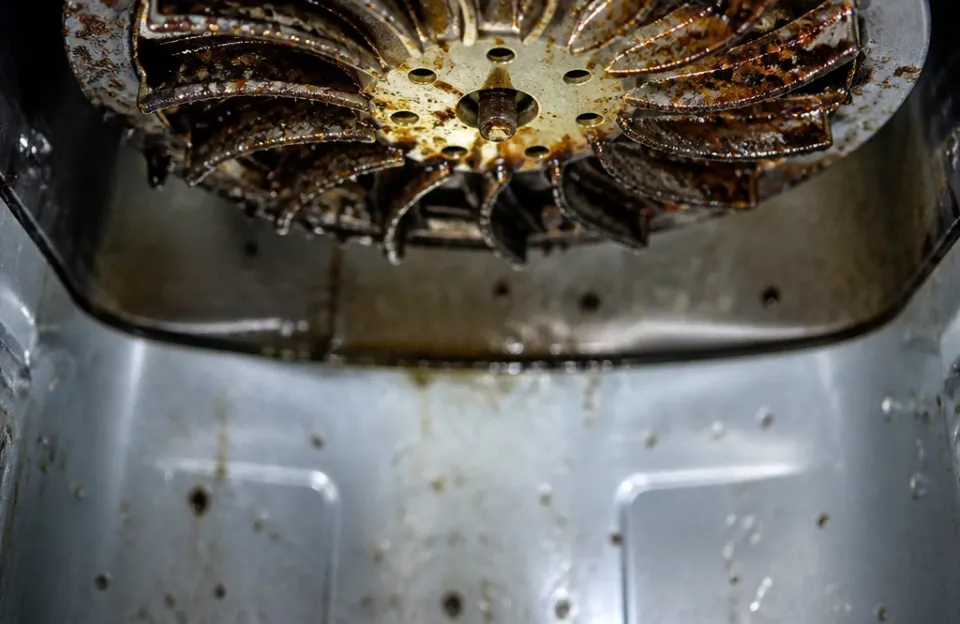
The heating coil sits at the top of the cooking chamber, usually hidden behind a metal guard or exposed directly above the basket. Over time, tiny food particles and oil droplets splatter upward and stick to this element. If left alone, they burn every time you turn the machine on, producing acrid smoke and bad smells.
Unplug the appliance and turn it upside down over a trash can or a towel. This angle gives you clear access to the top interior. Use a soft, dry brush to gently sweep away loose crumbs or dried bits.
A clean pastry brush or a soft toothbrush works well here. Do not press hard against the coil.
If the element has greasy buildup that a dry brush cannot move, dampen a cloth with warm soapy water. Wring it out until it is barely moist. Wipe the heating element carefully, avoiding any electrical connections.
Never spray water or cleaner directly into the top of the unit. Liquid pooling near the wiring creates a serious shock hazard and can short out the motor.
According to general appliance safety guidelines from the Consumer Product Safety Commission, keeping heating elements free of debris reduces fire risks in countertop appliances. A clean coil also radiates heat evenly, meaning your food cooks uniformly instead of browning on one side and staying raw on the other.
Washing Removable Trays and Drip Pans
Many models include a separate drip pan beneath the crisper basket. This catches falling oil and juices, preventing them from hitting the bottom heating element or burning on the base floor. Because it sits out of direct sight, people often forget to wash it.
Remove the drip pan after every use. Wash it exactly like the main basket: warm water, mild soap, soft sponge. If your model uses a silicone mat or a perforated parchment liner instead of a metal pan, hand wash the silicone or discard the parchment.
Reusing parchment liners traps moisture and bacteria.
Check the edges and corners of the drip pan. Grease tends to pool in the seams where the metal folds. Run your sponge along these crevices deliberately.
Leaving fat in the corners eventually leads to rancid odors that transfer to whatever you cook next. Even simple tasks, like reheating leftover slices quickly, will taste off if the drip pan holds old oil.
Cleaning the Exterior Housing and Control Panel
The outside of the appliance collects dust, fingerprints, and stray oil mist. Keeping the exterior clean prevents grime from working its way into the ventilation slots or control buttons.
Wipe the outer shell with a damp microfiber cloth. For stainless steel finishes, wipe in the direction of the grain to avoid streaking. Plastic housings tolerate gentle all-purpose cleaners, but avoid anything containing bleach or ammonia.
Harsh chemicals discolor plastic and degrade printed labels over time.
Pay close attention to the control panel. Whether your model uses a digital touchscreen or mechanical dials, grease builds up around the edges. Dip a cotton swab in rubbing alcohol and run it along the seams of the buttons or the border of the screen.
The alcohol cuts through the oil and evaporates quickly without seeping into the electronics.
Never submerge the main base unit in water. The motor, fan, and wiring are housed inside the plastic or metal shell. Water intrusion destroys the appliance immediately.
If you spill liquid down the side, unplug it right away and wipe it dry.
Maintaining Airflow Vents for Consistent Heat
Air fryers cook by circulating superheated air rapidly around the food. This process relies entirely on clear intake and exhaust vents. Most units have an air intake on the back or bottom and an exhaust vent on the top or rear.
Inspect these vents weekly. Dust, pet hair, and kitchen grease clog the slats. A blocked intake forces the internal fan to work harder, straining the motor and causing the unit to overheat.
An obstructed exhaust traps steam inside, resulting in soggy food instead of a crispy texture.
Use a dry toothbrush or a cotton swab to dislodge debris from the vent slats. Vacuuming the area with a brush attachment also works well. Make sure the appliance is unplugged before doing this.
When positioning the unit on your counter, leave at least five inches of clearance behind and above the vents. Pushing it flush against a wall or underneath a low cabinet chokes the airflow.
Proper ventilation matters most when cooking dense foods that require sustained high heat. Timing root vegetables accurately depends on steady air circulation. If the vents are blocked, the temperature fluctuates, and the cooking times become unreliable.
Deep Cleaning Schedule and Maintenance Frequency
Daily wipe downs handle most messes, but a scheduled deep clean extends the lifespan of the appliance significantly. How often you deep clean depends on how heavily you use it.
| Usage Level | Daily Action | Deep Clean Frequency | Focus Areas |
|---|---|---|---|
| Light (1-2 times a week) | Wipe basket and interior | Every 2 months | Heating element, vents |
| Moderate (3-5 times a week) | Wash basket, wipe interior | Monthly | Drip pan, exterior housing |
| Heavy (Daily use) | Full wash of all removable parts | Every 2 weeks | Coil degreasing, vent clearing |
During a deep clean, disassemble every removable part. Soak the basket, tray, and crisper plate together. While they soak, focus on the main body.
Turn it upside down to brush the heating element. Wipe down the entire interior chamber, paying special attention to the upper corners where grease splatters accumulate unseen.
Check the power cord during your monthly maintenance. Look for fraying, kinks, or exposed wires near the plug or where the cord enters the base. A damaged cord is a fire risk.
If you spot wear, stop using the appliance and contact the manufacturer for a replacement or repair.
Fixing Lingering Odors After Cooking Strong Foods
Cooking fish, heavily spiced meats, or pungent vegetables leaves smells trapped in the nonstick coating and the plastic housing. Running the empty appliance just burns those oils further into the surfaces.
To neutralize odors, place a small oven-safe dish filled with water and a few tablespoons of white vinegar inside the basket. Run the air fryer at 350°F for three to five minutes. The steam carries the vinegar through the chamber, breaking down the odor-causing oils.
Let it cool, then wipe the interior dry.
Lemon juice works similarly. Rub a cut lemon half over the cooled basket and crisper plate, let it sit for ten minutes, and rinse. The citric acid cuts through lingering grease films that hold onto smells.
If the odor persists after steam cleaning, check the exhaust filter. Some advanced models include a small charcoal or mesh filter near the fan. Consult your manual to see if yours has one.
These filters absorb smells but eventually saturate and need replacing. A saturated filter recirculates old odors back into your kitchen.
Dealing with strong smells is common when preparing seafood. Knowing how long to cook fillets properly minimizes the time the fish spends releasing oils at high heat, which helps reduce the overall smell left behind in the chamber.
Protecting the Nonstick Coating From Peeling
The nonstick surface is the most vulnerable part of the appliance. Once it chips or peels, food sticks permanently, and the basket becomes difficult to clean safely. Preventing damage requires changing a few common habits.
Stop using aerosol cooking sprays directly on the basket. Commercial nonstick sprays contain propellants and emulsifiers, like soy lecithin, that bake into a sticky, glue-like residue at high temperatures. This buildup bonds to the factory coating.
When you try to scrub it off later, you peel the actual nonstick layer away with it. Instead, use an oil mister filled with pure olive or avocado oil, or lightly brush oil onto the food itself before placing it in the basket.
Avoid stacking heavy items inside the basket when storing the appliance. Placing pots or other kitchen tools inside the air fryer drawer scratches the bottom. If you need to store things inside it, lay a paper towel or a soft cloth across the bottom first.
Use only silicone, wood, or nylon utensils to flip or remove food. Metal tongs scrape the coating every time they touch the sides. When pulling out a finished batch of food, lift it gently rather than dragging it across the bottom grate.
Troubleshooting Smoke During Operation
Seeing white or blue smoke pouring from the exhaust vent means oil or food debris is burning on the heating element or the bottom of the chamber. This is the most common issue users face, and it almost always points to a maintenance lapse.
If smoke appears mid-cook, turn the appliance off and unplug it immediately. Open windows to clear the room. Wait for the unit to cool completely before opening the basket.
Check the bottom of the cooking chamber. If you cooked fatty meat, excess grease likely pooled beneath the crisper plate and reached its smoke point.
To prevent this, add a tablespoon or two of water to the bottom of the outer basket before cooking very fatty foods. The water lowers the temperature of the dripping grease, stopping it from smoking. Just be careful not to add too much water, as boiling liquid can splash up onto the food or the heating coil.
Blue smoke indicates burning plastic or electrical issues. If you see blue smoke or smell melting wire, unplug the unit and do not use it again. Contact the manufacturer.
White smoke is almost always just burning fat, resolved by a thorough cleaning of the drip pan and the lower chamber.
Understanding how your specific model handles fat drainage helps prevent this. Checking reviews for units known for efficient airflow and design can show you how different baskets manage grease runoff differently.
Frequently asked questions
Can I put the air fryer basket in the dishwasher?
Most manufacturers state that removable baskets and crisper plates are top-rack dishwasher safe. However, the high heat and harsh detergents used in dishwashers degrade the nonstick coating much faster than hand washing. Hand washing with warm soapy water and a soft sponge preserves the finish significantly longer.
If you must use a dishwasher, skip the heated dry cycle.
Why does my air fryer smell like burning plastic?
A slight chemical smell during the first two or three uses is normal as factory protective coatings burn off. Run the empty appliance at 400°F for ten minutes in a ventilated area to clear it. If the plastic smell returns after months of use, check for melted food packaging, a warped plastic component near the heating element, or an electrical fault.
Persistent burning smells warrant unplugging the unit and contacting customer support.
How often should I replace the crisper plate?
Replace the crisper plate if the nonstick coating visibly flakes off, if the metal warps and no longer sits flat, or if the holes become permanently clogged with carbon. There is no set timeline. With proper hand washing and the use of soft utensils, a crisper plate lasts for years.
Warping usually happens from exposing a hot plate to cold water.
Is it safe to use aluminum foil inside the basket?
Yes, you can use small pieces of aluminum foil to catch drips or wrap delicate foods. Never line the entire bottom of the basket with foil. Blocking the perforations stops the hot air from circulating, which ruins the cooking process and can cause the appliance to overheat.
Always weigh the foil down with food so the fan does not blow it up into the heating element.
Do I need to season the nonstick basket like cast iron?
No. Factory-applied nonstick coatings do not require seasoning. Applying layers of oil and baking them on, as you would with cast iron, actually creates a sticky residue on modern PTFE or ceramic coatings.
Simply wash the basket gently before its first use to remove manufacturing dust, and rely on light brushing of oil on the food itself when needed.
Keeping Your Appliance Running Smoothly
Routine care prevents almost every common failure associated with countertop fryers. Wiping down the interior after every meal, soaking the basket instead of scraping it, and keeping the heating element clear of debris take very little time. These habits preserve the nonstick finish and keep the fan motor from overheating.
Stick to soft sponges, avoid aerosol sprays, and give the vents a quick check every few weeks. A well-maintained machine heats faster, cooks evenly, and avoids filling your kitchen with smoke.



1 thought on “How to Maintain an Air Fryer for Years of Crispy Meals”