An espresso machine not building pressure usually points to a grind that is too coarse, a worn pump, or scale blocking the water path. Most of the time you can fix it yourself with basic cleaning and a few adjustments. You rarely need a repair shop unless the pump motor has failed completely.
Why Your Espresso Machine Won’t Build Pressure
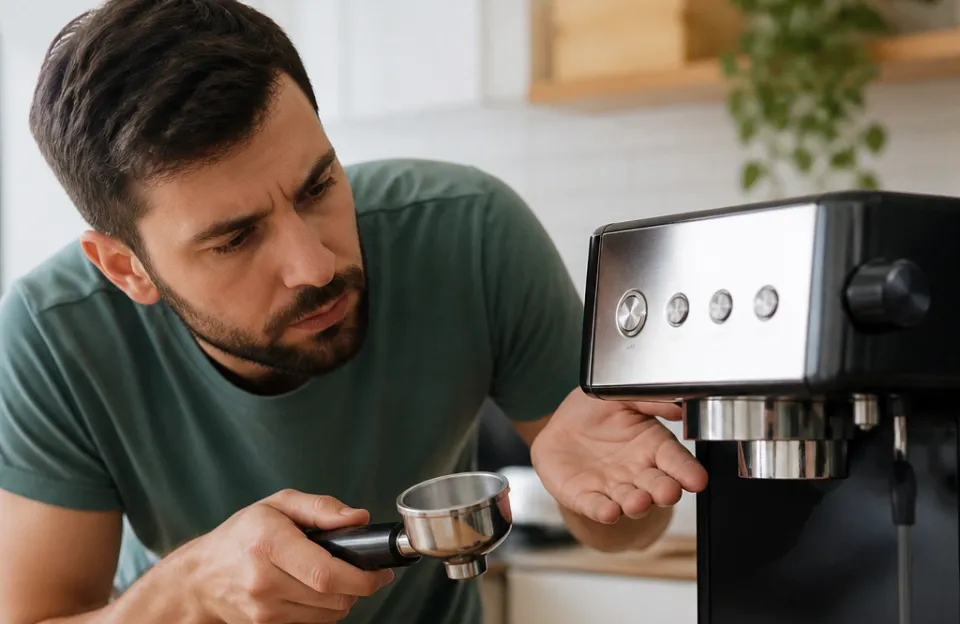
Proper espresso needs about 9 bars of pressure at the group head. That force pushes hot water through tightly packed coffee grounds in roughly 25 to 30 seconds. When your espresso machine is not building pressure, the water just flows through too fast.
The result is a thin, sour, watery shot with no crema on top.
Pressure problems almost always fall into three categories. The coffee puck offers too little resistance. The pump cannot push hard enough.
Or a blockage stops water from moving correctly. We will walk through each cause, starting with the most common one. Fixing this issue does not require special tools for the first few steps.
You just need patience and a way to test your results.
Before you take anything apart, run a blank shot. Pull the lever or press the brew button without any coffee in the portafilter. If water rushes out weakly, your pump or internal lines are the problem.
If water shoots out with strong force, your pump works fine. The issue is how you prepare the coffee. This simple test saves hours of guessing.
The Grind Size Is Too Coarse
This is the number one reason an espresso machine fails to build pressure. Coffee grounds create the physical barrier that forces the pump to work hard. Think of it like trying to blow air through a thick towel versus a loose net.
The towel resists. The net lets everything pass.
If your beans are ground too coarsely, water finds easy paths between the particles. It rushes through in under 15 seconds. The gauge on your machine will barely move.
The shot tastes weak and lacks body.
You need a finer grind. Adjust your grinder one or two clicks toward the fine setting. Pull another shot.
Watch the flow. It should start as a slow drip, then turn into a steady stream that looks like warm honey. If it still gushes out, go finer again.
Not all grinders can grind fine enough for espresso. A standard blade grinder chops beans unevenly. Some pieces are dust, some are boulders.
Water ignores the dust and flows around the boulders. You need a burr grinder designed specifically for espresso. These grinders use flat or conical metal burrs to crush beans into uniform, tiny particles.
If you suspect your current grinder is holding you back, look at dedicated espresso models. The Baratza Sette 270 is a popular entry point for home brewers who want precise control over fine particle sizes.

The Eureka Mignon Specialita is another reliable option known for quiet operation and very consistent fine grinding, which directly prevents low-pressure shots caused by uneven coffee beds.
When shopping for a new grinder, pay attention to stepless adjustment dials. Stepped dials lock you into fixed sizes. Stepless dials let you make micro-adjustments.
Those tiny changes are exactly what you need when dialing in a stubborn espresso recipe. Getting the right tool matters just as much here as picking safe materials for other kitchen appliances, like checking if cookware coatings are safe before you buy them.
Tamping Mistakes Let Water Bypass the Coffee
Even with a perfect grind, poor tamping ruins your pressure. Tamping compresses the loose grounds into a solid, flat cake called a puck. If the puck is uneven, water takes the path of least resistance.
This is called channeling. Water drills a hole through one weak spot instead of soaking the whole bed evenly.
Press down with about 30 pounds of force. More importantly, keep the tamper perfectly level. Tilt the tamper even slightly, and one side of the puck will be thinner than the other.
The water will rush through that thin side. Your pressure drops instantly.
Use a flat-bottom tamper that fits your portafilter basket snugly. If there is a large gap between the tamper edge and the basket wall, you leave a ring of loose coffee around the perimeter. Water flows through that loose ring immediately.
Distribute the coffee evenly before you tamp. Tap the portafilter gently on the counter to settle the grounds. Better yet, use a distribution tool (often called a WDT tool).
This is a handle with thin metal needles. Stir the dry grounds with the needles to break up clumps. Clumps create empty pockets.
Empty pockets become channels. Breaking up clumps is a small habit that fixes many pressure issues.
Make sure your dose matches your basket size. A double basket usually holds 16 to 20 grams of coffee. If you only put 14 grams in a basket meant for 18, the tamper sits too low.
The puck ends up too thin to resist the water. Check your basket’s recommended capacity and weigh your beans every single time. Guessing leads to inconsistent pressure.
Scale Buildup Blocks the Water Path
Hard water leaves mineral deposits inside your machine. Over months, calcium and magnesium bake onto the heating element, the pipes, and the tiny holes in the shower screen. This buildup narrows the water path.
Eventually, the pump struggles to push water through the restricted space.
If your machine used to pull great shots but now sounds louder and produces less water, scale is likely the culprit. Descaling dissolves these minerals. You need a proper descaling solution made for espresso machines.
Avoid plain white vinegar. Vinegar can damage rubber seals inside the boiler and leaves a lingering smell that ruins your coffee.
Follow the instructions for your specific model. Generally, you mix the descaler with warm water in the tank. Run it through the brew cycle.
Let it sit in the boiler for 15 to 20 minutes. Flush it out with clean water. Repeat until the water runs clear and tastes neutral.
Prevention is easier than fixing a blocked machine. Use filtered water. Pitcher filters or fridge filters remove enough hardness to slow down scale formation.
If your tap water is extremely hard, consider using bottled spring water or a specialized water formula designed for espresso. Keeping your water clean protects the whole system, much like measuring your cooking baskets properly helps you avoid fit issues and wasted effort in other daily routines.
Descaling frequency depends on your water hardness and how often you brew. For most home users making two to four drinks a day, descaling every two to three months keeps the pressure stable.
The Pump Is Worn Out or Failing
Espresso machines use either a vibratory pump or a rotary pump. Vibratory pumps are small, loud, and found in most home machines under $1,500. They use an electromagnetic coil to push a piston back and forth rapidly.
Rotary pumps are larger, quieter, and found in commercial or high-end prosumer machines.
Vibratory pumps have a lifespan. After a few years of daily use, the internal springs weaken. The piston loses its stroke length.
The pump still makes noise, but it cannot generate 9 bars of force anymore. You might hear a dull hum instead of the usual sharp buzzing.
To test the pump, attach a blind filter basket (a basket with no holes) to your portafilter. Lock it in and start the brew cycle. Since water has nowhere to go, the pressure gauge should climb quickly to 9 or 10 bars.
If it barely reaches 4 or 5 bars with a blind basket, your pump is failing. No amount of grinding finer will fix a dying pump.
Replacing a vibratory pump is a common DIY repair. Models like the Ulka EP5 are industry standards used across dozens of brands. They cost around $20 to $30.
If you are comfortable unplugging the machine, removing the outer shell, and swapping two hoses and two wires, you can do it yourself. Always unplug the machine before opening it. Take photos of the wire connections before disconnecting anything so you know exactly where they go back.
Rotary pumps last much longer but are more expensive to replace. If your rotary pump machine loses pressure, check the water supply line first. Rotary pumps often connect directly to a plumbing line.
A kinked hose or a closed valve starves the pump of water, causing a sudden drop in pressure.
The Overpressure Valve Needs Adjustment
Many modern espresso machines include an overpressure valve (OPV). This valve acts as a safety release. If pressure climbs above a set limit, usually 9 to 10 bars, the OPV opens.
It redirects excess water back into the reservoir or drip tray. This protects the coffee puck from being blown apart by too much force.
Sometimes the OPV gets stuck open. If it stays open, water bleeds off constantly during brewing. The pump works hard, but the pressure at the group head never builds because the water escapes through the valve.
On some machines, you can adjust the OPV. It is usually a brass fitting near the pump or the boiler, held in place by a nut. Turning it clockwise increases the pressure limit.
Turning it counterclockwise lowers it. If someone previously adjusted it too far down, your machine will never reach 9 bars.
Consult your manual before touching the OPV. Not all machines have adjustable valves. Some are factory-set and sealed.
Forcing a sealed valve breaks it, leading to leaks and costly repairs.
Gaskets and Seals Are Leaking Air
Rubber or silicone gaskets seal the connections inside your machine. The most important one is the group head gasket. This thick ring sits where the portafilter locks into the machine.
It creates a watertight seal against 9 bars of pressure.
Over time, heat and pressure dry out the rubber. It shrinks and cracks. When you lock the portafilter in, water sprays out the sides instead of going through the coffee.
You lose pressure instantly. If you see water dripping from the edges of the portafilter while pulling a shot, your group gasket needs replacing.
Group gaskets are cheap, usually under $10. Replacing them requires a flathead screwdriver or a specialized pick tool to pry the old, hardened rubber out of the groove. Press the new one in firmly.
Do this replacement once a year if you use your machine daily.
Internal seals also fail. O-rings inside the boiler or along the water lines can degrade. These leaks are harder to spot because they happen inside the casing.
If your machine drips from the bottom onto the counter, an internal seal has likely failed. Opening the machine to find the leak requires tracing the water path backward from the puddle.
Keeping seals healthy means avoiding harsh chemical cleaners. Stick to products made for espresso equipment. Using the wrong cleaning supplies can ruin rubber parts, similar to how picking the wrong accessories for your other kitchen gear causes unnecessary wear and tear.
The Shower Screen Is Clogged
Water exits the boiler and passes through a metal mesh disc called the shower screen before hitting the coffee. This screen spreads the water evenly across the puck.
Coffee oils and fine particles get pushed up into this screen during brewing. If you never clean it, the tiny holes plug up. A plugged shower screen restricts flow.
Ironically, this restriction sometimes causes the pump to build too much pressure before the water finally bursts through, or it causes uneven flow that mimics low pressure at the cup.
Remove the shower screen. Most are held in place by a single Phillips-head screw in the center. Soak the screen in hot water mixed with espresso machine cleaning powder (like Cafiza) for 30 minutes.
Scrub it gently with a soft brush. Hold it up to the light. You should see clearly through every tiny hole.
While the screen is off, wipe the exposed group head surface. Coffee residue cakes up there too. Reattach the clean screen.
You will likely notice an immediate improvement in flow consistency and pressure stability.
How to Test Pressure Accurately
Guessing based on the sound of the pump or the speed of the pour is unreliable. To truly know if your espresso machine is not building pressure, you need measurements.
Method 1: The Blind Basket Test
As mentioned earlier, insert a blind basket (no holes) into your portafilter. Lock it in. Start the pump.
Watch the built-in pressure gauge if your machine has one. It should rise steadily to 9 or 10 bars and stop. If it hovers at 4 or 5 bars, your pump is weak or your OPV is releasing too early.
Method 2: A Portafilter Pressure Gauge
If your machine lacks a built-in gauge, buy a portafilter pressure gauge. This tool replaces the coffee basket. It screws directly into the portafilter spout.
When you run the pump, the gauge shows the exact pressure the pump generates against a closed system. This isolates the pump performance from your coffee preparation skills.
Method 3: Timing the Shot
Weigh 18 grams of coffee. Grind it fine. Tamp it level.
Start the brew cycle. Time how long it takes to yield 36 grams of liquid espresso in the cup. The target is 25 to 30 seconds.
- Under 15 seconds: Grind is too coarse, or dose is too low. Pressure is definitely too low.
- 25 to 30 seconds: Pressure is correct.
- Over 40 seconds: Grind is too fine. Pressure is actually too high, choking the machine.
Using a digital scale that measures to the tenth of a gram removes all guesswork. The Hario VST-2000B is a standard choice for timing and weighing shots simultaneously.
The Acaia Lunar is the premium benchmark for professional-level precision and response time, though it carries a significantly higher price tag.
Tracking these numbers helps you understand if your pressure problem stems from the hardware or the recipe. Just like following specific times and temperatures when cooking proteins at high heat prevents raw centers, measuring your espresso variables prevents bad shots.
Quick Troubleshooting Checklist
If you feel overwhelmed, follow this exact order. Fix the first thing that fails before moving to the next.
- Run a blank shot. Weak flow means a pump or scale issue. Strong flow means a coffee prep issue.
- Check the grind. Make it finer. Pull a shot. If it still flows in under 15 seconds, go finer again.
- Weigh your dose. Put 18 grams in a double basket. Do not eyeball it.
- Inspect the tamp. Ensure it is perfectly flat. Use a WDT tool to break up clumps first.
- Clean the shower screen. Remove it, soak it, scrub it.
- Replace the group gasket. If water sprays sideways, swap the rubber ring.
- Descale the machine. If the pump sounds strained but water flow is weak, dissolve mineral buildup.
- Test with a blind basket. If pressure still won’t hit 9 bars after all the above, the pump or OPV needs mechanical repair.
Following this list prevents you from taking the machine apart when all you really needed was a finer grind setting.
Common Mistakes That Kill Pressure
People often chase complex mechanical fixes while ignoring basic habits. Here are the mistakes that cause an espresso machine not to build pressure, even when the hardware is perfectly fine.
Using stale coffee beans. Coffee releases carbon dioxide after roasting. This gas helps create resistance against the water. Beans roasted more than four weeks ago have lost most of their gas.
Stale coffee forms a weak puck that water pushes through easily. Buy freshly roasted beans. Look for a roast date on the bag, not just a “best by” date.
Switching beans without adjusting the grinder. Different coffees have different densities. A light roast Ethiopian bean behaves differently than a dark roast Sumatran bean. If you change bags and keep the exact same grind setting, your pressure will change.
Always expect to dial in the grind again when opening a new bag.
Leaving the portafilter cold. If you lock a cold metal portafilter into a hot group head, the temperature drops sharply. Cold water extracts coffee poorly and changes the viscosity of the liquid. Keep your portafilter locked into the machine when not in use so it stays hot.
Tapping the portafilter on the counter after tamping. Some people tap the side of the basket to knock loose grounds off the rim. Doing this after you already tamped breaks the seal between the puck and the basket wall. Water sneaks down that broken edge.
Distribute and groom the edges before you tamp, not after.
Paying attention to these small details keeps your workflow consistent. Consistency is the only way to know if a pressure drop is caused by your technique or a broken part.
Frequently Asked Questions
Why is my espresso coming out watery with no crema?
Watery espresso with no crema means the water passed through the coffee too fast. The pressure never reached the 9 bars needed to emulsify the coffee oils into crema. Grind your beans finer, increase your dose slightly, or tamp more firmly to create more resistance.
Can a dirty machine cause low pressure?
Yes. Scale buildup inside the boiler and pipes restricts water flow. A clogged shower screen blocks water from reaching the coffee evenly.
Both issues prevent the pump from generating full pressure at the group head. Descale your machine and soak the shower screen regularly.
How do I know if my espresso pump is broken?
Attach a blind filter basket to the portafilter and start the brew cycle. A working pump should force the pressure gauge to 9 or 10 bars within a few seconds. If the gauge barely moves and the pump makes a weak humming noise, the internal mechanism is worn out and needs replacement.
Does water quality affect espresso pressure?
It affects it indirectly over time. Hard water contains minerals that bake onto the heating elements and pipes. This scale buildup slowly narrows the water channels.
Eventually, the restriction becomes severe enough that the pump cannot push water through effectively, resulting in low pressure.
Should I adjust the overpressure valve myself?
Only if your machine manual explicitly allows it and you understand the risks. Turning the valve incorrectly can cause pressure to spike dangerously high, blowing out gaskets or cracking the boiler. If you are unsure, leave OPV adjustments to a certified technician.
Fixing an espresso machine not building pressure is mostly about process. Clean the machine, measure your coffee, grind it fine, and tamp it flat. If those steps fail, test the pump mechanically.
Most home baristas solve this problem within ten minutes once they stop guessing and start measuring.
As an Amazon Associate, we earn from qualifying purchases.