A puddle under your espresso machine is almost never caused by a mystery failure. In most homes, the water comes from one of three places: a drip tray that has quietly filled, a reservoir that is not seated properly or has a worn valve O-ring, or a group head gasket that has hardened with age. Unplug the machine and let it cool before you investigate. Then trace where the water first appears, because that location narrows the cause faster than any guess.
Espresso Machine Leaking Water? Start Here
Before touching anything, remove power. Water and mains electricity are dangerous together, so unplug the machine rather than simply switching it off. Boiler water can exceed 200°F, which means the machine needs at least two hours unplugged before you open or disassemble anything.
Once it is cool, empty the drip tray and dry the area around the machine with paper towels. You need a clean, dry baseline so that any new moisture is clearly visible. Park the machine on a dry towel and check it again after a few minutes.
Stop and seek professional diagnosis if water has reached the control board, the pump’s electrical contacts or the heating-element terminals. Do not run the machine in that condition.
Trace the Leak Before You Touch Anything
The sequence below follows water from the outside in. Each step is deliberately small so you can rule causes out rather than dismantle the machine on suspicion.
- Check the drip tray first. A full tray is the least dramatic explanation for a puddle on the counter, and it is easy to overlook.
- Reseat the water tank. A tank sitting even a couple of millimetres high can stop the valve opening fully, so water dribbles around the gasket instead of flowing into the machine.
- Inspect the tank body. Plastic tanks crack at stress points such as the handle and the seating area, and a hairline crack on the bottom can leak steadily while being nearly invisible.
- Run a cold leak test. Reinstall only the water tank, fill it halfway, and wait several minutes without turning the machine on. Water appearing under a switched-off machine points toward the tank, its valve or its seals.
- Brew a shot and watch where water emerges. Water underneath during pumping points more strongly to an internal hose, fitting, pump or boiler connection.
Keep the machine unplugged for the cold test. If the leak only appears when the pump runs, note the exact spot before deciding what to open.
Leaks Around the Portafilter: Group Head Gasket
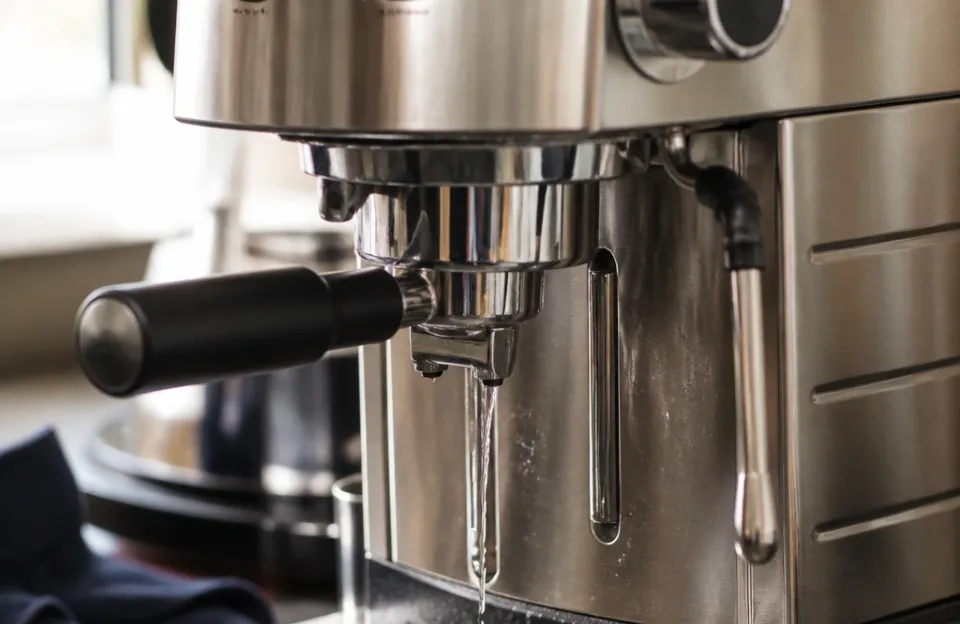
Water seeping from around the portafilter during or just after a shot is the most common leak location on home machines, and a worn portafilter gasket is the usual cause. A shower screen that has scaled up or bent can also force water sideways past the gasket because it no longer contacts the puck evenly.
A useful confirmation sign is a portafilter that locks far past its centre point while water sprays from the edges during the shot. That combination strongly suggests the gasket no longer fills the gap.
Replacement is a straightforward job on machines that allow it. On the Gaggia Classic Pro, the process is to remove the shower screen and its holder, pry out the old gasket, then press the new one in with its lip facing down. Independent guides describe replacing the group gasket every 12 to 18 months as routine maintenance, though the right interval depends on your machine and how often you brew.
Verify the gasket size and orientation against your own model’s manual before ordering or fitting one. Orientation varies between machines, and fitting a gasket the wrong way round can cause the leak to continue or worsen.
Reservoir and Tank Valve Leaks
The reservoir and its valve account for a large share of “leaks” that turn out to be cheap fixes.
A spring-loaded valve at the bottom of the tank mates with the machine’s intake, and its O-ring hardens over time and starts to leak. A valve that sticks, stays wet or drips continuously may have debris inside or a damaged spring and seal. Remove the tank, wipe the mating surfaces, and check the O-ring for stiffness, flattening or nicks.
If your machine uses a water-filter cartridge inside the tank, check the filter threads as well. Machines from brands such as Breville and DeLonghi can develop leaks at that connection.
When cleaning valve parts, avoid metal picks, abrasive pads, household petroleum jelly and compressed air on water valves and seals. Abrasives and the wrong lubricant can damage the very surfaces that are meant to seal.
Drip Tray Overflow and Normal Discharge
Not every puddle means a fault. Some water in the drip tray is normal because many machines drain water there after a shot and when relieving pressure. On the Gaggia Classic Pro, the three-way solenoid discharges water into the drip tray after each shot, so the tray fills faster than many owners expect.
Two specific behaviours are described as normal: a brief drip during heat-up caused by thermal expansion in the boiler, and a short drip of roughly three to five seconds after a brew ends as pressure equalises. A continuous drip after the machine has reached operating temperature and sat idle for five minutes or more is not normal and points to a genuine leak.
If the tray is overflowing but the machine is dry elsewhere, empty it more often and check that the tray is seated correctly. If water is pooling under the machine rather than in the tray, continue down the diagnostic list.
Internal Tubing and Fitting Leaks (Safety First)
Internal work starts and ends with the plug out of the socket. Keep the machine unplugged while inspecting hoses, clamps and fittings. Never run an opened machine connected to mains power in order to watch for leaks, because water plus live electrical components creates a shock hazard.
Look for damp patches at hose junctions, clamp marks, and where tubing meets the pump or boiler. Water underneath during pumping is the typical symptom of an internal hose, fitting, pump or boiler connection problem.
Two internal issues sit firmly outside normal DIY scope:
- Boiler fitting leaks. Weeping from brass fittings, solder joints or thread connections is not a DIY repair; proper work requires pressure testing, thread sealing and sometimes re-soldering.
- Sealed and compact machines. Where the internals are not designed for user access, an internal seal or hose leak is usually a service job.
If water has reached wiring, the control board or heating-element terminals, stop entirely and arrange professional diagnosis.
Steam Wand and Hot Water Spout Drips
Drips or hissing at the base of the steam wand usually mean a hardened O-ring. The ball joint or threaded base contains an O-ring that stiffens with repeated heat exposure.
A loose collar nut on the wand can sometimes be snugged up, but over-tightening risks stripping the brass threads. Turn gently and stop as soon as resistance increases. If snugging the nut does not stop the drip, the O-ring likely needs replacing.
Before ordering, confirm the seal type and size for your exact model. Wand assemblies differ considerably between machines, and some use complete valve units rather than a single accessible O-ring.
Descaling Mistakes That Cause Leaks
Heavy limescale stops valves and seals from seating cleanly, which produces slow internal weeps. Descaling often stops a scale-related leak outright.
The mistake is descaling carelessly or too rarely. Follow your machine’s manual and account for your water hardness. Many homes need descaling every one to three months, while filtered, soft water may allow less frequent treatment.
Do not assume a household descaler is safe for your boiler material. Chemical compatibility varies, and the manufacturer’s own guidance for your model is the reference to follow rather than generic advice. If the manual does not specify a product, check with the manufacturer before running any descaler through the machine.
After descaling, follow the flush and rinse instructions in your manual before brewing again.
Pump and Overpressure Valve Problems: When to Stop
Water appearing around the pump area or underneath during pumping can involve the pump itself or a connection near it. Diagnosing further requires access that many sealed home machines do not permit.
Pressure-relief components and pump assemblies are not routine user-service items on most home machines, and no service documentation was available here to authorise disassembly. Treat a suspected pump or pressure valve fault as professional work.
The same caution applies to anything involving the boiler. Repair of boiler fittings requires pressure testing and proper sealing, which is beyond a typical home toolkit.
Tools and Parts: Verify Before You Order
| Item | Purpose |
|---|---|
| Group head gasket | Seals the portafilter to the machine |
| Silicone O-ring kit | Replaces worn internal seals |
| Flathead screwdriver | Pries out old gaskets |
| Adjustable wrench | Tightens compression fittings |
| Descaling powder | Removes mineral blockages |
| Paper towels | Locates the exact source of the leak |
Match replacement parts to the exact model and part number rather than choosing by appearance alone. Gasket diameters, O-ring thicknesses and valve assemblies can look similar across models while being incompatible.
If you are also dealing with weak extraction alongside the leak, the guide to an espresso machine not building pressure covers the pressure side of diagnosis.
When to Call a Professional
Bring in a technician, or contact the manufacturer’s support line, in these situations:
- Water has reached the control board, pump contacts or heating-element terminals.
- The leak comes from boiler fittings, solder joints or threaded boiler connections.
- Your machine is sealed or compact and the leak is internal.
- You cannot confirm the correct part or procedure for your model.
If your machine is under warranty, check the terms before opening the case, since DIY work can affect coverage. For recall information on household appliances, the Consumer Product Safety Commission publishes official notices.
Preventing Future Leaks
Most leak prevention comes down to water quality and simple habits.
- Use filtered water where your manual recommends it. Softer water slows scale build-up and reduces the strain on valves and seals.
- Descale on schedule. Follow the manual and adjust for your water hardness, with many homes needing it every one to three months.
- Seat the reservoir fully every time. A partially seated tank is a common and avoidable cause of dribbles.
- Do not overtighten the portafilter. Locking it firmly is enough; forcing it past the centre point accelerates gasket wear.
- Keep valve parts clean. Avoid metal picks and abrasive pads on seals.
- Empty the drip tray before it overflows, and check underneath the machine occasionally so a slow internal weep does not go unnoticed.
A leak that returns after a gasket replacement usually means the new part was the wrong size, was fitted the wrong way, or the underlying cause was scale rather than the seal. Recheck the model-specific instructions before buying another part.
The Bottom Line
Start with the plug out and the machine cool. Check the drip tray, reseat and inspect the reservoir, then test cold before testing under pressure. Most home leaks trace back to a worn group gasket, a tank valve O-ring or a cracked tank, and those are affordable fixes.
If water has reached the electronics, the leak is at the boiler, or your machine is sealed, stop and get professional help. Fixing the cause rather than the puddle is what keeps the machine dry for good.