Nothing ruins a morning faster than a coffee grinder that won't start. Most dead grinders just have stuck beans, a tripped safety switch, or worn burrs. You can fix the common problems in under ten minutes with basic tools.
Why Your Coffee Grinder Stopped Spinning
A quiet grinder usually points to three main culprits. Old beans get stuck in the grinding chamber. A tiny safety switch gets pushed out of place.
Or the motor brushes wear down over time.
Blade grinders jam more often than burr models. The flat metal blade hits a hard bean and stops dead. Burrs handle tough beans better, but they still trap fine dust.
That dust builds up around the moving parts.
Check your warranty before you open anything. Taking apart a new machine voids most manufacturer guarantees. If it is less than a year old, call the brand first.
Clearing Jammed Beans From The Grinding Chamber
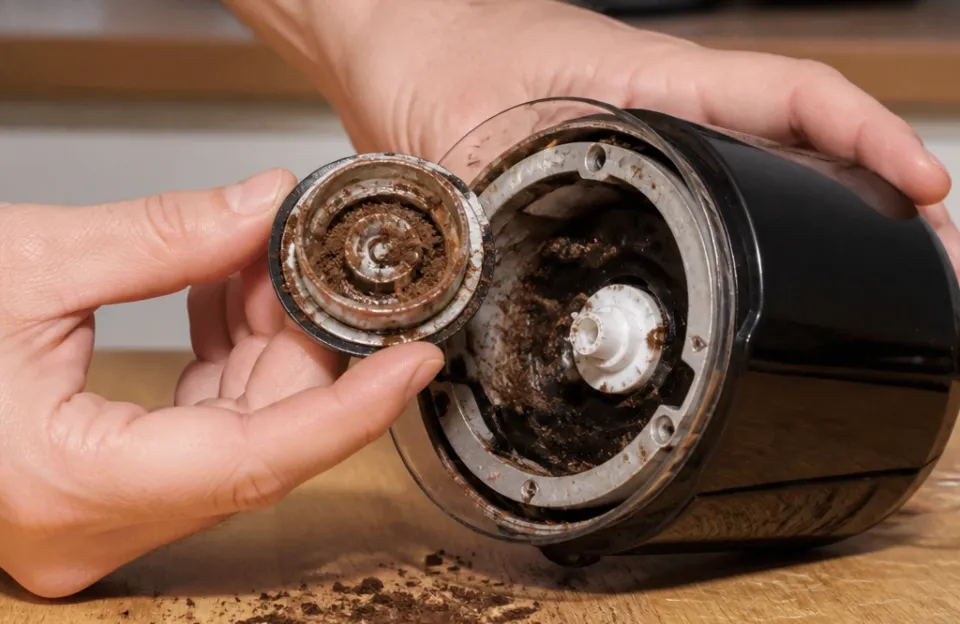
Stuck beans are the top reason for a frozen grinder. Oily dark roasts cause this problem the most. The oils make grounds stick together in thick clumps.
Unplug the machine before you touch the inside. Never put your fingers near the blades while it has power. This applies to all kitchen appliances, much like handling raw poultry safely requires strict attention to avoid cross-contamination.
Remove the hopper if your model has one. Look down into the burrs or around the blade. Use a wooden chopstick to poke at the stuck beans.
Metal tools can chip the burrs or scratch the bowl.
Tap the side of the grinder gently with your palm. This shakes loose small pieces blocking the path. Turn the top burr by hand if you own a manual-style electric model.
It should spin freely without heavy resistance.
Run dry white rice through the grinder once it moves. The rice absorbs leftover oils and pushes out fine dust. Throw that ground rice away when you finish.
Do not brew with it.
Finding The Hidden Safety Switch
Almost every modern grinder has a safety lock. This switch stops the motor if the lid or hopper is loose. It keeps fingers away from sharp spinning parts.
The switch is usually a small plastic pin. You will find it near the rim where the hopper locks in. Sometimes a tiny piece of chaff blocks this pin.
Blow on it or use a soft brush to clear the gap.
Push the hopper down firmly until you hear a click. That click means the pin is fully pressed. Try turning the power back on after it clicks.
If the pin feels broken or hangs loose, the switch is dead. You can buy replacement micro-switches online for a few dollars. Soldering a new one takes basic electrical skills.
Skip this repair if you lack confidence working with wires.
Checking Power Cords And Wall Outlets
Dead outlets trick many home cooks. Plug a lamp into the same socket to test it. If the lamp stays dark, flip your breaker box switch.
Look closely at the grinder power cord. Frayed wires or bent prongs stop the flow of electricity. A damaged cord needs a full replacement right away.
Do not wrap it in tape and keep brewing.
The Consumer Product Safety Commission tracks appliance fires caused by bad cords. Replace any cord that shows bare wire underneath the rubber.
Some grinders have internal thermal fuses. These fuses blow if the motor gets too hot. A blown fuse cuts all power instantly.
Replacing it requires opening the base and finding the small glass tube. Match the exact amp rating printed on the old fuse.
Cleaning Dirty Burrs That Refuse To Turn
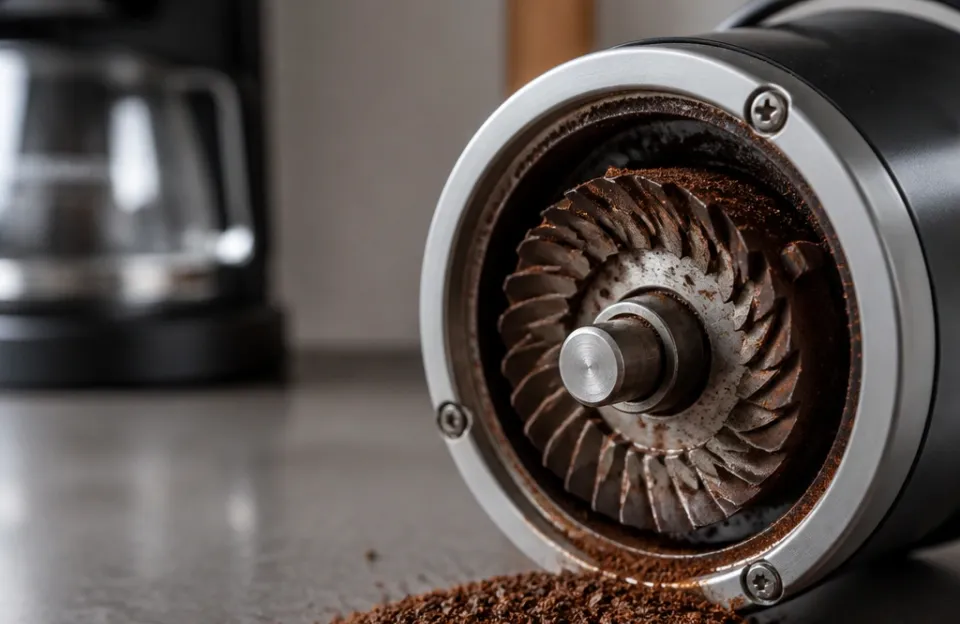
Burrs crush beans instead of chopping them. Over months, coffee oils bake onto the metal teeth. This sticky layer slows the motor down.
Eventually, the burrs bind together and stop.
Take the top burr out according to your manual. Brush both burrs with a stiff nylon brush. Avoid water on steel burrs because moisture causes fast rust.
Ceramic burrs can handle a quick rinse, but dry them completely before putting them back.
Use commercial grinder cleaning tablets for heavy buildup. You drop them in the hopper and run the machine. They scrub the oils off the cutting edges.
Run a handful of cheap beans afterward to clear any tablet dust.
Clean burrs spin freely by hand. If yours still drag against each other, check for a bent shaft. A bent shaft means the whole grinding head needs replacing.
Spotting Worn Motor Brushes In Older Grinders
Electric motors use small carbon blocks called brushes. These blocks press against the spinning motor core. They wear down slowly with every single use.
After a few years, the brushes get too short to make contact. The motor hums but the shaft does not spin. Or the grinder stays totally silent when you push the button.
Open the bottom plate to inspect the brushes. They sit in small holders on opposite sides of the motor. Measure them with a ruler.
If they are shorter than a quarter inch, swap them out.
Replacement brushes cost very little online. Search your exact grinder model number plus "carbon brushes." Pop the old ones out and slide the new ones in. Make sure the springs push them tight against the motor core.
This fix brings older machines back to life quickly. But if the motor smells like burnt plastic, the core itself is fried. No amount of new brushes will save a melted motor.
Blade Grinders Versus Burr Models When Parts Fail
Blade grinders cost less but break faster. The motor sits directly under a thin metal blade. Hard objects like stones mixed with beans snap the blade.
A snapped blade means buying a whole new unit.
Burr grinders cost more upfront. They separate the motor from the crushing teeth using gears. This setup handles hard beans much better.
When burrs go dull, you just buy a new set.
If you drink espresso, you need a burr model anyway. Espresso demands a very fine, even grind. Blade grinders chop beans into random chunks.
Read about different espresso setups to see why uniform grounds matter so much for high-pressure brewing.
Dull burrs make the motor work twice as hard. This extra strain trips the thermal fuse faster. Change your burrs every two to three years if you brew daily.
Strange Sounds Before Total Failure
Grinders rarely die without warning. Listen to the pitch of the motor when you brew. A high whine means the motor spins but the burrs do not catch.
This points to stripped plastic gears inside the drive train.
A low groaning noise means something is physically stuck. Unplug it immediately to prevent burning out the motor coils. Letting it groan for too long melts the internal wiring.
Clicking sounds usually come from a failing switch. The relay tries to engage but drops out fast. This happens when contacts inside the switch get covered in carbon dust.
Spraying electrical contact cleaner inside the switch sometimes fixes it.
Rattling means a screw backed out or a burr cracked. Stop using the machine right away. Loose metal pieces can fall into your coffee grounds.
Swallowing metal shards is a real hazard.
When Repair Costs More Than Replacement
Not every broken grinder deserves a fix. Cheap blade models cost under thirty dollars. Buying parts and paying for shipping often beats that price.
Just recycle the old one and buy fresh.
Mid-range burr grinders fall between fifty and one hundred fifty dollars. Replacing a set of burrs or a power cord makes sense here. The labor takes twenty minutes and saves you money.
High-end espresso grinders cost several hundred dollars. Sending these to a professional repair shop is smart. They have exact factory parts and know how to calibrate the alignment.
Guessing on expensive gear ruins your future shots.
Check if the brand sells spare parts directly. Some companies refuse to sell internal components to regular buyers. If you cannot buy the part, you cannot complete the repair.
Keep your kitchen gear running well with routine care. Basic maintenance prevents sudden breakdowns during your morning rush. Much like checking basket dimensions before buying inserts, knowing your grinder's specific limits helps you avoid pushing it past what it can handle.
Preventing Future Breakdowns With Daily Habits
Small habits keep grinders alive for years. Never leave roasted beans sitting in the hopper overnight. The oils drip down into the burrs and dry into glue.
Store beans in a sealed jar and only fill the hopper right before you brew.
Pulse the grinder instead of holding the button down. Running the motor non-stop builds intense heat. Short bursts let the coils cool off between cycles.
This simple change doubles the lifespan of cheaper motors.
Wipe the outside with a damp cloth weekly. Coffee dust settles into the buttons and seams. That dust holds moisture and corrodes the circuit board.
Keep the area around your machine dry and clean.
Avoid grinding flavored beans. Flavor syrups coat the burrs in thick sugar residue. Sugar melts from friction and turns into hard caramel.
It permanently glues the moving parts together. Buy pre-ground flavored coffee instead.
Run a quick visual check every month. Look for loose screws on the base. Check the cord for kinks or pet bite marks.
Catching a frayed wire early prevents a dangerous shock.
Fixing Uneven Grounds After A Jam
Sometimes the grinder runs again after clearing a jam, but the coffee tastes wrong. The beans come out in huge chunks mixed with fine powder. This means the burrs shifted out of alignment during the jam.
Take the top burr out and seat it again. Push down evenly on both sides until it clicks. An uneven burr crushes beans on one side and misses them on the other.
Blade grinders suffer from uneven chops naturally. The beans bounce away from the center blade. Shake the grinder gently while it runs to mix the beans.
This forces everything back toward the spinning metal.
If alignment fails to fix the texture, the burrs might be chipped. Inspect the cutting edges under bright light. Any missing teeth mean you need a new set.
Chipped burrs cannot produce a consistent size.
Calibration matters heavily for pour-over and French press methods. Each brewing style needs a specific particle size range. A misaligned grinder ruins the extraction rate completely.
Dealing With Moisture Damage On The Counter
Kitchens generate a lot of steam. Placing a grinder next to the stove or kettle invites trouble. Steam sinks into the motor housing and rusts the bearings.
Rusted bearings seize up and stop the shaft cold.
Move your grinder to a dry corner of the counter. Keep it far away from boiling pots. If it already got wet, unplug it and let it air dry for two days.
Point a fan at the vents to speed up the process.
Never submerge the base in water to clean it. Only the removable hopper and grounds bin belong in the sink. The electrical base must stay completely dry at all times.
Wipe it with a barely damp cloth instead.
Moisture also causes mold inside the bean chute. Old grounds trapped in a humid chute grow fuzzy spots fast. This adds a sour taste to fresh coffee.
Scrub the chute with a dry bottle brush every week.
Electrical Safety Rules For Kitchen Repairs
Working on plugged-in appliances causes severe injuries. Always pull the plug from the wall first. Do not rely on the power button being turned off.
Switches can fail internally and send power anyway.
Wear rubber-soled shoes when testing a repaired grinder. Stand on a dry floor. Keep your hands away from exposed wires while the power flows.
Use a multimeter to confirm zero voltage before touching the board.
Capacitors store electricity even after unplugging. Large grinders have capacitors that hold a painful charge for hours. Discharge them safely using an insulated resistor tool.
Skipping this step gives you a nasty shock.
If you feel unsure about any wiring step, stop working. Call a local appliance repair technician. Saving fifty dollars is not worth a trip to the hospital.
Electricity demands total respect in the kitchen.
Proper grounding protects you from stray currents. Three-prong plugs exist for a reason. Never cut the third prong off to fit an old two-slot outlet.
Use a grounded adapter rated for the correct wattage.
Choosing A Reliable Replacement If Yours Is Dead
When a grinder is truly beyond saving, picking the right replacement prevents repeat headaches. Look for models with metal drive gears instead of plastic. Plastic gears strip easily when hitting a dense bean.
Check the wattage rating on the spec sheet. Higher watts mean a stronger motor that resists jamming. A 200-watt motor struggles with light roasts.
A 400-watt motor powers through them without slowing down.
Read customer reviews focusing on long-term durability. Ignore comments about packaging or shipping speed. Look for notes from people who used it daily for over a year.
Their experiences reveal the true build quality.
Consider how easy it is to take apart for cleaning. Models that require special screwdriver bits hide poor designs. You want a machine that opens with standard Phillips screws.
Easy access means you will actually clean it regularly.
Match the grinder type to your favorite brewing method. Drip coffee makers need medium grounds. Espresso demands fine powder.
Buying the wrong style leads to constant frustration and wasted beans. Knowing which accessories fit specific models applies here too, always verify compatibility before buying add-ons or replacement parts for your specific machine.
Quick Answers About Dead Grinders
Why does my grinder hum but not spin?
A humming motor means power reaches the coils, but the shaft is stuck. This usually happens when the burrs jam or the drive gears strip. Unplug it and try turning the burrs by hand.
If they move freely, the internal gears are likely broken.
Can I wash the whole grinder in the sink?
No. Only the hopper and the catch bin are safe for water. The motor base contains live electrical parts.
Submerging it causes shorts, rust, and serious shock hazards. Wipe the base with a dry or slightly damp cloth.
How long should a home grinder last?
A cheap blade grinder lasts one to two years with daily use. Mid-range burr models survive three to five years. High-end commercial-style grinders run for ten years or more.
Regular cleaning and avoiding oily beans extends their life significantly.
Does grinding rice really sharpen the burrs?
Rice does not sharpen metal. It acts as a mild abrasive to scrub away baked-on coffee oils. This cleaning restores the original cutting edge.
But it cannot fix burrs that are genuinely dull or chipped.
Why did my grinder suddenly smell like burning plastic?
That smell means the motor is overheating. A severe jam forces the motor to draw too much current. The insulation on the copper wires starts melting.
Unplug it immediately and clear the blockage before trying again. Continued use will destroy the motor permanently.