Air fryer chicken wings no breading cook up crispy on the outside and juicy on the inside in about 25 minutes. You skip the flour, cornstarch, and egg wash entirely. The hot circulating air does the work, rendering the fat directly from the skin until it blisters and crisps.
Making air fryer chicken wings no breading means you get pure wing flavor without a heavy crust getting in the way. This method works for whole wings or separated flats and drumettes. Below, you'll find the exact steps to prep, season, and cook them, along with the science behind why bare skin gets so crunchy and how to avoid soggy spots.
Why skipping the coating still gives you crunch
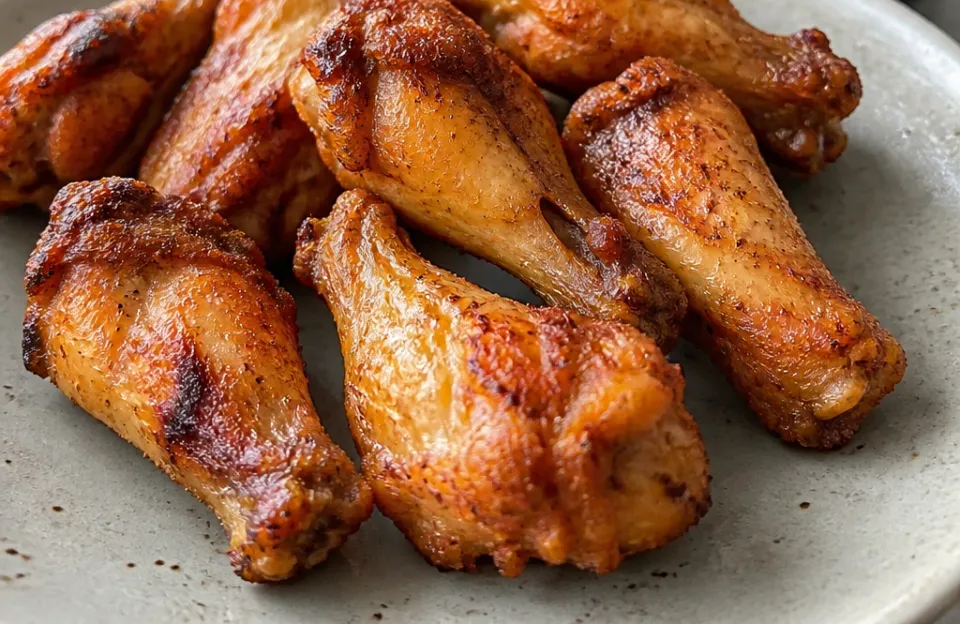
The crispness on naked wings comes from two things: dry heat and rendered fat. When hot air hits raw chicken skin, the moisture evaporates quickly. Once the surface dries out, the temperature of the skin rises above the boiling point of water.
The fat underneath melts and pushes through the tissue, essentially frying the skin in its own grease.
Breading absorbs oil and traps moisture. Without it, the skin has direct contact with the moving air. The USDA recommends cooking all poultry to an internal temperature of 165°F, which you can verify using a food safety standard approach.
Hitting that temperature while keeping the skin exposed is what builds the texture.
How moving air changes the cooking process
A countertop air fryer uses a heating element and a high-speed fan. The fan pushes air down and around the food basket. This constant movement strips away the thin layer of steam that naturally forms around wet meat.
Because the steam clears instantly, the skin dries faster than it would in a standard oven. Faster drying means faster browning. The Maillard reaction, the chemical process that creates brown color and savory flavor, kicks in sooner when moisture isn't blocking the heat.
Fat rendering without deep oil
Chicken wings have a high skin-to-meat ratio. That skin holds a lot of subcutaneous fat. In a deep fryer, external oil transfers heat to render that fat.
In an air fryer, the ambient heat does the same job over a slightly longer window.
As the fat melts, it drips through the basket holes into the drawer below. The wing sits in less grease as it cooks. This prevents the skin from becoming greasy or limp.
You end up with a dry, shatter-crisp exterior.
Prepping the wings before they hit the basket
Preparation dictates the final texture more than the cooking time does. Wet wings steam. Dry wings crisp.
Every step before you turn on the machine should focus on removing surface moisture and separating the pieces for even airflow.
- Pat the wings completely dry with paper towels. Press firmly against the skin. Do this twice if they feel slick.
- Separate whole wings into drumettes and flats if they aren't pre-cut. Twist at the joint until it pops. Discard the tips or save them for stock.
- Place the dried pieces in a large bowl.
- Drizzle a small amount of neutral oil over them. You need about one teaspoon per pound. Toss until every piece has a faint sheen.
- Add your dry seasonings. Salt, black pepper, garlic powder, and smoked paprika work well. Toss again to coat evenly.
- Let them sit at room temperature for ten minutes. This gives the salt time to draw out any remaining hidden moisture, which you can pat off one last time before cooking.
If you want to track temperatures remotely while managing other dishes, pairing this prep routine with a wireless probe setup keeps you out of the kitchen until the timer goes off.
Cooking times and heat settings for naked wings
Temperature control matters because you are balancing two goals: rendering fat without burning the skin, and cooking the meat through without drying it out. A two-stage approach handles both.
Start at 380°F for 12 minutes. This moderate heat gently warms the meat and begins melting the fat under the skin. If you start too hot, the outside burns before the inside reaches a safe temperature.
After 12 minutes, open the basket. Flip every single wing using tongs. You will notice some fat pooling in the bottom drawer.
This is normal.
Increase the temperature to 400°F. Cook for another 10 to 12 minutes. The higher heat finishes the browning process.
Watch closely during the last three minutes. Sugar-heavy rubs will darken very fast at 400°F.
| Cooking Phase | Temperature | Time | Purpose |
|---|---|---|---|
| Initial Render | 380°F | 12 minutes | Melts subcutaneous fat, cooks interior gently |
| Final Crisp | 400°F | 10-12 minutes | Browns skin, achieves crunchy texture |
Total cook time lands between 22 and 25 minutes for average-sized wings. Jumbo wings might need an extra three to four minutes at the higher temperature. Always check the thickest drumette with a fast digital thermometer to confirm it reads 165°F or higher.
Seasoning bare skin so spices stick
Without flour or batter, spices tend to fall off during the air circulation phase. Oil acts as the binder here. You only need enough to make the skin tacky.
Too much oil causes smoking; too little leaves bald spots where seasoning slides into the drip tray.
Apply the oil first. Massage it into the skin. Then add the dry rub.
Press the spices into the meat rather than just sprinkling them on top.
Salt needs special attention. Kosher salt adheres better than fine table salt because the larger flakes catch in the microscopic texture of the skin. If you use fine salt, cut the volume in half to avoid over-salting.
For spicy wings, cayenne pepper or chili powder works well in the dry rub. However, ground spices burn faster than whole ones. If your rub contains a lot of paprika or chili powder, stick closer to 390°F for the second phase instead of pushing it to 400°F.
Wet marinades require a different approach. If you marinate the wings overnight in something like soy sauce and ginger, you must wipe off the excess liquid before cooking. Leave the flavor absorbed in the meat, but remove the surface pool.
Otherwise, the liquid boils and steams the skin flat. After wiping, apply a tiny bit of oil and proceed with the standard cooking method. For those who prefer monitoring their food from another room, a Bluetooth-enabled reader tracks the internal temp without opening the drawer.
Saucing without ruining the crispness
Sauce destroys crunch if applied at the wrong time. Never put wet sauce on raw wings going into the air fryer. The sugars caramelize, then carbonize, leaving a bitter, burnt mess stuck to the basket.
Cook the wings completely naked. Get them as crispy as possible using the two-stage method described above. Transfer the finished wings to a large, clean mixing bowl.
Pour your sauce over the hot wings immediately. Toss them vigorously. The residual heat from the meat helps the sauce cling to the rough surface of the blistered skin.
Serve right away.
If you wait too long after tossing, the moisture from the sauce will eventually soften the skin. Have your plates ready before you pull the basket out.
Buffalo sauce is mostly butter and hot sauce. It coats easily. Barbecue sauce is thicker and heavier.
Use less barbecue sauce than you think you need, or it will weigh the wings down and mask the texture you worked to build. Teriyaki and honey garlic glazes contain high sugar content. They taste great, but require immediate serving to prevent sogginess.
Handling overcrowding and batch sizes
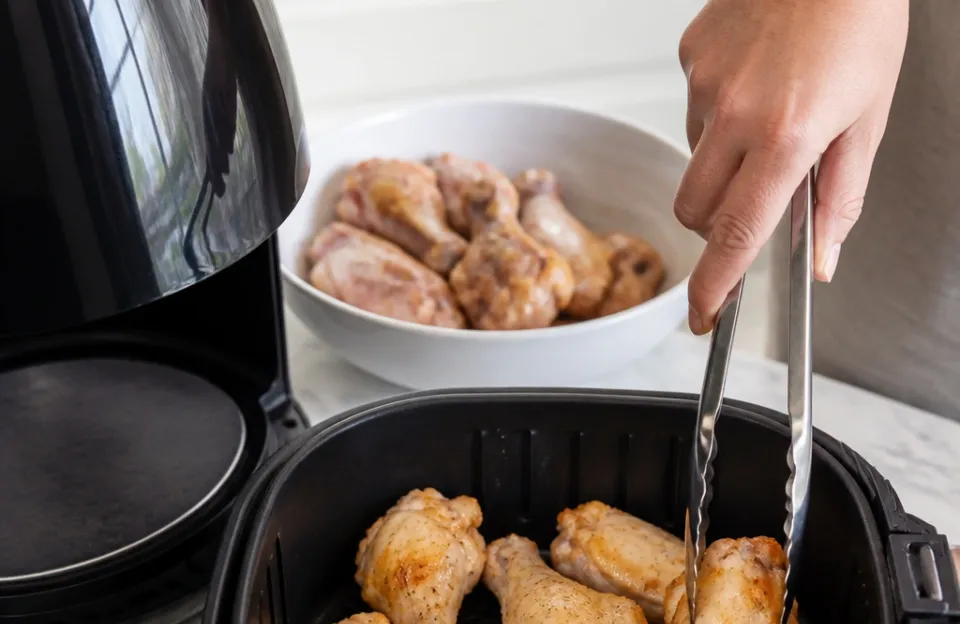
Air fryers vary wildly in capacity. A two-quart model fits maybe six drumettes in a single layer. A six-quart basket holds closer to two pounds.
The rule remains the same regardless of size: never stack the wings.
Overlapping pieces block the airflow. Where the air cannot reach, the skin stays pale, rubbery, and wet. The fat won't render properly in those blocked zones.
You end up with half a batch of great wings and half a batch of steamed chicken.
Cook in batches if necessary. Keep finished wings warm on a wire rack set over a baking sheet in a 200°F oven. Don't pile them on a plate lined with paper towels.
The bottom wings will sweat and lose their crunch while waiting for the next round.
Leave at least a quarter inch of space between each piece in the basket. Flats lay naturally side by side. Drumettes stand up awkwardly, so arrange them deliberately rather than dumping them in.
If you frequently cook large batches for gatherings, knowing how to maintain your appliance prevents old grease from smoking during these high-heat sessions.
Troubleshooting texture issues
Even with the right method, variables change. Humidity, wing size, and specific appliance wattage all affect the outcome. Here is how to fix common problems when making air fryer chicken wings no breading.
Skin sticks to the basket. This happens when there isn't enough oil on the skin or the basket wasn't preheated. Lightly spray the basket with cooking oil before adding the wings. Alternatively, use perforated parchment liners designed for air fryers.
Regular parchment blocks too much airflow.
Wings smoke heavily. Chicken wings release a lot of fat. If that fat hits the hot metal drawer at the bottom, it smokes. Put a tablespoon of water in the bottom of the drawer, beneath the basket, before cooking.
The water catches the dripping fat and keeps the temperature below the smoke point. You can also place a slice of bread in the drawer to absorb the grease.
Meat is dry but skin is pale. The temperature was too low for too long. The moisture cooked out of the muscle fibers before the skin had a chance to brown. Increase the second-phase temperature to 400°F or even 410°F, but watch closely to prevent burning.
Uneven cooking. The fan distribution in some models creates hot spots. Flipping the wings halfway through solves most of this. If you still notice one side browns faster, rotate the entire basket 180 degrees at the halfway mark.
Using a dual-sensor tool lets you monitor a wing in the front and one in the back simultaneously.
Spices burn and taste bitter. Your rub contains sugar or delicate herbs. Garlic powder burns faster than granulated garlic. Brown sugar chars at 400°F.
Switch to savory-only rubs for the cooking phase, or lower the final temperature to 375°F and extend the time by five minutes.
Storing and reheating leftovers
Leftover naked wings hold up better than breaded ones because there is no thick crust to turn mushy in the fridge. Still, proper storage matters.
Let the wings cool completely on a wire rack. Putting warm wings into a sealed container creates condensation. That water droplets onto the skin and ruins the texture.
Once cool, place them in a single layer in an airtight container. Separate layers with parchment paper if you must stack them. They keep in the refrigerator for three to four days.
Reheating requires dry heat again. Microwaves make them rubbery. Put them back in the air fryer at 370°F for four to six minutes.
Check them early so they don't dry out. The skin won't be quite as shatter-crisp as day one, but it will regain most of its snap.
You can also reheat them in a conventional oven at 400°F on a wire rack over a baking sheet. This takes about 10 minutes. Avoid covering them with foil, which traps steam.
If you froze the cooked wings, thaw them in the refrigerator overnight before reheating. Reheating from frozen usually results in a burnt exterior and a cold center.
Frequently asked questions
Can I use baking powder to make them crispier?
Yes. Adding half a teaspoon of aluminum-free baking powder per pound of wings changes the pH level of the skin. This accelerates the Maillard reaction and draws out moisture faster.
Mix it thoroughly with your salt and spices. Make sure it is baking powder, not baking soda. Baking soda tastes metallic and soapy if used in these quantities.
Do I need to flip the wings during cooking?
Flipping guarantees even browning. Air fryers circulate heat, but the elements are usually located at the top. The side facing up receives direct radiant heat, while the bottom relies solely on convection.
Turning them halfway through the cook time evens out the color and texture.
Are naked air fried wings healthier than deep fried ones?
They contain significantly fewer calories from added fat. Deep frying submerges the breading and skin in oil, which gets absorbed. Air frying renders the existing fat out of the chicken without adding much new oil.
The protein content remains identical. The reduction in calories comes strictly from eliminating the breading ingredients and the absorbed frying oil.
What if my air fryer only goes up to 390°F?
Many smaller or older models cap out at 390°F or 400°F. If yours stops at 390°F, simply add three to four minutes to the second phase of cooking. The difference between 390°F and 400°F is minor.
You will still achieve full rendering and browning, it just takes slightly longer. Rely on your thermometer reading 165°F rather than strict timing.
Can I cook frozen wings without breading this way?
You can, but the texture suffers. Frozen wings release a massive amount of water as they thaw in the heat. This water steams the skin before it can crisp.
If you must cook from frozen, start at 360°F for 15 minutes to thaw and drain the liquid. Empty the drawer, pat the wings dry quickly, add oil and seasoning, then finish at 400°F for 12 minutes. Thawing in the fridge overnight yields far superior results.
Should I poke holes in the skin before cooking?
No. Poking holes allows the juices inside the meat to escape during cooking. This leads to dry chicken.
The goal is to keep the moisture inside the muscle while rendering the fat just beneath the skin. Intact skin acts as a barrier that protects the meat fibers from the intense moving air.
Getting the most out of bare wings
Making air fryer chicken wings no breading relies entirely on managing moisture and heat. Dry the skin aggressively before cooking. Use a two-temperature approach to render fat slowly, then brown quickly.
Sauce them at the very last second to preserve the crunch. Pay attention to spacing in the basket, and always verify the internal temperature with a reliable thermometer. Once you dial in the timing for your specific machine, you'll get consistent, deeply savory wings without ever touching a bag of flour.


2 thoughts on “Crispy Air Fryer Chicken Wings With No Breading”