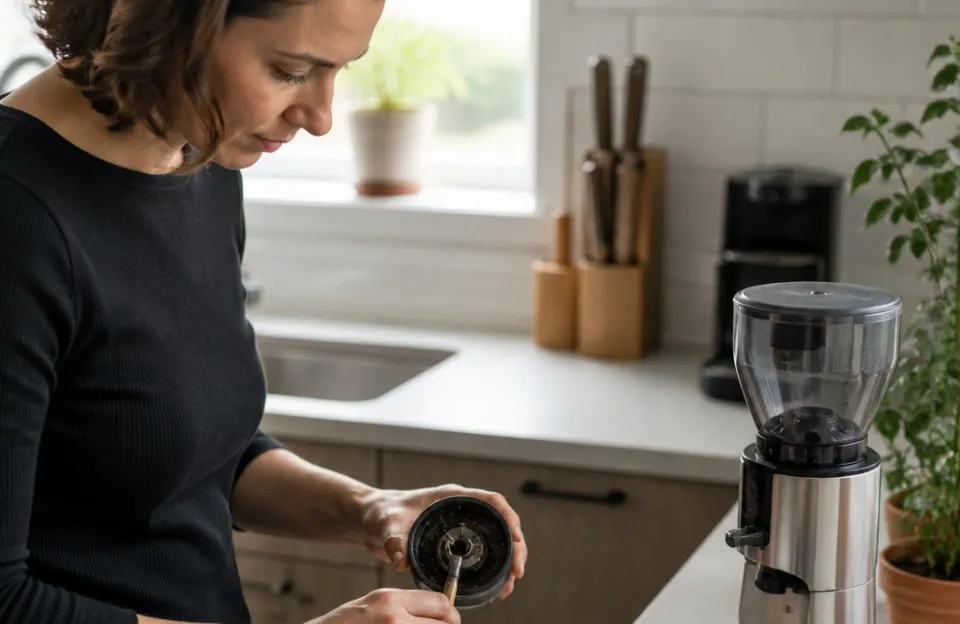
Descaling an espresso machine means circulating a food-safe acid solution through the internal water path to dissolve calcium and magnesium deposits. You should descale every two to three months for soft water or monthly for hard water, using only a descaler approved by your specific manufacturer. This process restores proper heating, stabilizes brew temperature, and prevents permanent damage to valves and pumps caused by limescale buildup.
Skipping this maintenance is the most common reason home espresso machines fail before their expected lifespan. While many guides focus on the chemical reaction, the real challenge is executing the cycle without damaging sensitive components like solenoid valves or aluminum boilers. We have compiled this guide based on technical service manuals and common repair patterns to help you clean effectively without voiding warranties or harming your equipment.
Why Limescale Destroys Espresso Machines
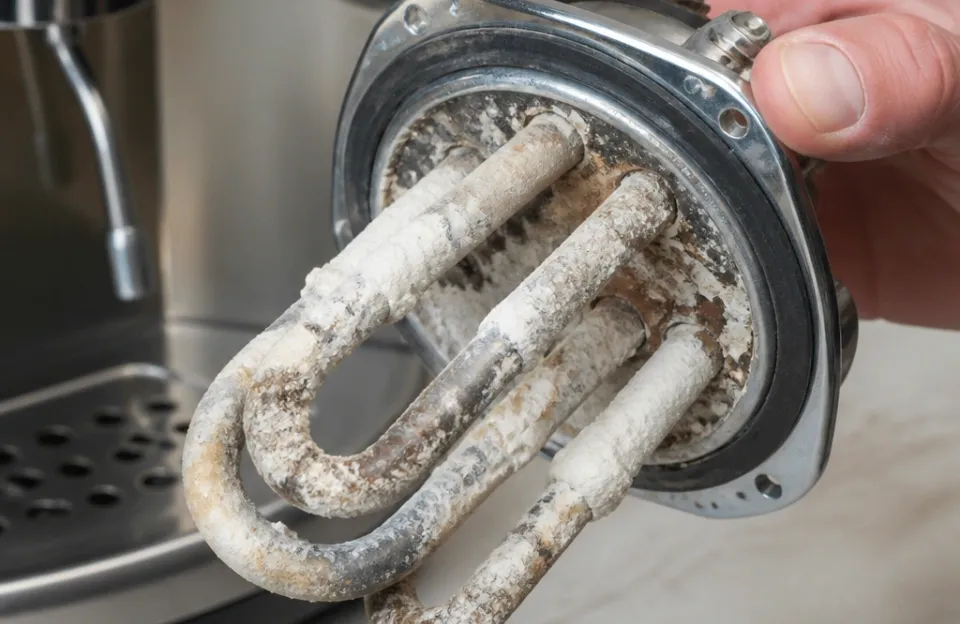
Water hardness is the primary enemy of espresso equipment. When water heats above 140°F, dissolved minerals precipitate out of suspension and bond to metal surfaces. This scale acts as an insulator on heating elements, forcing them to work harder and run hotter.
Over time, this thermal stress cracks heating elements and fuses thermostats.
Scale also restricts water flow through narrow tubing and valves. A partially blocked solenoid valve causes erratic pressure, leading to sour shots or channeling. In severe cases, scale completely blocks the thermoblock or boiler inlet, resulting in no flow at all.
According to the Specialty Coffee Association, water with excessive mineral content not only damages machinery but also extracts coffee poorly, creating flat or bitter flavors regardless of bean quality.
The rate of accumulation depends entirely on your local water profile. If you use unfiltered tap water in a hard water region like the American Southwest or Midwest, scale forms rapidly. Even filtered water contains some minerals necessary for coffee extraction, so descaling remains necessary even when using pitcher filters or refrigerator dispensers.
Only reverse osmosis systems with remineralization cartridges significantly slow this process, but they do not eliminate it entirely.
Choosing the Right Descaler for Your Machine Type
Not all acids are safe for every espresso machine. Using the wrong type can corrode seals, pit aluminum, or leave toxic residues. Always check your user manual first, as manufacturers often specify compatible products to maintain warranty coverage.
Citric Acid Based Descalers
These are derived from citrus fruits and are generally safe for machines with brass or stainless steel boilers. They are biodegradable and odorless. However, citric acid can react with aluminum over repeated uses, creating pitting.
Avoid these if your machine has an aluminum boiler unless the label explicitly states compatibility. They work slower than synthetic options and may require longer soak times.
Lactic Acid Based Descalers
Lactic acid is gentler on metals and seals than citric acid. Many European manufacturers recommend lactic-based solutions for machines with mixed metal internals. It dissolves scale effectively at lower temperatures, reducing risk to gaskets.
This is often the safest universal choice for superautomatic machines with complex internal plumbing.
Manufacturer Proprietary Blends
Brands like Breville, DeLonghi, and Jura formulate descalers specifically for their internal materials. These often contain corrosion inhibitors that protect copper and brass fittings during the cleaning cycle. While more expensive per ounce, they remove guesswork about material compatibility.
For high-end prosumer machines, sticking to the OEM recommendation is usually worth the premium.
What to Avoid
Never use white vinegar. Acetic acid degrades rubber gaskets and silicone seals, causing leaks that require costly repairs. It also leaves a persistent taste that taints future shots.
Avoid generic industrial descalers meant for dishwashers or kettles, as they may contain hydrochloric acid or other harsh chemicals unsafe for food-contact surfaces. Do not use baking soda or alkaline cleaners for descaling; these are for removing coffee oils, not mineral deposits.
If you need replacement parts after a failed cleaning attempt, checking air fryer accessories compatibility won’t help here, but understanding that appliance-specific parts matter applies equally to espresso maintenance. Always source descaling agents designed for pressurized coffee systems.
Pre-Descaling Preparation Checklist
Before mixing any solution, complete these steps to prevent damage and ensure the descaler reaches every part of the system. Rushing preparation leads to incomplete cleaning or accidental component failure.
- Remove Water Filters: Take out any charcoal or resin water filters from the tank. Descaling solution will ruin them instantly. Set them aside and note the installation date so you know when to replace them post-clean.
- Empty and Rinse Tank: Dump stale water and rinse the reservoir to remove sediment. Visible debris can clog intake valves during the descaling cycle.
- Backflush First (If Applicable): If your machine has a three-way solenoid valve and you use blind baskets, backflush with detergent before descaling. Coffee oils coat scale, preventing acid contact. Removing oils first allows the descaler to attack mineral deposits directly. Note that backflushing is distinct from descaling; if you’re unsure whether your machine supports it, consult the manual rather than guessing.
- Check Gaskets: Inspect the group head gasket and portafilter seal. If they are cracked or brittle, replace them before descaling. Acid exposure accelerates degradation of already weak rubber.
- Prepare Workspace: Have towels ready beneath the group head and steam wand. Descaler drips are acidic and can etch stone countertops or damage wood finishes.
- Mix Solution Correctly: Follow the ratio on the bottle precisely. Too concentrated risks metal damage; too dilute fails to dissolve scale. Use warm (not hot) water for mixing unless directed otherwise, as warmth improves dissolution without activating premature reactions.
This prep phase mirrors the care needed when measuring basket dimensions for other appliances; precision prevents operational failures later. Taking ten minutes now saves hours of troubleshooting afterward.
Step-by-Step Descaling Procedure
This general procedure applies to most semi-automatic and superautomatic machines. Always defer to your specific model’s manual for cycle activation sequences or special modes.
Fill and Prime
Pour the prepared descaling solution into the water tank. Reinsert the tank securely. Place a large container (at least 32 oz) under both the group head and steam wand.
Run the pump briefly to pull solution into the internal lines until you see liquid exiting both outlets. Stop the pump.
Soak Cycle
Let the solution sit inside the machine for 15 to 20 minutes. This dwell time allows the acid to soften hardened scale. Do not exceed 30 minutes, as prolonged exposure increases corrosion risk.
For superautomatics, activate the automated descale program if available; these programs manage timing automatically.
Circulate in Intervals
After soaking, run approximately 8 ounces of solution through the group head. Stop and wait five minutes. Repeat this pulse-and-wait pattern until half the tank is empty.
Then open the steam valve fully and dispense another 8 ounces through the steam wand. Alternate between group head and steam wand every few cycles. This ensures the descaler passes through both the brew circuit and the steam boiler or thermoblock.
Drain Completely
Once the solution tank is nearly empty, stop the cycle. Discard the spent liquid from your catch container. Never reuse descaling solution; it becomes saturated with dissolved minerals and loses effectiveness.
Thorough Rinsing Phase
Rinse the water tank thoroughly to remove residual acid. Refill with fresh, cool water. Run the entire tank through the group head and steam wand in continuous cycles.
Taste test the output water midway through rinsing. If you detect any sourness or chemical flavor, refill and repeat. Most machines require two to three full tanks of fresh water to neutralize completely.
Skipping adequate rinsing results in terrible-tasting espresso for days.
For readers familiar with maintaining safe cooking practices, think of rinsing like avoiding cross-contamination; residual cleaner compromises the final product just as surely as biological hazards compromise food safety.
Special Considerations for Superautomatic Machines
Superautomatic machines have internal brew units, grinders, and milk systems that add complexity. Never pour descaler into the bean hopper or grinder chute. Only introduce it through the designated water tank or service port.
Many superautomatics lock you into a multi-step program once initiated. Do not interrupt the cycle mid-process unless there is a leak or error. Interrupting can leave acid sitting in internal chambers or cause the machine to lose track of its cleaning state.
Keep the drip tray and grounds bin emptied before starting, as the machine may flush waste water internally during the cycle.
Milk carafes and frothers require separate cleaning. Descaler does not remove milk fat or protein residue. Clean milk systems with dedicated alkaline milk cleaners after descaling is complete and rinsed.
Mixing descaler and milk cleaner creates ineffective chemistry and potential safety hazards.
Some newer models have hardness sensors that trigger descale alerts based on actual usage rather than arbitrary timers. Trust these sensors over calendar schedules if your machine has them. Conversely, if you live in an extremely hard water area and your machine lacks smart sensing, shorten the recommended interval by 25% to stay ahead of buildup.
Troubleshooting Common Descaling Problems
Even careful execution sometimes yields issues. Here are solutions to frequent problems encountered during home descaling.
Machine Won’t Pump Solution: The intake valve may be airlocked or clogged with loose scale chunks dislodged during soaking. Turn off the machine, remove the tank, and check the intake screen for debris. Prime the pump manually if your model allows.
If the pump hums but moves nothing, a solenoid may be stuck; tapping gently on the side near the valve can sometimes free it, but persistent blockage requires professional service.
Leaks During Cycle: Acid can expose pre-existing weaknesses in seals. If leaking occurs only during descaling and stops afterward, the seal was marginal and needs replacement soon. If leaking persists after rinsing, the descaler may have degraded a gasket.
Replace affected seals before brewing again.
Persistent Sour Taste After Rinsing: You likely need more rinse cycles. Run one additional tank with a teaspoon of baking soda dissolved in it to neutralize residual acid, then follow with one more plain water tank. Never add baking soda during the descaling phase itself; use it only as a final neutralizing rinse.
Error Codes Appear: Consult your manual immediately. Some machines display specific codes for descale interruptions or sensor faults. Resetting usually requires completing a partial rinse cycle.
Ignoring error codes can lock the machine permanently.
Scale Flakes in Cup Post-Clean: This indicates significant buildup was present. Continue rinsing until water runs clear. Consider shortening future descale intervals.
Heavy flaking suggests the machine was overdue for maintenance; monitor shot consistency closely for the next week as remaining micro-deposits clear.
Understanding equipment limits matters across kitchen tools, whether you’re evaluating liner sizing or boiler capacity. Recognizing when a problem exceeds DIY scope prevents costly mistakes.
Establishing a Sustainable Maintenance Schedule
Prevention beats restoration. Create a schedule based on your actual water hardness and consumption volume rather than generic advice.
| Water Hardness Level | Grains Per Gallon (GPG) | Descale Frequency | Notes |
|---|---|---|---|
| Soft | 0–3 GPG | Every 4–6 months | Monitor taste; extend if using RO + remineralizer |
| Moderately Hard | 3–7 GPG | Every 2–3 months | Standard household range in many US regions |
| Hard | 7–10 GPG | Monthly | Consider inline softener or advanced filtration |
| Very Hard | 10+ GPG | Every 2–3 weeks | Professional-grade softening strongly recommended |
Test your water annually with inexpensive strips available at hardware stores. Municipal water reports provide baseline data but your home’s pipes may alter mineral content. Track descaling dates in a notebook or phone reminder app.
Consistency matters more than perfect timing; missing a cycle by two weeks is fine, but stretching months into years causes cumulative damage.
Pair descaling with regular backflushing (for applicable machines) and group head brushing. Mineral scale traps coffee oils, and oils trap minerals; addressing both simultaneously extends intervals between deep cleans. Think of descaling as one pillar of overall machine health alongside burr alignment, gasket replacement, and water filtration.
Frequently Asked Questions About Descaling
Can I use lemon juice instead of commercial descaler?
Fresh lemon juice contains citric acid but in inconsistent concentrations. Pulp and sugars can clog valves and promote bacterial growth. Commercial citric descalers are purified and dosed precisely for safe equipment use.
Stick to formulated products designed for pressurized systems.
Does descaling improve shot quality immediately?
Yes, if scale was restricting flow or causing temperature instability. Shots should pull more evenly and reach target temperature faster. However, descaling does not fix worn burrs, stale beans, or poor technique.
Expect improvement in consistency, not magic transformation of mediocre coffee.
Will descaling void my warranty?
Using non-approved descalers or improper methods can void coverage. Document your maintenance with receipts for approved products. Manufacturers typically honor warranties when owners follow documented care protocols.
Check your specific terms before proceeding.
My machine says “descale” but I just did it last month. Is it broken?
Most machines track cycles by volume or time, not actual scale levels. Reset the alert per your manual after each completed cycle. If the light returns prematurely despite correct resets, the flow meter or sensor may be faulty and need service.
Is descaling safe for vintage or antique machines?
Vintage machines often have lead solder, copper pipes without modern passivation, or irreplaceable gaskets. Standard descalers can cause irreversible damage. Consult a specialist restorer before attempting any chemical cleaning on machines older than 20 years or those with unknown service history.
Regular maintenance keeps your espresso machine producing café-quality shots for decades. Descaling is straightforward when approached methodically with the right products and realistic expectations. Treat it as routine care rather than emergency repair, and your machine will reward you with consistent performance and longevity.
As an Amazon Associate, we earn from qualifying purchases.