Air fryer shrimp cooks in 5 to 8 minutes at 400°F and delivers a firm, juicy texture without the rubbery chew that often ruins stovetop or oven methods. The circulating hot air sears the outside quickly while keeping the interior moist, making it one of the most reliable ways to prepare this protein for weeknight dinners or meal prep. You get consistent results with minimal oil and almost no active monitoring once the basket is loaded.
This guide covers the exact timing and temperature for different shrimp sizes, how to season them so flavor sticks, and the specific mistakes that lead to dryness or sticking. We also break down safe internal temperatures according to federal guidelines and explain why visual cues matter just as much as numbers. Whether you are cooking fresh, frozen, peeled, or shell-on, the method adjusts slightly but stays fast and simple.
Why Rapid High Heat Works Best for Shrimp
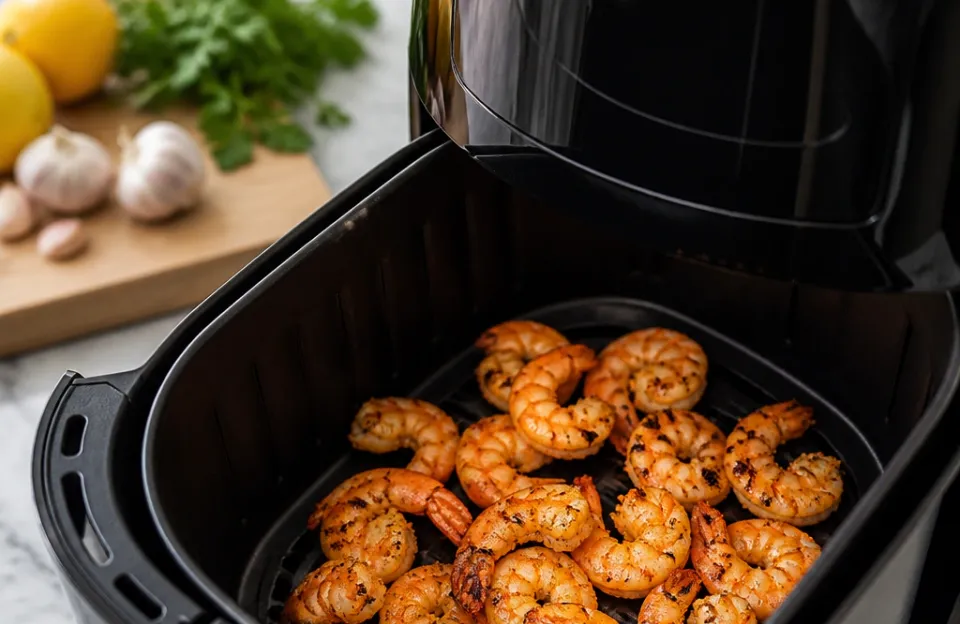
Shrimp muscle fibers are short and delicate, which means they go from perfectly cooked to tough and mealy in less than sixty seconds. Traditional boiling or sautéing often applies uneven heat, leaving some pieces overdone while others finish late. An air fryer solves this by blasting 360-degree convection heat that cooks every piece at the same rate.
This speed is what preserves moisture. The exterior gets a light sear that locks in juices before the center has time to dry out.
You also avoid the waterlogged texture that comes from boiling or steaming. Excess surface moisture evaporates instantly in the air fryer’s dry heat environment. This creates a better mouthfeel and allows seasonings to adhere properly rather than washing off.
For anyone tracking their intake, this method uses significantly less fat than pan-frying while delivering similar browning, a balance we also explore when looking at healthier wing preparations for comparison.
Size Determines Your Exact Cook Time
Shrimp sizing is standardized by count per pound, not by vague labels like "large" or "jumbo." Knowing your count is the single most important factor for setting the timer correctly. A 21/25 count shrimp needs about 7 to 8 minutes at 400°F. A 31/35 count shrimp needs only 5 to 6 minutes.
If you guess wrong, you will either undercook or turn them into rubber bands. Always check the bag or ask the fishmonger for the exact count range before you start.
Frozen Versus Thawed Timing Adjustments
Thawed shrimp is always preferable because it seasons evenly and cooks predictably. If you must cook from frozen, add 2 to 3 minutes to the base time and expect slightly more surface moisture. Pat frozen shrimp completely dry after thawing in cold water.
Never thaw shrimp in warm water or the microwave, as partial cooking begins before you even start. The USDA recommends cooking all seafood to an internal temperature of 145°F to ensure safety, regardless of starting state. You can verify this quickly using a fast digital thermometer to avoid guessing.
Getting Seasoning to Stick Without Sogginess
Dry seasoning falls off wet shrimp and burns on the basket floor. The fix is a thin binder that adds flavor without adding sogginess. Olive oil, avocado oil, or melted butter work best.
Toss the shrimp in 1 to 2 teaspoons of oil per pound first, then add salt, pepper, garlic powder, paprika, or citrus zest. The oil creates a tacky surface that grabs the spices and promotes browning. Skip non-stick spray directly on the basket, as propellants can degrade the coating over time.
Use parchment paper liners or toss the shrimp in oil instead.
Acidic ingredients like lemon juice or vinegar should be added after cooking, not before. Acid breaks down shrimp protein rapidly and turns the texture mushy if left to marinate for more than 15 minutes. If you want bright citrus flavor, zest the lemon into the oil-spice mix and squeeze fresh juice over the finished dish.
This approach mirrors how we handle garlic parmesan coatings where dairy and acid are managed separately to preserve texture.
Dry Brining for Better Texture
Salting shrimp 15 to 30 minutes before cooking draws out surface moisture through osmosis. Pat them dry again right before air frying. This step firms up the flesh and seasons it deeper than surface sprinkling alone.
It is especially useful for larger 16/20 or U15 counts that have thicker muscle walls. Do not dry brine for longer than 45 minutes or the shrimp will begin to cure and turn dense. Rinse and re-pat dry if you accidentally oversalt or leave them too long.
Step-by-Step Cooking Method for Consistent Results
Preheat your air fryer to 400°F for 3 minutes. Preheating ensures the shrimp hits hot air immediately, which prevents steaming and promotes searing. While it heats, pat your shrimp completely dry with paper towels and toss with oil and seasoning in a bowl.
Arrange them in a single layer with space between each piece. Overcrowding drops the air temperature and causes uneven cooking. Work in batches if necessary.
Set the timer based on your shrimp size using the chart below. Shake the basket gently halfway through to redistribute pieces and ensure even exposure. Check for doneness at the minimum time mark.
Shrimp is done when it forms a tight C shape, turns opaque pink throughout, and reaches 145°F internally. Remove immediately to stop carryover cooking. Let rest for 1 minute before serving to allow juices to redistribute.
| Shrimp Count Per Pound | Temp | Time (Thawed) | Time (Frozen) | Best For |
|---|---|---|---|---|
| U15 / Extra Jumbo | 400°F | 8–9 min | 10–12 min | Skewers, grilling substitute |
| 16/20 / Jumbo | 400°F | 7–8 min | 9–11 min | Main courses, tacos |
| 21/25 / Large | 400°F | 6–7 min | 8–10 min | Salads, pasta, general use |
| 26/30 / Medium-Large | 400°F | 5–6 min | 7–9 min | Stir-fries, appetizers |
| 31/35 / Medium | 400°F | 4–5 min | 6–8 min | Fried rice, soups, garnish |
Using a Thermometer to Eliminate Guesswork
Visual cues like color and curl are helpful but not foolproof. Lighting conditions, shrimp variety, and seasoning color can all mislead your eye. A reliable probe removes doubt entirely.
Insert the tip into the thickest part of the largest shrimp in the batch. If you are cooking a large quantity, spot-check three pieces from different areas of the basket. Wireless models let you monitor progress without opening the drawer and losing heat, similar to how you might track internal temps for poultry to ensure both safety and quality.
Common Texture Problems and How to Fix Them
Rubbery shrimp means overcooking. There is no way to reverse it, so prevention is everything. If your shrimp consistently turns out tough, reduce the cook time by 1 minute and check earlier next time.
Also verify your air fryer’s actual temperature with an oven-safe dial thermometer, as many units run hotter than displayed. Mushy shrimp usually indicates excess moisture or acid exposure. Ensure thorough drying and avoid marinades with vinegar, wine, or citrus juice before cooking.
Sticking happens when shrimp touches bare metal without adequate fat. Always use oil on the shrimp itself, not just the basket. Parchment liners help but can block airflow if they cover the entire bottom.
Cut liners to fit only the food area or use perforated versions designed for air fryers. If shrimp sticks despite oil, your unit may need cleaning. Built-up grease residue creates sticky spots that bond to proteins.
Wash the basket with warm soapy water after every use.
Shell-On Versus Peeled Considerations
Shell-on shrimp protects the meat from direct heat and reduces overcooking risk. Add 1 to 2 minutes to the cook time and expect messier eating. Score the back of shell-on shrimp to allow seasoning penetration and easier peeling later.
Peeled shrimp cooks faster and absorbs flavor better but dries out more easily. Reduce time accordingly and never skip the oil binder. Tail-on presentation looks nicer for plating but adds no flavor.
Remove tails for dishes where ease of eating matters more than appearance, like fried rice or pasta.
Adapting the Method for Meal Prep and Batch Cooking
Air fryer shrimp holds well for 3 to 4 days refrigerated when stored properly. Cool completely before sealing in airtight containers to prevent condensation. Reheat gently at 300°F for 2 to 3 minutes or eat cold in salads and grain bowls.
Avoid microwaving, which makes shrimp rubbery instantly. If prepping for multiple meals, undercook slightly during the initial batch. Pull at 140°F instead of 145°F to account for reheating.
This buffer prevents dryness later.
Batch cooking requires discipline about overcrowding. Resist the urge to dump a full pound into the basket at once. Two properly spaced batches yield better texture than one crowded batch that steams instead of sears.
Keep finished shrimp warm on a plate tented with foil while the second batch runs. Season each batch individually rather than tossing everything together beforehand. This ensures even coating and prevents clumping.
For planners who rotate proteins weekly, this technique pairs well with make-ahead wing strategies to streamline dinner assembly.
Flavor Variations That Actually Work
Classic garlic butter never fails. Melt butter with minced garlic and parsley, then toss cooked shrimp immediately after removing from the basket. Cajun spice blends bring heat and depth without extra liquid.
Mix paprika, cayenne, onion powder, and thyme with oil before cooking. Asian-inspired versions use sesame oil, ginger, and soy sauce added post-cook to avoid burning. Sweet chili glaze works the same way.
Toss hot shrimp in the sauce right before serving so it clings without making the exterior soggy. These finishing techniques keep the air-fried texture intact while delivering bold flavor.
Frequently Asked Questions
Can I cook shrimp with the shell on in an air fryer?
Yes, shell-on shrimp works well and actually helps protect the meat from drying out. Add 1 to 2 minutes to the standard cook time and score the shells lightly to let seasoning penetrate. Expect a messier eating experience but juicier results, especially for larger sizes.
Why did my air fryer shrimp turn out rubbery?
Rubbery texture comes from overcooking, which happens fast with shrimp. Reduce your cook time by 1 minute next time and check internal temperature at 145°F rather than relying solely on visual cues. Also verify your air fryer runs true to temperature, as many models fluctuate significantly.
Is it safe to cook frozen shrimp without thawing first?
It is safe but not ideal. Frozen shrimp releases extra moisture that hinders browning and can dilute seasoning. If you must cook from frozen, add 2 to 3 minutes and pat dry thoroughly after thawing in cold water.
Always confirm 145°F internal temperature per USDA seafood guidelines before eating.
How do I prevent shrimp from sticking to the air fryer basket?
Toss shrimp in 1 to 2 teaspoons of oil per pound before cooking. Oil on the food works better than spraying the basket. Use parchment liners cut to size or perforated air fryer papers if sticking persists.
Clean the basket thoroughly after each use, as old grease residue creates sticky spots.
What is the best dipping sauce for air fryer shrimp?
Cocktail sauce, garlic aioli, sweet chili, and remoulade all pair well. Serve sauces on the side rather than tossing to maintain the crispy exterior. Acidic sauces like lemon butter should be added just before eating to prevent the shrimp from breaking down and becoming mushy.
Before You Start Cooking Tonight
Air fryer shrimp rewards attention to detail but punishes neglect. Get the size right, keep the surface dry, use enough oil, and pull at the correct temperature. Those four habits eliminate nearly every common failure point.
Once dialed in, this method becomes your default for quick protein that feels far more intentional than its effort suggests. Pair it with rice, vegetables, or crusty bread and you have a complete meal in under fifteen minutes. For those exploring other air fryer proteins, our honey garlic wing recipe uses similar high-heat principles with a sweet-savory glaze applied at the end to preserve texture.




