To use an espresso machine for beginners, you need three things: finely ground coffee, a clean portafilter, and about 25 to 30 seconds of patience. The process involves grinding your beans, tamping them flat, locking the handle in place, and pulling a shot that yields roughly two ounces of thick, syrupy coffee. Once you understand these basic steps, making espresso at home becomes a fast morning habit rather than a stressful science experiment.
What You Need Before You Start
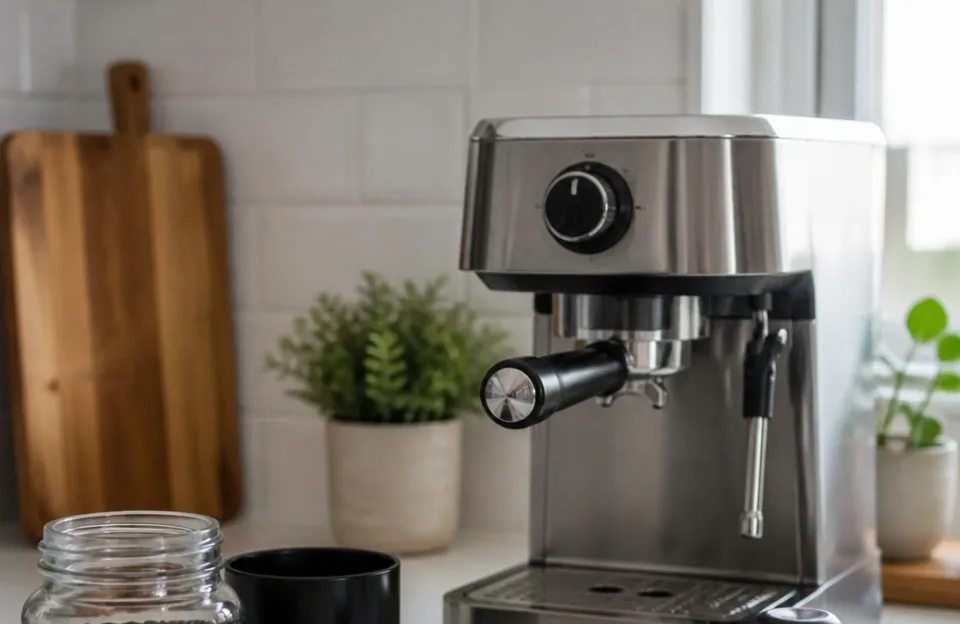
You do not need a commercial setup to make good espresso. A standard entry-level machine usually costs between $150 and $400. These models typically have a pressurized portafilter basket.
That design helps beginners by forgiving uneven grinds or light tamping. If you buy a machine with a non-pressurized basket, you will need a better grinder to get consistent results.
Here is what belongs on your counter:
- An espresso machine: Look for one with a 15-bar pump. This is the standard pressure needed to force water through tightly packed coffee.
- A burr grinder: Blade grinders chop beans into random sizes. Burr grinders crush them into uniform particles. Uniformity matters because water always finds the path of least resistance. If your grounds are uneven, the water channels through the loose spots and leaves the tight spots dry.
- Fresh coffee beans: Buy whole beans roasted within the last two to four weeks. Stale beans lose the carbon dioxide needed to form crema, which is the golden foam on top of a good shot.
- A tamper: Most machines come with a cheap plastic one. A heavier metal tamper weighing around 300 grams (about 10.5 ounces) makes it much easier to apply even pressure.
- A scale: Measuring by volume using scoops leads to inconsistent shots. A small kitchen scale that reads to the tenth of a gram removes the guesswork. We rely on precise measurements when dialing in new equipment, much like checking exact dimensions before buying any kitchen accessory.
- Filtered water: Tap water contains minerals that build up inside the boiler over time. Filtered water tastes better and protects the heating element.
If you want a reliable starting point, look at machines from Breville, De’Longhi, or Gaggia. They dominate the beginner market for a reason. Their manuals are clear, replacement parts are easy to find, and they heat up quickly.
Breville Bambino Espresso Machine
De’Longhi Stilosa Manual Espresso Machine
Understanding Your Espresso Machine Parts
Every machine looks different, but the core components are identical across brands. Knowing what each part does stops you from feeling lost when you read the manual.
The Portafilter: This is the handled metal basket where you put your coffee. It locks into the group head. Beginners often struggle here because the locking mechanism requires a firm twist to the right.
If it feels loose, water will spray everywhere. Always lock it in until the handle points straight toward you or slightly to the left.
The Group Head: This is the fixture on the front of the machine where the portafilter attaches. Water flows down through it. It has a rubber gasket inside that creates a watertight seal.
Over time, this gasket wears out. If you see water leaking from the top of the portafilter during a shot, the gasket likely needs replacing.
The Steam Wand: Located on the side, this metal pipe releases steam to heat and texture milk. It usually has a knob or a button to control the flow. Keep a damp cloth nearby.
Milk dries onto the wand instantly if you do not wipe it right after use.
The Drip Tray: Sits at the bottom to catch spills and the water purged during cleaning. Empty it daily. Leaving standing water breeds mold and smells bad.
The Water Reservoir: Usually sits at the back or side. Fill it with cold, filtered water. Never let it run completely dry while the machine is on, as the pump can burn out without water to push.
Understanding these parts helps you troubleshoot. If your shot runs too fast, the problem is in the portafilter (grind size or tamp). If no water comes out at all, check the reservoir or the group head for clogs.
Keeping your gear in good shape applies to all appliances, whether you are maintaining proper airflow or descaling a boiler.
Dialing In the Coffee Grind
Grind size is the single biggest factor in how your espresso tastes. For espresso, the coffee must be ground very fine, similar to powdered sugar or fine table salt.
If your grind is too coarse, the water rushes through the coffee bed in under 15 seconds. The result is a sour, thin, watery shot. This is called underextraction.
The water did not spend enough time touching the coffee to pull out the sugars and balancing flavors.
If your grind is too fine, the water struggles to pass through. The shot might take 40 seconds or more, or it might just drip slowly. The result is a bitter, harsh, burnt-tasting liquid.
This is overextraction. The water pulled out too many heavy, woody compounds.
Your target is a brew time between 25 and 30 seconds. This includes the first few seconds where the pump builds pressure before liquid appears.
Start with a medium-fine setting on your grinder. Pull a shot. Time it.
Taste it. Adjust based on the rules above. Only change one thing at a time.
If you change the grind size and the dose amount simultaneously, you will not know which adjustment fixed or ruined the shot.
Pre-ground coffee sold in grocery stores is almost always ground for drip coffee makers. It is too coarse for espresso. Even “espresso blend” pre-ground coffee loses its freshness rapidly once opened.
Grinding right before you brew is the only way to get a proper extraction.
The Step-by-Step Process to Pull a Shot
This is the core routine. Follow these steps in order every single time. Muscle memory takes over quickly.
1. Warm Up the Machine
Turn the machine on and wait. Entry-level machines need about 10 to 15 minutes for the boiler and the metal parts to reach a stable temperature. A cold portafilter drops the brewing water temperature immediately, leading to sour espresso.
Run a blank shot (water only, no coffee) through the portafilter to warm up the metal and your cup.
2. Measure the Coffee
Place your empty portafilter on the scale and zero it out. For a standard double shot, measure exactly 18 grams of coffee beans. Consistency here is vital.
If you use 16 grams today and 20 grams tomorrow, your shots will taste entirely different. Precision matters across all kitchen tasks, much like getting the timing right when cooking proteins at high heat.
3. Grind the Beans
Grind your 18 grams directly into the portafilter. Tap the side gently to settle the mound of coffee. You want an even bed of grounds, not a mountain peak.
4. Tamp the Grounds
Hold the tamper like a doorknob. Place it flat on the coffee. Press down firmly.
You do not need to push with all your body weight. About 30 pounds of pressure is the old standard, but the real goal is simply to compress the grounds until they stop moving. Once the coffee is fully compacted, pushing harder changes nothing.
Keep your wrist straight and the tamper perfectly level. A tilted tamp causes water to channel to the low side, ruining the extraction. Give the tamper a light polish by spinning it gently while lifting off.
This smooths the surface.
5. Clean the Rim
Wipe the edges and the ears of the portafilter with your finger or a brush. Loose grounds left on the rim will damage the rubber gasket inside the group head and cause leaks.
6. Lock and Brew
Insert the portafilter into the group head at an angle and twist firmly to the center. Place your warmed cup underneath. Start the brew cycle immediately.
Do not let the tamped coffee sit locked in the hot group head without water flowing, or the heat will scorch the top layer.
7. Watch the Extraction
The first drops should appear after 5 to 8 seconds. The liquid should start dark brown and gradually turn lighter, ending with a golden color. The flow should look like warm honey pouring from a spoon.
Stop the shot when you reach about 36 grams of liquid in the cup. This is a 1:2 ratio (18 grams of dry coffee yielding 36 grams of wet espresso). The entire process should take 25 to 30 seconds.
| Symptom | Likely Cause | How to Fix It |
|---|---|---|
| Shot finishes in under 20 seconds | Grind is too coarse or tamp is too light | Grind finer or apply firmer, level pressure |
| Shot takes over 35 seconds | Grind is too fine or dose is too high | Grind coarser or reduce coffee by 0.5 grams |
| Liquid sprays sideways | Portafilter not locked in or dirty rim | Wipe rim thoroughly and twist handle tighter |
| No crema on top | Beans are stale or water is too cool | Buy freshly roasted beans and preheat longer |
| Sour, sharp taste | Underextracted coffee | Grind finer to slow the water flow down |
| Bitter, dry taste | Overextracted coffee | Grind coarser to speed the water flow up |
Steaming Milk Without Burning It
Espresso is strong. Most people mix it with steamed milk to make lattes or cappuccinos. Steaming milk seems intimidating, but it relies on basic physics.
The National Institute of Standards and Technology (NIST) notes how precise temperature control affects fluid properties, and milk behaves similarly. You are introducing air and heat simultaneously.
Use whole milk for your first attempts. The fat content makes it forgiving and creates a creamy texture. Skim milk foams easily but tastes thin and dries out fast.
Oat milk is the best dairy alternative for beginners because its protein structure mimics cow’s milk well.
Fill a stainless steel pitcher just below the spout line. Purge the steam wand by turning it on for two seconds to blow out any trapped water. Submerge the tip of the wand just below the surface of the milk, slightly off-center.
Turn the steam on full power. You should hear a gentle paper-tearing sound. This means air is entering the milk.
This phase is called stretching. Do it for about 3 to 5 seconds for a latte, or a bit longer for a cappuccino which needs more foam.
After stretching, lower the pitcher slightly so the wand tip goes deeper into the milk. The tearing sound should stop. Now you are texturing.
The milk will spin in a whirlpool. This vortex breaks large bubbles into microfoam, creating a glossy, wet-paint texture.
Keep your other hand on the bottom of the pitcher. When it gets too hot to touch comfortably, the milk is around 140°F (60°C). Turn the steam off.
Do not exceed 160°F (71°C), or the milk proteins break down, leaving a scorched, eggy flavor.
Wipe the wand with a damp cloth immediately and purge it again for one second to clear milk from inside the pipe. Swirl the pitcher and tap it firmly on the counter to pop any remaining large bubbles. Pour the milk directly into your espresso.
Practicing this technique saves money. Buying coffee drinks daily adds up fast compared to brewing efficiently at home.
Cleaning and Maintenance Habits
Beginners often ignore maintenance until the machine breaks. Espresso machines operate under high pressure and heat. Coffee oils go rancid, and minerals build up.
A dirty machine makes terrible coffee regardless of your technique.
Daily Tasks:
Empty the drip tray. Rinse the portafilter and basket with hot water. Wipe the steam wand.
Run a quick flush of water through the group head without the portafilter attached to wash away stray coffee grounds. Knock out the used coffee puck immediately after brewing. Leaving a wet puck sitting in the basket makes cleanup much harder later.
Weekly Tasks:
Remove the filter basket from the portafilter and soak both in hot water. Scrub the shower screen (the metal mesh inside the group head) with a small brush. Coffee oils stick there and turn bitter over time.
Monthly Tasks:
Backflush the machine if your model supports it. This involves using a blind basket (one with no holes) and running the pump to force water backward through the internal valves, clearing out trapped oils. Some people use specific espresso machine cleaning powders for this.
Check your manual, as backflushing a machine not designed for it can damage the pump.
Descaling:
Depending on your water hardness, you will need to descale the machine every 2 to 6 months. Scale is calcium buildup inside the boiler. It blocks water flow and ruins heating efficiency.
Use a descaling solution recommended by the manufacturer. Avoid generic vinegar solutions unless the manual explicitly allows them, as vinegar can degrade rubber seals over time.
Keeping a strict cleaning schedule extends the life of your gear significantly. Routine upkeep prevents most issues before they start.
Common Beginner Mistakes to Avoid
Learning to use an espresso machine involves making bad coffee at first. That is normal. But some mistakes waste time and beans unnecessarily.
Changing multiple variables at once. If your shot is sour, do not change the grind size, increase the dose, and tamp harder all in the same attempt. Change only the grind size first. Pull the shot.
Taste it. If it is still wrong, adjust again. Troubleshooting requires isolation.
Using oily, dark roast beans. Very dark roasts release their oils onto the surface of the bean. These oils coat your grinder burrs, clog the portafilter basket holes, and gum up the group head. Medium or medium-dark roasts are much easier to work with and keep your equipment cleaner.
Tamping at an angle. A crooked tamp guarantees channeling. Water will rush through the thinner side of the coffee bed. The thick side stays dry.
You get sourness and bitterness in the same cup. Focus on keeping the tamper perfectly level.
Ignoring the ratio. Eyeballing the amount of coffee or the yield leads to inconsistency. Use your scale. An 18-gram dose yielding 36 grams of liquid is your baseline.
Once you master that, you can experiment with ratios, but start with the standard.
Skipping the warm-up. Brewing into a cold cup with a cold portafilter drops the water temperature drastically. Espresso needs water between 195°F and 205°F (90°C to 96°C) to extract properly. Let the machine heat up fully.
Frequently Asked Questions
Can I use regular coffee beans in an espresso machine?
Yes. “Espresso beans” are just a marketing term. Any coffee bean can be brewed as espresso.
However, medium to medium-dark roasts are generally easier for beginners to extract than very light roasts, which require highly precise grind settings to avoid extreme sourness.
Why is my espresso coming out watery with no crema?
This usually happens for three reasons. The coffee grind is too coarse, the beans are stale (roasted more than a month ago), or the machine is not reaching the correct brewing pressure. Check your grind size first, then verify your beans are fresh.
How much caffeine is in a double shot of espresso?
A standard double shot (using 18 grams of coffee) contains roughly 120 to 150 milligrams of caffeine. This is comparable to a standard 12-ounce cup of drip coffee. The difference is the volume of water; espresso delivers that caffeine in about two ounces instead of twelve.
Do I really need to buy a separate grinder?
If your machine does not have a built-in grinder, yes. Pre-ground coffee lacks the freshness and precise particle size required for good espresso. A dedicated burr grinder is the most important upgrade you can make.
It impacts the taste far more than upgrading the machine itself.
What is the difference between a pressurized and non-pressurized basket?
Pressurized baskets have a single tiny hole at the bottom, which artificially builds pressure regardless of your grind size. They are forgiving and work okay with pre-ground coffee. Non-pressurized baskets have many holes and rely entirely on the coffee bed to create resistance.
They produce better espresso but demand a high-quality grinder and precise technique.
Mastering how to use an espresso machine for beginners takes a few days of practice, mostly spent adjusting your grinder. Once you dial in that 25-second window and learn to steam milk without scalding it, you will rarely want to wait in line at a cafe again. Stick to the basic ratios, keep your equipment clean, and trust your scale over your eyes.
As an Amazon Associate, we earn from qualifying purchases.




