For standard chicken wings, the air fryer chicken wings time and temp sweet spot is 400°F for 20 to 25 minutes. You'll flip them halfway through. That combination gives you skin that shatters when you bite it and meat that pulls cleanly off the bone.
If you're working with smaller drumettes or larger jumbo wings, those numbers shift slightly. The rest of this piece breaks down exactly how long to cook every cut, what temperatures work best for different textures, and why guessing leads to rubbery skin or dried out meat.
Why Air Fryer Chicken Wings Time and Temp Matters More Than an Oven
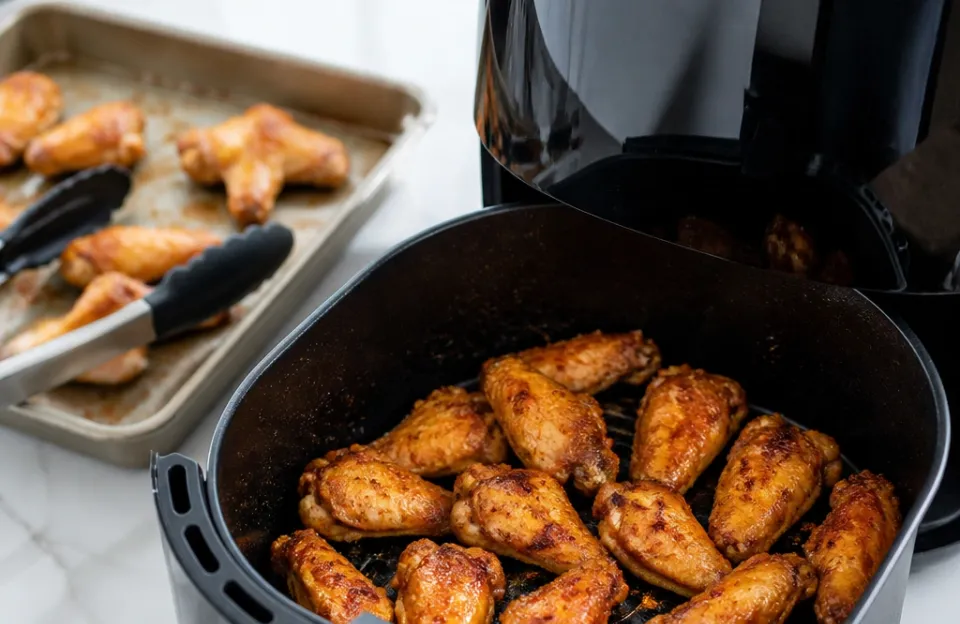
An air fryer cooks by blasting food with a tight loop of superheated air. A traditional oven has a much larger cavity, so the air moves slower and loses heat faster when you open the door. Because the air fryer chamber is small, the heat transfer to the surface of the wing happens almost immediately.
That rapid heat transfer means two things. First, the skin renders its fat much faster. Second, the window between perfectly crispy and burnt shrinks.
Leaving wings in for five extra minutes in a conventional oven might just dry them out a little. In an air fryer, five extra minutes at high heat turns the skin into charcoal.
Getting the air fryer chicken wings time and temp right means balancing that fast rendering process against the time the interior needs to fully cook. High heat crisps the outside. Sufficient time cooks the inside.
If you max out one without the other, you end up with raw meat under burnt skin, or safe but chewy meat under pale, flabby skin.
How the fan speed changes the cooking math
Most basket style air fryers run their fans at a single fixed speed. Oven style air fryers sometimes let you adjust it. Higher fan speed increases evaporation on the surface of the wing.
Faster evaporation dries the skin out sooner, which is the first requirement for crispness. If your model runs hot and fast, you may need to drop the temperature by 10 to 15 degrees compared to a slower model to keep the outside from burning before the inside finishes.
The role of starting temperature
Wings pulled straight from the fridge take longer to cook through than wings left on the counter for twenty minutes. Cold meat drops the ambient temperature inside the basket when you load it. The heating element has to work harder to recover.
If you cook cold wings using the exact same timing as room temperature wings, the center will likely be undercooked even if the outside looks done.
Baseline Numbers for Whole Wings, Drumettes, and Flats
Chicken wings usually come in three forms. You can buy whole wings, separated parts, or party wings where the tips are already removed. Each shape changes how the hot air flows around the meat, which directly affects your timing.
| Wing Cut | Temperature | Total Cook Time | Flip Point |
|---|---|---|---|
| Whole wings | 380°F | 25 to 30 minutes | 15 minutes |
| Drumettes | 400°F | 20 to 24 minutes | 10 to 12 minutes |
| Flats (wingettes) | 400°F | 16 to 20 minutes | 8 to 10 minutes |
| Jumbo wings | 390°F | 26 to 32 minutes | 15 minutes |
Whole wings have more joints and thicker sections near the shoulder. They need a slightly lower temperature for a longer period so the thick meat cooks before the thin skin at the tip burns. Drumettes are dense and cylindrical.
They handle 400°F well because the meat is uniform. Flats are thin and have two small bones running parallel. They cook the fastest and burn the easiest.
Jumbo wings are simply larger versions of standard cuts. They require more time for the heat to penetrate to the bone. Dropping the temperature by 10 degrees prevents the exterior from scorching during that extended cook.
Adjusting Heat for Different Textures
Crispy isn't the only way to cook a wing. Some people prefer a softer bite, while others want the skin to practically shatter. You control this by shifting the temperature up or down and adjusting the duration to match.
Maximum crunch at higher heat
If you want the crispiest possible skin, push the temperature to 410°F. At this heat, you must reduce the total time. Check flats at 14 minutes and drumettes at 18 minutes.
The intense heat rapidly boils off surface moisture and blisters the skin. The tradeoff is a very narrow margin for error. One minute too long results in bitter, blackened spots.
Tender meat at moderate heat
Cooking at 375°F yields softer skin and very juicy meat. This works well if you plan to toss the wings heavily in a wet sauce like buffalo or teriyaki. Since the sauce will soften the crust anyway, chasing maximum crispness is wasted effort.
Plan for 28 to 35 minutes at this lower temperature to guarantee the meat near the bone is fully cooked.
The two stage method
Many cooks use a two stage approach to get both tender meat and crispy skin. You start at 360°F for 15 minutes to gently render the subcutaneous fat. Then you pull the basket out, increase the heat to 400°F, and cook for another 8 to 10 minutes.
The initial low phase melts the fat layer beneath the skin. The final high phase puffs and crisps the now dry skin. This method takes slightly longer overall, but it produces very consistent results across different sizes of wings.
Checking Doneness Without Guessing
Visual cues lie. A wing can look deeply browned and still be raw near the joint. Conversely, a pale looking wing might be fully cooked if it was brined or marinated in something acidic that slowed browning.
Relying on color alone is how people serve unsafe poultry.
The USDA requires all poultry to reach a minimum internal temperature of 165°F to destroy harmful bacteria. For wings, aiming slightly higher, around 175°F, is better. The extra 10 degrees break down the tough connective tissue around the small bones, making the meat easier to eat.
To check this accurately, you need a reliable probe. A fast reading digital thermometer lets you check multiple wings quickly without leaving the basket open long enough to drop the cooking temperature. Insert the probe into the thickest part of a drumette, avoiding the bone.
Bone conducts heat differently than meat and gives false readings.
If you are cooking a large batch, checking several pieces matters. The wings near the edges of the basket often cook faster than those stacked in the center. Using a dual sensor setup allows you to monitor a piece on the outer edge and one in the middle simultaneously.
This tells you exactly when to shake the basket or rotate the pieces for even cooking.
For those who prefer wireless monitoring, a Bluetooth enabled probe tracks the internal temperature from your phone. You set an alarm for 175°F and walk away until it chimes. Just remember that most wireless probes are designed for ovens or smokers.
Verify that your specific model's plastic housing or antenna is rated for the concentrated, direct airflow of an air fryer basket before leaving it inside during the cook.
Surface Prep Before the Timer Starts
How you treat the wings before they hit the hot air stream dictates how well the chosen time and temperature perform. Wet wings steam. Dry wings roast.
Steaming prevents browning.
Patting the wings completely dry with paper towels is mandatory. Leave them uncovered on a wire rack in the refrigerator for a few hours, or even overnight, to dry the skin further. This technique, often called dry brining if salt is applied, draws moisture out of the epidermis.
Less surface moisture means the air fryer spends less energy evaporating water and more energy browning proteins.
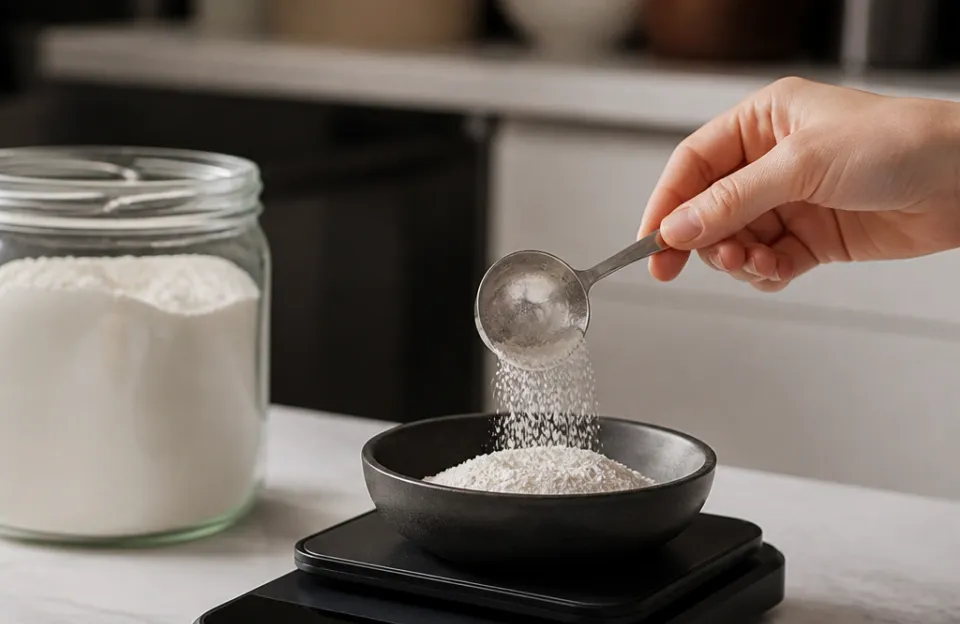
Tossing the dried wings in a small amount of baking powder also accelerates browning. Baking powder raises the pH level of the skin. Alkaline environments promote the Maillard reaction, which is the chemical process responsible for browning and flavor development.
Use about one teaspoon per pound of wings. Mix it with your salt and spices. Do not use baking soda, as the taste will be metallic and harsh.
Oil application should be minimal. Air fryers work by circulating hot air, not submerging food in fat. A light mist of neutral oil helps conduct heat evenly across the skin, but pouring oil into the basket creates smoke and greasy results.
The chicken skin itself contains plenty of fat that will render out during the first ten minutes of cooking. If you want to explore other dinner ideas once you master this technique, these reliable weeknight recipes follow similar principles of precise temperature control.
Batch Size and Basket Crowding
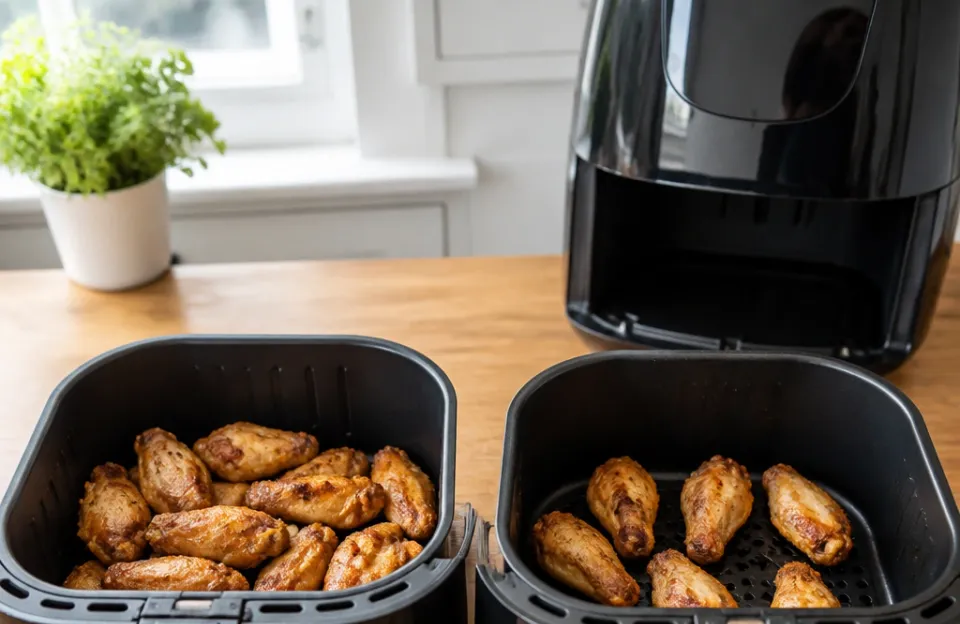
Air circulation requires empty space. If you pack the basket full, the hot air cannot reach the surfaces of the wings buried in the middle. Those hidden wings will boil in their own trapped moisture while the exposed ones on top burn.
A standard four quart air fryer comfortably holds about one to one and a half pounds of wings in a single layer. They can touch slightly, but they shouldn't overlap. Overlapping creates dead zones where heat doesn't penetrate.
If you need to cook three pounds of wings, do it in two batches. Keep the first batch warm in a 200°F conventional oven while the second batch finishes. Trying to force everything in at once ruins the texture and forces you to extend the cooking time unpredictably, making it impossible to rely on standard temperature guidelines.
Shaking the basket or flipping the wings with tongs halfway through the cook exposes the bottom surfaces to the heating element. Most air fryers have the coil located at the top. The bottom of the wing relies on reflected heat and air bouncing off the base plate.
Flipping guarantees both sides receive direct exposure.
Sauced Wings vs Dry Rubbed Wings
Sugar burns. This simple fact changes your entire approach to timing if you use a sweet glaze or barbecue sauce. Applying a sugar heavy sauce at the beginning of a 400°F cook guarantees charred, bitter wings within ten minutes.
Dry rubs made of salt, pepper, garlic powder, paprika, and herbs can go on before cooking. They form a crust that withstands high heat. Spices like paprika will darken significantly, which adds visual appeal without necessarily tasting burnt.
Wet sauces must wait until the end. Cook the wings completely using the standard times and temperatures for plain or dry rubbed wings. Once they reach 175°F internally and the skin is crisp, remove them from the basket.
Toss them in your sauce in a separate bowl. If you want the sauce to tack up and caramelize slightly, return the sauced wings to the air fryer for exactly two to three minutes at 380°F. Watch them closely.
Sugary sauces transition from sticky to scorched in under sixty seconds. After handling messy glazed batches, you'll want to know how to scrub the interior properly so baked on sugar doesn't ruin future cooks.
Frozen Wings Straight From the Bag
You can cook frozen wings in an air fryer, but the baseline numbers change entirely. Frozen meat introduces ice crystals that must melt and evaporate before browning begins. This adds significant time and requires a phased temperature approach.
Start frozen wings at 360°F for 10 minutes. This gentle initial heat thaws the exterior without instantly burning the frozen skin. After 10 minutes, the wings will have released a lot of liquid.
Drain any pooled water from the bottom of the basket if your model allows it, or carefully pour it out. Excess water causes violent spitting and steams the food.
Increase the temperature to 400°F and cook for another 15 to 20 minutes. Flip them at the 10 minute mark of this second phase. Total time for frozen wings usually lands between 25 and 30 minutes, compared to 20 to 25 for fresh.
Always verify the internal temperature with a quick response probe because frozen centers can hide under fully cooked exteriors.
Expect slightly less crispiness from frozen wings compared to fresh, dry brined ones. The excess moisture released during thawing makes achieving a glass shattering crust difficult. They will still be good, just structurally different.
Altitude and Appliance Wattage Variations
Not all air fryers output the same amount of heat, even when set to the same number. A 1700 watt unit recovers heat faster after you open the basket than a 1400 watt unit. If your model is on the lower end of the power spectrum, you may need to add two to three minutes to the suggested times.
Altitude also plays a minor role. Water boils at a lower temperature at higher elevations. Moisture evaporates faster.
If you live above 5000 feet, your wings might dry out quicker on the outside while taking the same amount of time to cook on the inside. Dropping the temperature by 10 degrees and adding a couple of minutes compensates for this rapid surface drying.
The first time you cook wings in a new machine, treat the recommended time as a guideline rather than a rule. Check early. You can always add two more minutes, but you cannot reverse overcooked meat.
Keeping track of what works for your specific appliance saves frustration later. If you ever notice inconsistent readings between batches, verifying your tool's accuracy against a stainless steel reference thermometer helps rule out equipment drift.
Frequently asked questions
Can I cook wings at 350°F the whole time?
Yes, but the skin won't crisp properly. Cooking at 350°F takes about 35 to 40 minutes. The lower heat slowly renders fat, but it never gets hot enough to trigger rapid blistering of the skin.
You'll end up with fully cooked, soft wings. This is fine if you plan to drown them in heavy sauce, but poor if you want a dry rub crunch.
Do I need to preheat the air fryer for wings?
Preheating for three to five minutes helps. A hot basket immediately starts searing the skin upon contact. If you put wings into a cold basket, the first few minutes of cooking time are spent just heating the metal and the air.
This delays fat rendering and can lead to sticking. Preheating makes your timing more predictable.
Why did my wings smoke so much?
Chicken wings contain a lot of fat. As that fat renders out, it drips to the bottom of the basket or the drip pan. When liquid fat hits the hot base or splashes onto the heating element, it smokes heavily.
Placing a small piece of bread or a tablespoon of water in the bottom catch pan beneath the basket absorbs grease and reduces smoking.
Is 165°F really safe enough for wings?
According to the FDA food safety guidelines, 165°F is the absolute minimum safe temperature for all poultry. However, wings have a high ratio of connective tissue to meat. Pulling them at 165°F leaves them slightly chewy near the joints.
Taking them to 175°F or 180°F melts that collagen into gelatin, resulting in a much better texture while remaining completely safe.
Should I stack wings if I'm in a hurry?
No. Stacking blocks airflow. The wings touching each other stay wet and steam instead of roasting.
You will end up with some raw spots and some burnt edges. Cooking in two single layer batches actually takes less total active troubleshooting time than trying to fix a ruined overcrowded batch.
Does opening the basket ruin the cooking time?
Every time you open the basket to flip or check the meat, the temperature drops rapidly. The appliance needs a minute or two to recover. Frequent checking adds up.
Flip once at the halfway mark. Only check earlier if you smell burning or suspect your specific model runs unusually hot.
Dialing in your perfect batch
Finding the right air fryer chicken wings time and temp comes down to understanding your specific machine and the size of your cuts. Start with 400°F for 20 minutes as your baseline. Pat the skin dry, leave room for the air to move, and always verify the internal temperature with a proper probe.
Once you nail that first batch, write down the exact numbers that worked. Your machine, your altitude, and your preferred level of crunch create a specific formula. Memorize it, and you won't need to guess again.