To clean a coffee maker, run a mix of equal parts white vinegar and water through a brew cycle, then flush it twice with plain water. Wash the carafe, filter basket, and lid in warm soapy water. Do this monthly to stop mineral buildup and keep your coffee tasting fresh.
That is the short version. But the details matter. A quick rinse does not remove scale inside the heating element.
It does not kill mold hiding in dark corners. And skipping the deep clean slowly ruins the machine you rely on every morning. This guide walks through exactly how to clean a coffee maker, step by step, for the standard drip machines most US kitchens have.
We will also cover single-serve pod brewers and manual methods like French presses, since they need different care.
Why Your Coffee Maker Needs Regular Cleaning
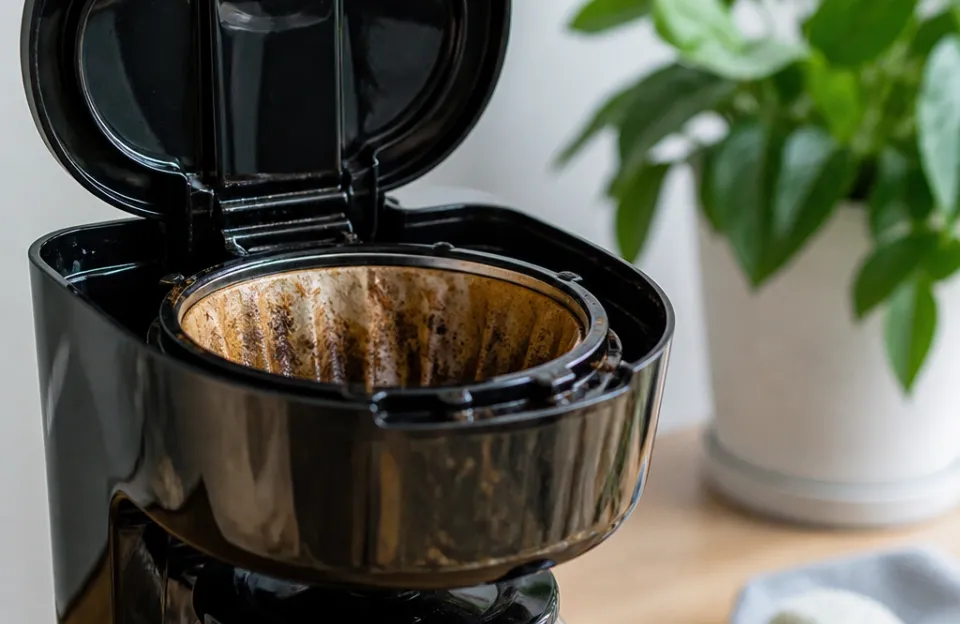
Tap water leaves minerals behind. Calcium and magnesium build up inside the tubes and heating element. This layer is called scale.
Scale blocks water flow. It makes the water heat unevenly. Your coffee takes longer to brew, and it never gets hot enough.
Weak, lukewarm coffee is usually the first sign of a clogged machine.
Then there is the moisture problem. A coffee maker stays damp. The water reservoir, the rubber gaskets, and the warming plate all hold moisture after brewing.
Dark, wet spots grow bacteria and mold fast. The National Sanitation Foundation (NSF) has found yeast and mold in coffee reservoirs during home audits. You might not see it, but you can taste it.
Old coffee oils go rancid. They leave a bitter, sour film on everything they touch.
If you notice floating specks in your cup, or if your morning brew tastes flat, the machine needs attention. Waiting until it stops working entirely means you are fighting heavy buildup that might already be permanent damage.
What You Need Before You Start
You do not need expensive kits to get the job done. Most of what you need is probably in your kitchen right now.
- White distilled vinegar. Plain white vinegar works best. Apple cider vinegar smells too strong and leaves a tint.
- Baking soda. Good for scrubbing stubborn stains without scratching glass or plastic.
- Mild dish soap. Unscented is better so you do not add floral notes to tomorrow's pot.
- A soft sponge or cloth. Avoid steel wool or rough scouring pads. They scratch plastic and glass, giving bacteria more places to hide.
- A small brush. An old toothbrush or a narrow bottle brush reaches tight spots around the spray head and under the brew basket rim.
- Fresh water. Filtered water is ideal for the final rinse cycles.
Commercial descaling solutions exist. They use stronger acids like citric or sulfamic acid. If your tap water is extremely hard, a dedicated descaler might work faster than vinegar.
But for routine monthly cleaning, white vinegar handles the job perfectly well.
Check current price on Amazon: [AMAZON LINK]
How to Clean a Drip Coffee Maker Step by Step
This is the standard method for automatic drip machines. It takes about an hour, though most of that time is just waiting for the cycles to run.
Empty and Disassemble
Start with a completely empty machine. Throw away any used grounds. Remove the paper or reusable filter.
Take off the carafe, the lid, and the brew basket. If your machine has a removable water reservoir, pull it out. Set these parts aside near the sink.
Wipe the outside of the machine with a damp cloth. Pay attention to the warming plate at the bottom. Spilled coffee bakes onto that hot surface quickly.
If there is crusted coffee on the plate, unplug the machine and let it cool completely. Then lay a damp, soapy cloth over the plate for ten minutes. The moisture softens the crust so you can wipe it away without scraping.
Wash the Removable Parts
Wash the carafe, lid, and brew basket in warm, soapy water. Use your soft sponge. If the glass carafe has brown stains at the bottom that soap will not lift, try this trick.
Add two tablespoons of baking soda and a splash of warm water. Swirl it around. Let it sit for fifteen minutes.
Scrub gently with your sponge. The baking soda acts as a mild abrasive. It lifts the stain without scratching the glass.
Rinse everything thoroughly. Soap residue ruins the taste of coffee just as badly as old oils do. Leave the parts upside down on a drying rack while you move to the internal cleaning.
Run the Vinegar Descaling Cycle
Fill the water reservoir with equal parts white vinegar and fresh water. If your machine holds 12 cups, use 6 cups of vinegar and 6 cups of water. Place the empty carafe back on the warming plate.
Put the empty brew basket in its spot.
Turn the machine on and start a normal brew cycle. Let it run until the reservoir is half empty. Then turn the machine off.
Leave the vinegar mixture sitting inside the tubes and heating element for thirty minutes. This pause is the secret. It gives the acid time to dissolve the hard mineral scale clinging to the inside walls.
After thirty minutes, turn the machine back on. Let it finish the cycle. Dump the hot vinegar water from the carafe down the sink.
It will smell strong. That is normal.
Flush with Fresh Water
Now you need to wash the vinegar out. Fill the reservoir completely with fresh, cold water. Run a full brew cycle.
Dump the water. Repeat this process one more time. Two full water cycles are usually enough to clear the vinegar taste and smell.
If you still smell vinegar after two rinses, run a third cycle. Some older machines with long internal tubing hold onto odors a bit longer. Once the water runs clear and odorless, you are done with the internal plumbing.
Reassemble and Brew a Test Pot
Put the washed brew basket, filter, and carafe back in place. Wipe down the exterior one last time. To be absolutely sure no vinegar flavor remains, brew a pot using fresh water and cheap coffee grounds.
Taste it. If it tastes fine, your machine is ready for your good beans. If it tastes slightly sharp, dump the pot and run one more water-only cycle.
Knowing how to maintain your daily appliances goes beyond just the coffee pot. For instance, keeping your other countertop gear clean, like checking materials used in air fryers, follows a similar mindset of protecting both your health and your equipment.
Cleaning Single-Serve Pod Coffee Makers
Pod machines need the same basic care, but the steps look a little different because of the needles and smaller chambers. Mineral buildup clogs the tiny puncture needle that pierces the pod. When that happens, water sprays everywhere except into your mug.
Unplug the machine. Remove the water tank and wash it with warm soapy water. Rinse it well.
Take out the pod holder or drip tray. Wash those in the sink too.
Look up inside the machine where the pod sits. You will see a small metal needle. Take a straightened paperclip and very gently poke through the needle hole to clear out trapped coffee grounds.
Be careful not to bend the needle. Wipe the surrounding area with a damp cloth.
To descale a pod machine, fill the reservoir with the same half-and-half vinegar and water mix. Place a large mug on the drip tray. Run a brew cycle without a pod in the machine.
Keep running cycles until the reservoir is empty. Let it sit for thirty minutes, just like the drip method. Refill the reservoir with fresh water and run multiple brew cycles until the water runs clear and smells neutral.
Usually, three to four water-only cycles do the trick.
If you own a more complex setup, understanding the differences between various espresso-style brewers helps you know which parts require extra attention during descaling.
Manual Brewers: French Press, Pour Over, and Cold Brew
Manual devices do not have heating elements or hidden tubes, which makes them simpler. But they trap coffee oils aggressively.
French press: Take it apart completely after every use. Remove the plunger rod. Unscrew the mesh filter assembly.
There are usually three pieces: a top plate, a fine mesh screen, and a bottom cross plate. Coffee oils and fine grounds get trapped between the mesh layers. Wash each piece individually in warm soapy water.
If you leave the mesh assembled, old oils will make your next batch taste bitter. Once a month, soak the disassembled mesh pieces in a mix of warm water and a tablespoon of baking soda for twenty minutes to strip away built-up grease.
Pour over cones: Ceramic and glass cones just need a wash with soap and water. If you use a metal mesh filter instead of paper, scrub it gently with a soft brush to keep the holes open. Clogged holes slow down the draw-down time and over-extract the coffee.
Cold brew pitchers: These steep coffee for twelve to twenty-four hours. That long contact time leaves heavy oil deposits on the plastic or glass. Wash the pitcher and the reusable filter immediately after pouring out the concentrate.
Do not let it dry with residue inside.
Maintaining these manual tools properly keeps your whole morning routine smooth, much like managing cooking temperatures prevents ruined meals elsewhere in the kitchen.
How Often Should You Clean Your Coffee Maker?
The answer depends on your water and your habits.
| Task | Frequency | Why it matters |
|---|---|---|
| Wash carafe and basket | After every use | Prevents rancid oil buildup and mold growth. |
| Wipe warming plate | Weekly | Stops baked-on spills from smoking. |
| Descale with vinegar | Monthly | Removes calcium scale before it blocks water flow. |
| Deep clean pod needle | Every two weeks | Prevents pressure backups and messy spraying. |
If you live in an area with hard water, you might need to descale every two or three weeks. Hard water has high mineral content. You can check your local water quality report through the Environmental Protection Agency or your local utility provider.
If you see white, chalky flakes in your kettle or on your faucets, your coffee maker is collecting the exact same deposits.
If you use filtered or bottled water, you can stretch the descaling interval to every six to eight weeks. But you should never skip washing the removable parts after brewing. Mold grows in standing moisture regardless of water hardness.
Common Mistakes People Make
Cleaning seems simple, but a few wrong moves cause real problems.
Leaving water in the reservoir overnight. Stagnant water breeds bacteria. Always dump leftover water when you are done brewing for the day. Leave the lid open so the inside dries out.
Airflow is your best defense against mold.
Using bleach. Never put bleach inside a coffee maker. It is too harsh for the internal seals and rubber gaskets. Worse, it is incredibly difficult to rinse out completely from narrow plastic tubes.
You do not want bleach residue mixing with hot water and coffee grounds. Stick to vinegar or commercial descaling liquids made specifically for coffee equipment.
Skipping the rinse cycles. Running one water cycle after vinegar is rarely enough. The heating element holds onto the vinegar smell. Always run at least two full reservoirs of plain water through the machine.
Smell the steam coming out. If it stings your nose, run another cycle.
Scrubbing the carafe with abrasive pads. Glass looks tough, but it scratches easily. Micro-scratches catch coffee oils and become impossible to clean later. They also weaken the glass, making it prone to cracking when exposed to boiling water.
Use soft sponges and baking soda instead.
Forgetting the showerhead. On drip machines, the part that drips water over the grounds is called the showerhead. Mineral deposits clog those tiny holes. Uneven water distribution leads to weak coffee.
Take a pin or a needle and gently clear the holes while the machine is unplugged and cool.
Avoiding these errors protects your investment. Just as you would carefully select the right basket inserts for other appliances, matching the right cleaning method to your specific brewer prevents accidental damage.
Signs Your Machine Is Beyond Cleaning
Sometimes a deep clean cannot save a coffee maker. If you have descaled the machine thoroughly and the water still barely trickles out, the internal pump might be failing. Pumps wear out over years of pushing water through calcified tubes.
If the machine leaks from the bottom during a brew cycle, an internal silicone hose may have cracked or disconnected. Vinegar cannot fix broken hardware.
Another warning sign is a persistent burnt plastic smell that does not go away after multiple water flushes. This often points to a failing heating element or melting internal wiring. Unplug the machine immediately.
Electrical faults are a fire hazard. At that point, replacing the unit is safer and cheaper than attempting repairs.
Keeping It Clean Longer
Prevention saves time. The easiest way to slow down scale buildup is to stop using plain tap water. Fill the reservoir with filtered water from a pitcher or your refrigerator door.
Fewer minerals mean less frequent descaling.
Empty the used grounds immediately after brewing. Do not let a wet puck of coffee sit in the basket all day. It starts growing mold within hours in a warm kitchen.
Leave the reservoir lid propped open when the machine is not in use. This lets the interior dry out completely. Mold needs moisture to survive.
A dry tank is a safe tank.
Wipe the warming plate after every use once it cools down. A quick pass with a damp cloth takes five seconds. It prevents the thick, baked-on crusts that require soaking later.
Routine upkeep takes far less effort than rescuing a neglected machine. Treat your coffee maker like any other tool in your kitchen that touches food. Respect the moisture, manage the minerals, and it will brew a clean, hot cup every single morning.
Frequently Asked Questions
Can I use apple cider vinegar instead of white vinegar?
You can, but it is not recommended. Apple cider vinegar has a darker color and a stronger, sweeter smell. It takes more rinse cycles to clear the odor out of the plastic tubing.
White distilled vinegar is cheaper, clearer, and rinses away much faster.
Is it safe to put the glass carafe in the dishwasher?
Most glass carafes are dishwasher safe on the top rack. Check your specific model's manual first. However, the intense heat from the bottom heating element in some dishwashers can stress the glass over time.
Hand washing with warm soapy water is always the safest option to prevent cracking.
How do I clean the inside of the water reservoir if my hand does not fit?
Use a mixture of warm water and a tablespoon of baking soda. Pour it in, swirl it around vigorously, and let it sit for fifteen minutes. Then use a long-handled bottle brush to reach the bottom corners.
Rinse thoroughly with fresh water afterward.
Why does my coffee still taste bad after I cleaned the machine?
You likely did not run enough rinse cycles after using vinegar. Run two more full pots of plain water through the brew cycle. If the taste is still off, your coffee beans might be stale, or your tap water might have a high chlorine content that the cleaning did not address.
Try brewing with bottled water to isolate the issue.
Can I use lemon juice to descale my coffee maker?
Lemon juice contains citric acid, which dissolves minerals. However, it also contains sugars and pulp unless heavily strained and processed. Those organic compounds can stick to the internal tubes and create new problems.
White vinegar or a dedicated descaling solution works much more reliably.
A clean coffee maker is the baseline for good coffee. No amount of expensive beans or precise grinding fixes a dirty machine. Run the vinegar cycle once a month, wash the parts daily, and keep the lid open to dry.
Your morning cup will taste exactly the way it should.
As an Amazon Associate, we earn from qualifying purchases.