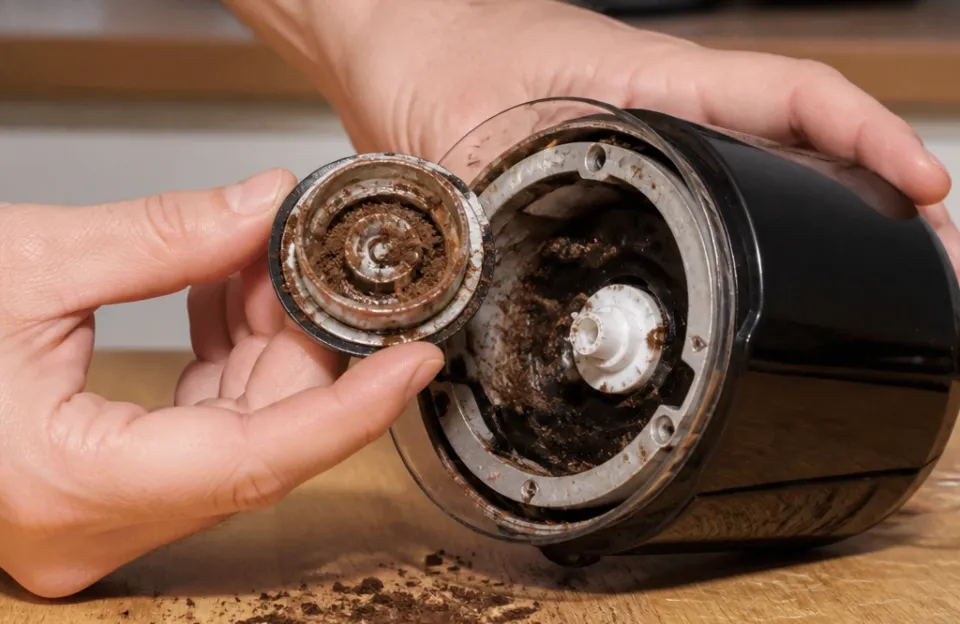
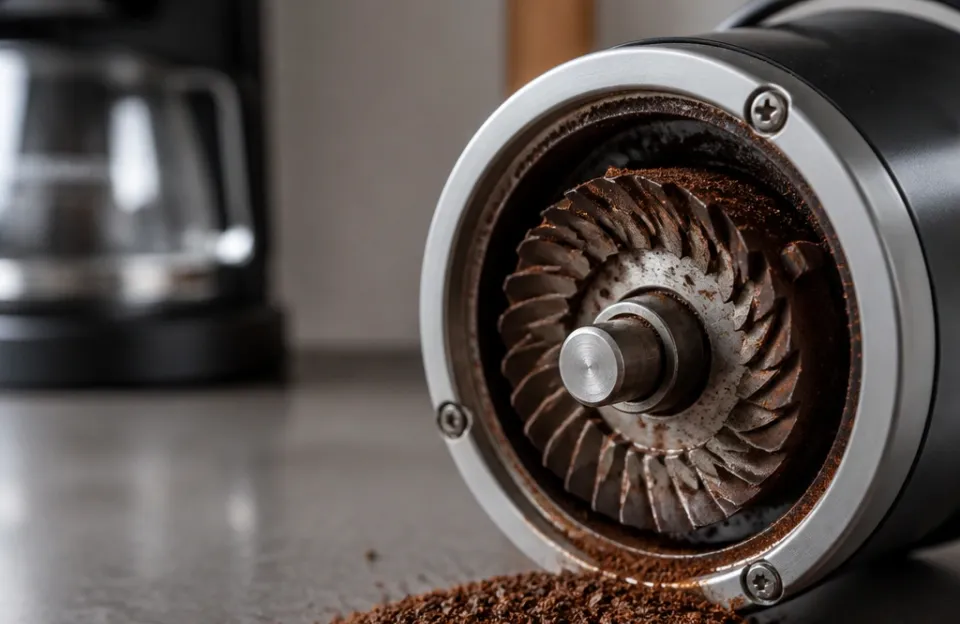
A jammed coffee grinder ruins your morning routine before it even starts. Most grinder failures stem from oil buildup, dull burrs, or simple electrical faults that you can fix at home. This guide walks you through safe troubleshooting steps to get your machine running smoothly again without buying a new one.
Clearing Jammed Burrs Without Damage
Grinders often stop mid-cycle when beans get stuck between the burrs. Dark roast beans are usually the culprit because they release more surface oil. This sticky residue binds with fine particles to create a cement-like blockage.
You must clear this obstruction before the motor burns out.
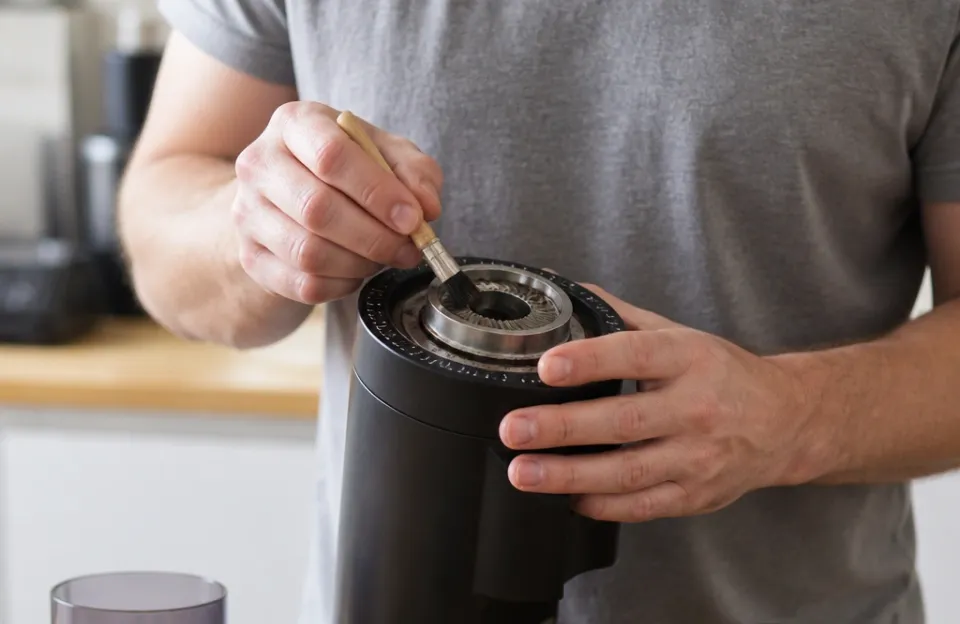
Unplug the machine first to prevent accidental activation. Remove the hopper and any visible beans from the top chamber. Use a small brush to sweep away loose grounds from the upper burr area.
Never use metal tools like knives or screwdrivers inside the grinding chamber. Metal on metal contact creates sparks and damages the precision cutting edges.
Check the manufacturer manual for specific disassembly instructions. Some models allow you to lift out the upper burr carrier by hand. Others require twisting a locking ring counter-clockwise.
If your unit does not permit easy access, do not force it apart. Forcing components can strip plastic threads permanently.
Use wooden skewers or plastic picks to gently dislodge packed grounds. Work from the center outward toward the chute. Compressed air cans work well for blowing out remaining dust.
Hold the nozzle upright to avoid spraying liquid propellant onto the burrs. Reassemble the unit carefully and test with a small amount of medium-roast beans.
If the jam persists after cleaning, the issue may be mechanical rather than debris-related. Worn burr shafts or broken drive gears cause similar symptoms. These internal failures typically require professional repair or replacement parts.
Continuing to run a mechanically seized grinder will destroy the motor windings.
Restoring Sharpness to Dull Cutting Edges
Dull burrs produce uneven particle sizes that ruin extraction. Your espresso might taste sour while your French press tastes bitter simultaneously. This inconsistency signals that the cutting surfaces have lost their edge.
Steel burrs typically last five to seven years with daily home use. Ceramic burrs stay sharp longer but can chip if dropped.
Inspect the burr edges under bright light. Sharp edges look crisp and defined against the background. Dull edges appear rounded, shiny, or flattened.
Run your fingernail lightly across the ridges to feel for wear. A sharp burr catches the nail slightly while a dull one feels smooth. Always handle burrs with care as they remain sharp enough to cut skin even when worn.
Replacement burrs must match your exact grinder model. Measure the outer diameter and inner bore size precisely. Note the number of mounting tabs or screw holes.
Generic burrs rarely fit correctly and cause alignment issues. Misaligned burrs generate excessive heat and inconsistent grind sizes. Check specialized retailers or the original manufacturer for verified compatible parts.
Installing new burrs requires patience and attention to detail. Clean the burr housing thoroughly before installation. Old coffee oils left behind will contaminate fresh grounds immediately.
Seat the lower burr firmly into its mounting position. Align the upper burr according to the factory calibration marks. Test the adjustment dial through its full range to confirm smooth operation.
Consider professional servicing if you lack confidence in reassembly. Improper installation voids warranties and risks personal injury. Many local coffee equipment technicians offer affordable burr replacement services.
They also calibrate the grind setting during installation for optimal performance. This service extends machine life significantly compared to DIY attempts gone wrong.
Diagnosing Motor and Electrical Failures
Electrical problems manifest differently than mechanical jams. The motor may hum without turning or fail to start entirely. Intermittent operation suggests loose wiring or failing switches.
Complete silence points to blown fuses or dead motors. Always verify power delivery before assuming component failure.
Test the wall outlet with another appliance first. GFCI outlets in kitchens trip frequently due to moisture exposure. Reset the outlet button if other devices also lack power.
Check the grinder’s power cord for visible damage or fraying. Bent prongs on the plug indicate internal wire breaks. Replace damaged cords immediately to prevent fire hazards.
Internal thermal fuses protect motors from overheating. These safety devices blow permanently when temperatures exceed safe limits. Testing continuity with a multimeter confirms fuse status.
Replacement fuses cost pennies but require soldering skills. Match the amperage and voltage ratings exactly. Higher-rated fuses defeat the safety purpose and risk motor fires.
Motor capacitors help single-phase motors start spinning. Failed capacitors cause humming without rotation. Swollen or leaking capacitor cases signal imminent failure.
Discharge stored energy before touching terminals to avoid shocks. New capacitors must match the microfarad rating precisely. Incorrect values cause starting torque problems or motor damage.
Switch contacts wear out after thousands of cycles. Carbon buildup prevents proper electrical connection. Cleaning contacts with electronic spray restores function temporarily.
Permanent fixes involve replacing the entire switch assembly. Sourcing exact replacement switches proves difficult for older models. Universal switches work only if terminal spacing matches perfectly.
Refer to appliance safety standards when working on electrical components. Underwriters Laboratories publishes guidelines for safe household appliance repair. Following these protocols prevents shock injuries and property damage.
When in doubt, consult a licensed electrician or appliance technician. Electricity demands respect regardless of voltage level.
Eliminating Rancid Oil Buildup
Old coffee oils turn rancid within weeks of exposure to air. This stale residue coats every internal surface over time. Fresh beans pick up these off-flavors during grinding.
Regular deep cleaning prevents taste contamination effectively. Monthly maintenance keeps flavor profiles clean and accurate.
Disassemble removable parts according to your user manual. Wash plastic hoppers and lids in warm soapy water. Avoid dishwashers unless explicitly approved by the manufacturer.
High heat warps plastic components and fades measurement markings. Dry all parts completely before reassembly to prevent mold growth. Moisture trapped inside causes corrosion and bacterial issues.
Clean non-removable surfaces with specialized grinder tablets. These food-safe cleaners absorb oils without leaving residue. Run the tablets through the grinder like regular beans.
Follow package directions for quantity and cycle duration. Brush out the resulting powder thoroughly afterward. Vacuum cleaners with brush attachments reach tight spaces effectively.
Never use liquid cleaners directly inside the grinding chamber. Liquids seep into bearings and motor housings. Water damage corrodes metal parts and shorts electrical connections.
Damp environments promote mold growth in hidden crevices. Stick to dry cleaning methods for internal components. External surfaces tolerate mild damp cloths safely.
Establish a cleaning schedule based on usage frequency. Daily users should deep clean monthly. Weekly brewers need quarterly maintenance.
Light users can extend intervals to six months. Track cleaning dates in a kitchen journal or phone calendar. Consistent maintenance prevents most flavor complaints and mechanical failures.
Adjusting Grind Settings for Consistency
Inconsistent particle size ruins coffee extraction balance. Fine particles over-extract while coarse ones under-extract. The result tastes both bitter and sour simultaneously.
Proper calibration aligns the burr gap with your brew method. Each brewing style requires specific particle size ranges.
Start with the manufacturer’s recommended baseline setting. Espresso typically needs fine settings around 1-5 on numbered dials. Drip coffee falls in the medium range around 10-15.
French press requires coarse settings near 20-25. These numbers vary wildly between brands and models. Treat them as starting points rather than absolute rules.
Adjust incrementally while tasting results systematically. Change only one variable at a time for clarity. Finer adjustments increase extraction and body.
Coarser adjustments decrease extraction and acidity. Document each change alongside taste notes. Pattern recognition develops through consistent record keeping over weeks.
Burr alignment affects consistency more than dial position. Factory calibration drifts with use and cleaning. Professional realignment restores uniform particle distribution.
Home users can check alignment with marker tests. Color the burr edges with dry erase marker then run briefly. Even wear patterns indicate good alignment while patchy marks show problems.
Static electricity causes grounds retention between doses. Retained old grounds mix with fresh batches unpredictably. Grounds weighing scales reveal retention amounts accurately.
Purge two grams of fresh beans after changing settings. This flushes stale particles from the chute and chamber. Consistent purging improves shot-to-shot repeatability dramatically.
Understanding how different types of espresso machines explained interact with grind size helps dial in settings faster. Semi-automatic machines forgive minor inconsistencies better than manual levers. Super-automatic units demand precise calibration for proper function.
Matching grinder output to machine requirements optimizes results.
Recognizing When Repair Costs Exceed Value
Some grinder problems justify replacement over repair. Evaluate repair costs against current market value honestly. Labor charges often exceed part costs significantly.
Vintage commercial units warrant expensive restorations. Consumer-grade appliances rarely justify major investments.
Calculate total repair expenses including shipping and labor. Compare this sum to fifty percent of replacement cost. Exceeding this threshold favors buying new.
Exceptions apply to discontinued premium models. Sentimental value cannot justify unsafe repairs though. Electrical faults in old units pose genuine fire risks.
Availability of replacement parts determines feasibility. Manufacturers support products for limited periods typically. Third-party parts vary widely in quality and fitment.
Poorly made burrs damage motors and produce bad coffee. Verify supplier reputation before ordering critical components. Reading reviews specifically mentioning your model helps avoid mistakes.
Consider upgraded features when evaluating replacements. Modern grinders offer improved consistency and quieter operation. Timer functions and programmable doses add convenience.
Better build quality extends service life substantially. Spending more upfront often saves money long-term. Research current options thoroughly before committing funds.
Dispose of unrepairable units responsibly through e-waste programs. Coffee grinders contain recyclable metals and electronics. Landfill disposal wastes resources and harms environments.
Many municipalities offer free drop-off locations. Retailers sometimes accept old units for recycling credits. Responsible disposal completes the ownership cycle properly.
Preventive Maintenance Habits That Extend Life
Daily habits determine grinder longevity more than build quality. Small routines prevent major failures consistently. Neglect accelerates wear exponentially over time.
Prevention costs nothing but attention and discipline. Establish these practices immediately after purchase or repair.
Wipe the exterior weekly with a dry microfiber cloth. Coffee dust accumulates on buttons and seams rapidly. Moisture from steam or spills invites corrosion.
Keep the grinder away from sinks and kettles. Humidity damages electronics and promotes rust formation. Store beans in sealed containers separate from the grinder.
Listen for unusual sounds during normal operation. Healthy grinders produce consistent humming or whirring noises. Grinding, clicking, or rattling indicates developing problems.
Address strange sounds immediately before damage spreads. Early intervention prevents catastrophic failures routinely. Record audio clips of concerning sounds for technician diagnosis.
Weigh beans before grinding whenever possible. Volumetric scoops vary with bean density and roast level. Overloading the hopper strains motors unnecessarily.
Running empty damages burrs through friction heating. Maintain consistent batch sizes for predictable results. Digital scales improve accuracy and repeatability significantly.
Rotate bean varieties gradually rather than abruptly. Oily dark roasts leave heavy residues quickly. Switching to light roasts cleans some residue naturally.
Dedicated grinders for espresso versus filter simplify maintenance. Cross-contamination affects flavor purity noticeably. Plan bean transitions strategically around cleaning schedules.
Keep documentation accessible for future reference. Manuals contain model-specific warnings and procedures. Purchase receipts establish warranty coverage periods.
Service records track maintenance history accurately. Organize papers in a dedicated kitchen binder. Digital photos of serial numbers aid parts ordering.
Preparedness reduces downtime during inevitable breakdowns.
Frequently Asked Questions About Grinder Troubleshooting
Can I use rice to clean my coffee grinder?
Uncooked white rice absorbs oils effectively in emergencies. However, rice starch can gum up burrs over repeated use. Commercial grinder cleaning tablets remain the safer choice.
Reserve rice cleaning for situations where proper supplies are unavailable. Always follow rice cleaning with thorough brushing and vacuuming.
Why does my grinder produce static-clumped grounds?
Low humidity environments increase static electricity significantly. Lighter roasts generate more static than darker roasts. Waiting thirty seconds after grinding allows charge dissipation.
Tapping the portafilter gently releases clinging particles. Humidifiers in dry climates reduce static problems overall. Anti-static sprays designed for grinders exist but require caution.
How often should I replace grinder burrs?
Home users typically replace steel burrs every five to seven years. Commercial settings demand annual or biannual replacement. Ceramic burrs last longer but shatter upon impact.
Taste degradation signals wear before visual inspection reveals it. Track poundage processed rather than calendar time alone. Heavy usage wears burrs faster regardless of age.
Is it worth repairing a cheap blade grinder?
Blade grinders lack replaceable parts generally. Motor failures in budget units justify replacement instead. Blade sharpening provides marginal improvement temporarily.
Upgrade to entry-level burr grinders for better results. Consistent particle size matters more than motor longevity. Investment in proper equipment pays dividends in cup quality.
What causes sour-tasting coffee despite correct settings?
Sourness indicates underextraction from too-coarse grinding. Channeling in espresso machines mimics grind problems. Stale beans taste sour regardless of grind size.
Water temperature below 195°F extracts insufficiently. Verify multiple variables before adjusting grind finer. Systematic elimination identifies true root causes efficiently.