You can make donuts in an air fryer by shaping rings from yeast dough or canned biscuit dough, spraying the basket lightly with oil, and cooking at roughly 350°F to 375°F until the dough is golden and fully cooked. The exact time depends on your dough, your appliance, and how many rings you load at once, so always check doneness rather than trusting a timer alone.
One safety point sits above every technique: raw flour and raw eggs can carry harmful bacteria, so dough must be fully cooked before you eat it. Cooking is the only reliable way to kill those germs, because flour is not treated to eliminate them during production. That means no tasting the raw dough and no pulling donuts early because the outside looks brown. For more on safe handling of raw flour and dough at home, the FDA publishes general food safety guidance that applies here.
How Circulating Heat Cooks the Donut Dough
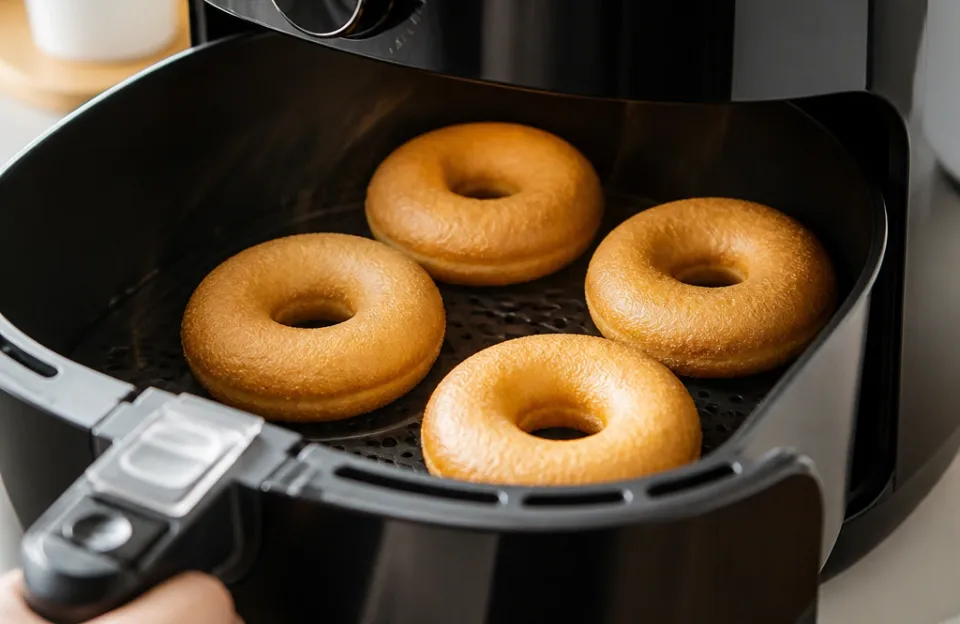
An air fryer works like a small, intense convection oven. A fan pushes hot air around the basket, so the dough’s surface dries and browns while the inside sets. That is why preheating for a few minutes helps the rings brown evenly once they go in. The same rapid air circulation that browns donuts also works well for crisping up chicken skin on other recipes.
Because the heat comes from moving air rather than a solid baking surface, the ring’s top and sides cook first. The underside browns more slowly unless you flip the donuts partway through. This is also why overcrowding is the most common cause of uneven results: too many rings block airflow and trap steam, so the dough steams instead of browning. The same principle applies to other air fryer foods, and university extension resources on food science explain how cooking method affects fat absorption and texture.
Preheating is not strictly required on every model, but it reduces the gap between your set temperature and the actual temperature when the cold dough hits the basket.
Yeast Dough Versus Canned Biscuit Shortcuts
You have two realistic starting points, and they behave very differently.
Yeast dough is the traditional route. It gives you a lighter, airier crumb and a proper donut chew, but it needs time to rise before you shape and cook. Plan for that proofing window up front.
Canned biscuit dough is the shortcut. It uses chemical leaveners rather than yeast, so there is no rise time. Each biscuit becomes one donut with a hole punched through the center, and a standard can yields roughly eight donuts with about ten minutes of cooking time. The texture is closer to a biscuit than a true yeast donut, but it is fast and forgiving.
Choose yeast if texture matters most to you. Choose biscuit dough if you want donuts on the table in under half an hour.
Shaping and Preparing the Dough for the Basket
For biscuit dough, separate the rounds and cut a hole in each one with a small cutter or a bottle cap. Save the holes, because they cook in about half the time and make good test pieces.
For yeast dough, roll it to about half an inch thick, cut rings, and let them rest until slightly puffy. Cold dough straight from the fridge will resist browning, so give it a few minutes at room temperature.
Arrange the rings in a single layer with space between them. If your basket is small, cook in batches rather than stacking, because restricted airflow prevents crisping. The same airflow principle applies to other air fryer foods, and university extension resources on food science explain how cooking method affects fat absorption and texture.
Why a Thin Oil Spray Changes the Crust
A light coating of oil helps the surface brown and keeps the dough from sticking to the basket. The key word is light: a heavy coat makes the dough greasy and can pool under the rings.
The safest method is to remove the basket from the appliance, spray it outside, and keep the spray away from the heating element and the base. Never spray directly into the air fryer housing, since that creates a fire hazard and can damage the appliance.
Hold the can roughly six to eight inches away and apply a brief, even mist to avoid residue buildup. If you prefer to avoid aerosol sprays, brush a thin layer of neutral oil onto the basket or onto the dough itself. Aerosol sprays can leave a sticky film on nonstick coatings over time, so a refillable sprayer or a pastry brush is a common alternative. Check your appliance manual for the manufacturer’s guidance on your specific basket coating. For more on how countertop appliances compare to traditional methods regarding fat absorption, university extension resources on food science offer detailed breakdowns of cooking techniques.
Air Fryer Donuts: Timing and Temperature Guidelines
This table gives starting ranges. Treat them as a launch point, not a guarantee, because wattage and basket design shift results.
| Dough Type | Temperature | Approximate Time | Doneness Cues |
|---|---|---|---|
| Canned biscuit | 350°F to 375°F | 5 to 7 minutes per batch | Deep golden brown, firm to the touch, no raw streaks when cut |
| Yeast dough | 350°F to 375°F | 6 to 9 minutes per batch | Evenly browned, puffed, springs back when pressed |
| Donut holes | 350°F to 375°F | 3 to 4 minutes | Golden all over |
Flip the rings about halfway through so both sides brown evenly. If your model runs hot, start checking a minute or two early.
Judging doneness. Color is your first cue, but it is not enough on its own. Press the center of a ring: it should feel firm and spring back rather than sink. Cut one open to confirm there are no raw, wet streaks inside. If you find raw dough, return the batch to the air fryer for a couple more minutes at a slightly lower temperature so the outside does not burn before the center sets. Having a reliable way to check internal temperatures is smart for all your appliance cooking, similar to how you would verify poultry is safe before serving dinner.
There is no single published internal temperature for air fryer donuts, so use visual and tactile checks rather than a number you cannot verify.
Adjusting for Your Air Fryer’s Wattage and Size
Air fryer wattage affects how fast the appliance reaches temperature and how quickly it recovers when you add cold dough. A higher-wattage model heats up faster, but the difference in actual cooking time once it is at temperature is smaller than most people expect. For reference, a 1,200W unit may take five to six minutes to reach 400°F, while an 1,800W unit may get there in two to three.
If your air fryer is rated under 1,400W, expect to add two to four minutes to most recipes and give it an extra minute of preheat. If it is over 1,800W, start checking two to three minutes earlier than the recipe suggests.
Wattage alone is not the whole picture. Individual units vary in how closely actual temperature matches the set temperature, so a 1,500W model running 25°F hot will brown food faster than an 1,800W model running 10°F cool. Testing your own appliance with an oven thermometer tells you more than the wattage rating does. Basket-style and oven-style air fryers also differ in how evenly they distribute air, so adjust your timing the first time you cook a new batch.
Glazing and Topping Warm Pastries
Glaze sticks best when the donut is warm but not piping hot. If it is too hot, the glaze slides off; if it is cold, the glaze sits on top and sets unevenly.
A simple approach is to dip one side of each warm donut into a thin glaze, let the excess drip back into the bowl, and rest the donut on a wire rack. For cinnamon sugar, brush or spray a very light coat of melted butter or oil on the donut first, then toss it in the sugar mixture so the coating has something to cling to.
Do this step while the donuts are still warm from the basket. Once they cool completely, coatings are far harder to adhere evenly.
What Goes Wrong and How to Fix It
Pale exterior. Usually a sign of too little oil, an underheated basket, or overcrowding. Increase the oil mist slightly, preheat longer, and reduce the batch size.
Dense center. The dough needs more time, not higher heat. Lower the temperature slightly and extend the cook time so the middle sets before the outside burns.
Burnt bottom. The basket may be running hot, or the donuts sat directly against a heating element. Flip sooner and drop the temperature by 25°F.
Glaze sliding off. The donuts were too hot when glazed, or the glaze was too thin. Let them cool for a minute or two and thicken the glaze with a little more powdered sugar.
Rings merging into each other. Too many rings in the basket. Space them out and cook in batches instead of trying to fit them all at once.
Raw streaks inside. Not cooked through. Return the batch to the air fryer at a slightly lower temperature until the center is fully set. If you cut one open and see raw looking streaks, return the batch to the machine for another two minutes at a slightly lower temperature to finish cooking without burning the outside.
Storing Leftovers and Reheating Them
Donuts are at their best within a few hours of cooking. If you have extras, let them cool completely before storing.
For food safety, remember that bacteria multiply quickly between 40°F and 140°F, and perishable food left at room temperature for more than two hours should be discarded. Cover leftovers in airtight packaging or sealed containers to keep out bacteria and retain moisture. Refrigerated leftovers can be kept for three to four days, or frozen for three to four months. If you are cooling a large batch, divide it into shallow containers so it chills quickly to 40°F or below.
For texture, refrigeration works against you: cold storage speeds up starch retrogradation, the process that makes baked goods taste stale. If you plan to eat them the next day, an airtight container at room temperature usually gives a better result than the fridge. For longer storage, freezing then reheating in the air fryer at around 350°F for two to three minutes revives the crust better than a microwave, which steams the interior. Planning ahead helps if you want to prep components earlier in the week, much like organizing ingredients for batch cooking savory snacks ahead of time.
Handle raw flour and eggs carefully during cleanup. Wash your hands, bowls, utensils, and countertops after they touch raw dough, and keep raw ingredients separate from anything you will eat without cooking.
Before You Heat Up the Basket
A few habits make the difference between a decent batch and a great one:
- Preheat for a few minutes so the basket is at temperature before the dough goes in.
- Mist the basket outside the appliance, away from the heating element and base.
- Cook in a single layer with space between rings. Batch-cook instead of crowding.
- Flip halfway through for even browning.
- Check doneness by color, feel, and a cut center. Never pull donuts early.
- Glaze while warm, not hot.
- Cool and store leftovers promptly, and refrigerate within two hours.
- Pair with a sweet dipping sauce for serving.
Cook the dough fully, keep your batches small, and glaze while the donuts are still warm. Those three habits cover most of what separates a pale, dense ring from a properly browned one with a coating that actually stays on.




