Cleaning the inside of an air fryer takes about 15 to 20 minutes after the unit cools down. You need warm water, dish soap, a soft sponge, and a damp cloth. The process involves washing the removable basket, wiping the interior walls, and carefully cleaning around the heating element.
Knowing how to clean the inside of an air fryer keeps your food tasting right and stops old grease from smoking during your next meal. Skipping this routine leads to burnt flavors and can shorten the lifespan of the appliance. If you cook fatty foods often, like when you prep crispy chicken wings for the week, grease builds up fast.
A quick wipe-down after every use prevents that buildup from hardening into a stubborn mess.
Supplies for Cleaning Your Air Fryer Interior
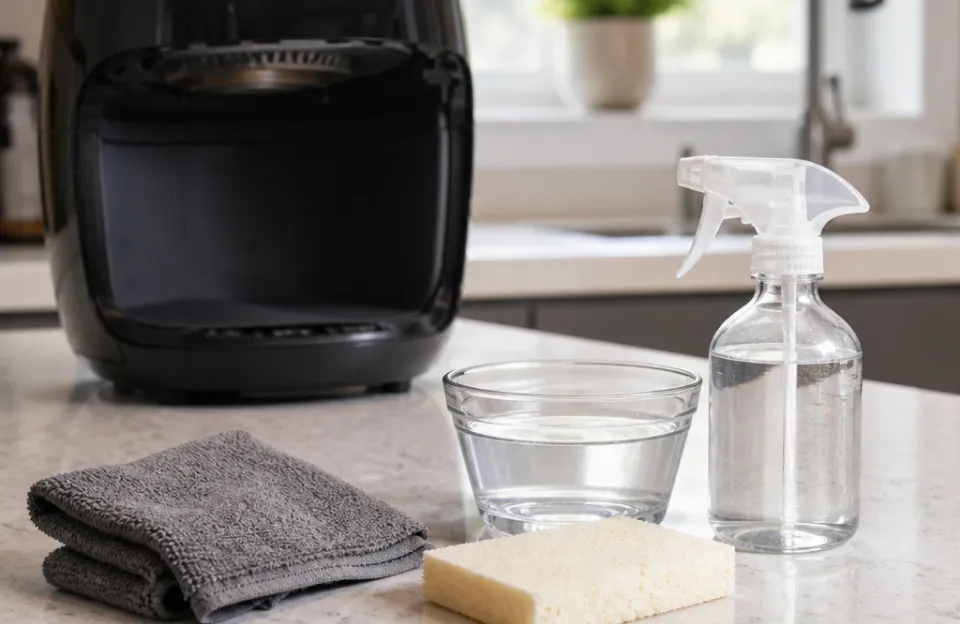
You don't need specialty chemicals to get the job done. Standard kitchen supplies work perfectly and won't damage the nonstick coating inside the machine.
- Warm water
- Mild dish soap
- Soft sponge or microfiber cloth
- Old toothbrush or soft-bristled brush
- Baking soda
- Paper towels
Avoid steel wool, abrasive scrubbing pads, and harsh chemical sprays. These scratch the nonstick surfaces inside the cooking chamber. Once that coating chips, food sticks permanently, and the exposed metal can rust.
Stick to soft materials and gentle soaps. If you have baked-on grease, baking soda mixed with a little water forms a mild paste that lifts grime without scratching. Keep a dedicated small brush, like an old toothbrush, specifically for getting into the tight corners near the fan and heating coil.
Step-by-Step Instructions: How to Clean the Inside of an Air Fryer
Follow these steps in order. Rushing or skipping the cooling phase risks burns or electrical shock.
1. Unplug the Machine and Let It Cool Completely
Pull the plug from the wall outlet immediately after cooking. Leave the basket out to let the hot air escape faster. Wait at least 30 minutes before touching the interior walls.
The heating element gets incredibly hot, and the metal chamber retains that heat long after the power cuts off. Touching it too soon causes severe burns. Cooling also prevents thermal shock if you introduce cold water to hot metal parts.
2. Remove and Wash the Basket and Crisper Plate
Take out the basket and the crisper tray or grate. Wash them in the sink with warm, soapy water. Use a soft sponge to wipe away oil and food particles.
If grease is baked on, let the basket soak in hot, soapy water for 10 to 15 minutes first. This loosens the stuck-on bits. Rinse thoroughly and dry completely with a towel before putting them back.
Leaving moisture in the basket causes rust over time. While most baskets are dishwasher safe, hand washing preserves the nonstick coating much longer. Frequent dishwasher cycles degrade the finish.
3. Wipe Down the Interior Walls and Floor
Dip a damp microfiber cloth or soft sponge into warm, soapy water. Wring it out well so it's damp, not dripping. Wipe the inside walls, the floor of the cooking chamber, and the ceiling area around the fan.
Work in circular motions to lift grease splatters. Pay close attention to the lower corners where oil pools and drips down during cooking. After wiping with soap, take a fresh cloth dampened only with plain water.
Wipe the entire interior again to remove any soapy residue. Soap left behind will burn and smoke the next time you turn the machine on, ruining whatever you're cooking.
4. Clean Around the Heating Element Safely
The heating element sits at the top of the interior chamber, usually behind a metal guard or directly exposed above the food. Flip the machine upside down or tilt it back slightly to see it clearly. Take a damp cloth or a soft-bristled brush and gently wipe the coils.
Don't press hard. The element is fragile, and bending it can break the internal wiring. If there is caked-on grease, dip an old toothbrush in a paste made of baking soda and water.
Gently scrub the affected spots on the coil. Wipe away the paste with a barely damp cloth. Never pour water directly onto the heating element or submerge the main unit.
Water entering the electrical housing causes short circuits and creates a serious fire hazard.
5. Dry Every Surface Before Reassembling
Moisture is the enemy of kitchen electronics. Take a dry paper towel or a clean microfiber cloth and wipe down the interior walls, the ceiling, and the heating element area. Leave the basket out and the drawer open for another 10 to 15 minutes to let ambient air evaporate any hidden dampness.
Putting wet parts back together traps humidity inside the sealed chamber. This promotes mold growth and accelerates rust on the metal screws holding the interior panels. Only reassemble the machine when everything feels completely dry to the touch.
Dealing With Stubborn Grease and Burnt-On Food
Sometimes a standard wipe-down doesn't cut it. If you recently cooked something heavily battered or very fatty, like when you figure out timing for thick-cut bacon, grease spatters everywhere and bakes onto the walls under high heat.
Make a thick paste using three parts baking soda to one part water. Apply it directly to the stubborn spots inside the chamber. Let it sit for 15 to 20 minutes.
The alkaline nature of the baking soda breaks down the polymerized fats. Scrub gently with a soft brush, then wipe clean with a damp cloth.
For really tough odors or heavy carbon buildup, place a small oven-safe bowl filled with water and a few lemon slices inside the basket. Run the air fryer at 350°F for about five minutes. The steam loosens the baked-on grime and neutralizes lingering smells.
Turn off the machine, let it cool slightly, and wipe the softened grease away easily.
Never use oven cleaner inside an air fryer. Oven cleaners contain lye and other caustic chemicals designed for heavy-duty ovens. They strip the nonstick coating instantly and leave toxic residues that contaminate your food.
Mild dish soap and baking soda handle 99% of interior messes safely.
Differences Between Basket Models and Oven-Style Units
Not all air fryers share the same interior layout, which changes how you approach the cleaning process.
| Feature | Basket-Style Air Fryers | Oven-Style / Toaster Air Fryers |
|---|---|---|
| Interior Access | Deep, narrow drawer opening | Wide front door, easy reach |
| Heating Element Location | Top of the deep chamber, often guarded | Top and sometimes bottom elements |
| Removable Parts | Basket and crisper plate | Wire racks, drip trays, rotisserie spit |
| Grease Accumulation | Pools at the bottom of the drawer | Splatters across glass doors and side walls |
| Cleaning Focus | Reaching the ceiling coil through a small hole | Wiping glass, cleaning multiple rack levels |
Basket-style models require more patience because you're reaching through a small opening to wipe the upper walls and the heating element. Oven-style models give you full access when you open the door, but they have more surface area to cover, including glass panels that show every fingerprint and grease splatter. For oven styles, pull out all the wire racks and wash them in the sink separately.
Wipe the interior walls, the top heating rods, and the glass door with a damp soapy cloth.
If you own a specific brand, always check the manual. For instance, owners of a Ninja AF101 model should follow the manufacturer's specific guidance regarding the nonstick coating care. Different brands use different grades of nonstick materials, and what works for one might void the warranty on another.
What Happens When You Skip Regular Cleaning
Ignoring the interior leads to compounding problems. Leftover oil heats up past its smoke point during the next use. This fills your kitchen with acrid smoke and coats your fresh food in a bitter, burnt flavor.
Over time, carbonized grease acts as an insulator on the heating element. The machine has to work harder and run hotter to push air through the blocked element, which strains the motor and increases electricity consumption.
A dirty interior also becomes a breeding ground for bacteria if food particles remain trapped in the crevices. The USDA warns against leaving perishable food residues at room temperature, as bacteria multiply rapidly between 40°F and 140°F. Wiping out crumbs and grease after cooking eliminates this risk entirely.
Furthermore, built-up grease near the high-speed fan can cause the blades to become unbalanced. This results in loud rattling noises and eventually burns out the fan motor. Keeping the upper chamber clean protects the mechanical components just as much as the cooking surfaces.
Knowing how these appliances evolved helps explain why modern units pack such powerful heating elements into small spaces, making regular maintenance even more critical than older, slower convection ovens.
Mistakes That Damage the Nonstick Coating
People ruin their air fryers by trying to clean them too aggressively. Here are the most common errors to avoid.
- Using metal utensils to scrape off food. Metal spatulas or forks scratch the nonstick layer instantly. Always use silicone, wood, or plastic tools to dislodge stuck food before washing.
- Plunging a hot basket into cold water. Thermal shock warps the metal base and causes the nonstick coating to bubble and peel off in sheets. Always wait for parts to reach room temperature.
- Spraying aerosol cooking sprays directly inside. Commercial aerosol sprays contain propellants like soy lecithin that bake onto the nonstick surface and create a sticky film that soap cannot remove. Use a pump-action oil mister or brush oil on the food itself instead.
- Scrubbing the heating element with a hard brush. Stiff bristles can snap the delicate nichrome wire inside the coil or knock loose the protective ceramic mounts holding it in place.
- Submerging the main body in water. The exterior housing contains the motor, wiring, and control boards. Water intrusion destroys the appliance permanently and creates a severe electrocution hazard.
If you accidentally scratch the interior coating, stop using abrasive tools immediately. Minor scratches won't stop the machine from working, but deep gouges expose the aluminum beneath. Food will stick relentlessly to those spots.
In practice, replacing the basket is cheaper than replacing the whole unit if the damage is isolated to the removable parts.
Cleaning Frequency Based on What You Cook
How often you need to deep clean the inside of an air fryer depends entirely on your menu. A light wipe-down with a damp paper towel should happen after every single use. But a full, soapy deep clean follows a different schedule.
If you mostly cook vegetables or lean proteins, like when you time out zucchini slices, a thorough interior cleaning once a week is plenty. Vegetables release very little fat, so the walls stay relatively clean.
If you cook fatty meats daily, such as when you prepare salmon fillets or breaded wings, grease splatters constantly. You need a full deep clean every two to three days. The fish oils and rendered animal fats polymerize quickly under high heat, turning into a hard, varnish-like layer that resists basic wiping.
For occasional users who run the machine once or twice a week, a deep clean once a month prevents odors from settling in. Just make sure to empty the crumb tray or wipe the bottom of the basket after each use so debris doesn't attract pests while the unit sits in storage.
Frequently Asked Questions
Can I use vinegar to clean the inside of my air fryer?
Yes, white vinegar works well for cutting grease and removing odors. Mix equal parts water and white vinegar in a spray bottle. Lightly mist the interior walls, avoiding the heating element directly.
Wipe it down with a damp cloth after letting it sit for a few minutes. Don't mix vinegar with baking soda inside the machine, as the foaming reaction makes a mess in the tight space.
Is it safe to put the air fryer basket in the dishwasher?
Most manufacturers state the basket and crisper plate are top-rack dishwasher safe. However, the harsh detergents and high heat in dishwashers degrade the nonstick coating significantly faster than hand washing. To extend the life of your basket, wash it by hand with warm, soapy water and a soft sponge.
Save the dishwasher for occasions when you are short on time.
Why does my air fryer smell like burning plastic after I clean it?
This usually happens if soap residue remains on the heating element or interior walls. When the machine heats up, the leftover soap burns and produces a chemical smell. Unplug the cooled unit and wipe the interior thoroughly with a cloth dampened only with plain water.
Run the empty machine for two minutes afterward to burn off any remaining moisture.
How do I get rid of a strong fish smell inside the chamber?
Fish oils cling stubbornly to the nonstick surfaces and the fan area. Wipe the interior with a cloth soaked in lemon juice or white vinegar. Alternatively, place a small oven-safe dish with water and half a lemon inside the basket.
Run the fryer at 350°F for five minutes. The citrus steam neutralizes the odor compounds. Follow up with a standard soapy wipe-down.
Can I use a magic eraser on the interior walls?
Melamine foam sponges, commonly known as magic erasers, act as ultra-fine sandpaper. While they remove stains effectively, they also strip away the nonstick coating on the interior walls and the basket. Avoid using them inside the cooking chamber.
Stick to soft microfiber cloths, sponges, and baking soda paste for safe stain removal.
Should I oil the inside of the air fryer after cleaning it?
No. Never coat the interior walls or the heating element with oil after cleaning. The machine relies on rapid air circulation, and adding extra oil to the chamber creates excess smoke and fire hazards.
Only apply oil directly to the food you are cooking, or lightly brush the basket right before adding ingredients if your recipe requires it.
Keeping Your Machine Ready for the Next Meal
Learning how to clean the inside of an air fryer properly saves money on replacement parts and keeps your food tasting fresh. The entire process relies on gentle tools, mild soap, and patience while the unit cools down. Never rush the cleaning steps, and never force hardened grease off with sharp objects.
Consistent, light maintenance after every use means you rarely have to tackle heavy, baked-on messes. Treat the nonstick surfaces with respect, keep water away from the electrical housing, and your machine will run reliably for years.