Air fryer frozen vegetables cook best at 400°F for 12 to 18 minutes when tossed with oil and spread in a single layer. You do not need to thaw them first. Cooking from frozen preserves texture and prevents the mushy consistency that often happens with other methods.
Most varieties reach peak crispness around the 15-minute mark if you shake the basket halfway through.
This method works because the air fryer’s rapid convection evaporates surface moisture faster than a standard oven can. That quick evaporation is what creates browning instead of steaming. This guide covers the specific timing adjustments for different vegetable types, seasoning strategies that stick without clumping, and how to avoid the most common texture failures.
We also address food safety standards for reheating previously cooked frozen produce versus raw frozen packs.
Why High Heat and Oil Matter for Frozen Produce
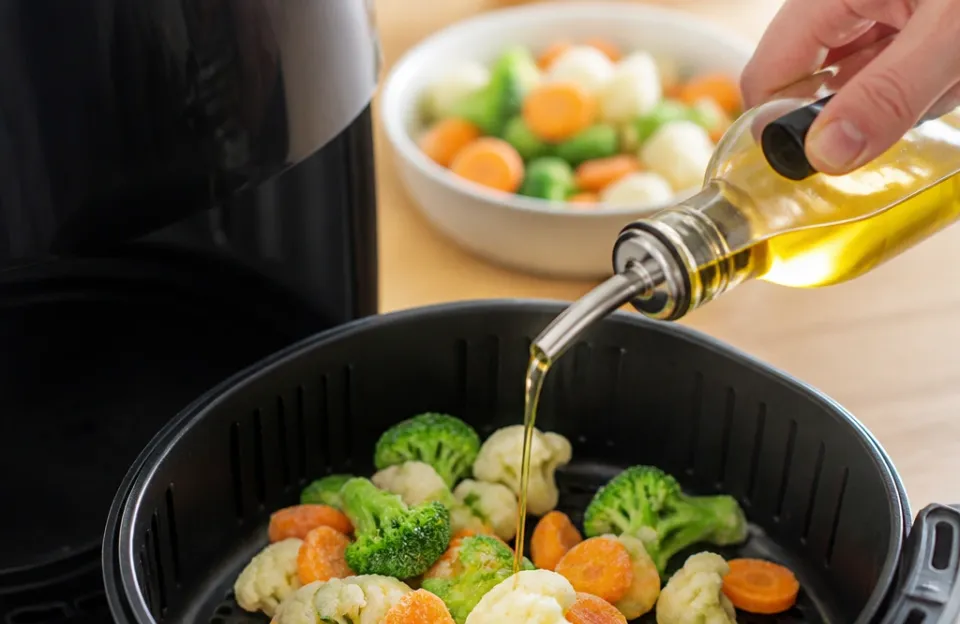
Frozen vegetables contain significant ice crystals that must sublimate or evaporate before browning occurs. If the temperature is too low, the ice melts into liquid water and soaks the vegetable tissue before the exterior can crisp. Setting your machine to 400°F or higher provides enough thermal energy to flash off that moisture.
Lower temperatures simply prolong the wet phase.
Oil plays a mechanical role here beyond flavor. It acts as a heat transfer medium between the hot air and the cold vegetable surface. Without fat, the dry circulating air dehydrates the exterior into a tough, leathery skin rather than a crispy one.
A light coating also helps seasonings adhere and promotes even Maillard reaction browning across irregular surfaces.
Managing Ice Crystal Sublimation
The transition from solid ice directly to vapor requires consistent high heat. Crowding the basket disrupts this process by trapping steam. When vegetables are piled high, the center mass stays below the boiling point while the outer edges burn.
Spacing allows the convective current to reach every surface. Batch cooking yields better results than forcing everything in at once.
Surface Area and Cut Size Variables
Pre-cut frozen mixes vary wildly in density and size. Small peas or corn kernels have high surface-area-to-volume ratios and cook fast. Large broccoli florets or cauliflower chunks retain internal cold spots longer.
Dense root vegetables like carrots or potatoes sit somewhere in between. Adjusting time based on physical dimensions matters more than following package instructions designed for microwave or boil-in-bag preparation.
Timing Adjustments by Vegetable Density and Type
Not all frozen vegetables follow the same clock. Categorizing by density gives you a reliable starting point that you can adjust based on your specific machine's wattage and airflow. These ranges assume a 400°F setting and a single-layer arrangement.
| Vegetable Category | Examples | Time Range (400°F) | Texture Goal |
|---|---|---|---|
| Soft / Small | Peas, Corn, Edamame | 8–12 Minutes | Warm, Lightly Blistered |
| Medium Florets | Broccoli, Cauliflower, Green Beans | 12–16 Minutes | Crisp-Tender, Browned Edges |
| Dense / Root | Carrots, Potatoes, Butternut Squash | 16–22 Minutes | Fork-Tender Interior, Crispy Exterior |
| Leafy / Thin | Spinach, Kale Chips, Zucchini | 6–10 Minutes | Dehydrated-Crisp, Not Burnt |
Soft vegetables need less time because they lack the structural density to withstand prolonged heat. Overcooking peas turns them into hard pellets. Check these early and frequently.
They benefit from a slightly lower rack position if your unit has adjustable heights to reduce direct top-element scorching.
Medium florets represent the standard use case. Broccoli and cauliflower develop excellent nutty flavors when the edges get dark brown. Green beans should look shriveled and blistered rather than bright green and limp.
Shake these vigorously at the 8-minute mark to rotate pieces from the center to the perimeter.
Dense roots require patience. The interior takes time to soften even at high heat. Cutting these uniformly before freezing helps, but commercial bags often contain uneven chunks.
Test doneness with a fork tip rather than relying solely on visual cues. If the outside browns too fast before the inside softens, drop the temperature to 375°F for the final five minutes.
Leafy greens are tricky because they contain thin cell walls that burn instantly. Use these only if you want chip-like texture. Watch them constantly after minute six.
They go from perfect to ash in under sixty seconds. Tossing them with oil is non-negotiable here to distribute heat evenly across delicate leaves.
Seasoning Strategies That Stick Without Burning
Adding salt and spices at the wrong time ruins both flavor and texture. Salt draws out moisture through osmosis. If applied before cooking, it pulls water to the surface and inhibits crisping.
Always salt immediately after the vegetables come out of the basket while residual heat helps the crystals dissolve and adhere.
Dry spices behave differently. Paprika, garlic powder, and cumin can burn and turn bitter at 400°F over 15 minutes. Mix these into your oil before tossing the vegetables, or add them during the last three minutes of cooking.
The oil buffers the spice particles from direct radiant heat. Fresh herbs like parsley or basil should always be added post-cook to preserve color and volatile aromatics.
Acid and Umami Finishers
Lemon juice, vinegar, and soy sauce add brightness but introduce liquid. Adding these before cooking re-wets the surface. Drizzle them over the finished vegetables right before serving.
Nutritional yeast, grated parmesan, or toasted sesame seeds add savory depth without moisture. These toppings also provide textural contrast against the crispy vegetable base.
Oil Selection for High-Heat Convection
Smoke point dictates which oils work safely. Extra virgin olive oil smokes around 375°F, making it risky for extended 400°F runs. Avocado oil, refined coconut oil, or light olive oil handle the heat cleanly.
Neutral oils let the vegetable flavor dominate. Infused oils add complexity but check their smoke points first. Spray oils often contain lecithin or propellants that leave gummy residues on baskets.
Pouring and tossing manually gives better coverage and avoids buildup.
Avoiding Sogginess and Uneven Cooking
Sogginess almost always traces back to overcrowding or insufficient preheating. The basket needs hot air circulation on all sides. Filling past the halfway line creates a steam pocket in the center.
Cook in batches if necessary. The second batch cooks faster because the basket retains thermal mass from the first run.
Preheating matters more for frozen foods than fresh ones. Dropping frozen vegetables into a cold basket drops the internal air temperature significantly. The recovery time extends the total cook and increases sogginess risk.
Run the empty unit at target temperature for three to five minutes before loading. This ensures immediate searing contact.
Shaking frequency affects uniformity. One shake at the midpoint is the minimum. For dense mixes or full baskets, shake every five minutes.
This redistributes pieces that have settled into cool zones. Use tongs or silicone-tipped tools to avoid scratching nonstick coatings. Never shake while the basket is inserted; pull it out fully to prevent hot oil splatter and ensure safe handling.
Food Safety Standards for Frozen Vegetable Handling
The USDA recommends cooking frozen vegetables to an internal temperature of 165°F when reheating previously cooked products or when preparing items labeled "ready to cook." Raw frozen vegetables intended for further preparation carry different labeling. Check the package carefully. Misunderstanding this distinction causes either unsafe consumption or unnecessary overcooking.
Listeria monocytogenes remains a concern in frozen produce because freezing does not kill bacteria; it only halts growth. Thawing at room temperature allows pathogens to multiply in the danger zone. Cooking directly from frozen eliminates this risk window entirely.
If you must thaw for recipe reasons, do so in the refrigerator and cook within 24 hours.
Using a reliable instant-read thermometer removes guesswork. Insert the probe into the thickest piece in the center of the batch. Digital thermometers give readings in seconds, minimizing heat loss during checking.
While visual cues work for experienced cooks, temperature verification is essential for vulnerable populations or when trying new vegetable types. Proper handling from freezer to plate ensures both safety and quality.
For detailed guidance on safe food storage and handling practices, refer to resources from the USDA Food Safety and Inspection Service. Their guidelines cover freezing, thawing, and minimum internal temperatures for various food categories. Following established standards protects against foodborne illness regardless of cooking method.
Pairing Vegetables With Proteins for Complete Meals
Vegetables alone make a side dish. Combining them with protein creates a balanced meal using the same appliance. Timing coordination is the challenge.
Chicken wings, for example, typically need 20 to 25 minutes at 400°F. Start the wings first, then add denser vegetables like carrots or potatoes when ten minutes remain. Softer vegetables go in during the final eight minutes.
Marinated proteins release juices that can steam nearby vegetables. Keep them separated using dividers or cook sequentially. If space allows, place proteins on the bottom rack and vegetables on top so dripping fat doesn't saturate the produce.
Alternatively, cook the protein first, rest it covered, then use the residual heat and rendered fat to finish the vegetables quickly.
Garlic parmesan preparations pair exceptionally well with roasted broccoli or cauliflower. The savory cheese and aromatic garlic complement the nutty char from high-heat convection. Honey garlic glazes work better with sweeter vegetables like carrots or sweet potatoes.
The sugar caramelizes alongside the natural vegetable sugars. Acidic marinades match well with green beans or asparagus to cut through richness.
Meal prep applications benefit from this method's speed and consistency. Cook multiple vegetable types in succession, cooling each on sheet pans before combining. Store in airtight containers for up to four days.
Reheat briefly to restore crispness. Having pre-cooked components ready makes weeknight assembly fast. Understanding proper storage duration and reheating methods prevents waste and maintains quality throughout the week.
Consider calorie density when planning portions. Vegetables add volume and fiber without significant calories. Balancing richer preparations with plain or lightly seasoned vegetables keeps meals satisfying without heaviness.
Tracking nutritional content helps maintain dietary goals while enjoying varied flavors. Knowing approximate calorie counts for common preparations supports informed portion decisions.
Troubleshooting Common Texture Failures
Burnt edges with raw centers indicate excessive heat or insufficient shaking. Reduce temperature by 25°F and increase agitation frequency. Smaller cuts cook more evenly than large chunks.
Consider chopping oversized pieces before cooking next time. Uniform sizing prevents the extremes of burnt and raw existing in the same batch.
Leathery, chewy texture means dehydration without browning. This happens when temperature is too low or oil is missing. Increase heat and ensure adequate fat coating.
Some vegetables naturally have tougher skins. Blanching before freezing helps, but you cannot reverse this after purchase. Accept the texture limitation or choose different varieties next time.
Seasoning falls off because the surface was too wet or oily when applied. Pat excess moisture before tossing if vegetables seem icy. Apply dry seasonings to oiled vegetables, not bare ones.
Post-cook salting adheres better to hot, slightly moist surfaces. Experiment with application timing to find what works for your preferred spice blends.
Basket sticking occurs when nonstick coating degrades or oil sprays accumulate residue. Clean thoroughly after each use. Avoid aerosol sprays with additives.
Line with parchment paper rated for air frying if sticking persists. Replace baskets when coating flakes visibly. Damaged nonstick surfaces pose health risks and worsen performance over time.
Frequently Asked Questions
Can I cook mixed vegetable medleys without some pieces burning?
Mixed bags contain varying densities that cook at different rates. Separate components by type if possible, or accept that some pieces will be softer than others. Adding the bag contents in stages helps.
Put denser vegetables in first, then add softer ones partway through. Stirring frequently also reduces hot spots that cause selective burning.
Do I need to preheat my air fryer for frozen vegetables?
Yes, preheating produces superior results. A hot basket initiates immediate surface drying and browning. Skipping this step extends cook time and increases sogginess risk.
Three to five minutes at target temperature is sufficient. The small energy cost pays off in texture quality and reduced total cooking duration.
Is it safe to eat air fried frozen vegetables that weren't fully heated through?
Previously cooked frozen vegetables must reach 165°F internally per USDA guidelines. Raw frozen vegetables labeled "ready to cook" also require this temperature. Vegetables labeled "raw" or "uncooked" for further preparation follow different rules but still benefit from thorough heating for palatability.
When uncertain, verify with a digital thermometer rather than guessing based on appearance.
Why do my vegetables taste bitter after air frying?
Bitterness usually comes from burnt spices or overcooked cruciferous compounds. Add delicate spices like garlic powder or paprika during the last few minutes only. Reduce temperature if browning happens too fast.
Some vegetables naturally develop bitter notes when heavily charred. Pull them earlier next time or balance with acid and salt to mask mild bitterness.
How do I clean baked-on residue from the basket after cooking vegetables?
Soak the basket in warm soapy water for fifteen minutes to loosen stuck bits. Use a soft sponge or nylon brush to protect nonstick coating. Avoid steel wool or abrasive cleaners.
For stubborn residue, make a paste of baking soda and water, apply, let sit, then scrub gently. Regular cleaning prevents buildup that causes future sticking and smoking.
Getting Consistent Results Every Time
Mastering air fryer frozen vegetables comes down to respecting moisture dynamics and heat distribution. High temperature, adequate oil, proper spacing, and timely agitation solve most problems. Treat timing guidelines as starting points, not absolutes.
Your specific unit's airflow pattern and your preferred texture dictate the final adjustments.
Keep notes on what works for your favorite vegetables. Record temperature, time, oil amount, and basket load size. Small tweaks compound over repeated attempts.
What fails once might succeed with a minor adjustment next time. Building this personal reference eliminates guesswork and builds confidence.
The convenience of frozen produce combined with air fryer speed makes healthy sides accessible on busy nights. Quality doesn't require fresh ingredients or lengthy prep. Understanding the science behind the method transforms mediocre results into genuinely good food.
Apply these principles consistently and the appliance earns its counter space through reliable performance.