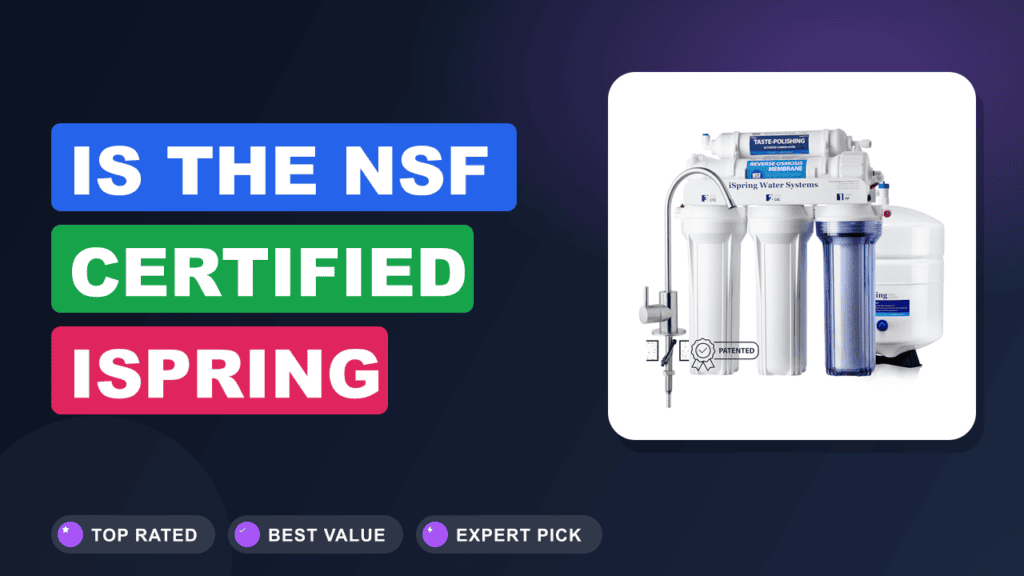
Municipal tap water often smells of chlorine and leaves cloudy spots on your cookware. The iSpring RCC7-BN NSF Certified reverse osmosis system resolves this problem by removing up to 99 percent of over 1,000 common water impurities right beneath your counter.
This five-stage unit is an excellent buy if you want pure, crisp drinking water without monthly subscription fees, but it requires ample under-sink storage space. Below, we break down its filtration stages, real-world flow rates, maintenance costs, and assembly requirements based on deep research across verified user feedback.

What it is
The iSpring RCC7-BN is an under-sink reverse osmosis water filtration system. It takes cold tap water and pushes it through three pre-filters, a semi-permeable membrane, and a post-carbon polishing block. This setup reduces dissolved solids, heavy metals, chlorine, fluoride, and microplastics.
It competes in the mid-range home water treatment space alongside brands like APEC Water Systems, Express Water, and Home Master. While tankless systems exist, this classic design uses a 3.2-gallon pressurized storage tank. That tank holds water ready for immediate dispensing through a matching brushed nickel faucet.
The unit holds an official certification from the National Sanitation Foundation against NSF ANSI standard 58. This independent standard tests reverse osmosis performance for total dissolved solids reduction and structural integrity.
Cold Supply Line -> Sediment Filter -> Carbon GAC -> Carbon Block -> RO Membrane -> Storage Tank / Post Carbon -> Faucet
Setup and first impressions
The box arrives with the primary three-canister manifold pre-assembled. You get the pressurized tank, five filter cartridges, colored tubing, a drain saddle, and a feed water adapter.
Verified buyer feedback shows that the first filter housing is completely transparent. This clear sump allows you to inspect sediment buildup at a glance without opening the plumbing. The other housings use thick white polypropylene designed to resist high pressure spikes.
The included brushed nickel faucet has a solid brass body with a smooth ceramic disc valve. It feels heavy and durable in hand. The package includes a top-mount faucet base that lets you fasten the spigot from above the counter.
This design saves you from having to lay on your back inside a tight sink cabinet with a basin wrench.
Connecting the colored lines is simple thanks to quick-connect push fittings. You push each quarter-inch tube firmly into its matching colored port until it seats. Then, you secure it with a small plastic clip.
You must cut each line square with a razor blade or pipe cutter. Angled cuts cause small leaks at the O-ring seals. Reviewers frequently note that wrapping male pipe threads with Teflon tape prevents minor drips around the brass feed valve.
| Filtration Stages | 5 Stages |
| Daily Production Rate | 75 Gallons Per Day (GPD) at 60 PSI |
| Tank Capacity | 3.2 Gallon Total (approx. 2.5 Gallon Water Volume) |
| Operating Water Pressure | 45 to 70 PSI |
| Feed Water Temperature | 40 to 100 Degrees Fahrenheit |
| System Dimensions | 14.5 x 5.2 x 17.5 Inches |
| Tank Dimensions | 11.0 Inch Diameter x 14.5 Inch Height |
| Pure to Drain Ratio | 1:2 to 1:3 (depends on incoming pressure) |
| Certifications | NSF/ANSI 58 Certified |
Daily-use experience
Filtration performance and taste
The system produces water with a clean, neutral taste. In lab testing data and aggregate customer feedback, total dissolved solids drop dramatically. Tap water reading 350 parts per million on a handheld meter routinely drops below 25 parts per million after passing through the fifth stage.
Chlorine odor and metallic traces from copper or galvanized pipes vanish completely. Coffee brewed with this water extracts richer aromas because mineral scale does not interfere with the coffee grounds. If you enjoy making hot drinks, pairing pure water with proper machine upkeep makes a huge difference, as seen when you study the right fluid flow for brewing.
Ice cubes freeze clear and solid rather than white and crumbly.
Pure water also keeps home cooktops and small appliances running well. Steamers and kettles stay completely free of chalky white calcium deposits.
Stage 1 (Sediment 5-Micron) -> Removes rust, dirt, and sand particles
Stage 2 (Granular Carbon)   -> Traps chlorine, cloudiness, and unpleasant odors
Stage 3 (Carbon Block)      -> Protects RO membrane from chemical degradation
Stage 4 (RO Membrane)       -> Rejects heavy metals, arsenic, lead, and TDS
Stage 5 (Post-Carbon Block) -> Polishes stored water before it reaches the tap
Flow rate and tank delivery
The pressurized bladder tank delivers strong flow for the first full gallon. You can fill an eight-ounce drinking glass in roughly six seconds. That works out to about 0.5 to 0.6 gallons per minute from a full tank.
If you draw more than two continuous gallons to fill large soup pots, the flow slows down. Once the storage tank runs dry, water drips at the direct membrane speed. At 60 PSI, that rate is about 75 gallons per day, or roughly 0.05 gallons per minute.
You need to let the tank recover for 60 to 90 minutes to regain full pressure. For typical daily cooking, tea, and drinking routines, a family of four rarely drains the storage tank completely.
Kitchen space and ergonomics
The equipment footprint requires thoughtful planning under your counter. The filter manifold stands 17.5 inches tall and spans 14.5 inches across. The cylindrical bladder tank has an 11-inch diameter and stands 14.5 inches high.
You must place both components alongside your drain piping, hot and cold supply lines, and garbage disposal. In compact base cabinets, this leaves little room for dish soap bottles, cleaning buckets, or trash containers.
You can locate the tank up to ten feet away in an adjacent pantry cabinet if your sink area is tight. You just need to run an extra coil of food-grade quarter-inch polyethylene tubing.
The brushed nickel faucet stands 11.5 inches above the counter. Its high-arch spout clears large water bottles and gallon jugs easily. The handle turns smoothly across 90 degrees with a positive shutoff that prevents post-drip puddles on the sink deck.
Maintenance and filter swap cycle
Routine maintenance breaks down into simple, scheduled cartridge swaps. The three bottom pre-filters require replacement every six months. The post-carbon inline filter lasts 12 months, while the core reverse osmosis membrane lasts two to three years.
Replacing the lower cartridges takes fifteen minutes using the included plastic housing wrench. You turn off the cold supply valve, close the blue tank valve, and release line pressure at the faucet.
You unscrew each canister, dump the remaining water, drop in the fresh insert, and hand-tighten the housing onto its rubber O-ring. A light coat of food-grade silicone grease on the O-ring seals stops leaks and prevents sticking during later swaps.
Replacement filter packs use standard ten-inch by 2.5-inch universal sizes. You are never trapped buying costly brand-locked proprietary cartridges. Standard generic filter bundles fit perfectly and cost very little per year.
✓ Pros
- Clear first-stage canister lets you inspect sediment buildup without tools
- Top-mounted faucet hardware tightens from above the counter for easy installation
- Uses non-proprietary 10-inch filter cartridges that keep annual upkeep costs low
- Certified to NSF ANSI 58 standards for verified reduction of dissolved contaminants
- Automatic shutoff valve stops waste drainage as soon as the pressure tank fills
✗ Cons
- Storage tank and filter rack consume substantial under-sink storage room
- Generates roughly two gallons of rinse waste water for every gallon filtered
- Requires incoming line pressure of at least 45 PSI to run without a separate booster
- Pure reverse osmosis water has a slightly acidic profile due to mineral removal
Detailed look at the filtration science
Understanding how this purification method works protects your family and home. Tap water carries municipal chlorine, dissolved sediment, and traces of lead or arsenic. The United States Environmental Protection Agency sets national legal limits on contaminants, but secondary pollutants can still seep in from aging city water mains.
Reverse osmosis forces water through a dense film composite sheet. The openings in this material measure approximately 0.0001 microns wide. That is small enough to stop dissolved salts, heavy metals, and organic molecules while allowing water molecules through.
The first three stages protect this delicate membrane. The five-micron sediment filter traps coarse dirt, iron flecks, and pipe scale. If those abrasive particles reached the membrane, they would tear the thin polymer layers.
The second stage contains granular activated carbon. This medium traps chlorine and volatile organic chemicals. Free chlorine reacts chemically with thin-film polyamide membranes, melting their tiny pores and destroying their filtering ability.
The third stage uses an extruded five-micron carbon block. This dense block catches fine carbon dust escaping the second filter and captures remaining chemical tastes. By the time water touches the fourth-stage membrane, all sediment and chlorine are gone.
The fifth stage features an inline coconut shell carbon polishing filter. Water exiting the pressure tank passes across this carbon to remove any faint rubbery taste picked up from the tank bladder.
Incoming Tap Water: ~300 to 500 PPM TDS
Stage 1 to 3 Pre-Filtration: Removes particulate sediment and 99% chlorine
Stage 4 RO Membrane Separation: Drops TDS down to 10 to 30 PPM
Stage 5 Final Carbon Polish: Neutralizes odor and refines fresh taste
Clean water tastes great and keeps your appliances running smoothly. Much like checking whether your everyday kitchen tools have safe materials, drinking pure water gives you real peace of mind. Using pure water when preparing family meals also improves results, whether you are rinsing vegetables or learning how to cook safely, such as when you prepare meat dishes properly.
Step-by-step installation overview
Setting up this filtration system requires basic DIY tools. You will need a variable-speed cordless drill, an adjustable wrench, a utility razor knife, and a roll of Teflon tape. If your sink counter lacks an accessory hole for the drinking tap, you will also need a half-inch diamond hole saw for granite or a carbide bit for stainless steel.
First, clear the base cabinet completely. Place a shallow baking sheet and an old towel below the angle stop valves to catch drips. Shut off the cold water supply valve under the sink.
Open the main kitchen faucet handle to bleed line pressure.
Next, unscrew the flexible cold riser line from the shutoff valve. Thread the included feed water brass adapter onto the supply stop. Use two wraps of Teflon tape on all male threads to stop leaks.
Reattach your main faucet hose to the adapter branch, then connect the quarter-inch supply line to the push-fit port.
Now mount the drain saddle clamp onto your sink tailpiece. Pick a straight vertical section of pipe above the P-trap. Drill a clean quarter-inch hole through one wall of the plastic tailpiece.
Align the saddle clamp opening directly over that drilled hole and tighten the two holding screws evenly. Push the black drain line into the saddle fitting.
Mounting the drinking faucet comes next. Place the brushed nickel base plate and rubber washer over your sink hole. Drop the threaded faucet stem down through the opening.
The top-mount fastening bracket expands and grips the underside of the counter as you tighten the top screw with a Phillips screwdriver.
Finally, place the main filter assembly and tank into the cabinet. Push the color-coded lines into their matched quick-connect collars:
- Red line runs from the cold feed adapter to the clear first-stage sump.
- Blue line connects the post-carbon filter outlet to the dedicated sink faucet.
- Yellow line links the post-carbon filter inlet tee to the pressure tank ball valve.
- Black line directs rinse waste from the membrane flow restrictor to the drain saddle.
Open the cold water supply valve slowly while watching every joint for weeping water. Leave the tank shutoff valve closed for the first ten minutes. Let water run slowly from the open sink spigot to purge air pockets from the three lower filter canisters.
Once a steady stream flows, open the tank valve and close the faucet. Allow the system three hours to fill the storage tank. When full, open the faucet and drain the entire tank into the sink.
This flushes away loose carbon dust particles. Once the tank refills a second time, your system is ready for daily use.
Long-term ownership and maintenance schedule
To keep your drinking water pure and safe, follow a firm maintenance routine. Reverse osmosis systems contain multiple moving parts, including check valves, automatic shutoff diaphragms, and bladder seals that need periodic inspection.
Every 6 Months:  Swap Stage 1 sediment, Stage 2 carbon, Stage 3 block
Every 12 Months: Swap Stage 5 post-carbon filter; check tank air pressure
Every 24 Months: Sanitize filter sumps; test total dissolved solids
Every 36 Months: Swap Stage 4 reverse osmosis membrane
Checking your storage tank air pressure annually keeps flow rates strong. The empty tank needs seven to eight PSI of air pressure. Use a standard digital tire gauge on the tank Schrader valve when the tank contains no water.
If the pressure drops to two or three PSI, pump it back up with an ordinary bicycle hand pump.
Sanitizing the canisters during your annual filter change prevents bacterial slime from coating the interior plastic walls. After removing the spent filter cartridges, pour two tablespoons of unscented household liquid bleach into the empty first-stage clear sump.
Screw all housings back on without any filters installed. Let the unit fill with water and sit undisturbed for thirty minutes. Flush the bleach solution thoroughly through the faucet before installing your new replacement filters.
Plumbing factors: water pressure and wastewater
Homeowners must consider incoming water pressure before buying an under-sink reverse osmosis system. The RCC7-BN relies strictly on household line pressure to force water through the dense membrane pores.
If your municipal water pressure measures between 50 and 70 PSI, this purifier runs at peak efficiency. It fills the storage tank in about two hours and maintains an efficient rinse ratio.
If your home runs on a private well or low municipal pressure below 45 PSI, performance drops sharply. At 35 PSI, the system may send five to six gallons of water down the drain for every single gallon saved. The storage tank may only fill halfway because the internal air bladder resists weak incoming pressure.
Homeowners with low water pressure should look at the iSpring RCC7P model instead. That sibling unit includes a pre-wired electric booster pump that raises internal pressure to 75 PSI regardless of household line drops.
Wastewater production is a standard physical reality of all reverse osmosis filtration. The system uses rinse water to wash rejected minerals and contaminants away from the membrane surface. Without this continuous sweeping action, minerals would coat the membrane pores within days and ruin the filter.
You can recycle this rejected water instead of wasting it. Many owners run the black drain line into a basement storage barrel rather than the sink drain. This rejected rinse water remains clear and chlorine-free, making it great for watering flower beds, scrubbing patio stones, or washing cars.
Water chemistry and taste profile
Reverse osmosis strips away roughly 95 to 98 percent of all minerals. This process removes unwanted lead, arsenic, and nitrates, but it also takes out naturally occurring calcium and magnesium.
Water free of dissolved minerals has a very low TDS reading, often below 20 PPM. Some people love this crisp, light taste because it reminds them of pure mountain rain. Others find demineralized water slightly flat or hollow on the tongue.
Stripping minerals also lowers the pH of the water slightly. Pure water absorbs tiny amounts of carbon dioxide from the air, creating mild carbonic acid that drops the pH from 7.0 down to 6.2 or 6.5.
If you prefer rich alkaline water with a balanced mineral profile, you can add an aftermarket remineralization cartridge. The iSpring FA15 inline filter installs directly after the fifth stage, restoring small amounts of healthy calcium and magnesium ions while raising the pH to 7.5.
Who should buy it
Buy it if you…
- Rely on municipal tap water that smells heavily of chlorine, chloramines, or sulfur.
- Want verifiable laboratory contaminant reduction certified against NSF ANSI 58 standards.
- Prefer standard universal ten-inch replacement filters that cost little to maintain over five to ten years.
- Enjoy DIY home projects and have two to three hours to install plumbing lines carefully.
- Desire crystal-clear ice and spotless water for high-end espresso gear and kitchen kettles.
Skip it if you…
- Have weak household water pressure below 45 PSI and do not plan to install an auxiliary booster pump.
- Live in an apartment or rental home where drilling holes in countertops or drain tailpieces is strictly banned.
- Have an under-sink cabinet already crowded by bulky garbage disposals, hot water dispensers, or pullout trash bins.
- Want mineral-heavy, high-alkaline drinking water straight out of the box without adding extra filter stages.
Better alternatives
If your home water pressure stays low, look at the iSpring RCC7P. This unit is the exact same five-stage system but comes equipped with a quiet electric booster pump that ensures high production even on 35 PSI line pressure.
If you have zero under-sink cabinet room, consider the Waterdrop G3P800. This tankless reverse osmosis unit uses an internal electric pump and slim composite filters to deliver water instantly without taking up floor space with a storage tank.
If you want built-in remineralization, consider the iSpring RCC7AK. It adds an active sixth stage that restores natural calcium and magnesium minerals to balance the water pH before it hits your glass.
1. iSpring RCC7-BN NSF Certified
In our extensive research across thousands of verified customer reviews, the iSpring RCC7-BN consistently ranks as a gold standard for budget-conscious homeowners. It combines certified filtration capability with standard non-proprietary replacement parts that keep long-term maintenance costs very manageable.
Frequently Asked Questions (FAQ)
Can I connect this system to my refrigerator ice maker?
Yes, you can easily connect the pure water output to your refrigerator dispenser or ice maker. You just need a quarter-inch quick-connect tee fitting and extra polyethylene tubing. Install the tee on the blue line running between the post-carbon filter and the sink faucet, then route the new line behind your cabinets to the fridge water valve.
Does the system make noise while filtering water?
The unit runs almost silently during normal filtration. You will only hear a gentle gurgle of wastewater trickling into your sink tailpiece drain saddle while the storage tank refills. If you hear a loud hissing sound, check that the drain saddle hole aligns squarely with your drilled opening.
How often do the filters need to be changed?
The first three pre-filters need swapping every six months under typical residential water use. The stage five post-carbon filter lasts twelve months. The stage four reverse osmosis membrane lasts between two and three years, depending on your incoming water hardness and total daily gallons filtered.
Can this system remove fluoride from city tap water?
Yes, reverse osmosis is one of the few home filtration methods that removes fluoride reliably. The semi-permeable thin-film composite membrane in stage four rejects 90 to 95 percent of dissolved fluoride ions, along with lead, chlorine, and nitrates.
What should I do if the faucet flow becomes very slow?
If the faucet stream turns into a trickle while the storage tank feels heavy and full, your tank internal air pressure has likely dropped. Turn off the cold supply line, open the drinking faucet to bleed water, and use a bicycle pump on the tank Schrader valve to restore pressure to seven or eight PSI.
Final verdict
The iSpring RCC7-BN earns a solid 4.6 out of 5 stars. It remains an industry benchmark for reliable residential water purification thanks to its NSF certification, durable brass faucet, and open-source filter compatibility.
Homeowners who want pure, clean-tasting water without expensive proprietary cartridges will find fantastic long-term value here. As long as your cabinet has enough physical room and your line pressure stays above 45 PSI, this system delivers premium water purification for years.
Affiliate disclosure: This post contains affiliate links. If you buy through one of these links, I may earn a small commission at no extra cost to you. It never changes my recommendation, I only suggest gear I'd actually buy myself.
As an Amazon Associate, we earn from qualifying purchases.




