Stale coffee oils ruin your morning cup, and a dirty grinder is usually the culprit. You can clean most home coffee grinders in about twenty minutes using dry brushes, rice, or cleaning tablets. Keeping the burrs or blades free of old grounds stops bitter flavors from mixing into fresh beans.
Time And Supplies Needed For The Job
Plan for fifteen to thirty minutes of work. Unplug the machine before you start. This keeps your fingers safe near sharp metal parts.
You need a few basic items. Grab a soft brush. A stiff pastry brush works well.
Get some microfiber cloths and a small bowl. You will also need uncooked white rice or special grinder cleaning tablets. Keep a toothpick or wooden skewer nearby for tight spots.
Do not use water on the grinding parts unless the manual says it is safe. Water causes rust on steel burrs. It also traps moisture inside the motor base.
Dry methods are best for daily upkeep. If you own a brewing setup that pulls espresso shots, clean the grinder even more often. Fine espresso grinds pack tightly and hold onto oils faster than coarse drip settings.
Why Old Coffee Oils Ruin Your Beans
Coffee beans contain natural oils. These oils give your drink its rich taste. But those same oils go bad over time.
They turn rancid when exposed to air.
Rancid oils stick to the inside of your grinder. They coat the burrs or blades. Every new batch of beans passes over this sticky layer.
The old oil mixes with the fresh grounds. This makes your coffee taste flat, sour, or bitter.
Heat speeds up this process. Grinders create friction. Friction creates heat.
Warm surfaces make oils spread and harden quickly. According to food safety guidelines from the FDA regarding equipment sanitation, keeping food contact surfaces clean prevents flavor transfer and bacterial growth. While coffee is low-risk for bacteria due to its roasting temperatures, stale oils still degrade quality fast.
Dark roast beans leave more oil behind than light roasts. Flavored coffees leave sticky residues that are very hard to remove. Switching between dark and light beans without brushing out the chamber leads to muddy flavors.
Cleaning A Blade Grinder With Rice
Blade grinders use a spinning metal propeller to chop beans. They are cheap and common. But they are tricky to clean because you cannot take them apart easily.
The rice method works great here. Measure one-quarter cup of plain, uncooked white rice. Do not use instant rice.
Instant rice is too soft. Pour the raw rice into the empty grinder hopper.
Put the lid on tight. Run the grinder for about sixty seconds. The hard rice grains act like tiny scrubbers.
They knock loose the stuck coffee dust. They also soak up the greasy oils coating the blades and walls.
Stop the machine and unplug it. Dump out the rice powder. It will look brown and smell strongly of old coffee.
Take a slightly damp paper towel. Wipe the inside of the grinding bowl carefully. Stay away from the bottom seal where the blade meets the motor.
You do not want liquid dripping into the electrical base.
Dry the inside completely with a clean cloth. Let it sit open for ten minutes before adding fresh beans. This rice trick takes five minutes.
Do it once a week if you grind every day.
Taking Apart A Burr Grinder Safely
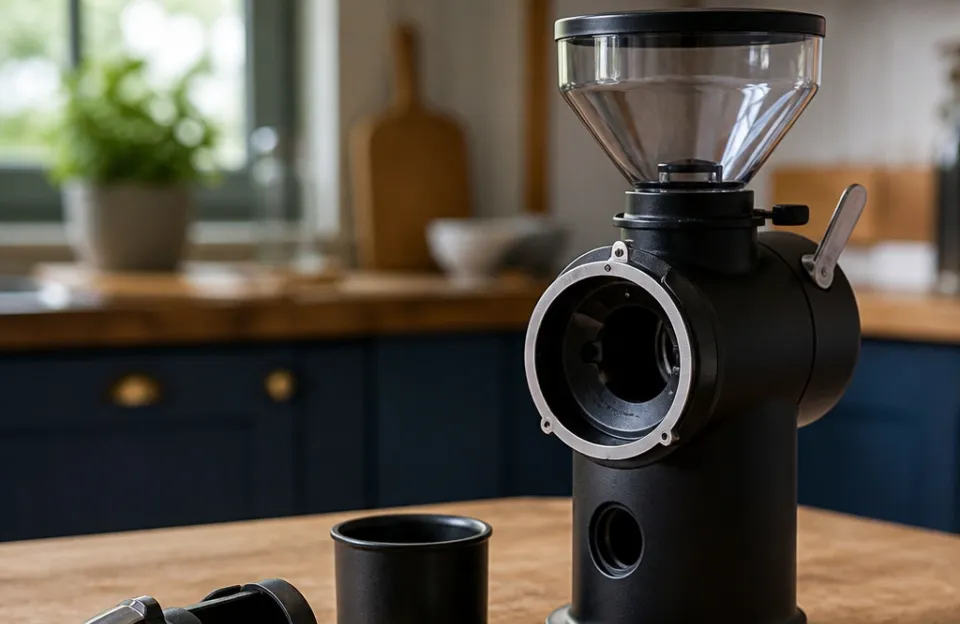
Burr grinders crush beans between two textured metal plates. They give a much more even grind size. They also have more parts that trap old coffee.
Start by unplugging the unit. Remove the bean hopper from the top. Most hoppers twist off with a quarter turn.
Wash the plastic hopper in warm soapy water. Rinse it well. Dry it completely before putting it back.
Wet plastic will make your next batch of beans clump together.
Next, lift out the upper burr. Some models have a handle you pull. Others require you to unscrew a locking ring.
Check your owner's manual if it feels stuck. Never force it. Metal burrs are heavy and sharp.
Hold them by the edges.
Once the top burr is out, you see the lower burr sitting in the grinding chamber. Do not try to remove the lower burr unless the manufacturer tells you to. On many machines, the bottom burr is attached directly to the motor shaft.
Messing with it can void your warranty or break the alignment.
Lay the parts out on a towel. Keep track of any small screws or washers. Losing a piece means the grinder will not run safely later.
Brushing Out The Burrs And Chute
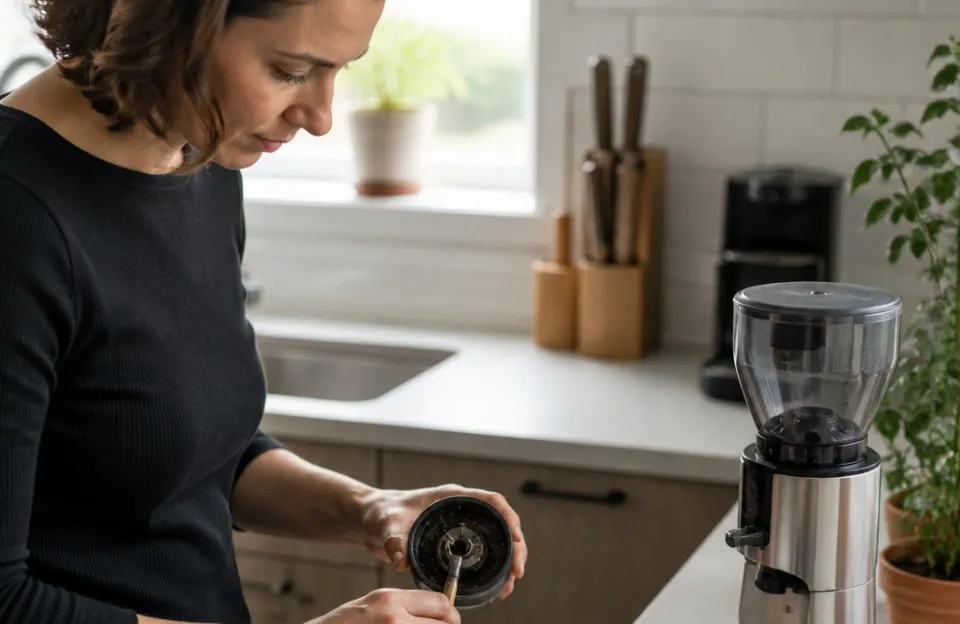
Take your stiff brush. Scrub the teeth of the upper burr. Work the bristles deep into the grooves.
Coffee dust packs tight in these ridges. Tap the burr gently against the edge of the sink to knock the debris loose.
Move to the grinding chamber. Brush around the stationary lower burr. Sweep out all the dark powder.
Use a toothpick for the narrow gaps between the burr and the outer wall. Grounds hide there and block the exit path.
Find the discharge chute. This is the tunnel where ground coffee falls into the catch bin. It clogs easily.
Push a pipe cleaner or a dry cotton swab down the chute. Pull out the clumps. A blocked chute forces the motor to work harder.
It also leaves old grounds trapped inside the machine for days.
Wipe the inside of the catch bin. Static electricity makes fine dust cling to the plastic walls. A barely damp cloth picks this up fast.
Dry the bin right away. If you switch between different roasts frequently, keeping the chute clear matters just as much as checking basket dimensions when fitting accessories to other countertop appliances. Space dictates how much residue builds up.
Running Commercial Grinder Cleaning Tablets
Brushes only reach the surface. To get deep into the pores of the burrs, use cleaning tablets. Brands like Urnex make pellets specifically for coffee grinders.
These are made from food-safe starches. They absorb oils better than rice and leave less dust.
Check the tablet package for the right dose. Usually, you need about half an ounce. Pour the tablets into the hopper.
Run the grinder until the tablets are gone. The machine will sound slightly different. The pellets are softer than beans, so the motor pitch changes.
The tablets push through the burrs and the chute. They grab the sticky oil residue along the way. The powder that comes out will be pale and dusty.
After the tablets finish, you must purge the grinder. Add a small handful of cheap coffee beans. Grind them and throw the result in the trash.
Do this twice. This flushes out any leftover cleaning dust. You do not want tablet residue in your morning cup.
Tablets cost more than rice. But they do a better job on stubborn dark roast buildup. Use them once a month for heavy use.
This deep scrub pairs well with regular brushing. Just like verifying material safety on heated kitchen plastics, knowing what chemicals touch your coffee gear gives you peace of mind.
Wiping Down The Outer Housing
The outside of the grinder gets dirty too. Coffee dust settles on the counter and the machine body. Oily fingerprints build up near the power button.
Dampen a microfiber cloth with plain water. Wring it out until it is almost dry. Wipe the plastic or metal housing.
Pay attention to the seams where the hopper meets the base. Dust gathers in these cracks.
For stainless steel bodies, wipe in the direction of the grain. This prevents streaks. If you see sticky spots, put a tiny drop of mild dish soap on the cloth.
Rub the spot gently. Wipe it again with a plain water cloth to remove the soap.
Never spray water or cleaner directly onto the grinder. Liquid can seep into the buttons or vents. It can reach the motor.
Always apply moisture to the cloth first.
Keep the power cord clean. Dragging a dusty cord across the counter spreads mess. Wipe it down while you clean the base.
A clean exterior helps you spot leaks or cracks early.
Mistakes That Damage Grinding Parts
People ruin their grinders by rushing the cleaning process. Avoid these common errors.
Never put steel burrs in the dishwasher. The high heat and harsh detergent strip the protective coating. The bare steel rusts quickly.
Rust pits the surface of the burrs. Pitted burrs crush beans unevenly. You will get large chunks mixed with fine powder.
Do not use compressed air cans meant for computers. These cans spray a freezing chemical propellant. The extreme cold can crack plastic chutes.
The moisture in the spray causes flash rust on metal parts. If you want to blow out dust, use a manual rubber bulb blower made for camera lenses.
Avoid soaking the whole machine. Only removable plastic parts should touch water. The motor base stays dry.
Always.
Do not use flavored rice or instant oats for the absorption method. Flavored items leave sugar behind. Sugar melts from the friction heat.
It turns into a hard, sticky glue inside the chamber. Plain white rice is the only safe pantry item to use.
Skipping the purge step after using tablets is another error. Leftover tablet dust tastes chalky. It ruins expensive specialty beans.
Always grind and toss a sacrificial batch of cheap beans afterward.
How Often You Should Clear The Grounds
Frequency depends on how much coffee you drink. It also depends on the type of beans you buy.
If you brew one pot a day with medium roast beans, a quick brush-out once a week is enough. Run the rice method every two weeks. Do a full burr removal and tablet clean once a month.
If you drink dark roasts or oily French roasts, the schedule speeds up. Dark beans shed oil constantly. Brush the chute every three days.
Run tablets every two weeks. The oils harden fast. Waiting a month lets them turn into a thick varnish.
Espresso users need the strictest routine. Espresso requires a very fine grind. Fine particles pack tightly into the burr teeth.
They block the chute faster than coarse drip grinds. Brush the portafilter area and the chute daily. Wipe the dosing forks if your machine has them.
If you switch between flavored coffee and regular coffee, clean the grinder immediately after the flavored batch. Flavoring syrups coat the inside heavily. They will taint every plain bean you grind afterward for weeks.
Treat your grinder maintenance with the same strict timing you would use when cooking raw poultry safely in a shared appliance. Cross-contamination ruins the final product either way.
Signs Your Grinder Needs Immediate Attention
Sometimes the calendar does not matter. The machine tells you it is dirty. Listen to it.
Pay attention to the sound. A clean grinder hums smoothly. A dirty one strains.
If the motor pitches higher or sounds like it is choking, the chute is likely clogged. Stop grinding immediately. Unplug it and clear the blockage.
Running a choked motor burns it out.
Look at the grounds in your catch bin. They should be uniform. If you see huge boulders mixed with fine dust, the burrs are coated in oil or worn down.
Oil causes beans to slip instead of crushing evenly. Clean the burrs first. If the problem continues after cleaning, the metal teeth might be dull.
Smell the hopper before adding new beans. Stick your nose close to the empty chamber. If it smells sour, musty, or like crayons, the oils are rancid.
Crayon smells are a dead giveaway of oxidized coffee fat. A simple brush will not fix this. You need tablets or a deep scrub.
Check the static cling. If grounds fly everywhere and stick to the sides of the bin like glue, moisture and oil are building up. Fresh, clean grinders produce some static, but excessive clinging means the internal surfaces need wiping.
Dealing With Stubborn Oil Buildup
Sometimes standard cleaning fails. Old oil turns into a hard shellac. This happens if a grinder sits unused for months, or if someone uses ultra-dark beans for years without maintenance.
You need a solvent. Do not use household degreasers. They are toxic.
Use high-proof grain alcohol or food-safe ethanol. Isopropyl alcohol works on metal parts, but you must rinse and dry them perfectly before grinding coffee again.
Remove the burrs. Dip a cloth in the alcohol. Rub the hardened spots on the metal.
Let it sit for two minutes to soften the shellac. Scrub with a stiff nylon brush. The black gunk will start to peel away.
For plastic parts that cannot handle alcohol, soak them in hot water with a scoop of powdered brewery wash or oxygen-based cleaner. These dissolve organic fats safely. Soak for thirty minutes.
Scrub and rinse thoroughly.
Never use metal wire brushes on burrs. Steel wire scratches the precision surfaces. Scratches hold more oil in the future.
Stick to nylon or natural bristle brushes.
If the buildup covers the motor shaft or deep internal gears, stop. Do not dig around the motor with wet tools. Call the manufacturer or a local appliance repair shop.
Opening the sealed motor housing voids warranties and risks electric shock.
Common Questions About Grinder Upkeep
Can I wash my grinder parts in the sink?
Only the plastic hopper and the catch bin. Steel burrs and the motor base must stay dry. Water rusts the cutting surfaces.
Soap leaves a film that alters coffee flavor.
Does grinding rice sharpen the blades?
No. This is a myth. Rice cleans the surfaces by absorbing oil and knocking off dust.
It does not sharpen dull metal. If your blades or burrs are dull, you must replace them. Sharpening coffee burrs requires specialized factory tools.
How long do burrs last before needing replacement?
Steel burrs typically last for about 500 to 1,000 pounds of coffee. Ceramic burrs last longer but chip easier. If your coffee tastes flat even after a deep clean, the burrs are likely worn out.
Replacement parts are available from the manufacturer.
Is it safe to use vacuum attachments on my grinder?
Yes, a small brush attachment on a shop vac works well for dry grounds. Keep the suction low. High suction can pull small alignment washers out of place.
Do not use a wet-dry vac if the filter is damp.
Why does my coffee taste sour after cleaning?
You probably left soap residue or did not purge the cleaning tablets. Run a half-cup of cheap beans through the machine and throw them away. This flushes out lingering cleaning agents.
Should I oil the burrs to prevent rust?
Absolutely not. Food-grade mineral oil is sometimes used on cast iron pans, but never inside a coffee grinder. Added oil mixes with coffee fat.
It goes rancid rapidly. It attracts more dust. Keep burrs bone dry.
Properly seasoned coffee oils from normal use provide a microscopic barrier, but intentional oiling ruins the grind quality.
Keeping your equipment clean sets the baseline for good coffee. Whether you are pulling shots or making a simple drip pot, starting with fresh, oil-free grounds changes the taste entirely. Regular brushing takes seconds.
Deep cleaning takes minutes. Both save you from buying a new machine prematurely.