Cooking an air fryer whole chicken takes about 60 to 75 minutes at 360°F for a standard 4-pound bird. You get crispy skin and juicy meat without heating up your entire kitchen or waiting hours for an oven to preheat. The key is using a reliable instant-read thermometer to verify the internal temperature reaches 165°F in the thickest part of the thigh, as cooking times vary significantly based on air fryer wattage and basket size.
This method works best for birds between 3 and 5 pounds that fit comfortably in your basket with space for airflow. Larger chickens require spatchcocking or a different cooking vessel entirely. We will cover the exact preparation steps, seasoning techniques that actually stick, safe temperature verification, and how to adjust timing when your specific model runs hot or cool.
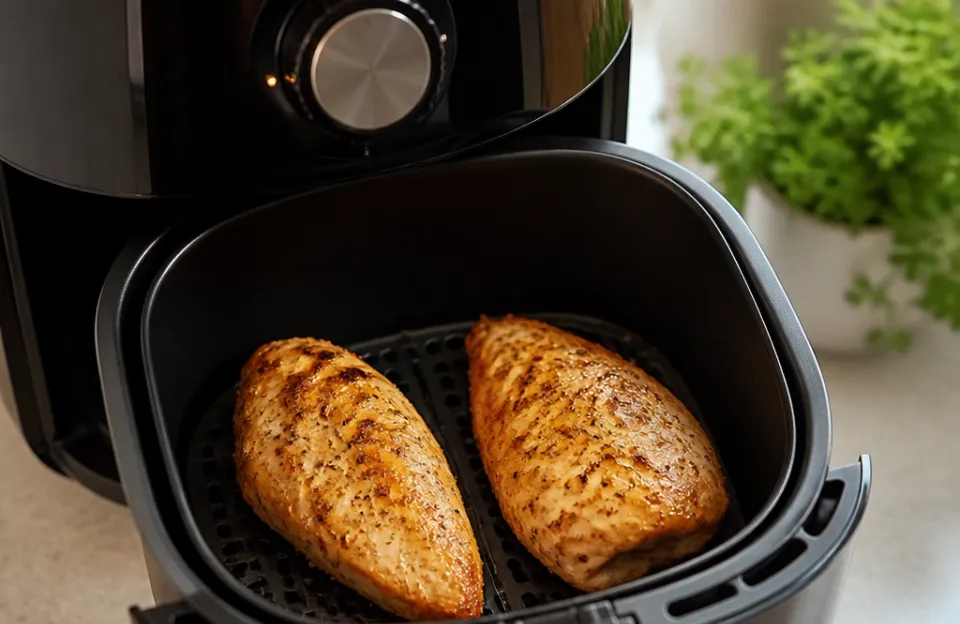
If you have previously cooked smaller poultry cuts in your air fryer, note that a whole bird requires lower heat and longer time to cook through without burning the exterior.
Why Air Circulation Changes Poultry Cooking Times
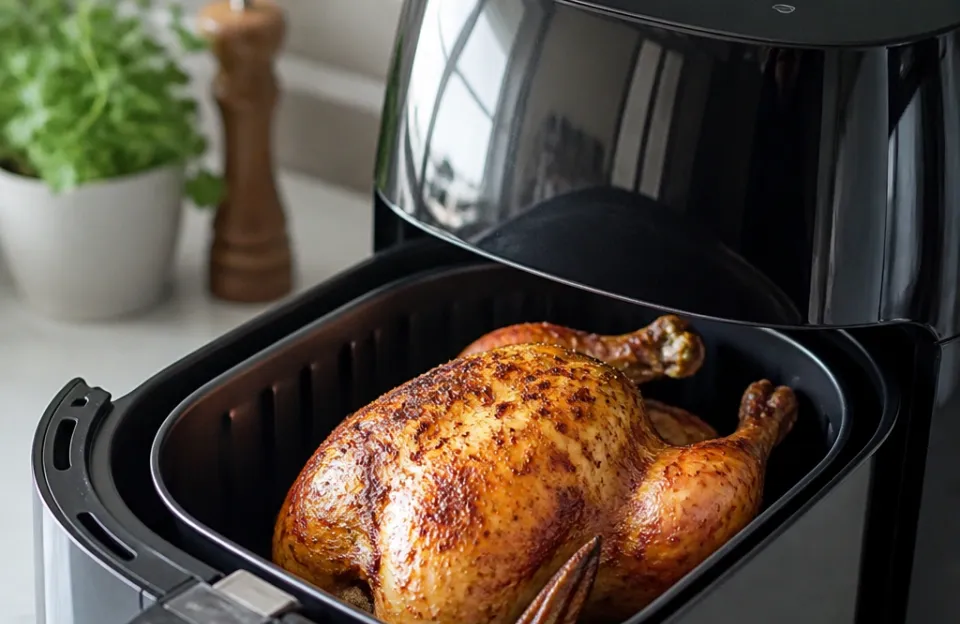
Air fryers are convection ovens that circulate superheated air at high velocity directly around the food. This rapid air movement transfers heat much faster than the still air in a conventional oven, which means you must reduce both temperature and time to prevent drying out the meat. A whole chicken that would roast at 425°F for 90 minutes in a standard oven typically cooks at 360°F to 375°F in an air fryer.
The intense airflow also renders fat from the skin more efficiently, creating crispness that usually requires higher oven temperatures or broiling.
The trade-off for speed is reduced margin for error. Because the heat source is closer and the air moves faster, the outside can overcook before the interior reaches safe temperature if you use traditional oven settings. Lowering the temperature by 25°F to 50°F below your standard roast chicken recipe compensates for this effect.
Monitoring internal temperature with a fast digital probe removes guesswork and prevents both undercooking and dryness.
Understanding Safe Internal Temperatures for Poultry
The USDA mandates that all poultry reach a minimum internal temperature of 165°F to destroy harmful bacteria like salmonella. This standard applies regardless of cooking method, including air frying. Always measure in the thickest part of the thigh and breast, avoiding contact with bone, which reads hotter than surrounding meat.
Relying on clear juices or golden skin color alone is unsafe, as these visual cues do not reliably indicate doneness in forced-air cooking environments where browning happens quickly.
Carryover cooking raises the internal temperature by 5°F to 10°F during resting. Pulling the chicken at 160°F allows residual heat to bring it to the safe 165°F threshold while keeping the meat juicier. Letting it rest for 10 to 15 minutes also redistributes moisture throughout the muscle fibers.
Skipping this step causes valuable juices to pool on the cutting board instead of staying in the meat.
Choosing the Right Bird Size for Your Basket
Most standard air fryer baskets accommodate a 3 to 4 pound chicken with adequate clearance. Birds larger than 5 pounds often touch the heating element or block airflow, resulting in uneven cooking and potential fire risk. Measure your basket's width and height before purchasing.
If your chicken touches any surface, it needs to be trimmed, spatchcocked, or cooked in batches.
Smaller birds between 2.5 and 3.5 pounds cook more evenly and develop better skin texture because air reaches all surfaces uniformly. These sizes also fit in compact models without modification. When shopping, look for "roaster" or "fryer" labels rather than "stewing hens," which are older, tougher birds unsuitable for quick dry-heat methods.
Organic and free-range options work identically to conventional birds in terms of timing and temperature.
Essential Prep Work Before Seasoning
Proper preparation determines whether your air fryer whole chicken turns out crisp or soggy. Start by removing giblets from the cavity and patting the entire bird completely dry with paper towels. Surface moisture creates steam that prevents browning, so spend extra time drying the skin, especially under the wings and inside the cavity.
Some cooks leave the bird uncovered in the refrigerator for several hours or overnight to further desiccate the skin, though this is optional.
Trussing or tying the legs together promotes even cooking by creating a compact shape that exposes less surface area to direct heat. Tuck wing tips behind the back to prevent burning. Lightly coat the basket with oil spray or line with perforated parchment paper to prevent sticking and simplify cleanup.
Avoid solid foil liners that block airflow from below, as this defeats the purpose of convection cooking and leads to pale, steamed undersides.
Building Flavor Layers That Survive High Heat
Dry spice rubs adhere better to air-fried chicken than wet marinades, which can drip off or create excess steam. Mix salt, pepper, garlic powder, paprika, and herbs in a small bowl, then massage directly onto dried skin. Salt draws out additional moisture while seasoning deeply, so apply it generously.
Oil helps spices stick and promotes browning, but use sparingly to avoid greasiness. One to two teaspoons rubbed over the entire bird is sufficient.
Fresh herbs burn at air fryer temperatures, so use dried versions or add fresh herbs only during the last five minutes of cooking. Acidic ingredients like lemon juice or vinegar should be applied after cooking or mixed into a finishing sauce rather than used during the air frying process. For deeper flavor penetration, season the bird and refrigerate uncovered for 4 to 24 hours before cooking.
This dry-brine technique seasons the meat throughout while further drying the skin for superior crispness. Those interested in marinade approaches for smaller cuts should note that whole birds benefit more from dry brining due to their thickness.
Positioning for Even Airflow and Browning
Place the chicken breast-side down for the first half of cooking, then flip to breast-side up for the remainder. Starting breast-down protects the lean white meat from direct heat exposure while the darker thigh meat begins cooking. Flipping halfway ensures both sides brown evenly and prevents the breast from drying out before the thighs reach temperature.
Use tongs or silicone gloves to handle the hot bird carefully during this step.
Elevating the chicken on a trivet or rack improves airflow underneath and prevents the bottom from steaming in rendered fat. If your air fryer lacks a rack, create one by crumpling foil into loose balls or using halved onions as natural lifters. Never let the chicken sit flat against the basket bottom, as this creates a barrier to circulating air and results in uneven cooking.
Adequate clearance on all sides is non-negotiable for proper convection performance.
Step-by-Step Cooking Process and Timing Adjustments
Preheat your air fryer to 360°F for three to five minutes before adding the chicken. Preheating ensures immediate searing and consistent timing. Place the prepared bird breast-side down in the basket and cook for 30 minutes.
Open the basket and carefully flip the chicken to breast-side up using tongs. Continue cooking for another 30 to 45 minutes, checking temperature at the 60-minute mark. Total cook time typically ranges from 60 to 75 minutes for a 4-pound bird.
Temperature accuracy matters more than clock time. Insert your thermometer into the thickest part of the thigh without touching bone. When it reads 160°F, remove the chicken immediately.
If using a wireless monitoring system, set the alarm to 160°F so you can track progress without repeatedly opening the basket. Each time you open the unit, temperature drops by 20°F to 30°F and recovery adds several minutes to total cook time.
Adjusting for Different Air Fryer Models and Wattages
Air fryers range from 1,200 to 1,800 watts, and higher wattage units cook faster. If your model exceeds 1,500 watts, reduce temperature by 10°F to 15°F or check temperature five minutes earlier than suggested. Lower-wattage models may need additional time.
Basket shape also affects timing; tall narrow baskets concentrate heat differently than wide shallow ones. Keep notes on your specific unit's behavior to refine future cooks.
Some models have preset "whole chicken" programs that automatically adjust temperature and time. Treat these as starting points only, as they assume average bird size and cannot account for your specific chicken's weight or starting temperature. Always verify doneness with a thermometer regardless of preset completion signals.
Manual control yields more reliable results once you understand your appliance's characteristics.
Resting and Carving for Maximum Juiciness
Transfer the cooked chicken to a cutting board and tent loosely with foil for 10 to 15 minutes. This resting period allows muscle fibers to relax and reabsorb juices squeezed toward the center during cooking. Cutting immediately releases those juices onto the board, leaving dry meat.
The internal temperature will continue rising to the safe 165°F threshold during this time.
Carve by removing legs and thighs first, then slicing breast meat against the grain. Save the carcass for stock or discard. Serve within 30 minutes for best texture and temperature.
Leftovers store well for meal prep applications similar to batch-cooked wing portions, though whole chicken meat stays moist longer due to its larger muscle structure. Refrigerate carved meat within two hours of cooking.
Troubleshooting Common Texture and Doneness Issues
Uneven cooking is the most frequent problem with air fryer whole chicken. If the breast is done but thighs remain undercooked, your bird may be too large or positioned incorrectly. Spatchcocking (removing the backbone and flattening) solves this by creating uniform thickness.
Alternatively, shield the breast with foil during the first half of cooking to slow its progress while thighs catch up. Remove the foil for the final 20 minutes to allow browning.
Soggy skin indicates insufficient drying before cooking or overcrowding in the basket. Ensure the bird fits with at least one inch of clearance on all sides. Increase temperature by 10°F for the last five minutes if skin isn't crisping adequately, watching closely to prevent burning.
Excessively dark skin before the interior reaches temperature means your heat is too high; reduce by 15°F and extend cooking time accordingly. A reliable infrared tool can help verify actual basket surface temperature if results are consistently off.
Preventing Dry Breast Meat While Ensuring Thigh Safety
Dark meat safely tolerates higher internal temperatures (175°F to 180°F) and remains juicy due to connective tissue content, while breast meat dries rapidly above 165°F. This mismatch requires strategic management. Dry brining with salt for 12 to 24 hours helps breast meat retain moisture through osmosis.
Starting breast-side down and flipping halfway through cooking also protects white meat from prolonged direct heat exposure.
If you consistently struggle with dry breast despite correct temperatures, consider spatchcocking or butterflying the bird to reduce overall thickness differential. Brining in saltwater solution (1 cup salt per gallon water for 4 to 12 hours) adds moisture directly to muscle cells, though this makes skin harder to crisp. Pat thoroughly dry after wet brining and increase initial cooking temperature slightly to compensate for surface moisture.
Managing Smoke and Grease Buildup During Cooking
Rendering fat from a whole chicken can smoke if it drips onto heating elements or accumulates excessively. Place a slice of bread or layer of vegetables beneath the rack to absorb dripping fat, replacing as needed. Clean the basket between uses to prevent old grease from smoking during subsequent cooks.
Ensure adequate ventilation in your kitchen, as air fryers exhaust concentrated cooking odors.
Excessive smoking may also indicate temperature is too high for the amount of fat being rendered. Reduce heat by 10°F if smoke appears before the chicken is halfway cooked. Trim visible excess fat from the cavity opening and neck area before cooking to minimize rendering volume.
Some fat is desirable for flavor and skin texture, but large deposits cause problems in confined air fryer spaces.
Frequently Asked Questions About Air Frying Whole Birds
Can I Cook a Frozen Whole Chicken in the Air Fryer?
Cooking frozen whole chicken in an air fryer is not recommended due to food safety concerns and uneven results. The exterior will overcook and potentially burn before the interior thaws and reaches safe temperature. Always thaw completely in the refrigerator for 24 to 48 hours before air frying.
If you must cook from frozen, use a conventional oven at lower temperature for extended time and verify internal temperature in multiple locations.
How Do I Know When My Air Fryer Whole Chicken Is Actually Done?
Use an instant-read thermometer inserted into the thickest part of the thigh, avoiding bone. The reading must reach at least 165°F for safety. Visual cues like clear juices or golden skin are unreliable indicators in air fryers because browning occurs faster than internal cooking.
A quality digital thermometer provides definitive confirmation in seconds and eliminates guesswork that leads to either undercooked or dried-out results.
Should I Use Oil Spray or Rub Oil Directly on the Skin?
Rubbing oil directly onto dried skin gives better coverage and crispness than spraying. Sprays often contain propellants or lecithin that can leave residue or create uneven coating. Use one to two teaspoons of neutral oil massaged thoroughly over the entire surface after seasoning.
This thin layer conducts heat efficiently and promotes Maillard browning without making skin greasy. Reserve spray for coating the basket to prevent sticking.
Can I Reheat Leftover Air Fryer Whole Chicken Without Drying It Out?
Reheat carved portions at 320°F for 3 to 5 minutes, covered loosely with foil to retain moisture. Whole leftover halves take 8 to 12 minutes at the same temperature. Adding a splash of broth or water to the basket creates steam that prevents drying.
Microwaving is faster but produces rubbery texture; air frying restores some crispness to skin while gently warming meat. Store leftovers in airtight containers and consume within four days.
Does Spatchcocking Improve Air Fryer Whole Chicken Results?
Spatchcocking significantly improves results by creating uniform thickness that cooks evenly. Removing the backbone and flattening the bird reduces cook time by 15 to 20 minutes and eliminates the breast-thigh doneness gap. All skin surfaces receive direct airflow for consistent crispness.
This technique is especially valuable for birds near your basket's maximum size capacity or when cooking for meal prep where even portioning matters.
Getting Consistent Results Across Different Batches
Mastering air fryer whole chicken comes down to respecting the physics of convection cooking and verifying doneness with proper tools rather than relying on generic timing charts. Your specific appliance, bird size, and preparation choices all interact to determine outcome. Take notes on temperature, timing, and results for each cook to build personalized reference data.
What works perfectly in one model may need adjustment in another, even at identical wattage ratings.
Start with the baseline 360°F for 60 to 75 minutes and adjust based on your observations. Prioritize thermometer readings over clock time every single cook. Once you dial in your preferred method, air frying delivers roast-quality chicken with minimal active effort and energy use.
The learning curve is short, and the payoff is reliable weeknight protein that rivals traditional oven roasting in flavor and texture while freeing up your main oven for other dishes.