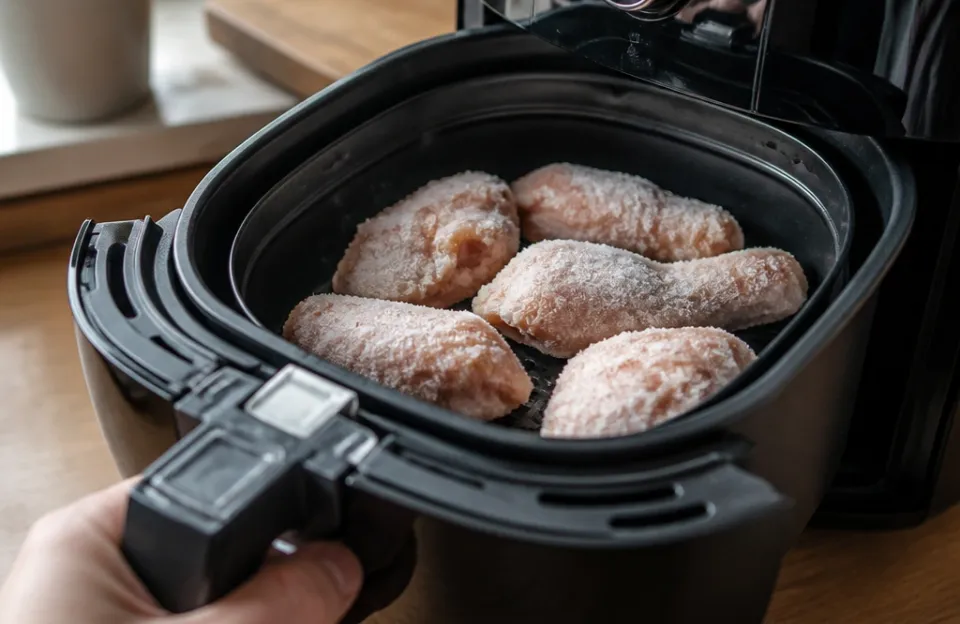
As a starting point, cook frozen fries at about 400°F (204°C) for 12 to 15 minutes, and fresh hand-cut fries at about 375°F (191°C) for 15 to 20 minutes, shaking the basket partway through. Those ranges are starting points, not guarantees: thickness, batch size, and your specific model all shift the right number. Start checking a couple of minutes before the minimum time, because adding time is easy and rescuing overcooked fries is not.
Air fryers work as small, high-powered convection ovens, so they move hot air fast and turn potatoes crisp quickly. That speed is also why an overcrowded basket fails: blocked airflow leaves the middle of the pile pale and soft while the edges brown.
Fry Times and Temperatures by Type
The table below gives supported starting points for the fry types with clear evidence. Treat every cell as a first attempt to adjust from, not a fixed rule.
| Fry Type | Temperature | Starting Time | Notes |
|---|---|---|---|
| Frozen french fries | 400°F (204°C) | 12 to 15 minutes | No added oil needed |
| Fresh french fries | 375°F (191°C) | 15 to 20 minutes | Shake the basket twice |
| Sweet potato fries | 380°F (193°C) | 12 to 15 minutes | Toss with oil first |
| Sweet potato fries, 1/4-inch thick | 380°F (193°C) | 15 to 18 minutes | Shake halfway |
| Potato wedges | 400°F (200°C) | 18 to 22 minutes | Shake every 7 minutes |
Thickness matters more than the name on the bag. Thin shoestring fries and thick steak fries both fall under the frozen-fry range, but they will not finish at the same moment: check thin cut fries early and give thick ones the full window and possibly a little more.
How to Prepare Raw Potatoes for Crisp Fries
Fresh potatoes carry a lot of surface moisture, and wet fries steam instead of crisping. Drying them properly is the step most home cooks skip, and it is the one that most reliably improves the result.
- Cut evenly. Aim for strips of consistent thickness so they finish together. A mix of thick and thin pieces will always cook unevenly.
- Soak in cold water. Rinse away surface starch so the fries are less likely to stick together in the basket.
- Dry thoroughly. Pat the strips dry with a clean towel; any remaining water turns to steam in the basket.
- Add a light oil coating. About 1 to 2 teaspoons of oil helps the fries brown. Toss to coat rather than pouring oil over them.
- Season after cooking. Hold the salt until the fries come out, so the surface stays dry while it crisps.
- Cook in stages if needed. Start at the lower end of the fresh-fry range, shake, and add time based on color and texture.
Why Temperature, Airflow and Batch Size Matter
Air fryer results depend on hot air reaching every surface, and overcrowding is the most common way to prevent that. Overcrowding can stop enough air circulating to cook the food properly, which is why the USDA advises against overfilling the basket. For most basket-style models, filling the basket about halfway to two-thirds full supports good circulation.
Frozen fries tolerate a little more crowding than fresh ones. Light overlap can work if you shake the basket several times during cooking. The warning signs of a basket that is too full are consistent: pale or soft fries, pieces clumping together, one area browning while another stays cold, steam collecting in the basket, and cooking that runs far longer than expected. When you see those signs, cook in batches instead of forcing everything in at once.
Temperature also needs judgment. Higher heat browns the outside fast, but if the center stays raw while the surface darkens, the heat is too aggressive. Drop the temperature and extend the time so the middle cooks before the crust over-colors.
How to Shake and Check for Doneness
Shake the basket or turn the fries about halfway through cooking so more surfaces meet the hot air. For wedges, a shake every 7 minutes keeps all sides exposed.
Time alone will not tell you when fries are done. Use color and texture as your main cues: a light to medium golden-brown color generally means the surface has started to crisp. A fry that is still pale or white is likely limp and undercooked, so give it more time.
Pick up one fry as a test. It should feel crisp at the edges and give way easily when bent, with no raw, hard center. If it bends without resistance and looks pale, return the basket for another 2 to 3 minutes.
Fixing Soggy, Pale or Uneven Fries
Match the symptom to its likely cause before adding more time. More minutes will not fix a basket that is too full.
| Symptom | Likely Cause | Diagnostic Check | Fix |
|---|---|---|---|
| Soggy, steaming fries | Wet potatoes or a crowded basket | Is there visible moisture or condensation in the basket? | Dry raw potatoes thoroughly and cook in smaller batches |
| Pale, soft fries after the full time | Too much food blocking airflow | Are pieces piled deep or clumped together? | Reduce the batch to half to two-thirds full and shake more often |
| Uneven browning | Uneven layer depth or no shaking | Is one side of the basket darker? | Spread the fries flat and shake partway through |
| Brown outside, raw inside | Temperature too high for the thickness | Does the surface darken well before the timer ends? | Lower the temperature and extend the time |
| Limp texture despite browning | Not enough oil on fresh-cut fries | Were the fries tossed with oil before cooking? | Add about 1 to 2 teaspoons of oil next time |
Adjusting Times for Your Air Fryer and Package Directions
Every air fryer cooks a little differently, even at the same set temperature. Wattage, basket size, and airflow pattern all affect actual cooking time, and larger baskets that spread food out more can need longer. If you use an oven-style air fryer rather than a basket model, add 2 to 4 minutes to the listed times.
Your manual and the food package are the most specific references you have for your own appliance. Follow package directions where they exist, especially for frozen products, and check your manual on preheating: some models call for it, others do not. Where preheating is permitted and there is no automatic setting, running the empty air fryer at cooking temperature for about 3 to 5 minutes is a reasonable starting point.
For more detail on the fresh-potato side of this process, see this guide to cooking fresh french fries in the air fryer.
Frozen Fries and Added Oil
Most frozen fries are already partially fried by the manufacturer, which is why they do not need the double-frying that homemade fries often get. Many cook well with no added oil at all.
Oil is optional rather than essential here. Some frozen fries benefit from a light coating for extra crispness and browning, while others do fine without it. If you want a crisper finish, a light spritz of cooking oil before cooking can help them brown. Add it sparingly: a heavy coating leaves the fries greasy rather than crisp.
Keeping Fries Crisp and Reheating Leftovers
Steam is what softens a fresh batch of fries, so do not dump them into a deep bowl or closed container. Spread them on a wire rack or plate in a single layer for a minute so the steam escapes.
For leftovers, refrigerate within 2 hours to keep them out of the temperature danger zone between 40°F and 140°F. Keep your fridge at 40°F or below and your freezer at 0°F. On a hot day, that window shortens: perishable food should not sit at room temperature for more than 2 hours, or 1 hour if the air temperature is above 90°F.
Reheat leftovers in the air fryer rather than the microwave, which tends to leave fries rubbery. Set a moderate temperature around 350°F and check every couple of minutes until the exterior is crisp again.
Getting the Best Result Every Time
Crisp air fryer fries come down to four habits: keep batches small enough for air to move, dry raw potatoes thoroughly, shake partway through, and judge doneness by color and texture rather than the clock alone. Start at the lower end of the supported range, check early, and add time in short increments.
Because times vary with your model, fry thickness, and batch size, note what works for your machine and your favorite brand. That record is more useful than any universal chart, and it turns a good first batch into a repeatable one.