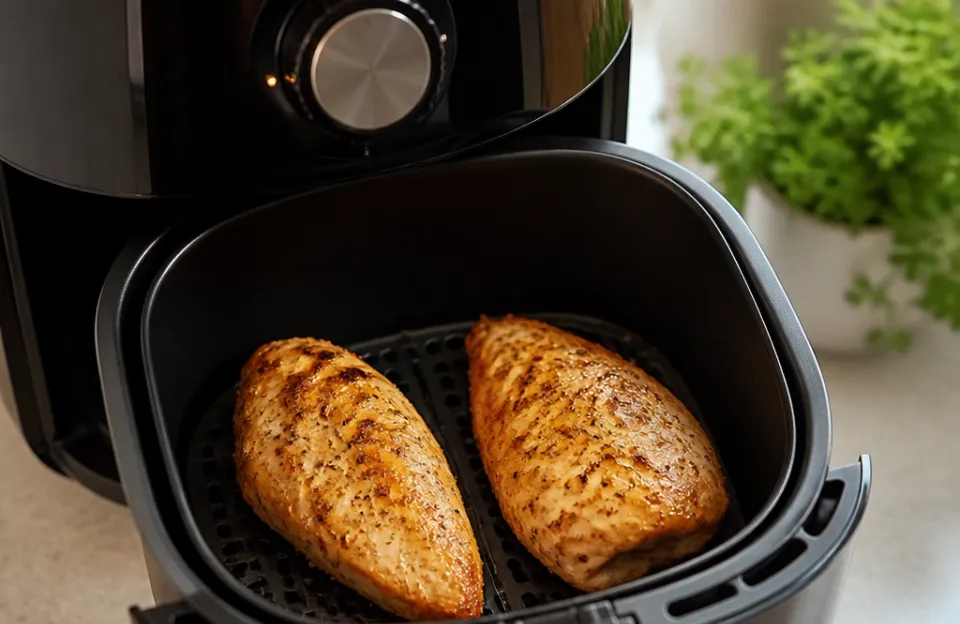
If your air fryer smells like plastic, it is almost always caused by the protective factory coating on the heating element or interior basket burning off during early use. This odor is normal for brand new units and usually disappears after two or three cooking cycles. The smell comes from manufacturing residues heating up, not from the food you are cooking.
This article explains exactly why that chemical odor happens, how to get rid of it fast, and when a lingering smell points to a real safety problem. You will also find practical steps to remove the scent before your first meal, plus notes on why certain models hold onto odors longer than others. If you have noticed your air fryer smells like plastic right out of the box, the fixes below will clear it up safely.
Why Brand New Air Fryers Release Chemical Odors

Air fryers reach temperatures above 400 degrees Fahrenheit very quickly. Manufacturers apply thin protective coatings to metal parts during assembly so nothing scratches or corrodes in transit. These coatings include industrial oils, anti-rust agents, and non-stick curing compounds.
When the heating element gets hot for the first time, those residues burn away. That burning process releases volatile organic compounds into the air, which creates the distinct plastic or chemical smell.
The heating coil sits at the top of the appliance, directly exposed to the fan. As air circulates, it pushes those fumes down through the basket and out the exhaust vent. This means the entire cooking chamber fills with the odor before it escapes into your kitchen.
Because the fan moves air so rapidly, the smell can feel much stronger than it would from a standard oven going through the same break-in phase.
Most budget and mid-range models use stamped metal baskets coated with PTFE-based non-stick layers. PTFE is safe for cooking at normal temperatures, but the initial curing process can release a slight odor. Higher-end units sometimes use ceramic coatings or stainless steel interiors, which tend to produce less noticeable fumes during their first run.
Regardless of the material, some level of initial off-gassing is standard across all brands.
Factory Protective Coatings Burning Off
The primary source of the smell is the anti-corrosion oil applied to the heating element. Factories coat the bare metal coils to prevent rust while the units sit in warehouses or ship overseas. This oil is never meant to stay on the element permanently.
It is designed to burn off completely once the appliance reaches high heat. During that first twenty-minute run, the oil smokes slightly and produces a sharp, synthetic odor.
You might also notice a faint haze near the exhaust vent during this phase. That is just the vaporized oil escaping. Once the coating burns away entirely, the haze stops and the smell fades.
Running the unit empty at its highest temperature setting accelerates this process. Doing this outside or under a strong range hood keeps the fumes out of your living space.
Plastic Housing Heating Up Nearby Components
While the heating element causes most of the odor, the outer shell plays a minor role too. The exterior housing is made of heat-resistant plastics like polypropylene. During the first few uses, the internal heat radiates outward and warms this plastic shell.
New plastic releases its own mild scent when heated, adding to the overall chemical smell inside the kitchen.
This secondary odor is much weaker than the one coming from the heating coil. It also dissipates faster because the exterior plastic does not have heavy factory oils baked onto it. After three or four uses, the housing fully cures and stops releasing any noticeable scent.
Keeping the appliance away from walls or cabinets allows better airflow, which cools the exterior faster and reduces this specific smell.
Removing the Plastic Smell Before Your First Meal
You do not have to just tolerate the odor while cooking your first batch of food. A quick cleaning routine removes loose factory dust and excess oils before the heating element even turns on. Skipping this step means the fan blows loose particles around, which can stick to the heating coil and create more smoke.
Wiping everything down takes five minutes and significantly cuts down the initial fumes.
Start by removing the basket and crisper plate. Wash both pieces in warm water with standard dish soap. Use a soft sponge rather than an abrasive scrubber, since scratching the non-stick surface ruins the coating.
Rinse them thoroughly and dry them completely with a towel. Any leftover moisture will turn to steam and mix with the burning oils, making the smell worse.
Next, take a damp cloth and wipe the inside of the main unit. Focus on the walls of the cooking chamber and the area around the heating element. Do not submerge the base in water or run it under a faucet.
You only need to remove visible dust or oily residue left behind from packaging. Once the interior is wiped and dry, reassemble the basket and plug the unit in.
The Vinegar and Lemon Steam Method
White vinegar neutralizes odors effectively because its acetic acid binds to the volatile compounds causing the smell. Lemon juice adds citric acid, which cuts through greasy factory residues. Combining them creates a steam bath that coats the interior surfaces without requiring harsh scrubbing.
This method works well for stubborn smells that survive a basic soap wash.
Place a small oven-safe bowl inside the basket. Add equal parts white vinegar and water, filling the bowl about halfway. Squeeze half a lemon into the mixture and drop the rind in as well.
Set the temperature to 350 degrees Fahrenheit and run the cycle for ten to fifteen minutes. The liquid will boil and fill the chamber with acidic steam.
Once the cycle finishes, unplug the machine and let it cool completely. Remove the bowl and wipe the interior walls with a clean, damp cloth. You will likely notice the vinegar smell replaces the plastic odor temporarily.
Leave the basket open in a well-ventilated room for an hour. The vinegar scent evaporates quickly, taking the chemical smell with it.
Baking Soda Paste for Stubborn Residue
If the vinegar steam leaves a faint odor behind, baking soda absorbs what is left. Mix three tablespoons of baking soda with enough water to form a thick paste. Apply this paste directly to the interior walls of the cooking chamber using a soft cloth.
Avoid rubbing it onto the heating element itself, as dried powder can block airflow or cause sparking later.
Let the paste sit for thirty minutes. Baking soda is highly porous and pulls trapped odors out of the microscopic texture of the metal and plastic surfaces. After thirty minutes, wipe the paste away with a damp sponge.
Rinse the sponge frequently to avoid spreading the dissolved residue back onto the walls. Dry the interior with a paper towel before plugging the unit back in.
This approach is especially useful if you bought a floor model or a refurbished unit that sat in a warehouse for months. Older inventory tends to accumulate more dust and stale factory oils. The baking soda treatment lifts that aged grime much better than dish soap alone.
| Cleaning Method | Best Used For | Time Required | Materials Needed |
|---|---|---|---|
| Warm Soapy Wash | Removing loose dust and packaging oils | 10 minutes | Dish soap, soft sponge, towel |
| Vinegar and Lemon Steam | Neutralizing strong chemical odors | 20 minutes | White vinegar, lemon, water, small bowl |
| Baking Soda Paste | Absorbing lingering or aged smells | 45 minutes | Baking soda, water, soft cloth |
| High Heat Burn-Off | Curing the heating element coating | 20 minutes | None (run empty) |
Running a Break-In Cycle Safely
After washing and treating the interior, you still need to burn off the remaining protective oils on the heating coil. This requires running the appliance empty at a high temperature. Doing this correctly prevents the smell from transferring to your food later.
If you skip the break-in cycle, your first meal will likely taste slightly chemical or metallic.
Take the appliance outside if possible. Place it on a sturdy patio table or concrete surface away from flammable materials. Plug it into an outdoor outlet or use a heavy-duty extension cord rated for high-wattage appliances.
Running it outdoors keeps the fumes completely out of your house. If you live in an apartment without outdoor access, place it directly under your stove's exhaust hood and turn the fan to maximum.
Set the temperature to the highest setting available, usually 400 degrees Fahrenheit. Set the timer for twenty minutes. Let the unit run completely empty.
Do not put the basket inside during this step if the manual advises against it, though most manufacturers recommend leaving the basket in so it cures alongside the element. Watch for light smoke coming from the back vent. This is expected.
Once the timer goes off, unplug the machine. Let it cool down naturally with the basket pulled out slightly to allow airflow. Do not pour cold water on the hot element to speed up cooling, as thermal shock can crack the metal or shatter the non-stick coating.
After it reaches room temperature, wipe the interior one last time to remove any ash or soot left by the burned oil. From here, the unit is ready for actual food. Once you start cooking regularly, knowing how long potatoes take or timing other staples becomes much easier without worrying about strange background flavors.
When the Smell Points to a Real Problem
A plastic odor during the first three uses is normal. A plastic odor that appears suddenly after six months of regular cooking is a warning sign. Appliances degrade over time, and certain failures produce dangerous fumes.
Knowing the difference between a harmless break-in smell and a melting component keeps you safe.
If you notice a sharp, acrid smell accompanied by visible smoke or a flickering display panel, unplug the unit immediately. Do not try to finish your cooking cycle. This usually indicates an electrical short or a failing wire insulation inside the base.
The wiring harness runs close to the heating element, and prolonged exposure to extreme heat can eventually melt the rubber casing around the wires.
Another common failure point is the fan motor. The motor relies on plastic gears or bushings in cheaper models. When the motor overheats due to grease buildup or age, those plastic parts begin to melt.
This produces a sweet, sickly burning smell that is distinct from the sharper factory-oil odor. If the fan sounds louder than usual or rattles before the smell starts, the motor bearings are likely failing.
Check the power cord as well. High-wattage countertop appliances draw significant current. If you plugged the air fryer into a power strip or an outlet shared with another heavy appliance like a microwave, the cord can overheat.
Feel the plug and the cord near the wall outlet. If they are hot to the touch or smell like burning rubber, the circuit is overloaded. Move the appliance to a dedicated wall outlet.
Checking reviews of specific builds, like this Ninja glass model, can also reveal whether certain designs run hotter than average.
Melted Accessories Left Inside the Basket
Sometimes the problem has nothing to do with the appliance itself. People frequently leave silicone spatulas, paper towels, or plastic food packaging inside the basket between uses. When the unit preheats, these items press against the heating element or the hot upper walls and melt instantly.
This creates a massive amount of toxic black smoke and a terrible smell.
Always check the basket visually before turning the machine on. If you accidentally melt something inside, unplug the unit and take it outside. Let it cool completely.
You will need to carefully scrape the melted plastic off the non-stick coating using a wooden spoon or a plastic scraper. Never use a metal knife, as gouging the coating exposes bare metal that will rust and flake into future meals. If the plastic fused directly to the heating coil, the appliance is likely ruined and needs replacement.
How Ventilation Changes the Experience
Where you keep your air fryer dictates how bad the plastic smell feels. Countertop placement matters more than most people realize. Pushing the appliance flush against a wall or tucking it under low-hanging cabinets traps the exhaust.
The hot, odorous air bounces off the backsplash and lingers in the immediate breathing zone.
Leave at least five inches of clearance behind the exhaust vent. Keep the top of the unit completely clear so heat can rise away from the electronics. If your kitchen lacks good cross-breeze ventilation, open a nearby window during the first few uses.
The goal is to create a path for the air to exit the room rather than circulating back down toward the counter.
Using the appliance near a range hood is the best indoor setup. Turn the hood fan on before starting the air fryer. The hood captures the rising fumes and vents them outside or filters them through charcoal pads.
This simple habit makes the break-in process virtually unnoticeable indoors. Even after the plastic smell is gone, running the hood helps clear normal cooking grease from the air, keeping your kitchen cleaner overall. Proper ventilation also matters when you are warming up leftover pizza late at night and want to avoid setting off sensitive smoke alarms.
Does the Type of Non-Stick Coating Matter
The material lining the basket affects both the intensity and duration of the initial smell. Most affordable air fryers use PTFE, commonly known by brand names like Teflon. PTFE requires a curing process at the factory, and trace amounts of uncured material often remain on the surface.
When you heat it for the first time, those traces off-gas. The FDA regulates food-contact surfaces, and standard PTFE coatings are approved for cookware, but the initial heating phase still produces a noticeable odor. You can read more about FDA cookware safety standards if you want deeper context on approved materials.
Ceramic-coated baskets generally smell less during break-in. Ceramic coatings are typically free of PTFE and cure differently during manufacturing. They tend to release fewer volatile organic compounds when heated initially.
However, ceramic coatings wear out faster than PTFE if you use metal utensils or abrasive sponges. Once the ceramic chips, the exposed aluminum underneath reacts with acidic foods and creates a different type of metallic smell.
Stainless steel baskets produce almost no plastic odor because they lack synthetic coatings entirely. The tradeoff is that food sticks aggressively to bare stainless steel unless you use cooking spray or oil. Very few consumer air fryers use fully uncoated stainless steel interiors due to this sticking issue.
If you prioritize zero chemical smell above all else, look for models advertising uncoated steel components, but be prepared for extra scrubbing after every meal. Choosing a reliable machine, such as a well-reviewed Cuisinart build, often balances coating durability with minimal initial odor.
Lingering Odors After Cooking Certain Foods
Sometimes owners confuse food odors with a returning plastic smell. Cooking fatty proteins generates heavy grease splatter. If that grease hits the upper heating element and isn't cleaned off, it bakes into a hard carbon layer.
The next time you turn the machine on, that old grease burns and produces a harsh, acrid smoke that mimics a chemical fire.
This happens frequently when people cook heavily seasoned meats or battered foods. The spices and flour burn onto the element much faster than plain oil. To prevent this, wipe the ceiling of the cooking chamber with a damp cloth after preparing greasy meals.
Wait until the unit is completely cool and unplugged. Reach in carefully with a soft microfiber cloth to avoid bending the delicate metal fins around the heating coil.
Fish leaves a particularly stubborn scent that binds to plastic housings. If you cooked salmon yesterday and the unit smells strange today, it is likely trapped fish oils rather than melting plastic. Washing the basket with hot soapy water usually fixes it.
For persistent food smells trapped in the exterior vents, wiping the outside casing with a diluted vinegar solution pulls the oils out of the textured plastic. Getting the timing right on delicate proteins, like knowing exactly when salmon finishes, prevents excessive smoking and keeps the interior cleaner.
Common Mistakes That Make the Smell Worse
People often panic when they smell the initial plastic odor and make errors that damage the appliance or prolong the problem. Rushing the cleaning process or using the wrong chemicals creates new issues.
- Spraying aerosol cooking sprays directly into a hot basket. Many commercial cooking sprays contain propellants and emulsifiers that leave a sticky residue. When this residue builds up on the heating element, it burns and smells like melting plastic. Use pump-action oil sprayers or brush oil on manually instead.
- Washing the hot basket in cold water. Plunging a 400-degree basket into a sink full of cold water causes thermal shock. This can warp the metal frame and crack the non-stick coating. Cracked coating exposes raw materials that smell strange when reheated. Always let the basket cool on the counter first.
- Ignoring the drip tray or bottom pan. Grease pools at the very bottom of the unit beneath the basket. If you never pull this out and wash it, the pooled fat heats up repeatedly during every use. Eventually, it scorches and fills the kitchen with a burning chemical stench.
- Running the unit continuously for hours. Air fryers are designed for short, intense cooking bursts. Leaving one running for multiple hours straight, perhaps trying to dehydrate large batches of fruit, overstresses the fan motor and heating element. Overheated motors smell like burning plastic and fail prematurely.
- Using harsh oven cleaners inside the chamber. Standard oven cleaners contain lye and other caustic chemicals. These strip the non-stick coating entirely and leave behind toxic residues. When heated, those residues release fumes far worse than the original factory smell. Stick to dish soap, vinegar, and baking soda.
If you follow a solid maintenance routine, the initial plastic smell stays confined to the first day of ownership. Treat the break-in cycle as a mandatory step rather than an optional suggestion. Wash the parts, run the vinegar steam, burn off the element outdoors, and wipe it down.
After that process, the appliance should smell like nothing but the food you put inside it. And once that fresh start is complete, you can focus on the fun part, like finding the right dipping sauces for crispy wings or testing out new recipes without worrying about strange background flavors ruining the meal.
Frequently Asked Questions
Is the plastic smell from a new air fryer toxic?
The odor released during the first few uses comes from burning factory oils and curing coatings. While unpleasant, brief exposure during a standard break-in cycle is generally considered safe for adults. However, you should run the initial empty heating cycle in a highly ventilated area or outdoors.
People with asthma or severe respiratory sensitivities should avoid the room entirely until the unit cools and the air clears.
How many uses before the plastic smell goes away completely?
For most models, the smell disappears after two to three full cooking cycles. Running a dedicated twenty-minute empty burn-off at maximum heat usually handles the worst of it immediately. If you washed the unit thoroughly with soap and vinegar before that first run, you might not notice any odor at all during actual cooking.
Cheaper units with heavier factory coatings occasionally take four or five uses to fully cure.
Can I use my air fryer if it still smells slightly like plastic?
If the smell is faint and you are only on your first or second use, it is likely just residual off-gassing. You can cook food, though strongly flavored items might pick up a slight chemical taste. It is better to run another empty high-heat cycle or repeat the vinegar steam method first.
If the smell is strong, sharp, or accompanied by smoke after several uses, stop using the appliance and contact the manufacturer.
Why does my old air fryer suddenly smell like burning plastic?
A sudden plastic smell in an older unit usually points to a hardware failure rather than normal off-gassing. Check for a failing fan motor, melting wire insulation near the heating element, or foreign objects stuck to the upper coil. Unplug the machine immediately and inspect the interior with a flashlight.
If you see melted plastic, scorch marks on the wiring, or a seized fan blade, the appliance needs professional repair or replacement.
Does putting foil in the basket cause a plastic smell?
Aluminum foil itself does not smell like plastic when heated. However, if lightweight foil gets sucked upward by the powerful fan and touches the heating element, it can melt the surrounding plastic housing or spark against the coil. This creates a burning smell and poses a fire hazard.
Always weigh foil down securely with food and never let it cover the entire bottom of the basket, as blocking airflow forces the motor to work harder and overheat.
What to Remember About That First Run
That sharp chemical smell is just the manufacturing residue doing exactly what it is supposed to do: burning off. Don't let it scare you away from using the appliance. Take the time to wash the basket, run the vinegar steam, and do the empty high-heat cycle outside or under your hood.
Those thirty minutes of prep save you from eating food that tastes like a hardware store. Once the element cures and the exterior housing settles, the machine runs clean. Just keep the heating coil free of built-up grease after that, and the only thing you will smell is dinner.