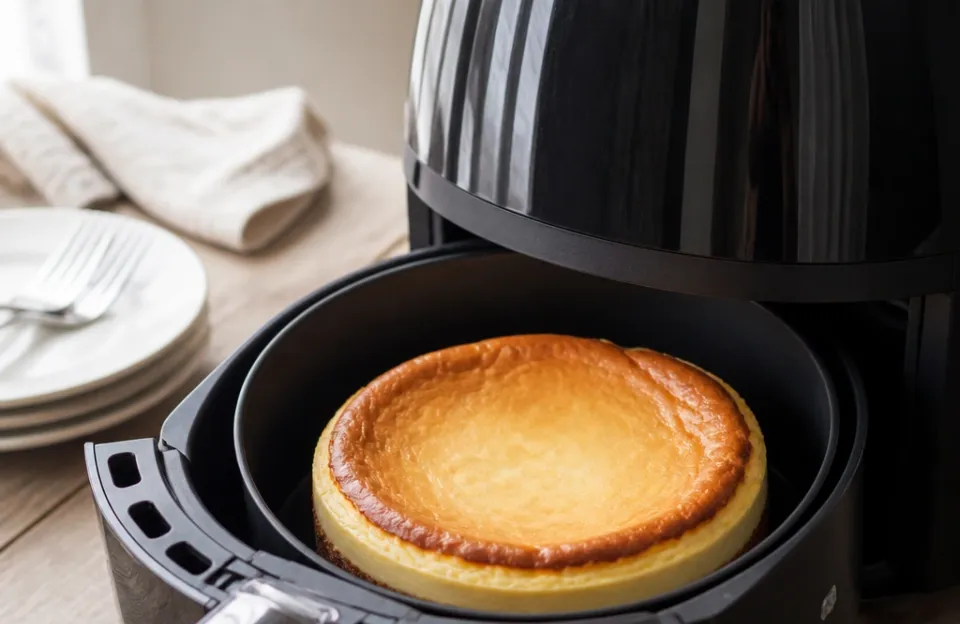
You can bake a genuinely creamy cheesecake in an air fryer. The method uses a small oven-safe pan, a lower temperature than a conventional oven recipe, and a thermometer check instead of guesswork. Most batches finish in roughly 25 to 35 minutes, though the exact window depends on your model, pan, and batter depth.
The main variables are pan fit, temperature reduction, and doneness. Get those three right and the rest of the process is forgiving.
Why Air Circulation Changes Baking Times and Textures
Air fryers use rapid convection: a powerful fan circulates hot air at high speed inside a small, enclosed chamber, which makes them more efficient than a conventional oven where air moves slowly through a much larger space. For a custard-based dessert, that efficiency cuts both ways. The surface sets faster, the top browns sooner, and the interior can overcook before you realize the center has passed the point of creaminess.
Because of that, the standard conversion advice is to reduce the oven temperature by about 25°F and shorten the cooking time by roughly 20 to 25 percent, meaning you multiply the original time by about 0.75. These are starting estimates, not precise formulas, and they were developed for general baking rather than custard specifically. Baked goods such as cakes and breads need extra attention when converted from a conventional oven, and cheesecake belongs in that category.
The practical takeaway: set your air fryer a little lower than the original recipe, check earlier than you think you need to, and rely on internal temperature rather than the clock.
Pan Size and Clearance Come First
Before you mix anything, measure your basket. A pan that fits but leaves no airflow gap will produce a steamed, uneven result.
Air fryer ovens generally accept 6 to 8-inch baking pans that are 2.8 inches or shallower, as long as the pan leaves 1 to 2 inches of clearance around all sides for airflow. The depth limit matters most: anything taller than about 2.8 inches risks touching the heating element, which can burn the food and damage the machine. You should also leave a gap of roughly 1 to 2 cm all the way around the bakeware, avoid covering the perforated base of the basket, and keep everything clear of the element above.
Size guidance by pan diameter:
- 6-inch pan: fits every basket-style air fryer and most oven-style units with room to spare. It also fits a 3.5 to 4 litre basket and works for single-layer cakes, quiches, and frittatas.
- 7-inch pan: a middle-ground size that suits Philips and Ninja basket models.
- 8-inch pan: the maximum for most standard air fryers, but clearance should be checked before baking.
For Philips Airfryers specifically, a small basket accepts pans up to 7.1 x 3.6 inches and a large basket fits pans up to 6.7 x 7.1 inches. Treat that as a reference point rather than a universal rule, since it is secondhand information and your own model may differ.
One more caution: never place a solid dish that covers the entire basket base. It traps air underneath, kills circulation, causes the bottom of the food to steam rather than set evenly, and may cause the machine to overheat.
Choosing a Safe Pan Material
Any bakeware labeled oven-safe works in an air fryer, and air fryer temperatures rarely exceed 400°F, which is well within the limits of standard bakeware. Within that group, the materials behave differently.
Oven-safe metal tins and foil trays perform well because metal heats fast and distributes heat evenly, making it the most reliable choice for baking. Oven-safe ceramic and stoneware retain heat well and are suitable if they carry an oven-safe mark; that heat retention is useful for dishes that benefit from residual cooking, though it can also push a custard past its target after you pull the pan out. Tempered, oven-rated glass works if the glass is at room temperature before it goes in and the machine is not running at extreme heat.
Avoid loose paper in the basket. Paper towels, napkins, and unweighted parchment sheets can be caught by the fan and blown upward into the heating element, creating a fire hazard.
Adapting a Conventional Cheesecake Recipe
Start from a recipe you already trust, then make two adjustments.
Temperature: drop the oven temperature by about 25°F. If your recipe calls for 325°F, set the air fryer to 300°F.
Time: reduce the original baking time by 20 to 25 percent. If the recipe says 60 minutes, start checking around 45 minutes. Because these figures are general estimates rather than custard-specific conversions, treat the earliest estimate as your first checkpoint, not your target.
If you are starting from a recipe written in Celsius, make the temperature conversion first and then apply the reduction, since the 25°F figure is a Fahrenheit adjustment.
Mixing a Smooth Batter
Creamy texture starts before the pan goes in. Two habits matter most:
Bring ingredients to room temperature. Cold cream cheese resists blending, which tempts you to keep mixing and incorporate air.
Mix on low speed and stop as soon as the batter is uniform. Air whipped into the batter expands during baking and then collapses as the cheesecake cools, which is a common cause of sunken centers. Scrape the bowl down once or twice rather than running the mixer longer.
Pour the batter into your prepared pan and smooth the top. Tap the pan gently on the counter a few times to release large bubbles.
Equipment Beyond the Basket
You need a pan that fits, and you need a way to measure the center. A fast digital thermometer lets you confirm the interior has reached a safe temperature without repeatedly opening the basket and losing heat.
A reliable wireless probe is useful for the same reason: air fryers lose heat quickly when opened, so monitoring without breaking the seal helps keep the bake even.
Checking Doneness with a Verified Safe Temperature
This is the step where most air fryer cheesecakes go wrong, in one direction or the other.
The USDA Food Safety and Inspection Service states that egg dishes such as quiche and casseroles should be cooked to a safe minimum internal temperature of 160°F. The FDA gives related guidance for food service operations: foods prepared with raw shell eggs not broken for immediate service should be cooked to 68°C (155°F) for 17 seconds. For a home cheesecake, 160°F is the practical target.
Insert your thermometer into the center of the cheesecake, avoiding the crust and the very bottom of the pan. When the center reads 160°F, it is safely cooked. The center should look slightly jiggly when you nudge the pan, and it will firm up considerably during chilling.
If the center is below 160°F, return the pan to the air fryer and check again in 5-minute intervals. Do not chase a higher number than needed. The goal is a safe temperature, not the highest one you can reach.
Cooling Gradually to Prevent Cracks
Cracks come from fast temperature changes, either during baking or when the cheesecake moves from hot appliance to cool counter.
The FDA advises cooling cooked eggs and egg-containing foods from 57°C (135°F) to 21°C (70°F) within two hours, and then to 5°C (41°F) within an additional four hours. That gives you a framework: your cheesecake should move through the warm-to-cool range steadily, then into the refrigerator, without sitting out for hours.
A practical sequence that fits that framework: turn the air fryer off and let the cheesecake rest inside with the basket slightly open for 10 to 15 minutes. Then move it to a wire rack on the counter until the pan is close to room temperature. Run a thin knife around the edge once the cake has firmed, then refrigerate.
Troubleshooting Common Problems
Cracked top. Almost always a fast temperature change or an overbaked surface. Cool more gradually next time and pull the pan as soon as the center hits 160°F.
Sunken center. Usually overmixed batter or an underbaked middle. Mix on low speed only until smooth, and verify the center temperature rather than relying on visual cues.
Wet or soggy bottom. Often caused by inadequate airflow under the pan. Check that you have 1 to 2 inches of clearance and that nothing is blocking the perforated base of the basket. A solid dish covering the whole basket base traps air and causes this directly.
Overbaked, dry, or grainy. The custard went past its target. Air fryers vary in temperature accuracy by as much as 67°F, so your 300°F setting may not be 300°F in practice. Check earlier next time and use the thermometer as your main signal.
Uneven browning on one side. Rotate the pan partway through if your model has a hot spot, but do it quickly to preserve heat.
Adjusting for Different Air Fryer Models
There is no single universal temperature and time for air fryer cheesecake. Models differ in wattage, basket volume, fan strength, and temperature accuracy, and that last factor alone can swing results by up to 67°F. An oven thermometer helps you learn what your unit actually does at a given setting.
Use the first batch as calibration. Note the actual temperature, the time it took to reach 160°F at the center, and how the top browned. Then adjust for batch two.
Water and Foil: What to Know Before You Try It
You will find advice online about adding water to the basket to create steam, or covering the pan with foil to slow browning. Both carry caveats worth understanding before you do either in your own appliance.
Water. A small amount of water in the drawer beneath the basket can sometimes help reduce smoke when cooking fatty foods, because it catches hot fat before it burns. Filling the basket with water is not recommended, since too much water can splash, steam excessively, or damage parts. Pouring water into the air fryer unit itself is not safe because water needs to be kept away from electrical components. Independent sources describe these uses, but they are not manufacturer manuals, so check your own model’s instructions before adding water to any part of the appliance.
Foil. Aluminum foil is safe to use in an air fryer as long as you follow three rules: never let foil touch the heating element, make sure the foil is weighted so it does not blow around the basket, and avoid contact with acidic ingredients. Individual manufacturers may state different requirements, so your manual is the final word for your unit.
Given these limits, a cheesecake that fits properly and is checked with a thermometer usually does not need either intervention. If you do use foil, tent it loosely and keep it well clear of the element.
Storing Leftover Cheesecake
Once your cheesecake has cooled, the safety framework is the same as for any egg-containing food. The FDA advises holding cooked eggs and egg-containing foods cold at 5°C (41°F) or below.
Wrap the cheesecake tightly or transfer slices to an airtight container and refrigerate promptly. Keep it cold at or below 41°F throughout storage. If you are cooling a freshly baked cheesecake rather than storing leftovers, follow the two-stage cooling timeline: 135°F down to 70°F within two hours, then down to 41°F within four more hours.
Specific refrigerator and freezer shelf-life figures for homemade cheesecake are not established by a single authoritative source, so use your judgment on quality and rely on the temperature rules for safety.
Before Your Next Batch
The method is straightforward once you have the three anchors in place. Choose a pan that fits with 1 to 2 inches of clearance on all sides and stays at or under 2.8 inches deep. Drop your recipe’s temperature by about 25°F and its time by 20 to 25 percent, then check earlier than the estimate suggests. Bake until the center reads 160°F.
If you want to practice the same convection-baking approach on something simpler before committing to a custard, air fryer cookies use a similar temperature reduction and a much shorter window. For a savory bake in the same pan size, air fryer zucchini is a quick way to get familiar with how your model circulates heat.
Cool gradually, chill thoroughly, and keep it cold. That covers both the creaminess and the safety side of the equation.




