If you don’t have an air fryer, or yours just broke, you can still get crispy food. A convection oven is the closest general substitute because both cook with fan-driven hot air. A conventional oven, toaster oven, cast iron skillet, deep fryer, broiler, grill, or microwave convection mode can also work, depending on the food. Each method needs adjusted temperature, time, oil, and attention to doneness.
Knowing what to use when your countertop appliance is unavailable saves dinner. This guide covers how each alternative works, what foods it handles best, and where it falls short compared with a dedicated machine. You’ll also find timing adjustments so you don’t end up with burnt edges or raw centers.
How Countertop Air Frying Actually Works
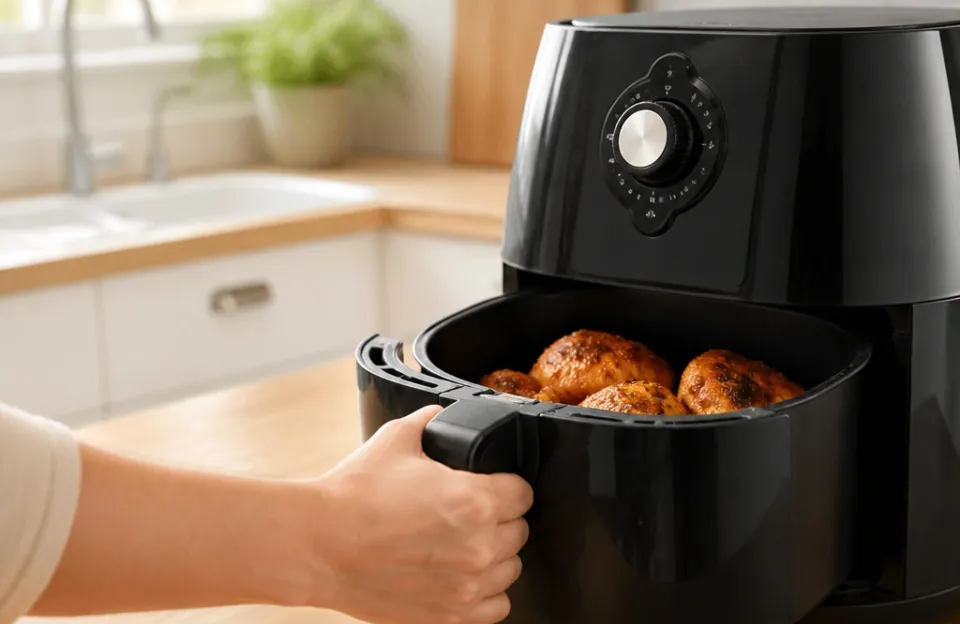
An air fryer is essentially a countertop convection oven. A heating element sits near the top, and a powerful fan blows hot air down and around the food in a tight basket. Because the cooking chamber is small, the air moves fast and stays intensely hot.
That rapid circulation pulls moisture off the surface of the food, and the food becomes crisp through the quick circulation of hot air. Air fryer recipes generally cook for 5 to 25 minutes at 350 °F to 400 °F.
When you look for air fryer alternatives, you are looking for other ways to achieve that dry, intense heat. Standard ovens do this more slowly. Skillets do it through direct contact with hot metal and oil. Deep fryers submerge the food entirely. The goal is always the same: trigger the Maillard reaction, which browns proteins and sugars to build flavor and crunch.
The main difference between these methods comes down to space and airflow. A large oven takes longer to heat because there is more empty space to fill. A skillet only heats the bottom of the food unless you flip it. Understanding these mechanics helps you pick the right tool for the meal you are making.
Your Standard Oven: Convection Versus Conventional
A full-sized convection oven is the closest match among air fryer alternatives. It has a fan built into the back wall that circulates hot air around the racks. A conventional oven without a fan still works, but it is a weaker substitute for crispness.
Air fryers cook faster and consume less energy than larger ovens, so expect the full oven to feel slower. Preheating takes longer, and the larger cavity distributes heat less aggressively than a small basket.
To mimic an air fryer, change two things: temperature and cookware. Place food on wire racks set over rimmed pans rather than solid baking sheets. Elevating the food lets hot air hit the bottom, preventing soggy spots.
This method handles large batches easily. You can spread out a whole tray of potato wedges without them touching. Crowding is the enemy of crispiness, and a full oven gives you plenty of space. Getting the timing right for potatoes requires watching them closely, since a larger oven cavity browns less aggressively than a small basket.
Reconciled Temperature and Time Conversions
Published conversion guidance conflicts, so treat any single formula as a starting point and check food early. One source suggests setting a convection oven about 25 °F lower than the air fryer temperature and extending cooking time by about 20 percent, yet the same source also offers a conflicting alternative of 25 °F lower plus 5 to 10 minutes.
A conversion calculator uses a 25 °F drop for a conventional oven and a 15 °F drop for a convection oven, with time multipliers of 1.1 for thin foods, 1.2 for standard foods, and 1.35 for thick foods. A food blog recommends increasing the temperature by about 25 °F and adding about 5 to 10 minutes for a conventional oven.
A practical approach:
- Convection oven: drop the air fryer temperature by roughly 15 to 25 °F, keep the time close to the original, and check early.
- Conventional oven: keep the temperature at or slightly above the air fryer setting (about 25 °F higher), then add time.
- Always check early: about 3 minutes before the estimate for thin foods and 5 minutes before for standard or thick foods. You can always cook something longer, but you can’t un-burn it.
Rotate your pans halfway through cooking. Even convection ovens have hot spots, and swapping the top and bottom racks keeps everything browning evenly. If you’re roasting vegetables like zucchini slices on a rack, give them space so steam escapes instead of pooling under the food. Using a wire rack over a baking dish or stone helps air circulate.
Toaster Ovens Built for High Heat
Modern toaster ovens are capable machines, and many include a dedicated air fry setting. Even without that button, the compact size makes a toaster oven a strong air fryer alternative. The heating elements sit close to the food, mimicking that intense, direct heat.
Use the highest fan setting your toaster oven allows. Place food on the wire rack that came with the unit, not directly on the crumb tray. As with the full oven method, airflow underneath matters.
Toaster ovens suit single servings or small batches: two chicken breasts or a handful of fries fit comfortably. They preheat faster than a wall oven. This makes them practical for weeknight meals when you want speed without sacrificing texture.
One limitation is height. Thick items might sit too close to the top heating element and burn before the center cooks through. Keep an eye on taller foods and lower the rack if needed. If you plan to roast a thicker cut, checking guides on cooking salmon fillets properly helps you judge the clearance your toaster oven actually needs.
Cast Iron Skillets and Stovetop Searing
Sometimes you don’t need circulating air at all. A heavy cast iron skillet provides intense, even heat directly to the surface of the food. This is how people got crispy food for decades before countertop appliances existed.
Pan-frying uses a thin layer of oil, usually about an eighth of an inch. Heat the skillet until the oil shimmers, then add your food. The direct contact creates a hard sear immediately.
This method works especially well for breaded cutlets, bacon, and smaller cuts of meat. Rendering bacon strips in a cold pan first, then raising the heat, yields flat, crunchy results without forced air.
The downside is attention. You have to stand there and flip the food. An air fryer lets you walk away; a skillet demands you stay close. Grease splatter is another reality, so plan on wiping down the stove afterward.
Cast iron retains heat beautifully. Once it’s hot, adding cold food doesn’t drop the temperature drastically, and that steady heat is what builds a good crust. Avoid moving the food around too much once it’s in the pan. Let it sit and form a bond with the metal before flipping.
Shallow Frying Breaded Meats
For heavily breaded items, shallow frying beats baking almost every time. Oil conducts heat faster than air, so flour-dusted wings or coated drumettes turn golden brown in minutes. When you’re searing seasoned chicken pieces in a skillet, keep the oil depth consistent so the breading sets uniformly before you flip.
Use a neutral oil with a high smoke point. Oils with high smoke points recommended for deep frying include olive, peanut, canola, corn, grapeseed, safflower, sunflower, and vegetable oil. Olive oil can taste bitter at very high searing temperatures, so choose according to the heat you plan to use.
Deep Frying for Maximum Crunch, Safely
Deep frying is the original method for the texture people now expect from an air fryer. Deep-fried food comes out hot and crispy outside and safely cooked in the center, and deep frying oil can reach temperatures over 400 °F. Cooking oil is a highly flammable liquid, so extreme safety measures are needed.
This is the best choice when texture is your absolute priority. The oil seals the exterior quickly, building a thick crust while the inside cooks. The drawbacks are obvious: deep frying requires cups of oil, it’s messy, and disposing of used oil is a chore.
Oil Temperature, Pot Choice and Fill Level
USDA lists example deep-frying oil temperatures of 375 °F for chicken pieces and turkey, 350 °F for chicken fingers, and 320 °F for fish fillets and shrimp. Use a thermometer to monitor the oil rather than guessing.
If you don’t own a dedicated fryer, use a deep, heavy skillet. Avoid cast iron for deep frying because it breaks down oil faster than other metals. Never leave the fryer unattended. Because frying is so fast, food can blacken, burn, and become a fire hazard if cooked only a few minutes too long.
Do not overcrowd the frying basket. Overcrowding can cause undercooking, uneven cooking, and overflowing oil. Keep a kitchen fire extinguisher available when deep-frying.
Water, Grease Fires and Recovery Steps
Never add wet food to hot oil. When water encounters very hot oil at about 350 °F, it vaporizes instantly into superheated steam, expands quickly, and can cause oil to splatter and injure you.
If a grease fire starts, never use water to put it out, because water can cause flaming oil to splatter and spread. A kitchen fire extinguisher or covering the fryer with a metal lid is the best way to put out a grease fire, and you should call 911 immediately.
Checking Doneness After Frying
Do not test the internal temperature of food while it is submerged in hot oil, because that gives an inaccurate reading. Remove the food from the oil first, then check it with a food thermometer.
USDA safe minimum internal temperatures are 145 °F for fish, 145 °F with a 3-minute rest for whole cuts of beef, pork, veal and lamb, 160 °F for ground meat, and 165 °F for poultry. The broader USDA chart also lists 165 °F for leftovers and casseroles, and FoodSafety.gov lists 165 °F for all poultry, including ground poultry and stuffing inside poultry.
Broilers and Direct Radiant Heat
Every oven has a broiler, which is essentially an upside-down grill. The heating element blasts intense radiant heat downward onto the top surface of your food. While it doesn’t circulate air, it browns surfaces very fast.
Broiling works best for thin cuts of meat, melting cheese on casseroles, or charring vegetables. Place your oven rack about four to six inches below the broiler element and watch the food constantly. The line between perfectly charred and completely burnt is short.
This isn’t a complete replacement for an air fryer because it only heats one side at a time. You still have to flip the food, and thicker items can burn on the outside before the inside reaches a safe temperature.
Use the broiler as a finishing step rather than a primary cooking method. If you’ve baked a dense two-pound meatloaf slowly, a quick blast under the broiler glazes the top without drying out the center. Always confirm doneness with a thermometer.
Microwave Convection Modes
Many modern microwaves include a convection setting. When activated, a heating element turns on and a fan circulates air inside the microwave cavity, turning your microwave into a miniature oven.
Microwave convection modes can be effective for small items such as reheating pizza, crisping a few tater tots, or baking a single potato. The cavity is even smaller than a toaster oven’s, so it heats up quickly. The limitation is capacity: large platters or tall glasses won’t clear the rotating plate.
Separating Microwave Mode from Convection Mode
The safety rules differ between the two modes, and they are not interchangeable. Microwave energy and metal do not mix, while convection mode uses a heating element and fan. Cookware that is safe in convection mode may be unsafe in microwave mode.
Follow your appliance manual for which racks, pans, and materials the manufacturer permits in each mode. Do not assume a metal rack included with the oven is safe during microwave operation. Read the manual carefully before switching modes to avoid sparking or damage.
Outdoor Grills and Smokers
A charcoal or gas grill provides intense, dry heat. Closing the lid traps that heat and creates a convection effect similar to an oven. Grills are excellent air fryer alternatives in warmer months when you don’t want to heat up the kitchen.
Indirect grilling is the key technique. Light one side of the grill and place the food on the unlit side, then close the lid. The ambient temperature inside will hover in a roasting range, and you get the added benefit of a slight smoky flavor that no indoor appliance can replicate.
Grills require more setup time and are bulkier to operate than plugging in a countertop device. They suit larger items like whole chickens, thick steaks, or big batches of vegetables. Trying to grill a handful of frozen fries is frustrating because they fall through the grates, so use a grill basket or a sheet pan placed directly on the grates for smaller items.
Comparing Methods, Matching Foods and Adapting Recipes
Different methods yield different results. Picking the right one depends on whether you value speed, crunch, or convenience most. The table below summarizes qualitative differences, not measured test results.
| Method | Preheat Time | Crispiness Level | Oil Needed | Best Used For |
|---|---|---|---|---|
| Convection Oven | 10-15 mins | High | Minimal | Large batches, sheet pan meals |
| Toaster Oven | 3-5 mins | High | Minimal | Small portions, quick reheats |
| Cast Iron Skillet | 2-3 mins | Medium-High | 1-2 tbsp | Breaded meats, bacon, searing |
| Deep Fryer | 5-10 mins | Very High | Several cups | Fries, battered foods, doughnuts |
| Broiler | Instant | Medium (top only) | None | Melting cheese, thin steaks |
| Grill (Indirect) | 10-20 mins | High | Minimal | Whole birds, outdoor cooking |
Preheat times vary widely by model. Regardless of the tool, always let the cooking surface reach the target temperature before adding food. Dropping ingredients into a cold pan or lukewarm oven guarantees a soggy exterior.
Matching Specific Foods to the Right Method
Frozen snacks and appetizers. Mozzarella sticks, tater tots, and frozen dumplings do best in a toaster oven or convection oven. Spread them on a wire rack so dry heat evaporates surface ice quickly.
Fresh vegetables. Roasting broccoli, Brussels sprouts, or cauliflower requires space. Use your full-sized oven with a sheet pan, toss the vegetables in a little oil and salt, and don’t crowd the pan, or they will steam instead of roast.
Breaded chicken. Cutlets, tenders, or nuggets need direct heat to set the breading. A cast iron skillet with shallow oil is ideal. If you want to avoid the stove, a toaster oven on its highest bake setting works. Learning how long drumettes need on the stove versus the oven prevents dried-out poultry.
Reheating leftovers. Pizza and fried chicken lose their texture in a standard microwave. Move them to a skillet over medium-low heat with a lid, so the bottom crisps while trapped heat warms the toppings. Alternatively, use the toaster oven.
Thick cuts of meat. Pork chops or bone-in chicken thighs need sustained heat to cook through without burning the outside. A full oven or indirect grilling handles this safely. All poultry, including ground poultry and stuffing inside poultry, should reach 165 °F, and steaks, roasts, and chops of beef, pork, veal and lamb should reach 145 °F with a 3-minute rest.
Refrigerate leftover cooked food within 2 hours to avoid the temperature danger zone between 40 °F and 140 °F. For raw, stuffed breaded chicken breast products, do not cook them in an air fryer; follow the manufacturer’s cooking instructions instead.
Adapting Recipes Written for Basket Fryers
Most online recipes assume you are using a basket-style machine. Translating those instructions to other tools requires a few basic adjustments, starting from the conversion ranges above and checking early.
First, address the temperature. Use the temperature drop and time multiplier that matches your oven type and food thickness, and remember that sources conflict on the exact figures. Start with the calculator’s multipliers, then adjust based on what you observe.
Second, adjust the time and check early, about 3 minutes before the estimate for thin foods and 5 minutes before for standard or thick foods.
Third, modify the oil application. In a basket, you often spray the food lightly. In a skillet, you pour oil into the pan. In an oven, toss the food in a bowl with a tablespoon of oil so the coating is even before spreading it on the rack.
Finally, account for flipping. Basket models often tell you to shake the drawer halfway through. In an oven, you must open the door and turn the items with tongs or a spatula. Skipping this step leaves one side pale and soft.
Common Mistakes When Ditching the Basket
People run into the same issues repeatedly when switching away from a countertop appliance. Avoiding these errors keeps your food edible.
- Crowding the baking sheet. Piling food in a single mound traps steam, and steam prevents browning. Spread everything out so pieces aren’t touching, and use two pans if necessary.
- Skipping the preheat. Putting food into a cold oven or warm skillet delays the searing process, so the food releases moisture slowly and boils in its own juices. Wait for the full temperature.
- Using the wrong bakeware. Dark metal pans absorb heat faster and can burn the bottoms of delicate items. Light-colored aluminum or stainless steel wire racks provide more predictable results.
- Ignoring the fan setting. If your oven has a convection button, press it. Leaving it off turns your oven into a standard thermal box, which cooks slower and browns unevenly.
- Applying wet batters. Air-based alternatives cannot handle wet, dripping batters like tempura or beer batter. The liquid drips off before it sets, creating a mess. Wet batters belong in hot oil, so stick to dry flour coatings or breadcrumbs for oven and skillet methods.
Choosing Your Backup Method Wisely
You don’t need a specialized gadget to get crispy, browned food. The equipment already in your kitchen handles the job once you understand how heat moves through it.
If speed matters most, grab the cast iron skillet or the toaster oven. If you are feeding a crowd, fire up the main convection oven. If you crave maximum crunch and don’t mind the cleanup, heat oil in a heavy pot and follow the deep-frying safety steps above.
Every method here can produce excellent food. The trick is matching the technique to the ingredient, adjusting your expectations for timing, and checking doneness with a thermometer rather than guesswork. Pick the tool that fits tonight’s menu and start cooking.