Cleaning an air fryer basket takes about 15 to 30 minutes for a standard wash. If you have baked-on grease or carbon buildup, it might take closer to an hour with soaking time. You need hot water, dish soap, and a non-abrasive sponge.
That is the short answer for how to clean an air fryer basket after everyday cooking.
Most baskets have a nonstick coating that strips away if you use the wrong tools. Metal scouring pads, steel wool, and harsh chemical sprays will ruin the surface. Once that coating peels, food sticks permanently, and you usually have to buy a replacement part.
The steps below keep the finish intact while removing stuck-on food and grease.
Supplies to grab before washing your air fryer basket
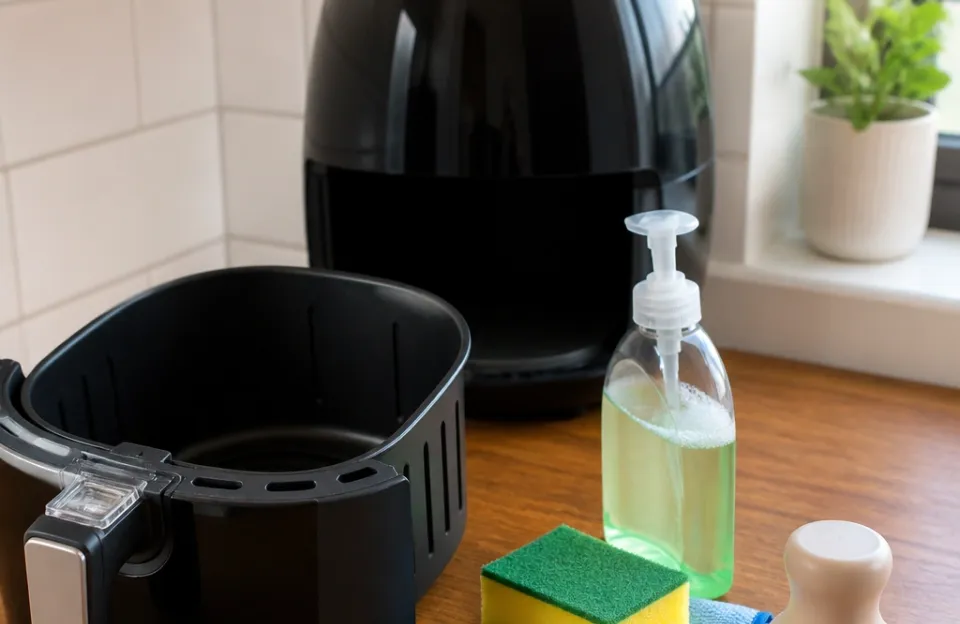
You do not need specialized cleaning products. Standard kitchen supplies work fine as long as they are gentle on nonstick surfaces.
- Liquid dish soap
- Baking soda
- White vinegar
- A soft sponge or microfiber cloth
- A silicone spatula or soft-bristle brush
- A large bowl, sink, or basin for soaking
Avoid abrasive scrubbers entirely. Even the rough side of a standard kitchen sponge can scratch some coatings over time. Stick to soft sponges, dishcloths, or brushes designed for nonstick cookware.
Removing fresh grease and crumbs right after cooking
The easiest way to handle cleanup is doing it while the mess is still fresh. Dried grease takes significantly more effort to remove than warm grease.
- Unplug the appliance and pull the basket out. Set it on a heat-safe surface like a wooden cutting board or a folded towel.
- Wait 10 to 15 minutes until the metal is cool enough to touch. Washing a scorching hot basket under cold water can warp the metal or crack the coating due to thermal shock.
- Tap the basket upside down over the trash can to knock out loose crumbs.
- Add a few drops of dish soap and fill the bottom with warm water.
- Wipe the inside with a soft sponge using circular motions. Focus on the corners where oil pools.
- Rinse thoroughly under warm running water. Soap residue left behind will smoke the next time you turn the heat on.
- Dry the basket completely with a towel before sliding it back into the machine. Trapped moisture causes rust on any exposed metal edges.
If you cooked something particularly messy, like crispy wings coated in baking soda, you will likely need more than a quick wipe. Sugary glazes and rendered animal fat harden fast. Move straight to the soaking step when dealing with heavy proteins or sticky marinades.
Loosening stubborn burnt-on food with a baking soda soak
When food bakes onto the mesh or the solid base, scrubbing harder is the wrong move. Pressure damages the nonstick layer. Soaking does the heavy lifting instead.
- Sprinkle two to three tablespoons of baking soda across the bottom of the dirty basket.
- Pour in enough warm water to cover the stuck-on areas.
- Let it sit for 15 to 30 minutes. For severe carbon buildup, leave it for up to an hour.
- Use a silicone spatula to gently push at the softened debris. It should flake off without scraping.
- Wash with soapy water, rinse, and dry.
Baking soda is mildly alkaline. It breaks down fats and proteins without scratching the surface. This method works well after roasting root vegetables or timing potatoes perfectly when starchy bits tend to fuse to the wire rack.
Using a baking soda paste for targeted spots
Sometimes only one specific area has burnt residue. A full soak is unnecessary for a single patch.
Mix three parts baking soda with one part water in a small bowl to form a thick paste. Apply it directly to the burnt spot. Leave it for 15 minutes.
Scrub gently with a soft toothbrush or sponge. Wipe clean. The concentrated paste stays in place better than liquid and attacks the carbon directly.
Dissolving greasy film with white vinegar
Grease leaves a sticky, invisible film even after you wash away the visible food. Vinegar cuts through that oily residue.
Pour half a cup of white vinegar into the basket. Add warm water until the greasy sections are submerged. Let it soak for 10 minutes.
Swish the liquid around, then dump it out. Wash normally with dish soap and a sponge. The acid in the vinegar breaks down the lipid bonds in the grease.
This approach is especially useful after cooking high-fat foods. If you recently figured out the exact minutes for bacon, you know how much fat renders out during that process. Vinegar handles that slick leftover film better than extra soap alone.
You can also combine baking soda and vinegar, though they neutralize each other quickly. The fizzing action helps lift debris mechanically, but the chemical cleaning power comes from using them sequentially rather than mixed together. Soak in vinegar first, rinse, then apply a baking soda paste if spots remain.
Cleaning the wire mesh holes without tearing the coating
Air fryer baskets typically fall into two categories: perforated metal with hundreds of small holes, or solid nonstick pans with a separate crisper plate. The perforated style traps food in every tiny opening.
Do not poke a knife or metal skewer through the holes to clear them. You will chip the surrounding coating.
Take a soft-bristle brush, like a clean pastry brush or a dedicated dish brush. Dip it in warm soapy water. Brush the mesh in a sweeping motion across the holes.
The bristles push the softened gunk through without scratching the metal.
For stubborn particles wedged tightly in the mesh, soak the entire basket first. After 30 minutes in warm soapy water, the trapped bits swell and loosen. Then use the brush.
Some people find that a wooden toothpick works for individual stubborn holes, provided you push gently and avoid scraping the sides of the hole.
If your model uses a removable crisper plate instead of a perforated basket, take the plate out. Wash both pieces separately. Food hides underneath the raised plate, and leaving it assembled means you miss the grease pooling at the very bottom.
Always check your specific model's manual. Brands like Ninja or Cuisinart design their baskets differently, and forcing a crisper plate out the wrong way can bend the tabs.
What happens when you use the wrong scrubber
The most common way people ruin an air fryer basket is by treating it like a stainless steel frying pan. Nonstick coatings are thin layers of polytetrafluoroethylene (PTFE) or ceramic bonded to aluminum or steel. They tolerate heat well, but they cannot handle abrasion.
| Cleaning Tool | Safe for Nonstick | Effect on Coating |
|---|---|---|
| Soft sponge | Yes | Cleans without scratching |
| Microfiber cloth | Yes | Good for light grease |
| Silicone brush | Yes | Reaches mesh holes safely |
| Nylon scrubber | Borderline | Can cause micro-scratches over time |
| Rough sponge side | No | Strips coating gradually |
| Steel wool | No | Removes coating immediately |
| Metal scouring pad | No | Deep scratches and peeling |
Once the coating flakes off, the exposed base metal reacts with acidic foods and moisture. Aluminum oxidizes. Steel rusts.
Food sticks aggressively to the bare spots, making future cleaning even harder. At that point, the basket usually needs replacing.
According to guidelines from the U.S. Food and Drug Administration, modern PTFE coatings are safe for cooking when kept below 500°F, which all standard countertop appliances stay within. However, scratched or peeling coatings lose their nonstick properties and can introduce flakes into food.
Keeping the surface intact is a matter of both performance and basic maintenance.
Putting the basket in the dishwasher
Many manufacturers label their baskets as dishwasher safe. Technically, they will survive a cycle. In practice, the dishwasher is hard on nonstick finishes over time.
Dishwasher detergent contains strong enzymes and abrasives meant for baked-on casserole dishes. The prolonged heat of the drying cycle also stresses the coating. If you run the basket through the dishwasher daily, you will notice the nonstick surface degrading months earlier than if you hand washed it.
If you prefer the dishwasher for convenience, place the basket on the top rack. Use a mild detergent pod rather than heavy-duty powder. Skip the heated dry setting and let it air dry.
Hand washing with mild dish soap remains the safest option for extending the lifespan of the coating.
Dealing with lingering odors in the basket
Sometimes a basket looks clean but smells like last week's fish. Porous grease residues trap odor molecules even after washing.
Wash the basket with soap and water first. Then wipe the entire interior with a paper towel soaked in white vinegar. Let it air dry completely.
The acetic acid neutralizes the odor compounds.
For persistent smells, make a paste of baking soda and water. Coat the inside of the basket and leave it overnight. Rinse it out the next morning.
Baking soda absorbs volatile organic compounds that cause bad smells. This trick works well if you frequently cook heavily spiced meals or prep chicken for the week where raw poultry odors linger.
Never spray aerosol cooking oils directly into the basket to mask smells or prevent sticking. Aerosol sprays contain propellants like soy lecithin that bake into a sticky, impossible-to-remove residue at high temperatures. Use a pump oil mister or brush on a thin layer of regular cooking oil instead.
When the nonstick finish starts peeling anyway
Even with perfect care, nonstick coatings wear out eventually. Friction from food, utensils, and washing slowly thins the layer. If you see small flakes coming off or food suddenly sticking everywhere despite using oil, the coating has reached the end of its life.
Stop using a peeling basket for direct food contact. Check if the manufacturer sells replacement baskets. Many brands offer them as spare parts for a fraction of the cost of a whole new unit.
You can also look into aftermarket replacements, though fit varies.
Some people line their baskets with parchment paper liners to protect the coating and extend its life. If you do this, never preheat the appliance with just the paper inside. The fan will blow the paper into the heating element, causing a fire.
Always weigh the liner down with food before turning it on. Perforated parchment liners allow airflow while catching drips, reducing how often you need to deep clean the actual basket.
Rinsing and drying the basket properly before storage
Skipping the final rinse or putting a damp basket away causes two problems: soap flavor transfer and rust.
Soap left on the surface burns the next time you turn the heat on. It creates a bitter taste and blue smoke. Rinse the basket under running water until it feels completely smooth and squeaky, with no slippery film.
Drying matters just as much. Towel dry the inside and outside. Pay attention to the rim where the basket meets the drawer, and the feet or tabs that hold the crisper plate.
Water pools in these crevices. If your basket has a solid metal core beneath the coating, trapped water will eventually cause it to rust from the inside out.
Leave the basket out on the counter for 10 minutes after towel drying to let any remaining moisture evaporate before pushing it back into the housing. Storing it slightly ajar rather than fully clicked in also promotes airflow if you live in a humid climate.
Frequently asked questions
Can I use oven cleaner on my air fryer basket?
No. Oven cleaners contain sodium hydroxide or other highly caustic chemicals designed to dissolve baked-on carbon in heavy-duty ovens. These chemicals will eat through a nonstick coating in minutes.
They can also pit the underlying aluminum or steel. Stick to dish soap, baking soda, and vinegar.
How often should I deep clean the basket?
A quick wash with warm soapy water after every single use is mandatory to prevent buildup. A deeper soak with baking soda or vinegar is only necessary when you notice sticky residue, discoloration, or food starting to cling. For most home cooks, a deep soak once or twice a month keeps the surface in good shape.
Is it safe to submerge the entire basket in water?
Yes, the basket itself is just metal and coating. Submerging it in a sink or basin is perfectly safe. The part you must never submerge is the main appliance housing that contains the electrical components, heating element, and fan.
Only detach the basket or drawer from the base before washing.
Why does my basket still feel greasy after washing with soap?
Standard dish soap sometimes struggles to break down polymerized grease, which is oil that has been heated repeatedly until it turns into a sticky resin. White vinegar or a baking soda soak breaks those bonds better than soap alone. You may also be using water that isn't hot enough to melt the fat effectively.
Can I put a silicone liner in the basket to avoid cleaning it?
Silicone liners catch a lot of drips and crumbs, reducing how dirty the basket gets. They don't eliminate cleaning entirely. Oil splatters still reach the sides, and steam carries grease upward.
You still need to wash the basket regularly, though a liner means you can often get away with a quick wipe instead of a full soak. Just make sure the liner fits properly and doesn't block the airflow vents, or your food won't crisp correctly.
Keeping your basket in working order
Learning how to clean an air fryer basket properly saves you money on replacement parts and keeps your food tasting right. The rules are simple: wait for it to cool, use soft tools, rely on baking soda or vinegar for tough spots, and dry it completely. Avoid the dishwasher when possible, skip the aerosol sprays, and never use metal scrapers.
Routine maintenance takes less than five minutes after most meals. Saving the deep soaks for heavy cooking days prevents the grease from ever hardening into a permanent problem. Treat the nonstick surface gently, and the basket will last as long as the appliance itself.
If you want to explore more ways to get the most out of your machine, reading up on how long these appliances have actually been around gives good context on how the designs and coatings have evolved over the years.