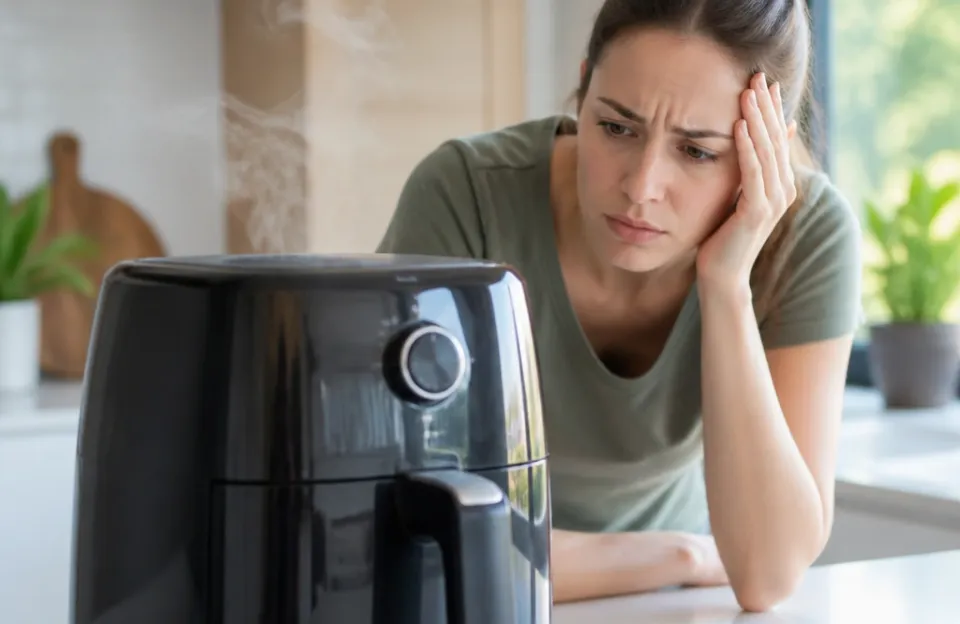
Air fryer food turns out soggy when the basket is overcrowded, the surface is too wet, or the temperature is set too low. An air fryer cooks by blowing hot air rapidly around the food. If that airflow gets blocked or if moisture pools on the surface, the exterior steams instead of browning.
Fixing the issue usually means adjusting how you prep the food and how much you put in the basket at one time.
If you're wondering why is my air fryer food not crispy, the answer almost always comes down to three things: space, moisture, and heat. This article breaks down exactly how each factor stops browning, what changes to make before you start cooking, and a few edge cases where certain foods just won't crisp up no matter what you do.
How Rapid Air Circulation Creates a Crunchy Exterior
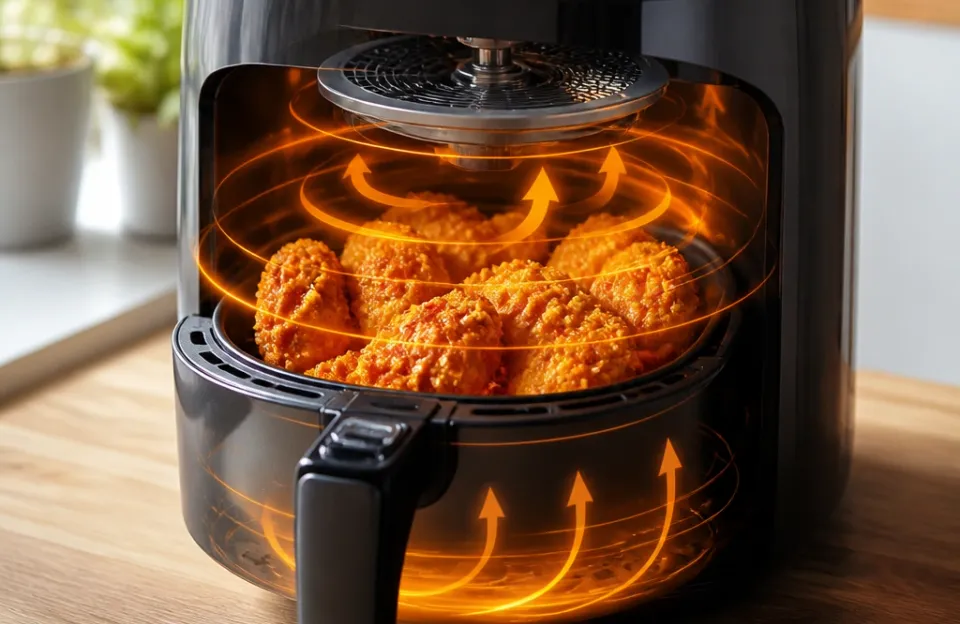
An air fryer is a small convection oven. A heating element sits near the top, and a powerful fan pushes that hot air down and around the food at high speed. This constant blast of heat evaporates surface moisture quickly.
Once the outside of the food dries out, the temperature rises past 300°F, triggering the Maillard reaction. That chemical process is what turns starches and proteins brown and crunchy.
When anything interrupts this drying phase, the food stays soft. Too much water on the surface means the air has to work harder just to evaporate it. The internal temperature of the food might finish cooking before the outside ever gets dry enough to brown.
You end up with something fully cooked inside but pale and chewy outside.
The size of the appliance matters here too. A compact 2-quart model moves air differently than a large 8-quart unit. If you switch sizes or brands, your old timing and spacing habits might stop working.
Understanding the basic airflow mechanics helps you troubleshoot why is my air fryer food not crispy without guessing.
Why Steam Is the Enemy of Browning
Moisture is the main reason food fails to crisp. When water hits high heat, it turns to steam. In a deep fryer, oil displaces water instantly, creating a hard crust.
In an air fryer, there's no vat of oil to force that rapid dehydration. The hot air has to do all the work.
If you put wet vegetables or unpat-dried chicken into the basket, the water creates a localized steam cloud. The fan circulates that humid air right back onto the food. Steaming keeps the surface temperature stuck around 212°F.
It never reaches the 300°F threshold needed for crunch.
This applies heavily to frozen foods as well. Ice crystals melt into water during the first few minutes of cooking. If you don't account for that extra liquid, the food will boil in its own runoff before it ever starts to roast.
The Role of Oil in Dry-Heat Cooking
People often assume air fryers need zero oil. They cook using air, after all. A completely dry surface rarely crisps well unless the food has a high natural fat content, like bacon or chicken thighs.
For potatoes, vegetables, or breaded items, a thin layer of oil conducts heat directly against the food's surface.
Oil bridges the gap between the hot air and the food. It raises the surface temperature faster than air alone. Without it, the hot wind just blows over a dry, starchy exterior, sometimes leaving it leathery rather than crunchy.
Tossing cut potatoes in a tablespoon of oil before cooking makes a massive difference in the final texture.
Too much oil causes the opposite problem. Excess fat drips through the basket grate, pools at the bottom, and smokes. It can also saturate a breading, making it heavy and greasy instead of light and shattered.
A light mist or a quick toss in a bowl is all you need.
Overcrowding the Basket Blocks Hot Airflow
Piling food on top of itself is the fastest way to ruin a batch. The fan needs open space to push air around every single piece. When fries are stacked three layers deep, the ones in the middle sit in a pocket of trapped steam.
They never see direct heat.
A good rule is to arrange everything in a single layer with a little space between pieces. If you're making wings for a simple weeknight dinner, lay them out so they aren't touching. Yes, this means cooking in batches.
Batch cooking takes longer, but it guarantees every piece gets hit by the circulating air.
Shaking the basket halfway through cooking helps, but it doesn't fix severe overcrowding. If the basket is packed solid, shaking just rearranges the pile. The center remains blocked.
Only removing some of the food solves that.
| Crowding Level | Airflow Contact | Typical Result |
|---|---|---|
| Single layer, spaced apart | Full circulation on all sides | Even browning, high crunch |
| Slight overlap (touching edges) | Mostly clear, minor shadow spots | Mostly crispy, some soft patches |
| Double layer | Bottom layer blocked entirely | Top browns, bottom steams |
| Packed full | No circulation in the center | Entire batch stays soft and pale |
Moisture Left on the Surface Prevents Crisping
Skipping the paper towel step ruins texture. Whether you're washing fresh produce or thawing meat, surface water needs to go away before the food enters the basket. Patting items dry takes ten seconds and fixes half the sogginess issues people run into.
Vegetables like zucchini hold a lot of water. If you slice them and throw them straight in, they release their internal moisture rapidly. Giving high-water vegetables a quick salt rub and letting them sit for ten minutes draws out excess liquid.
Wipe that away, add a touch of oil, and they will actually brown.
Marinades present a similar challenge. Wet marinades drip off the food and pool in the basket. If you marinate chicken or tofu, let the excess drip off completely.
Better yet, use a dry rub. Spices mixed with a tiny bit of oil stick to the surface and form a crust without adding extra water to the cooking chamber.
Temperature Settings That Are Simply Too Low
Setting the dial to 350°F because you're afraid of burning the food leaves it limp. Most items need 380°F to 400°F to achieve real crunch. Lower temperatures cook the inside perfectly fine, but they don't generate enough thermal energy to dehydrate the outside quickly.
Preheating matters too. Dropping cold food into a cold basket means the first five minutes are spent just warming up the metal. During that warm-up phase, the food slowly releases moisture without any intense heat to evaporate it.
Preheating for three to five minutes gives you an immediate blast of hot air the second the basket slides in.
Different models run slightly hot or cool. If your machine lacks a preheat setting, just run it empty at your target temperature for a few minutes. Checking the manual for your specific brand, whether it's a popular countertop model or a larger oven-style unit, clarifies how fast it recovers heat after you open the drawer.
Batters and Coatings That Don't Belong in an Air Fryer
Wet batters belong in deep fryers. A classic beer batter or tempura mix relies on submersion in hot oil to set its shape instantly. In an air fryer, wet batter just drips through the holes in the basket.
It makes a mess, burns on the bottom plate, and leaves the food naked.
If you want a coated crunch, use a standard breading procedure. Flour, egg wash, then breadcrumbs or panko. Press the crumbs firmly into the food so they adhere.
Spray the breaded surface lightly with oil. The hot air will toast the crumbs, giving you a fried texture without the deep fryer.
Cornstarch is a secret weapon for bare proteins. Dusting chicken wings or tofu cubes in a thin layer of cornstarch absorbs surface moisture and creates a micro-crust. Mixing a pinch of baking soda into your dry seasoning alters the pH of the skin, speeding up the browning reaction significantly.
Just be careful not to use too much, or the food will taste metallic.
Foods That Naturally Resist Getting Crunchy
Some ingredients will never shatter like a french fry. High-moisture foods like tomatoes, mushrooms, or thick cuts of raw fish behave differently. They soften and roast beautifully, but expecting a hard crunch from a cherry tomato misunderstands the ingredient.
Thick, dense items struggle too. A massive potato wedge takes so long to cook through that the outside might burn before the center softens, or the center finishes while the outside stays damp. Cutting food into uniform, smaller pieces exposes more surface area to the moving air.
Matching your cooking duration to the size of the cut prevents the outside from drying out too early or staying wet too long.
Cheese is another tricky one. Breaded mozzarella sticks can work if frozen solid first. Fresh cheese just melts and leaks.
Knowing which foods suit the appliance saves a lot of frustration.
Quick Adjustments to Get Your Next Batch Right
Fixing soggy results requires changing a few habits before you press start. These adjustments apply to almost everything you cook, from reheated pizza to fresh vegetables.
- Dry the food thoroughly. Use paper towels on meats and veggies. Let washed greens spin completely dry in a salad spinner.
- Apply a light coat of fat. Use an oil mister or toss food in a bowl with one teaspoon of oil. Avoid pouring oil directly into the basket.
- Leave breathing room. Arrange items in a single layer. Cook in two batches if necessary.
- Crank up the heat. Set the temperature to 390°F or 400°F for most roasting tasks. Drop it only for delicate items or thick cuts needing longer times.
- Preheat the machine. Run it empty for three minutes so the food hits immediate heat.
- Flip or shake halfway. Open the drawer at the midpoint. Turn larger items with tongs. Shake smaller items like fries.
- Use dry coatings. Stick to panko, cornstarch, or spice rubs. Skip wet pancake or beer batters.
Following these steps consistently removes the variables that cause steaming. Once you lock in the spacing and moisture control, the heat does the rest.
Situations Where the Standard Rules Change
Frozen foods complicate the moisture rule. You shouldn't thaw frozen fries or nuggets before air frying. Thawing them turns the ice into surface water, resulting in mush.
Cook them straight from the freezer. The appliance needs a few extra minutes to burn off the ice crystals, so add two or three minutes to the package directions.
Reheating leftovers introduces different challenges. Cold pizza or day-old fried chicken already lost its original crunch. Putting it back in at a lower temperature, around 350°F, warms it without scorching the existing crust.
Timing matters heavily here. Leaving reheated slices in too long dries out the toppings before the dough crisps.
Altitude affects boiling points and evaporation rates. If you live at a high elevation, water boils below 212°F. Food might release moisture faster, but the air holds less oxygen, slowing the Maillard reaction.
You may need to increase the temperature by 10 to 15 degrees to compensate.
Basket design plays a part. Some air fryers use a solid tray instead of a perforated basket. Solid trays trap grease and moisture underneath the food.
If your model has a solid pan, flipping the food becomes mandatory, not optional. Perforated baskets allow air to hit the bottom of the food, promoting even browning.
Using the wrong accessories blocks airflow too. Silicone liners or parchment paper sheets are convenient for cleanup. If they cover the entire bottom of the basket without holes, they act as a shield.
The air bounces off the paper instead of wrapping around the food. Always buy perforated liners designed specifically for air fryers, or cut your parchment to leave the edges exposed.
Misconceptions About Achieving a Fried Texture
People expect identical results to deep frying. An air fryer uses convection heat, not submersion. The crunch it produces is closer to oven-roasting than to a vat of peanut oil.
Expecting a wet-battered onion ring to come out identical to a restaurant version sets you up for disappointment.
Spraying aerosol non-stick cooking sprays directly into the basket damages the machine. Many commercial sprays contain propellants and lecithin that build up on the non-stick coating. Over time, this residue chips off and ruins the basket.
Buy a pump-action oil mister filled with avocado or olive oil. It gives you the same coverage without the chemical buildup.
Assuming higher heat always equals better crunch leads to burnt exteriors and raw interiors. If you're cooking thick chicken drumsticks, blasting them at 400°F chars the skin while the meat near the bone stays undercooked. According to the USDA food safety guidelines, poultry must reach an internal temperature of 165°F.
Starting at a moderate 360°F to render the fat, then finishing at 400°F for the last five minutes, yields both safe meat and crispy skin. Balancing the total cooking time with a two-stage temperature approach works best for thick cuts.
Thinking the appliance cleans itself is another trap. Grease buildup on the heating element or the fan blade reduces efficiency. Old, baked-on fat insulates the element and slows down the air movement.
Wiping the interior and washing the basket after every use keeps the airflow strong.
Frequently asked questions
Does opening the basket ruin the cooking process?
Opening the drawer causes a brief drop in temperature, but the heating element recovers very quickly. Shaking or flipping the food halfway through is necessary for even browning. Keep the drawer open for less than thirty seconds to avoid losing too much ambient heat.
Can I stack fries if I shake them constantly?
Constant shaking still doesn't expose the bottom layer to direct airflow. Stacked fries steam each other. You get much better results by splitting a large bag into two separate batches, even though it adds a few minutes to your total kitchen time.
Why does my food come out dry but not crunchy?
Dryness without crunch usually means the temperature was too low and the cooking time was too long. The slow heat pulled all the moisture out of the food without ever reaching the high temperature required to trigger the Maillard browning reaction. Raise the heat and shorten the time.
Do I need to use oil on frozen breaded foods?
Most commercially frozen breaded items, like fish sticks or mozzarella bites, are par-fried at the factory. They already contain enough oil in the breading to crisp up in the air fryer. Adding more oil makes them greasy.
Raw vegetables and fresh meats, however, require a light coating.
Is baking powder or baking soda better for crispy chicken skin?
Baking soda is stronger and changes the pH level of the skin rapidly, leading to faster browning. Baking powder contains baking soda plus an acid, making it milder. A tiny pinch of baking soda works wonders, but too much leaves a soapy flavor.
Baking powder is safer if you tend to over-season.
Why did my food crisp up yesterday but not today?
Inconsistency usually points to a change in preparation. You might have skipped patting the meat dry, crowded the basket more than usual, or used a different size vegetable cut. Even switching from fresh to frozen ingredients changes the moisture dynamics entirely.
Track your prep steps to find the variable that shifted.
Getting the Crunch You Actually Want
Soggy air fryer meals happen when moisture wins the race against heat. Keeping the basket uncrowded, drying your ingredients thoroughly, and pushing the temperature high enough to trigger browning fixes the vast majority of texture problems. Every machine runs slightly differently, so pay attention to how your specific model handles airflow and adjust your prep accordingly.
Once you dial in the spacing and moisture control, the appliance does exactly what it promises.