Your meat thermometer gives different readings because the number depends on more than the meat. Probe placement, insertion depth, sensor type, calibration drift and response time all change what the display shows. The food itself is rarely the problem. Reading the same roast twice and getting different results usually means the sensing tip has moved, the probe has not finished settling, or the thermometer has drifted out of calibration. Fix those four factors and most inconsistency disappears.
The Short Answer: It Is Usually Technique, Sensor Behavior or Calibration
A thermometer only reports the temperature of the small area its sensor touches. If that area changes, the reading changes with it. A reading is only correct when the thermometer sits in the proper location of the food, so a probe that slips from the center toward the surface will climb or fall for reasons unrelated to the meat. An incorrectly inserted thermometer, or one placed in the wrong area, will not accurately reflect the food’s internal temperature.
Most food thermometers give an accurate reading within 2 to 4 degrees F, so small differences between two devices can fall inside normal tolerance rather than signaling a fault. Before blaming the thermometer, rule out the technique issues below.
Probe Placement Changes the Number Every Time
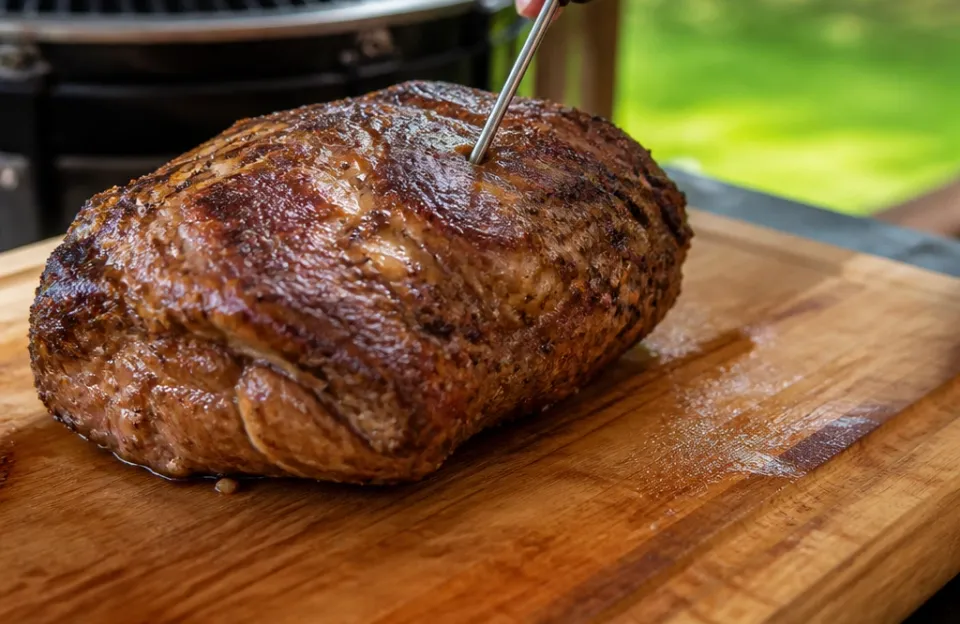
The sensing area must sit in the thickest part of the food, away from bone, fat or gristle, because those materials heat differently from lean meat and can pull the reading away from the true internal temperature. For thin foods such as cutlets or burgers, insert the thermometer through the side until it reaches the center rather than pushing down through the top. For guidance on target temperatures for specific cuts, a pork internal temperature guide can help you match the right number to the right piece of meat.
One reading is often not enough on a large roast or an irregular piece. Each piece of food should be checked individually, because pieces cook at different rates and a single spot can miss the coolest zone. If you probe the same chicken breast in two different spots and get two different numbers, the lower one is the one that matters.
Insertion Depth Matters as Much as Position
A probe that is too shallow measures the air or the surface crust, not the center. Manufacturer instructions state how far a thermometer must be inserted to give an accurate reading, so check the booklet for your model rather than guessing. The requirement varies by design: dial thermometers must be inserted about 2 to 3 inches into the food, while thin, fast-response digital probes need far less depth.
If your probe has a dimple or notch stamped on the shaft, treat that mark as the minimum depth line. Pushing past it is fine. Stopping short of it is not.
Digital, Thermocouple and Analog Sensors React Differently
The three common sensor designs work on different physical principles, which produces different speeds and different behavior at the margins.
| Type | How it measures | Typical settling behavior | Best use |
|---|---|---|---|
| Bimetallic dial | A metal coil twists as it warms | Slowest of the three | Oven-roasting, where the probe stays in place |
| Thermistor digital | Electrical resistance changes with heat | Settles in a few seconds | General kitchen probing |
| Thermocouple digital | Two joined metals generate a small voltage | Fastest of the three | Quick spot checks across many pieces |
Bimetallic coil thermometers, the ones with the large round clock-style face, are the slowest tools in the kitchen because they rely on a metal coil that physically twists as it warms. If you are comparing designs, it helps to know which units hold up best over repeated heating and cooling cycles. A dial thermometer should be allowed 1 to 2 minutes in ice water for temperature calibration, which reflects how slowly the coil responds.
Digital designs trade that patience for speed. Many cooks keep both an oven-safe dial model for long roasts and a digital kitchen reader for quick checks at the grill.
Calibration Drift Throws Off Older Probes
A thermometer can be perfectly built and still read wrong after enough cycles of heat, cold and handling. Drift is the slow loss of accuracy over time, and it is the most common reason an older probe disagrees with a newer one.
Run an Ice-Point Check
Fill a container with crushed ice and a small amount of cold water, mix it into a slurry, insert the probe and leave it for about 3 minutes. The thermometer should read 0 degrees C. A simple ice-water test can also be run faster: hold the thermometer in the ice water for 30 seconds without touching the sides or bottom of the glass.
If repeated ice-point readings vary by more than 1 degree C, the thermometer should be replaced or serviced rather than trusted. A thermometer that fails the check twice in a row has told you what you need to know.
What to Do About a Failing Reading
An inaccurate dial thermometer can often be adjusted by turning the nut on the back of the gauge with pliers. Many digital thermometers have no user adjustment at all, so the known inaccuracy must instead be added to or subtracted from the target temperature. In practice, a digital probe that reads 1 degree low means you cook to 1 degree above your target.
Calibration frequency depends on the device, the manufacturer and local food-safety rules. Thermometers should be calibrated regularly, with at least once every 6 months recommended depending on use, though that figure comes from Australian food-business guidance and may not match your own jurisdiction or home practice. For a step-by-step walkthrough, see this meat thermometer calibration guide using ice and boil tests.
Response Time Creates False Readings
A probe does not report the meat’s temperature the instant it enters. It reports its own temperature, which rises toward the meat’s temperature over a few seconds or minutes. Pull the probe too early and you capture a number that is still climbing.
Speed varies by sensor. Thermistor thermometers typically take about 3 to 6 seconds to settle on a final reading, while thermocouples can often give a reading in 2 seconds or less, though these figures are indicative and actual times vary by model. Faster is not automatically better for accuracy, but it does make it easier to wait for the number to stop moving. A rapid-read option such as this rapid-read option shortens the wait without changing the underlying principle.
The practical rule is simple: watch the display until it holds steady for two or three consecutive beats. If the number is still moving when you withdraw the probe, you did not measure the meat. You measured a moment during the measurement.
Infrared Guns Measure Surfaces, Not Centers
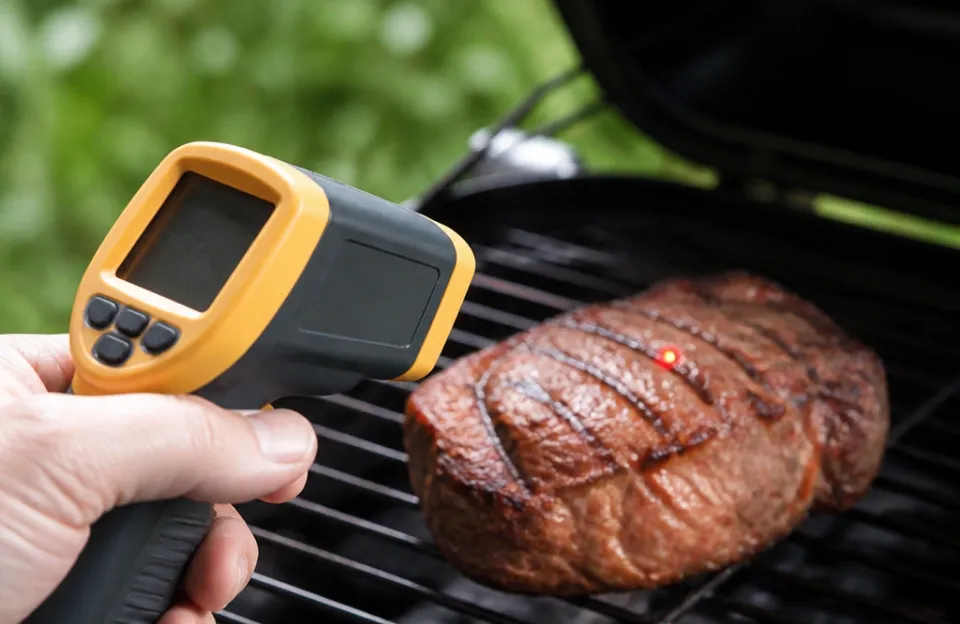
An infrared thermometer reads the temperature of the surface it is aimed at. That makes it useful for checking a pan, a grill grate or a pizza stone, and unsuitable for verifying whether the inside of a roast has reached a safe temperature. An infrared laser tool will happily report a number for a chicken breast, but that number describes the skin or the sear, not the center.
Color and grill marks are not reliable indicators that food is safe to eat, and a surface reading has the same weakness. Using a food thermometer is the only reliable way to confirm that food has been cooked to a safe minimum internal temperature, so an infrared gun cannot substitute for a probe inserted into the food. Use the infrared tool for equipment and the probe for doneness.
Wireless Signal Drops Cause Phantom Numbers
A wireless thermometer separates the probe from the receiver, and that separation introduces a failure mode: the signal can drop. When it does, the display may freeze on the last received number, jump to a default value, or show a gap. The meat did not change temperature. The connection did.
This is a common enough problem that dropped connections have their own troubleshooting steps, including moving the receiver closer and removing metal obstacles between the probe and the base. If your readings seem to jump only when you walk into another room, suspect the link rather than the sensor.
Swapping Probes Between Different Bases
Many probes are calibrated as a matched pair with the base unit that reads them. Mixing a probe from one brand or model with a base from another can produce readings that are consistently off, because the electronics were never characterized for that probe.
A replacement probe should come from the same manufacturer and be specified for your model. If you have lost track of which probe belongs to which unit, label them. For a mismatched or damaged probe, a replacement probe matched to your base is the reliable fix.
The narrow exception is standardized thermocouple systems, where probes of the same declared type may interchange. Do not assume compatibility across consumer brands without checking the manual.
Safe Temperature Targets Worth Measuring Against
All this precision only matters because the target numbers matter. When you check a reading, you are checking it against a safe minimum.
- Ground meats should reach a safe minimum internal temperature of 160 degrees F (71.1 degrees C).
- All poultry, including ground poultry, should reach 165 degrees F (73.9 degrees C).
- Beef, pork, veal and lamb steaks, chops and roasts should reach 145 degrees F (62.8 degrees C) and rest at least 3 minutes.
Rest time is not a formality. It allows the innermost parts and juices of certain meats to become fully and safely cooked. A reading taken before the rest can undersell the final result, which is one more reason two checks of the same roast can disagree.
Getting Consistent Numbers: A Short Diagnostic Sequence
Work through these steps in order. Most inconsistency resolves before the last one.
- Check the position. Aim for the thickest part, away from bone, fat and gristle, and go through the side on thin foods.
- Check the depth. Confirm the sensor is past the minimum insertion mark or, for a dial, about 2 to 3 inches in.
- Wait for the number to settle. Do not read a display that is still climbing.
- Probe more than one spot. Larger cuts and separate pieces can read differently, and every piece should be checked.
- Run an ice-point check. Crushed ice, cold water, about 3 minutes, expected reading of 0 degrees C.
- Act on the result. More than 1 degree C of variation across repeated checks means replace or service it; a small known offset on a digital unit means compensate in your target.
Replace rather than adjust when readings swing unpredictably, when the ice-point result changes between checks, or when the display itself behaves erratically. Consistency of error is fixable. Randomness is not.
Frequently Asked Questions
Why do I get a different number when I probe the same steak twice? The tip is almost certainly in a different place. Even a small shift toward the surface or a bone changes the result, and a reading taken mid-climb differs from one taken after the display settles.
Can I trust two different thermometers to agree exactly? Not necessarily. Most food thermometers give an accurate reading within 2 to 4 degrees F, so two devices can both be within specification and still disagree by several degrees.
Does it matter which spot I check on a whole chicken? Yes. Check the thickest part of the thigh and breast, away from bone, and check more than one location on a large bird.
How often should I test my thermometer? Regularly, with manufacturer and local guidance as your reference. One food-safety authority recommends at least every 6 months depending on use, which is a reasonable starting interval for a home cook who probes often.
Are infrared thermometers accurate for checking doneness? They measure surface temperature, not internal temperature, so they cannot confirm that the center of the food reached a safe minimum. Use a probe inserted into the food instead.
Is a slow thermometer less accurate? Not inherently. A dial thermometer is slow but can still be accurate when calibrated and read after it settles, while a fast digital probe can be wrong if you pull it before the number stabilizes.
Different readings are a signal to check your method, not a reason to distrust thermometers altogether. Confirm the probe is in the thermal center at the right depth, give the sensor time to settle, and run an ice-point check whenever two readings disagree. If the check fails, compensate for a known offset on a digital unit or adjust a dial, and replace anything that varies unpredictably. A thermometer you have verified is the only reliable way to know your food reached a safe internal temperature.