Air fryer apple crisp is a small-batch dessert made by cooking sliced apples with sugar and cinnamon in an oven-safe dish that fits the air fryer, then adding an oat and butter topping and continuing until the apples soften and the topping browns. A supplied small-batch method uses a 6- to 7-inch baking dish, serves four, and bakes in about 22 minutes, while another approach preheats to 350 °F. Sliced apples need roughly 18 to 22 minutes of heat before they soften, and the topping can brown well before the fruit is ready, so timing depends on your model, dish size and topping thickness.
Why Air Fryer Apple Crisp Works So Well
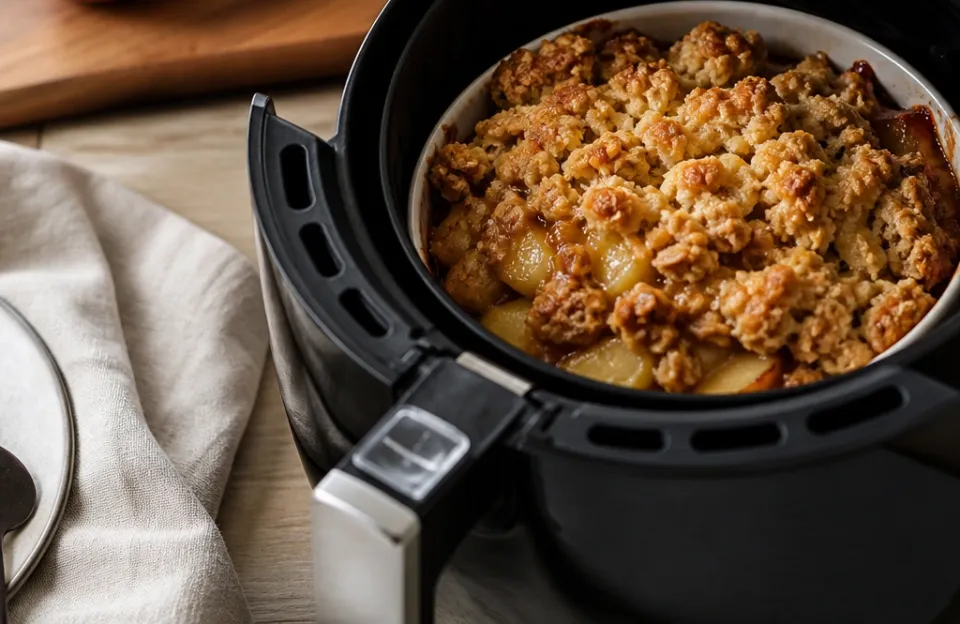
An air fryer circulates hot air directly over the surface of the topping, which drives off moisture and encourages browning in a way a larger oven does not have to. Because the element sits only a few inches above a small dish, the oats and butter brown quickly, while the apples underneath need longer to soften.
That gap between how fast the topping browns and how long the apples take is the main issue you are managing. If you simply set a timer and walk away, you may end up with a dark, dry topping over firm apple slices. The fix is either to protect the topping for part of the bake, or to start the apples before the topping goes on.
Choosing Apples That Hold Their Shape
The apple you pick determines whether you get tender slices or a watery, collapsed filling. Firm, tart varieties hold up better under circulating heat. Softer apples break down faster and release more liquid, which can make the topping soggy.
- Good choices: Granny Smith, Honeycrisp, Braeburn, Jonathan and Pink Lady.
- Avoid or use quickly: Red Delicious, McIntosh and any apple that already feels soft.
Cut the apples into even slices, about 1/4 inch thick. Even thickness matters more than the exact size, because thin slices cook faster than thick ones and uneven pieces leave some apples underdone while others turn to mush. Peeling is optional; the skin adds texture and holds the slices together, but peeled apples soften a little faster.
Building the Oat Topping Without Soggy Spots
The topping is where most apple crisps go wrong in an air fryer. A topping that is roughly half sugar and butter by weight browns quickly under an element a few inches above it, so it has little margin for error.
Use rolled oats rather than instant oats. Rolled oats keep some structure and crisp up, while instant oats turn pasty. Cold butter matters too: cut it into small cubes and rub it into the flour, oats, sugar and a pinch of salt until you have coarse crumbs with some pea-sized butter pieces left. Those larger butter pieces create crisp pockets instead of a uniform, dense layer.
If your mixture looks sandy and dry, add a teaspoon of cold water at a time rather than more butter. If it looks wet and clumpy, add a spoonful of oats or flour. You want it to hold together when squeezed but still crumble when dropped onto the apples.
Ingredients and Tools for Air Fryer Apple Crisp
You do not need special equipment, but a few choices make the result more reliable.
For the filling
- 4 to 5 medium firm apples, sliced about 1/4 inch thick
- 2 to 3 tablespoons sugar, plus more to taste
- 1 teaspoon ground cinnamon
- A pinch of salt
- 1 to 2 tablespoons water or lemon juice
For the topping
- 1/2 cup rolled oats
- 1/3 cup all-purpose flour
- 1/4 cup brown sugar
- 4 tablespoons cold butter, cubed
- A pinch of salt
- Optional: chopped nuts, a splash of vanilla
Tools
- A 6- to 7-inch oven-safe baking dish that fits your air fryer
- A mixing bowl and a small bowl for the topping
- Measuring cups and spoons
- A spatula or spoon
- Aluminum foil or parchment paper if your owner’s manual allows them
Substitutions
| Ingredient | Substitute | Notes |
|---|---|---|
| All-purpose flour | Oat flour or a gluten-free blend | Texture may be slightly denser |
| Brown sugar | White sugar plus a little molasses | Flavor shifts slightly |
| Butter | Plant-based butter | Choose a firm, baking-style product |
| Rolled oats | Quick oats | They soften faster and crisp less |
Mixing the Filling and Assembling the Dish
Toss the sliced apples with sugar, cinnamon, salt and the water or lemon juice in a bowl. Let them sit for about 10 minutes. This brief rest draws out some juice, which helps the apples soften without steaming the topping later.
Spoon the apples into the baking dish and press them down gently so the surface is fairly level. A level surface helps the topping brown evenly. If your dish is shallow, the apples may mound slightly above the rim, which is fine as long as the dish still fits in the air fryer with clearance above it.
Scatter the topping over the apples in an even layer. Do not press it down hard; a loose, crumbly layer lets hot air circulate and crisp the surface.
Cooking Times and Temperatures for Air Fryer Apple Crisp
Preheat the air fryer to 350 °F if your manual recommends preheating, and butter or lightly oil the dish first. Place the dish in the basket or on the rack, leaving space around the sides so air can move. Cook for about 18 to 22 minutes total.
Many recipes cover the dish tightly with aluminum foil for the first part of the bake, then remove the foil to let the topping brown. If you use this method, start with the foil on for roughly 10 minutes, then uncover and continue cooking until the topping is golden and the apples are tender.
Doneness cues
- The topping is deep golden brown and smells toasted.
- A knife slides easily through the thickest apple slice.
- The filling bubbles gently at the edges.
Appearance and color are not reliable indicators of safety or doneness in general; a food thermometer is the reliable way to confirm harmful bacteria have been destroyed. Combination dishes such as casseroles must be cooked to 165 °F as measured with a food thermometer. An apple crisp is a fruit dessert rather than a meat or egg dish, so the main practical use of a thermometer here is confirming the filling is hot throughout; rely on tenderness and bubbling as your texture cues.
How Different Air Fryer Models Change the Result
Basket-style and oven-style air fryers differ in baking performance, and preheating matters more for batters than for other foods. A basket model with a strong fan can dry and darken a topping faster than a gentler oven-style unit.
If your air fryer runs hot, drop the temperature to 325 °F and add a few minutes. If it runs cool, keep 350 °F and check at 20 minutes. Wattage, basket size and dish material all shift the result, so treat any single time as a starting point rather than a fixed rule.
Fixing Burnt Edges, Soggy Centers, and Dry Toppings
| Problem | Likely cause | Fix |
|---|---|---|
| Topping burnt, apples firm | Element too close, topping browned first | Cover with foil, lower to 325 °F, extend time |
| Soggy oats | Too much liquid from apples or butter | Drain apples before assembling, use rolled oats, uncover for the last few minutes |
| Dry, sandy crumble | Too much flour or too little butter | Add cold butter in small pieces or a teaspoon of water |
| Crisp sticking to dish | Dish not greased or too small | Butter the dish, use a slightly larger one, or line the bottom with parchment if your manual allows |
| Uneven browning | Dish too close to the element | Move the dish lower, rotate it halfway through |
Aluminum foil and parchment paper can be used in an air fryer if kept away from the heating element, airflow is not blocked, and they are weighed down with food; parchment suits baking and delicate or sticky foods, foil suits greasy and saucy foods, and wax paper should not be used because it is not heatproof. Because manufacturer instructions vary, always check your specific air fryer manual before using foil or parchment.
Serving, Storing, and Reheating Leftovers
Serve the crisp warm, ideally within an hour of baking. Perishable food should not be left out for more than 2 hours at room temperature, or 1 hour when the temperature is above 90 °F. Within that window, refrigerate leftovers in a shallow container.
Cooked leftovers should be refrigerated within 2 hours of cooking or removal from a warming appliance, and most cooked leftovers should be used within 3 to 4 days. Leftovers can be kept in the refrigerator for 3 to 4 days or frozen for 3 to 4 months. Keep your refrigerator at 40 °F or below and your freezer at 0 °F. Bacteria grow rapidly between 40 °F and 140 °F, so avoid leaving the crisp in that range for long.
Reheat leftovers to 165 °F. For best texture, reheat in the air fryer at 325 °F for 4 to 6 minutes rather than in a microwave, which softens the topping. A covered dish in a conventional oven at 350 °F for 10 to 12 minutes also works.
Adjustments for Dietary Needs and Smaller Batches
These are optional adjustments rather than tested formulas, so treat them as starting points.
- Gluten-free: Use a gluten-free flour blend and certified gluten-free oats. Standard oats are often processed on shared equipment, so check the label if cross-contamination matters to you.
- Dairy-free: Replace butter with a firm plant-based butter. The topping may brown slightly faster, so check a few minutes earlier.
- Reduced sugar: Cut the sugar in the filling by half and use 2 tablespoons in the topping. The crisp will brown less, so watch it more closely.
- Smaller batch: A 6- to 7-inch dish serves about four. If you use a smaller dish, reduce the filling and topping proportionally and check for doneness a few minutes earlier.
Getting the Timing Right
Air fryer apple crisp is forgiving once you understand the one tension in the recipe: the topping browns fast while the apples need longer. Start with a 6- to 7-inch dish, firm apples, cold butter and rolled oats. Preheat to 350 °F if your manual says to, cover the dish if your air fryer runs hot, and judge doneness by golden topping, bubbling edges and a knife that slides through the thickest apple slice.




