Pouring a cup that tastes sour or bitter because your grinder is off by a few clicks is a huge letdown. Calibrating a coffee grinder means setting the burrs to a true zero point and dialing in the right grind size for your brew method. You do this by finding where the burrs just touch, marking that spot, and adjusting from there.
Time And Tools For The Job
This task takes about fifteen to thirty minutes. It is not hard, but you must pay close attention. Rushing can damage the burrs or strip the threads.
You need a few basic things before you start. Grab a small brush to sweep away old grounds. Keep a soft cloth nearby to wipe the parts clean.
You also need a permanent marker to mark the zero point on the dial. If your grinder has a manual, keep it open on the counter. Different brands have slightly different parts.
A kitchen scale helps if you plan to test the grind with water right after. Just make sure the scale reads in grams. Small changes in weight change the taste of your drink.
This kind of routine upkeep keeps your morning cup tasting bright and clean.
Why Grinders Drift Off Target
Burrs wear down over time. Coffee beans are hard, and grinding them every day takes a toll. As the metal or ceramic edges dull, the gap between the burrs grows wider.
A setting that gave you fine powder last year might give you coarse sand today.
Vibration plays a part too. Every time the motor spins, the whole unit shakes. Over weeks and months, those tiny shakes loosen the adjustment ring.
The dial slips a fraction of a millimeter. That fraction is enough to ruin an espresso shot.
Oily beans leave residue inside the chamber. This sticky buildup can jam the adjustment threads. When the threads stick, the dial feels tight even when the burrs haven't moved.
You think you changed the setting, but nothing actually shifted. Cleaning the threads fixes this problem fast.
Finding True Zero On Your Burrs
True zero is the exact spot where the top and bottom burrs barely touch. You want them to kiss, not crash. If they crash, the motor will stall or the metal will chip.
Start by unplugging the machine. Never work on a plugged-in grinder. Remove the hopper so you can see the top burr.
Lift the top burr out if your model allows it. Brush away all the dust and old grounds. Wipe the threads with your dry cloth.
Put the top burr back in place. Turn the adjustment dial toward the fine end. Do this very slowly.
Spin the burr by hand as you turn the dial. Listen closely. You will hear a faint scraping sound when the two burrs meet.
Stop turning the dial the second you hear that sound.
Back the dial off just one click toward the coarse side. Spin the burr again. The scraping noise should stop.
This silent spot, just one click above the scrape, is your true zero. Take your permanent marker and draw a line on the collar at this spot. Now you have a fixed reference point.
If you use a type of home espresso setup that demands very fine grounds, knowing your true zero is mandatory. Espresso needs a tight gap, and guessing will only waste good beans.
Adjusting Stepless Dials
Stepless grinders do not have numbered clicks. They move in a smooth, endless circle. This gives you total control, but it also makes calibration tricky.
There are no built-in stops to guide you.
Once you find true zero, you must rely on your marker line. To set a grind size, turn the dial away from your zero mark by a specific distance. Many baristas use fractions of a turn.
For example, a quarter turn from zero might be perfect for drip coffee. A half turn might work for a French press.
The downside of stepless dials is memory. If someone bumps the collar, you lose your spot. You have to find true zero all over again.
Some folks put a piece of tape on the base to mark their favorite spots. Tape peels off eventually, so a marker line on the metal lasts longer.
When you turn a stepless dial, use gentle pressure. Forcing it can warp the thin metal threads. If the dial feels stiff, take the burr out and check for trapped rocks or hard bean fragments.
Setting Clicks On Stepped Collars
Stepped grinders lock into preset notches. You feel a distinct click as you turn the collar. This makes it much easier to return to a previous setting.
To calibrate a stepped model, you still need to find true zero first. Turn the dial toward the fine numbers until the burrs touch. Note the number on the dial at that exact moment.
That number becomes your new baseline.
Sometimes the factory numbers don't match reality. The dial might say "1" when the burrs touch, but the manual says "1" should be a coarse setting. Don't panic.
Factory settings are just rough guides. Your ears and hands tell the truth. Write down your actual zero number on a sticky note and put it near the machine.
From your real zero, count the clicks outward. Three clicks coarser might be your sweet spot for pour-over. Ten clicks might be right for cold brew.
Because the steps are fixed, you can always count back to your exact spot.
Checking Particle Spread By Sight
Numbers and clicks only get you close. You have to look at the actual ground coffee to know if you nailed it. Run a small handful of beans through the grinder.
Pour the grounds onto a white plate or a piece of white paper.
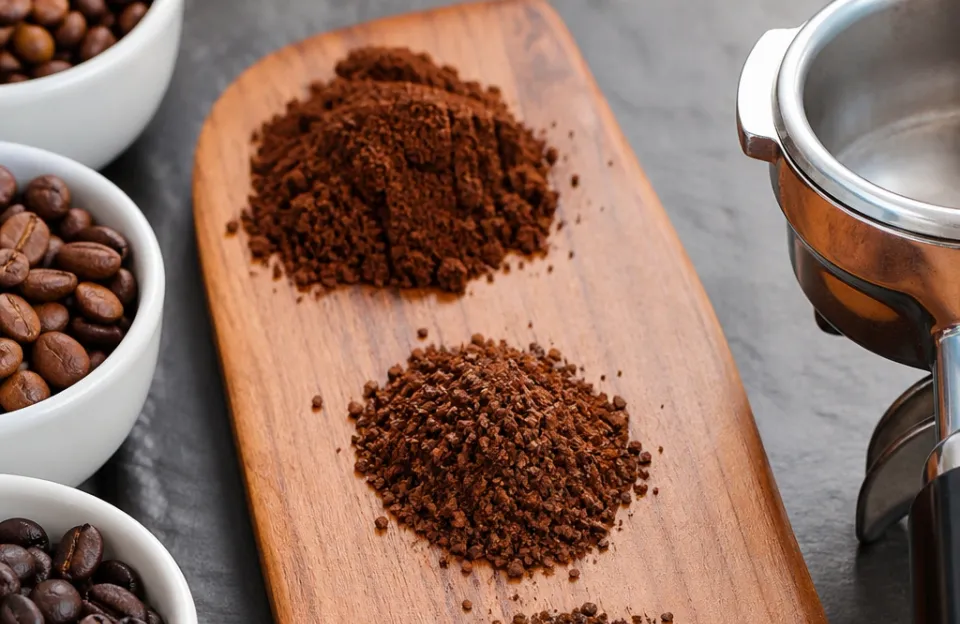
Spread the grounds out with your finger. Look for uniformity. If you set the grinder for medium, all the pieces should look like sea salt.
If you see large chunks mixed with fine dust, your burrs might be misaligned.
Misalignment happens if the top burr sits crooked in its holder. Take the burr out and seat it again. Make sure it drops flat and doesn't wobble.
A wobbly burr creates uneven gaps, which chops beans into random sizes instead of uniform pieces.
Fine dust clogs paper filters and makes drip coffee taste harsh. Large chunks let water pass too fast, leaving your drink weak and sour. Visual checks catch these issues before you waste a whole pot of coffee.
Dialing In With A Brew Test
Sight is good, but taste is the final judge. Pick a standard recipe to test your new setting. Use exactly 15 grams of coffee and 250 grams of hot water.
Heat the water to 200 degrees Fahrenheit.
Pour the water over the grounds. Start a timer. Watch how fast the water drains through the bed.
If it rushes through in under two minutes, the grind is too coarse. Turn the dial one click finer and try again.
If the water pools on top and takes four minutes to drain, the grind is too fine. Back the dial off one click toward coarse. You want the water to drain steadily, finishing right around the three-minute mark.
Taste the result. Sour notes mean the water flowed too fast. Bitter, dry notes mean it flowed too slow.
A balanced, sweet cup means your calibration is spot on. Write down the exact setting that gave you that good cup.
This process mirrors how professionals dial in drinks daily. According to the Specialty Coffee Association, controlling extraction through precise grind sizing is the primary way to manage flavor balance. Guesswork simply does not work.
Clearing Old Grounds From The Chamber
You cannot calibrate a dirty grinder. Stale grounds hide in the chute, the burr teeth, and the threads. These old bits mix with fresh coffee and throw off your measurements.
Unplug the unit. Remove the hopper and the top burr. Use your brush to sweep the inner chamber.
Pay special attention to the area right below the burrs. Grounds pack tightly there.
Some people use compressed air to blow out the dust. If you do this, hold the nozzle at an angle. Blowing straight down can push dust deeper into the motor housing.
Short bursts work best.
Wipe the threads with a dry cloth. Never use water on the burrs or the threads. Water causes rust on steel burrs and swells wooden or plastic parts.
If you see oily buildup, use a dry toothbrush to scrub it off. For heavy oil, grind a tablespoon of raw white rice. The rice absorbs the oil and scrubs the teeth clean.
Toss the rice flour afterward and brush the chamber out one more time.
Real Limits Of Home Calibration
Home grinders have physical limits. The motors are small, and the tolerances are loose compared to commercial machines. You can get a great cup at home, but you cannot expect lab-level perfection from a fifty-dollar appliance.
Thermal expansion is a hidden issue. As the motor runs, it heats up. Metal expands when it gets hot.
A setting that works perfectly for the first cup might drift slightly by the third cup as the burrs warm up and expand. High-end models use thicker metals to resist this, but budget models flex easily.
Static electricity also fights you. Dry climates cause chaff and fine dust to cling to the plastic walls of the chamber. This static messes with the flow rate and makes your visual checks less reliable.
Tapping the side of the grinder gently before brewing helps knock the static dust loose.
Finally, cheap adjustment rings wear out. Plastic threads strip if you force them. Once the threads are stripped, the dial spins freely without moving the burrs.
At that point, no amount of calibration will help. You either replace the part or buy a new grinder.
Mistakes That Damage The Burrs
Turning the dial to the finest setting while the motor is running is a quick way to break things. If the burrs touch while spinning at high speed, the motor stalls. The sudden stop can shear the drive pin or burn out the motor windings.
Always adjust the dial while the machine is off, or only while it is running empty and moving toward a coarser setting.
Dropping the burrs is another common error. Ceramic burrs shatter if they hit a tile floor. Steel burrs dent.
Even a tiny dent on the cutting edge will tear the beans instead of slicing them. Always work over a soft towel on the counter. If you drop a burr, inspect the teeth closely before putting it back.
Using flavored beans during calibration leaves sticky residue behind. Sugars and syrups coat the burrs and glue the adjustment ring in place. Always calibrate with plain, unflavored roasted beans.
Save the vanilla hazelnut blend for after you have locked in your settings.
Ignoring the user manual causes headaches too. Some grinders have safety locks or reverse-threaded collars. Turning them the wrong way tightens them until they crack.
Read the instructions for your specific brand before you twist anything.
Recalibration Triggers To Watch For
You don't need to calibrate every single day. But certain events demand a fresh check. Switching to a new bag of beans is the biggest trigger.
Different origins and roast levels have different densities. A light roast from Ethiopia is harder and denser than a dark roast from Sumatra. The same dial setting will produce different particle sizes for each bean.
Humidity changes matter too. Summer air holds more moisture. Beans absorb that moisture and swell slightly.
Swollen beans grind differently than dry winter beans. If your morning cup suddenly tastes off after a weather shift, check your grind size.
Bumping the grinder on the counter knocks the dial out of place. If you move the machine to clean under it, verify your setting before you brew. Kids, pets, or just wiping down the counter can spin the collar a few clicks without you noticing.
Changing your brew method requires a full reset. If you switch from a French press to a pour-over cone, you are jumping from very coarse to medium-fine. Find your true zero again and count your clicks from scratch.
Matching your grind to your brew method is just as important as picking the right brewing device for your kitchen.
Keeping The Threads Clean Long Term
Clean threads mean smooth adjustments. Make it a habit to brush out the grinder once a week. It only takes two minutes.
Pop the top burr out, give it a quick sweep, and put it back.
Avoid using liquid cleaners near the adjustment ring. Soap leaves a film that attracts more coffee dust. Stick to dry brushing and occasional rice purges.
If you must use a damp cloth, wring it out completely so no water drips into the mechanism.
Store your beans in an airtight container away from the stove. Heat and steam from cooking rise into the air and settle on your equipment. Grease from frying pans coats everything in the kitchen over time, including your grinder's exposed dials.
Keeping the unit covered when not in use prevents this greasy buildup.
Check the tension of the adjustment ring monthly. It should turn smoothly but hold its place firmly. If it feels sloppy or loose, look for a tension screw on the collar.
Some models let you tighten a small set screw to add friction back to the dial. Tighten it just enough to stop drifting, but not so much that you can't turn it by hand.
Grinder Questions Answered Fast
How often should I find true zero?
Do it when you first buy the grinder. After that, check it whenever you change bean types or notice a bad taste in your cup. Once a month is a safe habit.
Can I calibrate a blade grinder?
No. Blade grinders chop randomly. They don't have burrs or adjustment dials.
You control the size by how long you hold the button down. For consistent results, switch to a burr model.
Why does my dial slip back after I set it?
The threads might be worn, or oil is making them slick. Clean the threads thoroughly. If they are stripped, contact the manufacturer for a replacement collar.
Is a loud squealing noise normal during calibration?
No. Squealing means the burrs are pressed together too hard under power. Turn the machine off immediately.
Move the dial toward coarse until the noise stops. You went past true zero.
Do ceramic burrs need different steps than steel ones?
The steps are the same, but ceramic is brittle. Be much gentler when finding true zero. Let the burrs barely whisper against each other.
Pressing them hard will crack the ceramic edges.
What if my grinder has no external dial?
Some entry-level models have internal shims. You calibrate them by adding or removing thin paper or metal washers under the burr carrier. Check your manual for shim instructions.
Does bean age change the grind setting?
Yes. Fresh beans release more gas and shatter differently than stale beans. Stale beans tend to produce more fine dust.
You might need to grind slightly coarser as a bag ages.
Can I use water to wash the burrs?
Only if they are stainless steel and you dry them instantly. Carbon steel burrs will rust within hours if washed with water. Ceramic burrs can handle water but take a long time to dry fully.
Stick to dry cleaning methods.