Making air fryer chicken wings using baking soda is a straightforward process that takes about 40 minutes from start to finish. The baking soda dries out the skin before cooking, which gives you a shatteringly crisp exterior without needing any oil or deep frying. You need raw chicken wings, aluminum-free baking soda, salt, and an air fryer.
The method works because baking soda is alkaline. It raises the pH level on the surface of the chicken skin. This change in pH breaks down proteins faster when heat is applied.
It also pulls moisture away from the skin so it can brown and blister properly in the dry, circulating air of the machine.
Ingredients and tools for crispy wings
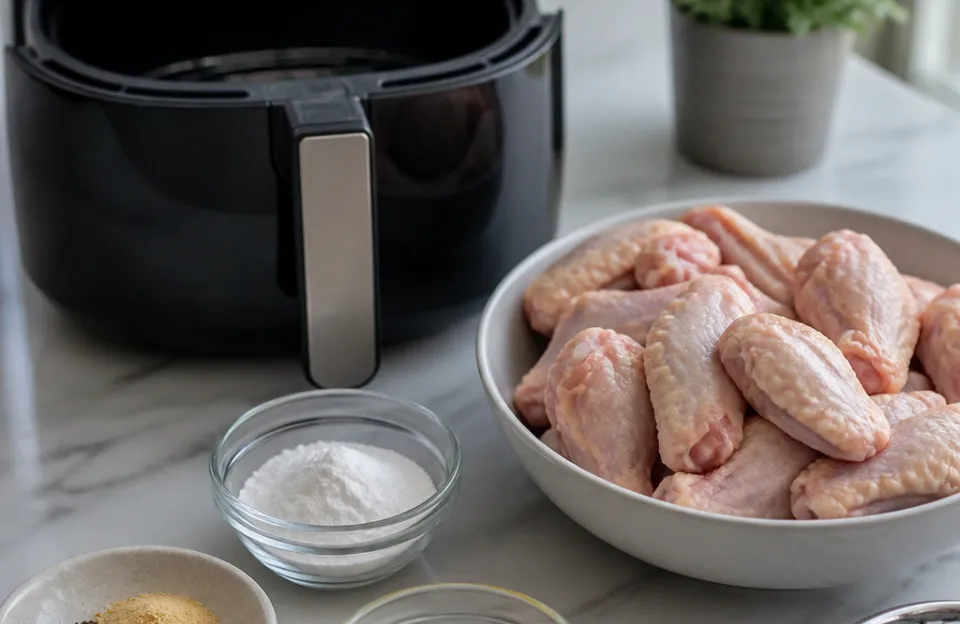
You only need a few things to pull this off. Keep the list short.
- 2 pounds of raw chicken wings (flats and drumettes separated)
- 1/2 teaspoon of aluminum-free baking soda
- 1 teaspoon of kosher salt
- Paper towels
- A large mixing bowl
- An air fryer with a basket
Always buy aluminum-free baking soda. Regular baking soda contains sodium aluminum sulfate. When heated, that compound leaves a harsh metallic taste on the food.
Aluminum-free versions use different acid salts that won't ruin your dinner.
You will also want a reliable way to check the meat temperature at the end. Poultry must reach a safe internal temperature to eat. I keep a fast-reading digital probe in my kitchen drawer specifically for checking thick pieces of meat right before serving.
Why baking soda changes the texture of chicken skin
Raw chicken skin holds a lot of water. Moisture is the enemy of crispness. When you put wet skin into an air fryer, the hot air has to evaporate all that water before browning can even begin.
That takes time, and the meat underneath often overcooks before the outside gets crunchy.
Baking soda solves this problem through chemistry. According to food science research from institutions like the USDA, altering the pH of meat surfaces changes how proteins react to heat. Baking soda is highly alkaline.
When you coat the wings in it, the alkalinity speeds up the Maillard reaction. That is the chemical process responsible for browning and developing complex flavors.
The baking soda also draws water out of the skin cells through osmosis. Less water means the surface temperature climbs faster once the wings hit the hot air. You get a blistered, fried texture without submerging the food in hot grease.
If you ever want to try a similar approach for other cuts, understanding safe pork temperatures or poultry guidelines helps you apply the same drying technique safely across different proteins.
| Coating Method | Prep Time | Crispness Level | Flavor Impact |
|---|---|---|---|
| Baking Soda | 5 minutes + 30 min rest | Very High | Neutral if measured correctly |
| Baking Powder | 5 minutes + 30 min rest | High | Slightly salty |
| Cornstarch | 2 minutes | Medium | Can taste chalky |
| Plain / No coating | 0 minutes | Low | Pure chicken flavor |
Drying the wings before seasoning
Patting the chicken completely dry is the first physical step. Take the wings out of the package and lay them on a stack of paper towels. Press more paper towels firmly against the top.
You want to absorb as much surface liquid as possible.
If you skip this, the baking soda turns into a wet paste immediately. A paste clumps up. It won't distribute evenly across the skin.
Uneven distribution leads to spots that are perfectly crisp next to spots that taste bitter and soapy. Dry skin allows the powder to cling lightly and uniformly.
Let the patted wings sit uncovered on a plate for about ten minutes while you measure your seasonings. Air exposure helps evaporate whatever moisture the paper towels missed.
Measuring the baking soda accurately
This is where most people mess up air fryer chicken wings using baking soda. They treat it like flour or cornstarch and toss in a heavy handful. Too much baking soda will ruin the dish.
It leaves a distinct, soapy, chemical flavor that no amount of hot sauce can cover up.
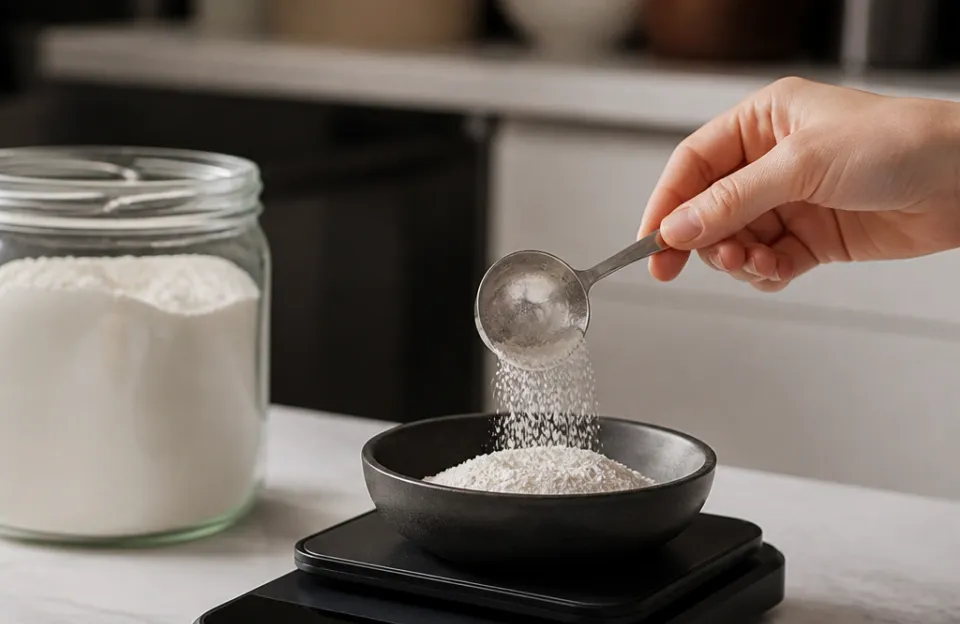
For two pounds of chicken wings, you need exactly half a teaspoon of baking soda. Combine it with one teaspoon of kosher salt in a small bowl before adding it to the meat. Mixing the two dry ingredients together first guarantees the tiny amount of baking soda spreads out evenly when you toss the wings later.
Put the dried wings into your large mixing bowl. Sprinkle the salt and baking soda mixture over the top. Use your hands to toss the wings until every piece has a very light, barely visible dusting.
The skin should look matte, not white.
Resting the coated wings to draw out moisture
Once the wings are tossed, they need time to sit. Arrange them in a single layer on a wire rack set over a baking sheet. If you don't have a wire rack, a plate lined with fresh paper towels works fine.
Leave them uncovered at room temperature for 30 to 45 minutes. During this window, the salt and baking soda pull water out of the skin. You will physically see the surface change.
It goes from looking slightly damp to feeling tacky and dry. The skin tightens up against the meat.
Do not put them in the refrigerator for this specific resting phase. Cold air slows down the moisture extraction. Room temperature keeps the chemical process moving at the right pace.
If you need to prep them hours ahead of time, do the 30-minute counter rest first, then move them to the fridge uncovered. But for immediate cooking, the counter is best.
Arranging the basket for proper airflow
Air fryers cook by blasting food with rapidly circulating hot air. If you block that air, the food steams instead of crisping. Overcrowding the basket is the fastest way to ruin the batch.
Place the rested wings into the air fryer basket in a single layer. Leave a small gap between each piece. The hot air needs to touch every side of the skin simultaneously.
If your air fryer is small, cook the two pounds in two separate batches. Trying to cram everything in at once drops the ambient temperature inside the basket and traps steam.
There is no need to spray the basket with oil. The baking soda treatment prevents sticking effectively. The rendered chicken fat will provide plenty of lubrication as the cooking progresses.
If you plan on making large batches regularly, keeping the interior clean matters. Knowing how to scrub the heating elements after rendering lots of chicken fat extends the life of the appliance.
Temperature settings and cooking times
Set the air fryer to 380°F (193°C). Cook the wings at this temperature for 12 minutes. This initial phase cooks the meat through gently without burning the baking-soda-treated skin too early.
After 12 minutes, pull the basket out. Flip every single wing over using tongs. You will notice the skin is already starting to firm up and turn golden.
Put the basket back in and cook for another 10 minutes at 380°F.
Now crank the heat up. Increase the temperature to 400°F (204°C) for the final 5 to 8 minutes. This high-heat blast is what triggers the rapid blistering.
Watch them closely during these last few minutes. The transition from deeply golden to burnt happens fast because the alkaline skin browns quicker than untreated chicken.
Total cook time usually lands between 27 and 30 minutes. Thicker drumettes might need the full 8 minutes at the higher temperature. Smaller flats might be done in 5.
Verifying the internal temperature safely
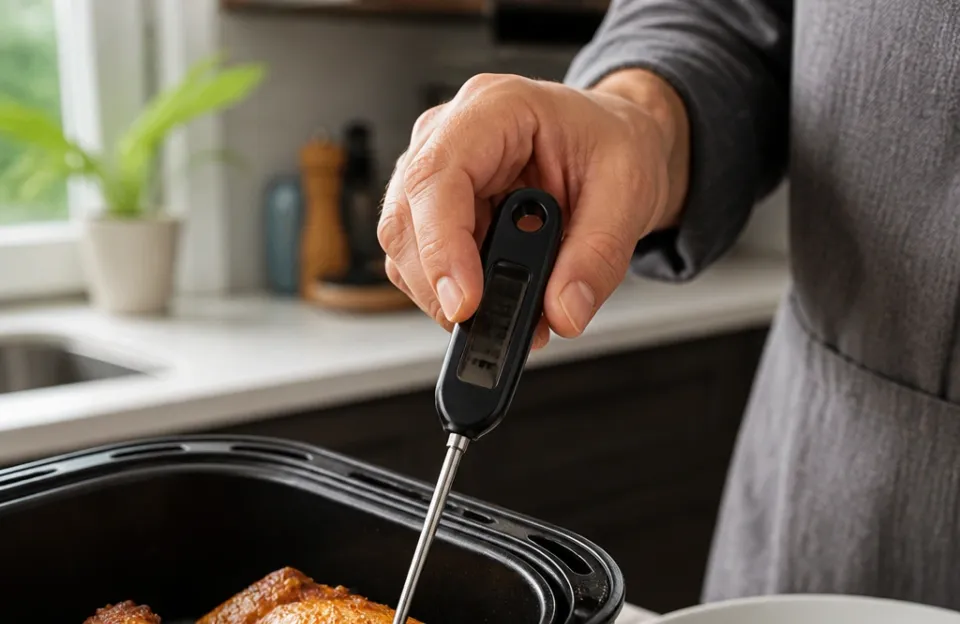
Chicken must reach 165°F (74°C) internally to be safe to eat. Visual cues are unreliable, especially when baking soda alters the color of the skin. The outside might look perfectly dark and crispy while the inside near the bone remains undercooked.
Insert a thermometer probe into the thickest part of a drumette. Avoid touching the bone, as bone conducts heat differently and gives false readings. If you cook large batches frequently, a wireless dual-probe setup lets you monitor the internal temp without constantly opening the basket and losing heat.
If the reading is below 165°F, put the wings back in for two-minute intervals until they hit the mark. Once they reach temperature, remove them immediately. Leaving them in a hot basket continues the cooking process and dries out the meat.
For those who prefer tracking temps remotely while prepping sides, a Bluetooth-enabled model handles that well.
Tossing in sauce without losing the crunch
The biggest risk after doing all this work is drowning the crispy skin in wet sauce and turning it soggy again. Timing and technique matter here.
Never add the wings to the sauce while they are still in the hot air fryer basket. Transfer them to a large, clean, dry bowl first. Let them rest for about two minutes.
This brief pause allows the crust to set and harden slightly as the surface cools.
Warm your sauce separately in a small pot or microwave. Pour the warm sauce over the rested wings. Toss them gently with a spatula or by shaking the bowl.
Don't stir aggressively. The goal is a thin, even coating, not a heavy bath. Serve immediately.
The longer sauced wings sit, the softer the skin becomes. If you prefer dry rubs, apply them before the baking soda step, or toss the finished plain wings in a dry spice blend right out of the basket.
Adjusting the method for frozen wings
You can use this technique on frozen chicken wings, but the process requires modifications. Do not put frozen wings directly into the air fryer with baking soda. The ice crystals prevent the powder from contacting the skin, and the excess water creates a steaming environment.
Thaw the wings completely in the refrigerator overnight first. Once thawed, pat them aggressively dry with paper towels. Frozen meat releases significantly more water during thawing than fresh meat does.
You might need three or four rounds of patting to get the surface truly dry.
After they are dry, proceed with the standard baking soda and salt toss, followed by the 30-minute uncovered rest. The cooking time may need an extra 3 to 5 minutes at the lower 380°F stage since previously frozen meat tends to retain cold spots near the joints longer.
Dealing with different air fryer sizes
A 4-quart air fryer behaves differently than a 6-quart or dual-basket model. Smaller baskets concentrate heat more intensely. The fan sits closer to the food.
In a compact machine, the final high-heat blast at 400°F might burn the skin in just 3 minutes instead of 5.
Larger ovens or toaster-style air fryers have more volume to heat. They often run slightly cooler than their digital display suggests. If you use a larger unit, you might need to extend the final crisping phase by a few minutes.
If you suspect your machine runs hot or cold, placing an independent dial gauge inside the basket during a test run reveals the true ambient temperature.
Basket-style air fryers with a paddle that rotates the food automatically aren't ideal for this recipe. The constant tumbling knocks the delicate, drying skin around before it sets. Manual flipping halfway through yields a much better crust.
Mistakes that ruin the crust
Using baking powder instead of baking soda is a common mix-up. Baking powder contains baking soda plus an acid (like cream of tartar) and a starch filler. It works for oven-roasted wings, but in the intense, direct convection of an air fryer, the starch can sometimes scorch unevenly.
Stick to pure baking soda for the air fryer method.
Skipping the drying step is another frequent error. Wet wings dilute the alkaline coating. The baking soda dissolves into the surface moisture rather than sitting on top of the skin to alter its pH.
Leaving the wings in the basket after the timer goes off causes residual heat to overcook the meat. Always transfer them to a cooling rack or serving platter immediately. And finally, applying a heavy hand with the baking soda guarantees a bitter, inedible result.
Measure carefully. Half a teaspoon per two pounds is the limit.
Frequently asked questions
Does baking soda make chicken wings taste weird?
If you measure it correctly, you cannot taste the baking soda at all. Half a teaspoon spread across two pounds of chicken neutralizes during cooking. Using too much, however, leaves a distinct soapy, metallic flavor that ruins the batch.
Can I leave the baking soda on the wings overnight?
Leaving baking soda on raw chicken skin for more than an hour starts to break down the proteins too far. The texture turns mushy and unappealing. Thirty to forty-five minutes at room temperature is the sweet spot for drawing out moisture without degrading the meat structure.
Is baking soda the same as baking powder for this recipe?
They are chemically different. Baking soda is pure sodium bicarbonate. Baking powder includes sodium bicarbonate mixed with a dry acid and cornstarch.
For air fryer chicken wings using baking soda, the pure alkaline form provides the fastest moisture extraction and crisping action.
Do I need to add oil to the wings before air frying?
No oil is required. Chicken skin contains enough natural fat to render out and crisp the exterior. Adding oil to baking-soda-coated skin can actually cause splattering and interfere with the drying process.
Why are my wings still soggy after air frying?
Sogginess usually comes from overcrowding the basket or skipping the initial pat-dry step. If the wings touch each other, steam gets trapped between them. Cook in smaller batches and verify your machine's actual temperature with a standalone thermometer if the problem persists.
What temperature should the air fryer be set to?
Start at 380°F for the first 22 minutes to cook the meat through without burning the treated skin. Finish at 400°F for the last 5 to 8 minutes to blister and crisp the exterior.
Getting the timing right every time
Air fryer chicken wings using baking soda rely on a precise balance of chemistry and heat. The alkaline powder does the heavy lifting by pulling moisture out of the skin and accelerating browning. Your job is simply to measure the half-teaspoon accurately, give the wings enough space in the basket, and watch the clock during that final high-heat blast.
Once you dial in the timing for your specific machine, you get deep-fried crunch with a fraction of the mess.



1 thought on “Crispy Air Fryer Chicken Wings With Baking Soda”