Sous vide cooks food in a sealed bag at a precise water temperature, so the meat never gets hotter than the bath. That raises an obvious question: why do you even need to use a meat thermometer for sous vide? The answer is verification.
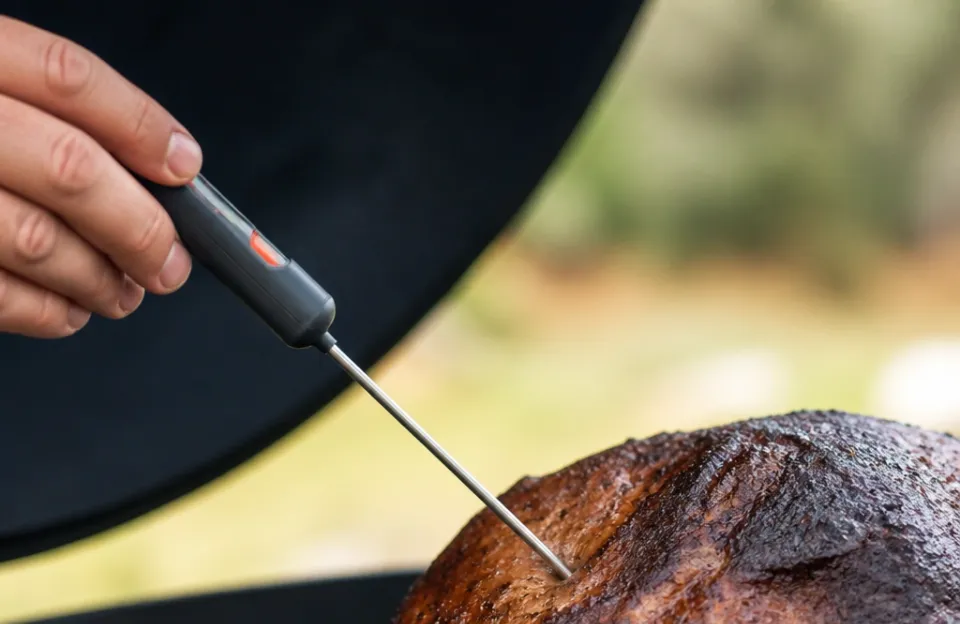
You use it to confirm the water bath is holding the right temperature, and you use it to check the internal temperature of the meat after the cook finishes or during a post-bath sear.
Learning how to use a meat thermometer for sous vide takes about five minutes once you understand where and when to probe. The process relies on two distinct checks: measuring the water before the protein goes in, and spot-checking the meat itself afterward. You will need a reliable instant-read digital thermometer to do this properly.
Thermometers that work inside a water bath
Not every kitchen thermometer survives a sous vide setup. Analog dial thermometers are too slow and often lack the precision needed for low-temperature cooking. Infrared laser guns only read surface temperatures, so they cannot tell you what is happening inside a sealed bag or deep in a water bath.
A fast digital probe is the standard choice here. If you want to monitor the bath without opening anything, a wireless dual-probe setup lets one sensor sit in the water while the other stays ready for the final meat check.
Speed matters more than almost any other specification. When you pull a bag out of the water to test the meat, the temperature starts dropping immediately. A slow probe gives you a false low reading because the meat cools while the sensor catches up.
Look for a model that stabilizes in three seconds or less, like a fast-reading digital option built for quick kitchen checks.
Water resistance is another practical requirement. You will be working over a container full of hot water, and splashes happen constantly. A thermometer rated IP65 or higher handles steam and accidental drops into the bath without shorting out the electronics.
| Thermometer Type | Reads Water Bath Temp | Reads Internal Meat Temp | Speed | Best For |
|---|---|---|---|---|
| Instant-read digital probe | Yes | Yes | 1 to 3 seconds | Spot-checking after the cook |
| Wireless dual-probe | Yes (leave-in) | Yes (leave-in) | Continuous | Monitoring long cooks remotely |
| Infrared laser gun | Surface only | No | Instant | Checking pan heat for searing |
| Analog dial | Yes (slow) | Yes (slow) | 15+ seconds | Backup only, avoid for sous vide |
Calibrating your probe before the first cook
A thermometer that reads two degrees off can ruin a sous vide steak. At 129°F, you are aiming for medium-rare. If your probe actually reads 131°F, you have overshot the target.
Calibration fixes this drift.
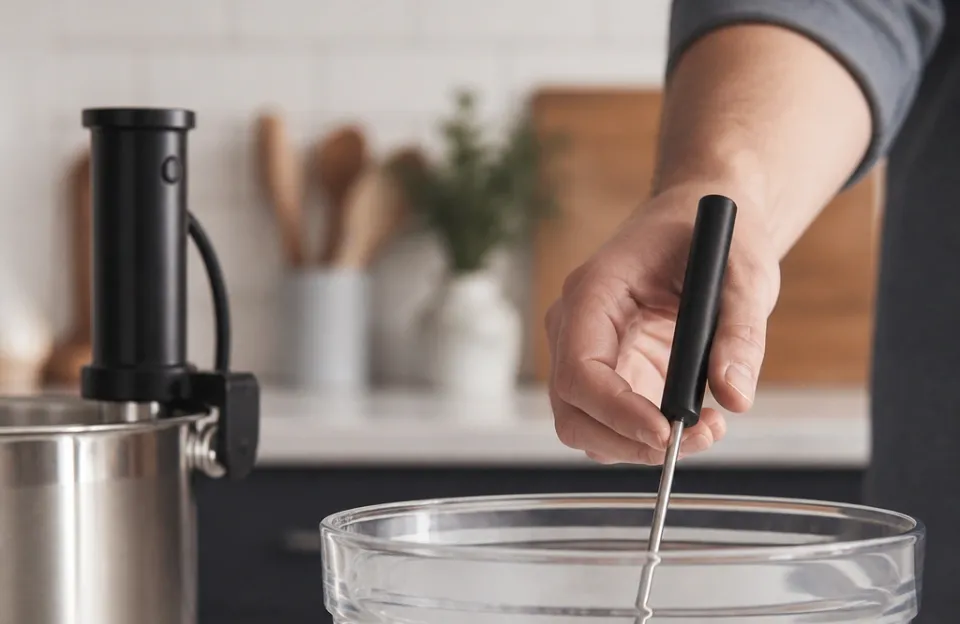
Fill a glass with crushed ice and add just enough cold water to fill the gaps between the cubes. Stir it well. Insert the thermometer probe into the center of the ice slurry without touching the sides or bottom of the glass.
Wait for the reading to stabilize. It should display exactly 32°F (0°C).
If the number is off, most digital models have a calibration button or a reset function detailed in the manual. Adjust it until it reads 32°F. Doing this once a month keeps your readings accurate.
You can verify your tool's accuracy against USDA food safety guidelines for minimum internal temperatures whenever you switch to a new cut of meat.
Some people skip this step because their device worked fine out of the box. Sensors drift over time due to heat exposure and minor impacts. Taking thirty seconds to run an ice bath test prevents ruined dinners later.
Measuring the water bath temperature
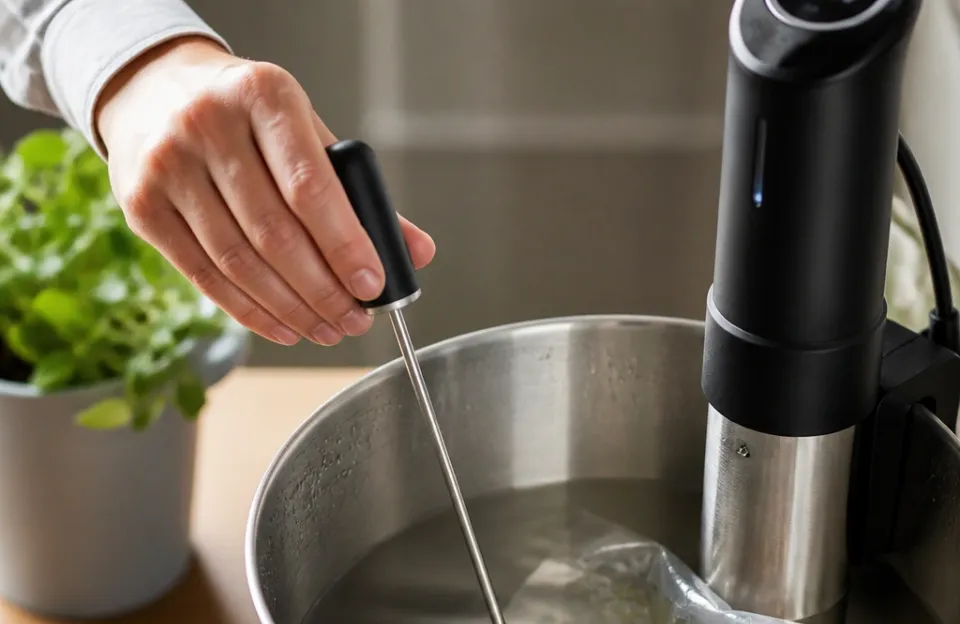
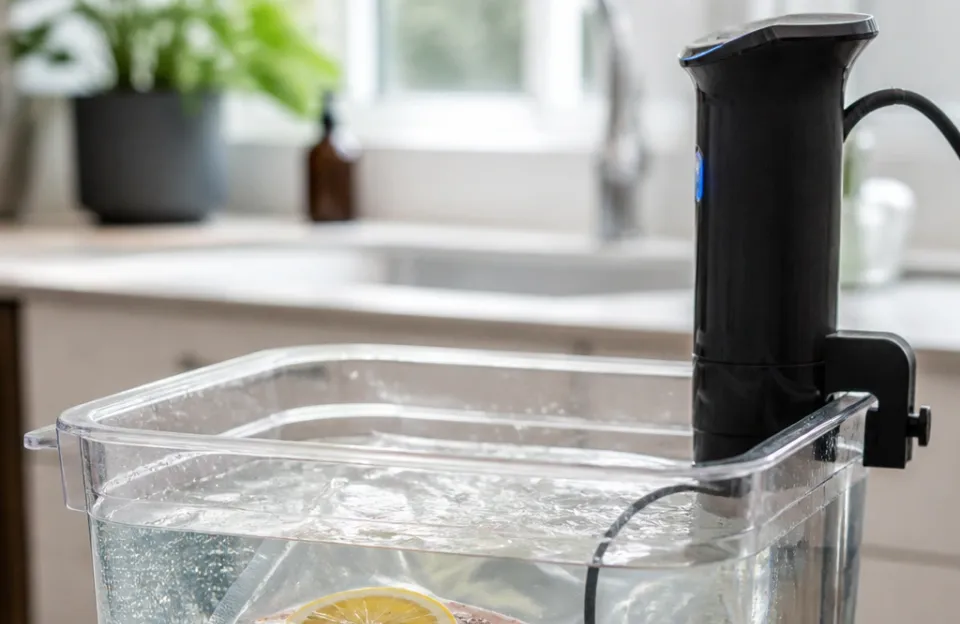
The immersion circulator has its own built-in sensor, but trusting it blindly is a mistake. Mineral buildup on the heating element or a failing internal sensor can cause the actual water temperature to drift away from the number displayed on the screen.
Fill your container and turn on the circulator. Set your target temperature. Wait for the machine to beep or indicate it has reached the set point.
Then take your separate digital thermometer and insert the probe directly into the water. Hold it near the center of the container, away from the direct flow of the circulator's pump and away from the walls of the pot.
Compare the two numbers. They should match within half a degree. If your handheld probe shows a significant difference, your circulator might need descaling or recalibration.
This step is especially important if you rely on a basic standard digital thermometer rather than a dedicated sous vide tool. Verifying the bath temperature gives you confidence that the environment cooking your food is exact.
For longer cooks lasting 24 hours or more, checking the water bath periodically guards against silent failures. A circulator that loses half a degree overnight might not trigger an alarm, but it changes the texture of something like a pork shoulder or beef short rib.
Spot-checking the meat after the timer ends
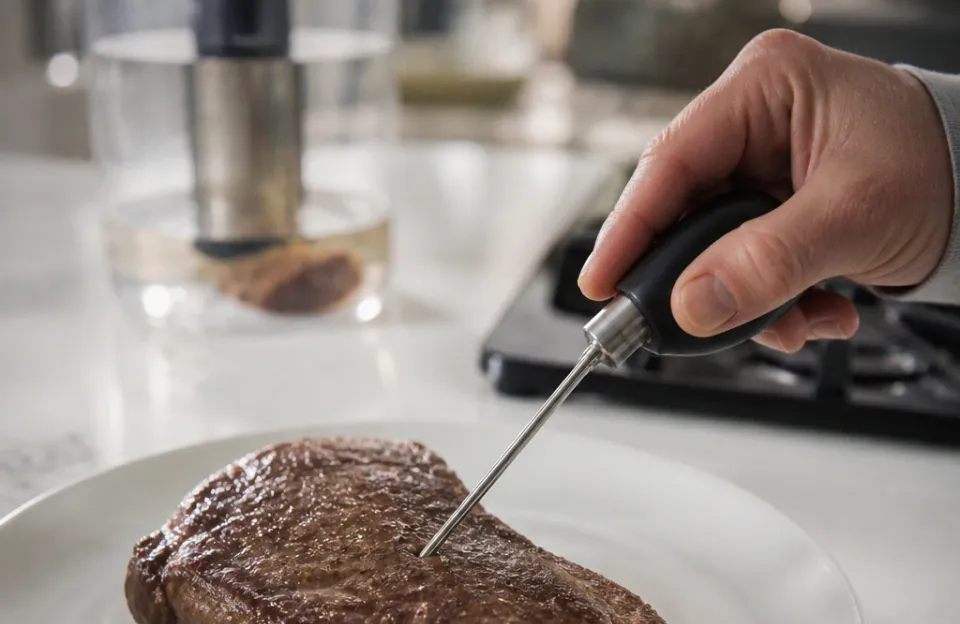
This is the core task when figuring out how to use a meat thermometer for sous vide. The method differs slightly depending on whether you plan to sear the meat afterward or serve it straight from the bag.
Testing meat served directly from the bag
When you cook chicken breasts or fish fillets and intend to eat them without a high-heat finish, you need to verify they hit the safe internal temperature throughout. Pull the sealed bag out of the water. Dry the outside of the bag completely with a towel so it does not slip in your hands.
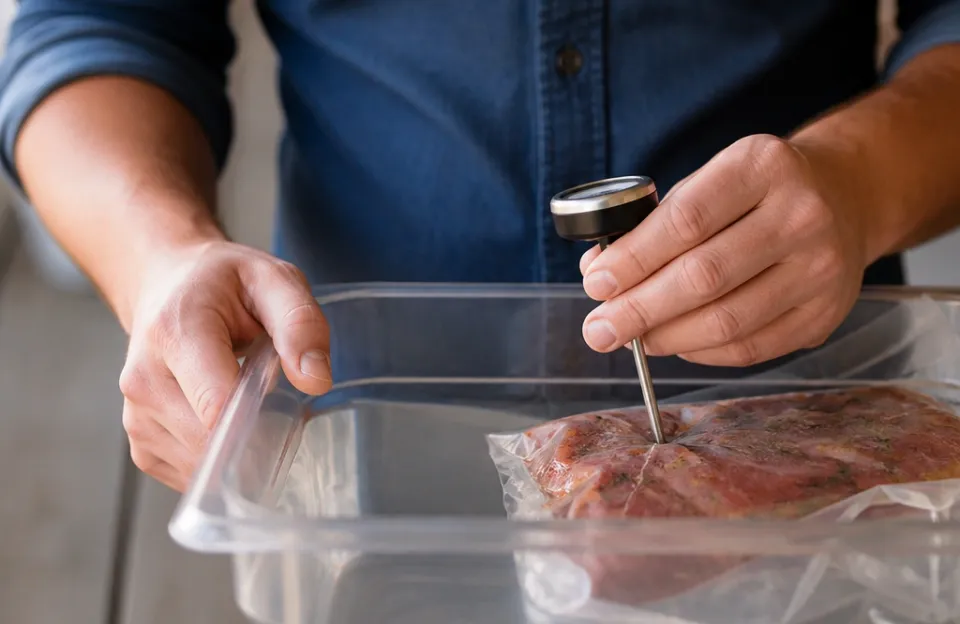
Open the bag or fold down the top. Insert the probe into the thickest part of the meat. Push the tip all the way to the geometric center.
Watch the numbers drop as the sensor passes through the outer layers and settles in the middle. The final stable number is your true internal temperature. It should match the water bath temperature you set, assuming the cook time was long enough for thermal equilibrium.
Puncturing the bag means you cannot put it back in the water if the meat is underdone. Only do this when the recommended cook time has fully elapsed. If you are nervous about ruining the seal prematurely, use a piece of foam tape on the bag before cooking.
You push the probe through the tape, which seals around the metal shaft and prevents water from leaking into the bag.
Checking temperature before a finishing sear
Steaks, pork chops, and duck breasts usually get a hard sear in a cast iron skillet or with a torch after the water bath. The goal of the sear is to build a crust without raising the internal temperature past your target doneness.
Remove the meat from the bag and pat it extremely dry with paper towels. Insert the thermometer probe into the center of the thickest section. Note the temperature.
It will likely be a few degrees lower than your water bath setting because the surface cooled slightly during removal.
Heat your pan until it is smoking. Sear the meat for 30 to 45 seconds per side. Immediately probe the center again.
You want to see that the internal temperature did not climb more than two or three degrees. If it jumps from 129°F to 138°F during the sear, your pan was too hot or you left the meat in too long. Practice makes this timing easier, and having a reliable rechargeable probe nearby speeds up the workflow since you do not have to fumble with battery compartments mid-sear.
Where to place the probe in different cuts
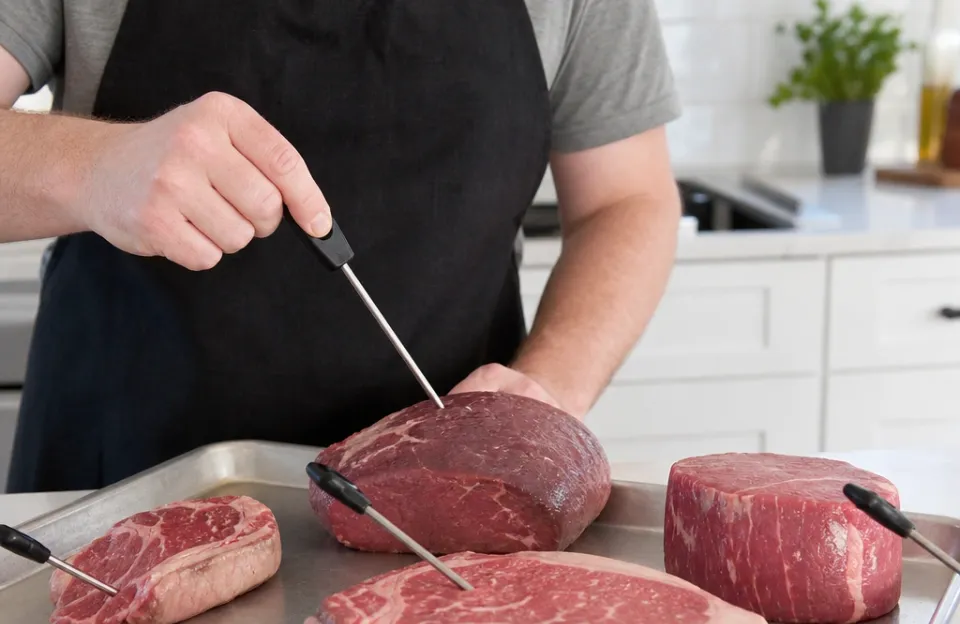
Placement determines accuracy. Hitting a pocket of fat or resting the tip against bone gives you a false reading. Fat insulates and reads cooler than muscle tissue.
Bone conducts heat differently and can skew the number either way depending on the cook stage.
Chicken breasts: Insert the probe horizontally into the thickest end. Push it until the tip reaches the center. Chicken is dense, so make sure the sensing area of the probe is fully buried in the meat.
Poultry requires strict adherence to safe temperatures, so double-check your reading if it seems unusually low.
Steaks (ribeye, strip, filet): Aim for the exact geometric center. If the steak has a large fat cap or an eye of fat running through it, angle the probe to stay in the red muscle tissue. For thin steaks under one inch, insert the probe from the side rather than the top to get enough depth.
Pork chops: Treat them like steaks. Find the thickest part away from the bone. If you are cooking bone-in chops, keep the probe tip at least half an inch away from the bone structure.
Fish fillets: Fish is delicate and cooks very quickly in a sous vide bath. Insert the probe gently into the thickest section. Because fish proteins denature at lower temperatures, even a slight overshoot changes the texture from buttery to chalky.
A highly responsive digital model helps catch these subtle differences before they ruin the dish.
Using leave-in probes during the water bath
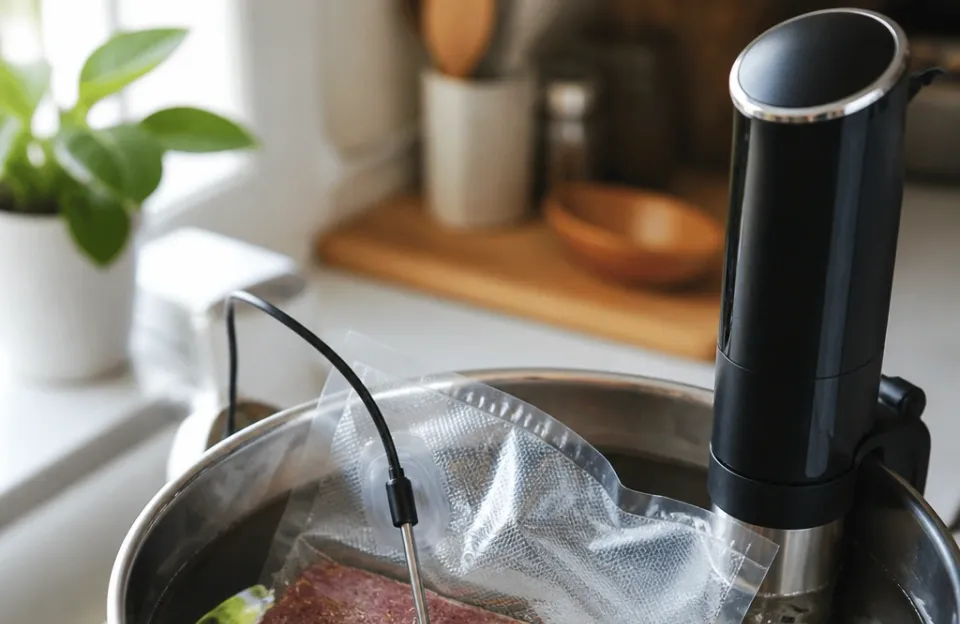
Most home cooks open the bag to check the meat at the end of the cook. But you can also monitor the internal temperature continuously by using a leave-in probe inside the bag while it sits in the water bath.
This requires a specific setup. You place the meat in the bag, insert the probe into the center of the meat, and then seal the bag around the probe cable. Many vacuum sealers cannot handle a wire passing through the seal.
Instead, use a zip-top bag or a specialized sous vide bag with a foam pad or silicone gasket designed to seal around the wire.
Run the wire out of the water bath to a base station sitting on the counter. This allows you to watch the meat's internal temperature rise and equalize with the water in real time. It removes the guesswork from timing.
You know exactly when the center of a thick roast hits 135°F because the screen tells you.
Wireless models eliminate the wire problem entirely. You insert the transmitter probe into the meat, seal the bag normally, and drop it in the water. The signal transmits through the water and plastic to a receiver or phone app.
Just verify that the specific wireless model you choose is rated for full submersion at your target cooking temperature. Some Bluetooth sensors fail above 150°F or lose connection underwater. If you run into signal drops, checking advice on fixing a thermometer losing connection can save you from abandoning the method altogether.
Leave-in monitoring is mostly useful for thick roasts, whole tenderloins, or tough cuts cooked for 24 to 72 hours. For a standard one-inch steak cooked for an hour, opening the bag at the end is much simpler.
Mistakes that ruin your readings
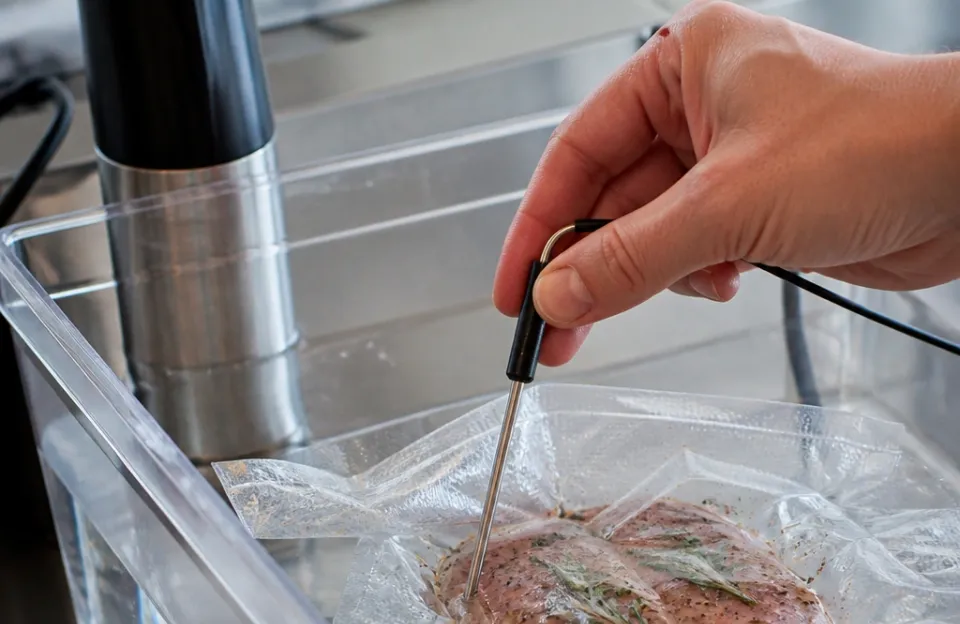
Even with a good thermometer, bad habits lead to bad data. Here are the errors that come up most often when people figure out how to use a meat thermometer for sous vide.
Leaving the probe in the bag too long after opening. Once you break the seal, the meat is exposed to room temperature air. If you spend thirty seconds fishing around for the center of the steak with your probe, the outside layers cool down. Your reading drops, making you think the meat is undercooked when it was perfectly done ten seconds earlier.
Have your plan ready before you open the bag.
Touching the bag wall with the probe tip. When testing through an opened bag, it is easy to accidentally push the probe tip against the plastic or rest it on the bottom of the container. Plastic and water hold heat differently than meat. Always ensure the sensing zone is surrounded entirely by flesh.
Ignoring the minimum insertion depth. Most instant-read thermometers have a sensing area located about half an inch up from the tip. If you only push the very point of the needle into a thin piece of fish, the sensor is still sitting in the air outside the meat. Read the manual for your specific model to find its required depth.
Using a dirty probe between tasks. If you check raw chicken and then use the same unwashed probe to check a finished steak, you risk cross-contamination. Wipe the probe with a sanitizing cloth or hot soapy water between every single check.
Trusting a dying battery. Digital thermometers slow down and give erratic readings as the battery drains. If your usual one-second response time suddenly stretches to five seconds, replace the battery or charge the unit before blaming the sous vide machine for uneven cooking. Choosing one of the most durable thermometers available reduces how often you deal with hardware issues in the first place.
Frequently asked questions
Do I really need a meat thermometer if my immersion circulator is accurate?
Yes. The circulator controls the water temperature, but it cannot tell you if the center of a thick piece of meat has actually reached that temperature yet. A thermometer verifies that thermal equilibrium happened.
It also protects you if the circulator's internal sensor drifts or fails silently during a long cook.
Can I use an infrared thermometer gun to check sous vide meat?
No. An infrared gun only measures the surface temperature of whatever it points at. It cannot see through a plastic bag, and it cannot read the internal temperature of a steak.
You can use one to check how hot your cast iron skillet is before searing, but it is useless for verifying the doneness of the meat itself.
What is the safe internal temperature for sous vide chicken?
Safety depends on both temperature and time. According to USDA standards, poultry held at 165°F is safe instantly. However, in sous vide cooking, you can pasteurize chicken at lower temperatures if you hold it there long enough.
For example, chicken breast held at 148°F for at least 27 minutes achieves the same bacterial reduction as 165°F instantly. Always verify your specific time and temperature combination with official pasteurization tables.
Will poking a hole in the vacuum bag ruin the sous vide cook?
Only if you do it while the bag is still submerged and supposed to be sealed. If you puncture the bag underwater, water rushes in and dilutes the juices, potentially changing the flavor and texture. If you poke the meat after removing the bag from the water to check the final temperature, the cook is already over, so the broken seal does not matter.
Why does my thermometer read lower than the water bath setting?
If you check the meat immediately after pulling it out, the surface cools rapidly. Additionally, if the cook time was too short, the center of the meat simply has not caught up to the water temperature yet. A two-inch thick roast needs significantly more time in the bath than a one-inch steak to reach the target temperature all the way through.
How often should I calibrate my digital probe?
Calibrate it once a month if you cook sous vide frequently, or every time you drop the thermometer on the floor. Use the ice water method described earlier. It takes less than a minute and prevents the frustration of serving overcooked food because your sensor drifted by three degrees over the last few months.
Keeping your readings honest
Mastering how to use a meat thermometer for sous vide comes down to speed, placement, and trust in your tools. The water bath does the heavy lifting by creating a controlled environment, but the thermometer acts as your proof that the physics actually worked on the food inside the bag. Keep your probe calibrated, aim for the thickest part of the protein, and move quickly when you open the seal.
Those small habits are the difference between guessing your dinner is done and knowing it is.