A coffee maker leaking water is usually caused by one of a few simple things: a reservoir that is not seated properly, a worn or misaligned seal, mineral scale or a clog blocking the brew path, or a loose carafe lid or collapsed filter. Start by unplugging the machine and checking your model’s manual before you open anything. If water has reached internal electrical parts or the heating components, stop there and contact the manufacturer.
Why Your Coffee Maker Leaking Water Happens
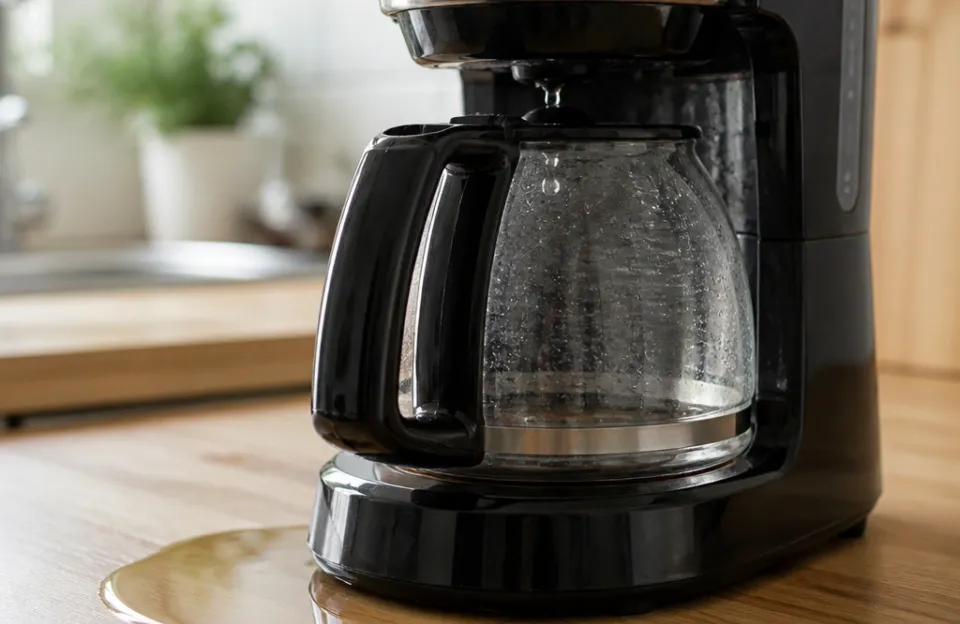
Water inside a brewer travels from the reservoir through tubing, a heating element, valves, and finally to the showerhead. A leak appears wherever that path is interrupted by a loose fitting, a tired gasket, or a blockage that pushes water somewhere it should not go.
Where the puddle forms tells you a lot. Water underneath the machine points to something inside the water path. Water at the side or around the reservoir base points to the tank or its outlet seal. Water around the brew basket or warming plate usually means the water is missing the carafe rather than escaping the machine.
One useful clue is scale. Buildup tends to reduce water flow gradually rather than causing an instant pressure drop, so a slow decline in performance often comes before a leak.
Before you take anything apart, read the manual for your exact model. Many manuals state that the machine contains no user-serviceable parts and that owners should not disassemble it. Some explicitly forbid removing the cover and direct owners to contact the manufacturer about leaks. Others go further and say the inside is not owner-serviceable and that repair must be done by authorized personnel.
That does not mean every leak needs a service centre. It does mean the safe fixes are the external ones: seating, seals, lids, filters, and descaling. Anything past that is a decision for the manufacturer.
Find the Leak First: Underneath, Reservoir or Side, Carafe and Brew Basket
Before touching a single screw, run this simple triage. It takes a few minutes and points you toward the right fix.
- Unplug the brewer and dry the machine and counter completely.
- Fill the reservoir to its normal level and set it in place without brewing. Watch for drips at the base or side.
- If nothing appears, brew a cycle with water only and watch underneath, at the sides, and at the basket.
- Note whether the leak happens only while brewing or also when the machine sits idle.
A leak only during brewing suggests the problem is on the pressurized side of the water path. An idle drip points toward the reservoir, its outlet valve, or a seal that no longer closes.
Quick Fix 1: Reseat the Reservoir and Check for Overfilling
This is the most common and easiest fix. Pull the reservoir out, empty it, and look at the bottom outlet. On removable tanks there is usually a spring-loaded valve with a rubber gasket around the drain hole. Press the gasket with a finger: it should spring back. If it feels hard or stays compressed, it needs replacing, and some manufacturers sell that seal separately while others require a new tank.
Wipe the mating surfaces on both the tank and the machine base with a damp cloth, then seat the tank firmly until it clicks or sits flush. Fill only to the marked maximum line. Overfilling can push water into an overflow vent that routes down the side of the machine.
Check that the tank is not warped or cracked at the corners, where stress builds up over repeated heating and cooling cycles. A hairline crack at the base is a replacement job, not a repair.
Quick Fix 2: Inspect Seals, Gaskets, and the Carafe Lid
Sometimes the machine is working correctly and the water is simply missing the pot. Check the carafe lid first. Many glass pots have a plastic lid with a small tab or paddle that presses a spring valve in the brew basket to release coffee. If the lid is warped, or if you are using a generic replacement pot that does not match the original height, that valve never fully opens. Coffee backs up in the basket and spills over the sides.
Make sure you have the exact replacement carafe for your model. Even a small difference in height can stop the lid from engaging the drip-stop mechanism.
Next, inspect the rubber seals where the reservoir meets the base and any visible gaskets around the brew basket. Grit and dried coffee act like sandpaper on these parts. A weekly wipe with a damp cloth keeps them smooth and helps them seal.
Quick Fix 3: Clear a Clogged Showerhead or Blocked Brew Path
The showerhead is the disc inside the top of the machine that sprays water over the grounds. Mineral deposits clog its tiny holes, so water channels to one side, hits the edge of the filter basket, and overflows down the outside.
Cleaning method matters, and the manual should guide it. The BUNN Speed Brew manual, for example, instructs owners to switch off the tank, unplug the brewer, let it cool for at least two hours, then unscrew the sprayhead with their fingertips and clean it. That model’s manual suggests cleaning the sprayhead about every three months, or twice a month in very hard water. Follow your own model’s procedure rather than borrowing another brand’s method.
Paper filters can also cause overflows. Cheap filters lack stiffness, so hot water collapses them against the basket wall and water flows behind the paper. Thicker filters or a permanent mesh basket avoid this. If you use paper, flatten the crimped seams before placing the filter so the walls stay rigid.
Quick Fix 4: Descale Using the Manufacturer’s Specified Method
Scale narrows the inside of tubing and restricts flow, and descaling is the fix. The catch is that the correct agent, concentration, and rinse steps vary by model, and a method for one brewer is not a safe template for another.
The differences are real and documented. The Gaggia Classic Pro manual instructs owners to use only the Gaggia descaling product and never vinegar or other descalers. The Jura E8 manual states that non-recommended agents such as vinegar could damage the machine. Nespresso’s VertuoLine guidance warns that vinegar or store-bought descalers may damage that machine. Keurig’s guidance is to use its branded descaling solution, and the company notes that alternatives, vinegar included, may affect the warranty. On the other side, the Mr. Coffee 12-cup JPX37 manual describes a clean cycle using Mr. Coffee cleaner or four cups of undiluted white vinegar, and the BUNN Speed Brew manual allows a vinegar clean using one quart of white vinegar every three months. The Breville BDC650 manual also gives a vinegar procedure.
So check your manual before you pour anything in. Vinegar and dedicated descalers both dissolve limescale, but they differ in speed, odor, rinse requirements, and whether the manufacturer accepts them. Never use flavored vinegars, fruit juices, or undiluted vinegar where the manual does not allow it.
Cadence also comes from the manual. The Gaggia Classic Pro manual calls for descaling every two months, even with bottled water, while a Jura E8 fitted with a CLEARYL Smart filter stops prompting for descaling. Treat those as model-specific examples, not a universal schedule.
One water-quality note: very pure water is not automatically better. Several manuals forbid distilled or highly filtered water, and some link it to problems such as a leaking hot water outlet and pumps that keep running. Use the water type your manual specifies.
Quick Fix 5: Check Hoses and Valves, or Stop and Escalate
If the external fixes have not solved it, you are now looking at internal parts: hoses, valves, and the heating block. This is the point to slow down.
Many manuals forbid opening the machine at all, and some restrict repair to authorized personnel. Where a manual permits owner access, follow it exactly and never run the brewer with the housing open or with water near electrical components. For machines whose manuals describe no owner adjustment of pump, valve, or pressure, service goes through a dealer or authorized service centre.
Replacing a split hose or a failed check valve is not something the available evidence establishes as an approved owner repair for any specific model, so treat it as a manufacturer-service question rather than a DIY step. If the heating block or any electrical component is involved, stop and escalate.
Repair or Replace: A Decision Rule with Warranty Caveats
Use these questions in order.
- Is the machine still under warranty, and does the manual forbid owner disassembly? If yes, contact the manufacturer before spending anything.
- Are the parts you need actually sold for your model? Moccamaster states that its removable parts are designed to be easily replaceable and that it offers replacement parts, including for older brewers. Not every brand matches that.
- What do the warranty terms say about the failure? The BUNN Speed Brew manual states a three-year warranty but excludes the glass carafe and use with water having a high mineral content. The Mr. Coffee 12-cup JPX37 manual states a one-year limited warranty.
- Is the failed part external and replaceable, or is it the heating block or internal electronics? External parts favour repair; internal heating faults favour replacement or service.
If the answer to question 4 is internal and the warranty has lapsed, replacement is usually the cleaner decision. Do not attempt to patch a cracked tank or heating block.
If You Replace: Supported Trade-Offs and Conditional Recommendations
No single brewer is best for every reader, and the available evidence does not include failure rates or lifespan data, so choose on the factors you can actually verify: parts availability, warranty terms, and how easy the machine is to maintain.
| Factor | What to Check | Example From Manufacturer Statements |
|---|---|---|
| Parts availability | Are replacement parts sold for your model, including older units? | Moccamaster states removable parts are designed to be easily replaceable and parts are offered for older brewers |
| Warranty length and exclusions | How long, and what is excluded? | BUNN Speed Brew states three years, excluding the glass carafe and high-mineral water use; Mr. Coffee JPX37 states one year limited |
| Descaling flexibility | Does the manual allow vinegar, or require a branded descaler? | Mr. Coffee JPX37 allows a vinegar clean cycle; Gaggia Classic Pro requires its own descaler and forbids vinegar |
| Owner maintenance access | Can you clean the sprayhead and path from outside? | BUNN Speed Brew instructs unplugging, cooling, and unscrewing the sprayhead for cleaning |
Conditional recommendations based on those statements:
- If replaceable parts and long-term maintenance matter most, a Moccamaster is worth comparing, given the manufacturer’s stated parts program.
- If a longer stated warranty and outside-only cleaning tasks matter most, compare the BUNN Speed Brew, keeping in mind its exclusions.
- If you want a documented vinegar clean cycle and a lower-cost machine, the Mr. Coffee JPX37 is the relevant comparison point.
Confirm current pricing, warranty terms, and return policies with the manufacturer or retailer before buying, since those details change and were not verified here.
Preventing Future Leaks with Routine Care
- Descale on your manual’s schedule. The BUNN example is every three months with one quart of white vinegar, plus sprayhead cleaning every three months or twice a month in very hard water. The Gaggia example is every two months. Your model’s manual overrides both.
- Wipe the reservoir mating surfaces and visible gaskets weekly so grit does not wear the seals.
- Fill only to the maximum line to avoid overflow vents.
- Use the water type your manual specifies; several manuals forbid distilled or highly filtered water.
- Listen for changes in pump sound. Scale reduces flow gradually rather than causing an immediate pressure drop, so a strained or higher-pitched pump is an early warning worth acting on with a descale.
- Keep the brewer on a stable, flat surface so the tank and carafe are not repeatedly jostled out of alignment.
Frequently Asked Questions
Why Does My Coffee Maker Only Leak When Brewing, Not When Sitting Idle?
A leak that appears only during brewing points to the pressurized side of the water path, where water is pushed through the heater and up to the showerhead. An idle drip points instead to the reservoir outlet, its seal, or a gasket that no longer closes.
Is a Leaking Coffee Maker a Fire Hazard?
Water reaching the warming plate, power cord, or internal circuit board can cause a short circuit, so unplug a leaking machine immediately. Do not power it on again until you have found the source, dried the components completely, and completed the repair. If water has reached internal electrical or heating parts, contact the manufacturer rather than continuing.
Can I Use Plumber’s Tape on a Coffee Maker Hose?
No. Thread seal tape is made for metal pipe threads, not the smooth plastic barbs or rubber hoses inside a brewer, and wrapping it around a hose prevents the hose from seating properly. This is also not an approved owner repair in the available manufacturer statements, so treat internal hose work as a service question.
Does Using Bottled Water Prevent Leaks?
Not reliably, and it is not a substitute for descaling. What the manuals do say is that some brewers forbid distilled or highly filtered water, and some link very pure water to problems such as a leaking hot water outlet. Follow your manual’s water guidance and descaling schedule.
Should I Repair a Cheap Drip Machine or Buy a New One?
Check the warranty first, since many manuals forbid owner disassembly. Then check whether parts are sold for your model. If the fault is external (seal, lid, filter, scale), repair or clean it. If it is the heating block or internal electronics, replacement is usually the cleaner path.
How Often Should I Descale My Coffee Maker?
Use your manual’s schedule. Examples from manufacturer statements include every two months for the Gaggia Classic Pro and every three months for the BUNN Speed Brew. These are model-specific, not universal.
A puddle on the counter rarely means the end of your brewer. Work through the external fixes first: reseat and check the reservoir, inspect seals and the carafe lid, clear the showerhead, and descale using your model’s approved method. If the leak persists into the internal water path or touches electrical or heating parts, stop and let the manufacturer handle it, or replace the machine using the parts and warranty factors above.