To use a drip coffee maker, fill the reservoir with fresh cold water, line the basket with a filter, add medium-ground coffee at roughly 1 gram per 16 to 18 grams of water, and start the brew cycle. Let the cycle finish before you pull out the hot carafe. Rinse the removable parts after each use, and descale on the schedule your manual specifies.
Most disappointing pots come down to a few fixable variables: an inaccurate ratio, the wrong grind, a dirty machine, or water that is not hot enough. Work through those in order before you blame the appliance.
What You Need Before the First Brew
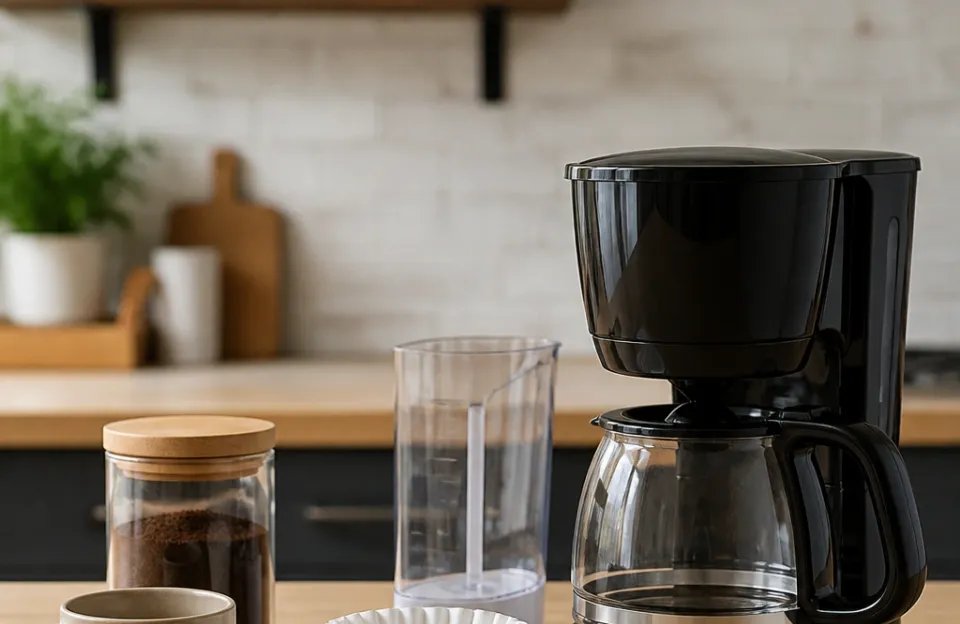
Gather four things: fresh cold water, medium-ground coffee, a filter that fits your basket, and a clean carafe. If you have a kitchen scale, use it. Weighing in grams removes the guesswork that measuring scoops introduces.
Filtered water is the better default. Distilled water is not recommended for brewing.
Once you know the machine works, a burr grinder and a scale are the upgrades that most reliably improve consistency. Neither is required to make a good first pot.
Set Up the Machine Correctly
Unpack the machine, remove any packing tape from the carafe and basket area, and wash the carafe, basket, and reusable filter in warm soapy water. Wipe the exterior with a damp cloth. Do not immerse the base.
Then run a plain water cycle with no coffee and no filter. This flushes manufacturing residue from the internal water path before your first real brew. Discard that water.
Check that the filter basket is seated fully and the carafe sits square on the plate or under the brew head. A carafe that is slightly off-center is one of the most common causes of a flooded counter on the first run.
Pour-Over Cones
If your machine uses a cone-shaped basket, confirm the filter size matches the cone. A filter that is too small collapses inward and dumps grounds into the carafe. A filter that is too large blocks the drain hole and causes overflow.
Measure Coffee and Water Accurately
The Specialty Coffee Association’s recommended coffee-to-water ratio is 1:16 to 1:18, meaning 1 gram of coffee per 16 to 18 grams (or milliliters) of water. The finished brew should land around 1.15% to 1.35% dissolved coffee solids.
A worked example makes this concrete. For a 500-milliliter pot, use about 28 to 31 grams of coffee at the 1:16 to 1:18 range. For a full 1-liter carafe, double that to roughly 56 to 63 grams.
Why Your Carafe Markings Are Misleading
Marked cups on a carafe are typically smaller than a standard 8-fluid-ounce measuring cup. If you fill to the “6” line expecting 48 ounces, you will actually get less water and a stronger brew than you planned. Measure water with a liquid measuring cup or a scale the first few times, then note where the true level sits on your carafe.
This is also why copied recipes often taste wrong in your kitchen. The numbers assume a cup size your machine may not use.
Choose the Right Grind Size
A medium grind is the standard recommendation for drip coffee makers and pour-over. It should feel like coarse sand, not powder and not gravel.
Pre-ground supermarket coffee is usually milled for drip machines, so it is a reasonable starting point. If you grind at home, start at the medium setting and adjust from there.
The grinder matters less than consistency. An uneven grind produces both sour and bitter notes in the same cup, which makes troubleshooting almost impossible.
Step-by-Step Instructions for a Drip Coffee Maker
- Fill the reservoir with fresh cold water. Use the markings or a measuring cup. Do not exceed the maximum line; overfilling can cause overflow on some models.
- Insert the filter. Use a paper filter sized for your basket, or a clean reusable filter. Seat it fully.
- Add the coffee. Weigh it if you can, or use a level scoop and level the bed of grounds so water passes evenly.
- Close the lid and place the carafe. Confirm the carafe is centered and the lid is on if your model has one.
- Start the cycle. If your machine is programmable, confirm the clock is set correctly, then press brew.
- Wait for the cycle to finish. Drip brewing should take roughly 4 to 6 minutes. A much faster cycle usually means the grind is too coarse or the machine is scaled.
- Remove the carafe carefully. Hold the handle, keep the spout away from your body, and set it on a heat-safe surface. If the machine has a pause-and-serve feature, use it sparingly; pulling the carafe mid-cycle interrupts the flow and can cause the basket to overflow.
- Turn off the hot plate if your model has a manual switch, and discard the grounds once the basket cools.
A short checklist for the morning: cold water in, filter seated, grounds leveled, carafe centered, cycle finished, plate off.
Adjusting the Grind Size for Better Taste
Taste is the most reliable diagnostic you have. Use one change at a time so you can tell what worked.
If the coffee tastes sour, weak, or thin, the water is passing through too quickly. Grind finer in small steps, or add slightly more coffee.
If the coffee tastes bitter, harsh, or dry, the water is over-extracting. Grind coarser, or use slightly less coffee.
If the brew tastes flat and the cycle ran fast, check the grind first, then check for scale. Mineral buildup insulates the heating element and can drop brew temperature below the ideal 195°F to 205°F (90°C to 96°C) range, producing flat, under-extracted coffee. Treat that temperature-drop mechanism as a general explanation rather than a measured figure for your machine.
Cleaning and Maintenance
Routine cleaning and descaling solve different problems, and you need both. Soap and water remove coffee oils and grounds residue from surfaces. An acidic descaler removes calcium and magnesium scale from the internal water path.
Daily and Weekly Cleaning
Rinse the carafe, basket, and reusable filter after every use. Deep clean the removable parts weekly with warm soapy water. Wipe the exterior and the hot plate with a damp cloth; do not submerge the base.
Monthly Descaling
The general guidance is to descale every one to three months depending on water hardness. In hard-water areas, monthly descaling is common; in soft-water areas, up to about three months is often enough. Manufacturer schedules can differ substantially. Mr. Coffee manuals, for example, recommend descaling every 80 brews with soft water and every 40 brews with hard water.
Your manual takes priority over any generic vinegar recipe. Vinegar is documented for several drip brands, including Cuisinart, Mr. Coffee, Hamilton Beach, BUNN, and Ninja. Other manufacturers specify their own descalers and warn against vinegar. SMEG’s DCF02 manual specifies SMEG-recommended descalers and does not mention vinegar or citric acid. Philips manuals forbid descalers based on sulfuric acid, hydrochloric acid, sulfamic acid, or acetic acid, and specify Philips descaler. Jura, Philips, Gaggia, and the Nespresso Pixie manuals name vinegar as something not to use. Breville, De’Longhi, Keurig, Nespresso, and Gaggia manuals call for their own descaler.
For a machine where vinegar is acceptable, a documented Mr. Coffee procedure uses 4 cups (20 fl oz) of undiluted white vinegar or Mr. Coffee Cleaner, a 30-minute soak, then two fresh-water rinse brews. Remove the water filtration disk before decalcifying if your machine has one. On Mr. Coffee models without a Clean button, the user pauses the brew manually after about three cups have flowed through, lets it stand 30 minutes, then finishes the cycle. Expect at least two full rinse cycles, and expect some residual vinegar smell.
Two safety points apply to any descaling method. Do not open or handle the basket if it overflows or will not drain; unplug the machine and let it cool first. And never fill the reservoir past the MAX line, since on some models overfilling may cause water to leak and irreparably damage the appliance.
If your machine’s manual is missing, look it up by model number on the manufacturer’s site before descaling.
Troubleshooting Quick Fixes
Work through these in order before you consider replacing the machine.
Coffee Is Cold or Lukewarm
Confirm the carafe is seated on the hot plate and the plate is switched on. Check that you are not brewing into a cold, thick-walled thermal carafe that was never preheated. Run a plain water cycle and feel the temperature; if the water comes out cool and the machine has visible scale, descale it and retest. Mineral buildup reduces heating efficiency and can clog internal pipes. If the machine still brews cold after descaling, the fault is internal. Stop there and contact the manufacturer or a repair service rather than opening the housing.
The Basket Overflows or Will Not Drain
Unplug the machine and let it cool before touching the basket. Common user-fixable causes are a filter that is too fine or double-stacked, a grind that is too fine, or a carafe pulled out mid-cycle. Clean the basket valve area and retry with a coarser grind.
The Machine Has No Power
Check the wall outlet with another appliance, confirm the plug is fully seated, and look for a reset button or switch on the base if your model has one. If the machine stays dead after those checks, an internal thermal fuse may have tripped. That is not a user-serviceable repair. Contact the manufacturer or a qualified technician.
The Coffee Tastes Off
Clean the removable parts and the basket first. Then descale if it has been more than a few months. If an off taste persists after both, taste your water on its own; water quality carries directly into the cup. Replacing the machine is a last step, not a first one.
Common Mistakes That Ruin Your Coffee
- Using hot tap water to speed things up. Fill with fresh cold water instead. Beyond taste, very hot tap water can dissolve more material from household plumbing, so cold water is the safer default for brewing.
- Eyeballing the coffee. A heaped scoop and a level scoop differ by a lot. Weigh the grounds for a week and you will stop guessing.
- Never descaling. Scale builds silently, then shows up as slow cycles and cool coffee.
- Leaving coffee on the hot plate for hours. The plate keeps it warm, but the flavor keeps degrading. Brew what you will drink.
- Skipping the pre-brew rinse on a new machine. That first plain water cycle is not optional.
- Assuming every brand accepts vinegar. Check the manual before you pour anything acidic into the reservoir.
Storing Coffee So It Still Tastes Good
Cooler storage slows the changes in coffee’s volatile compound profile, which helps preserve the aroma and flavor you paid for. In one study, coffee stored at 20°C for a month developed more earthy, sharp, and smoky notes and fewer chocolatey and sweet notes than coffee stored at 5°C. That study stored Arabica, Robusta, and an 80/20 blend at 5°C and 20°C for one month. It evaluated espresso and cold brew rather than drip, so treat the finding as general guidance on cooler storage rather than a drip-specific guarantee.
The aroma compounds that define fresh coffee are reported to dissipate over roughly two to four weeks, though that figure comes from a truncated summary rather than a full dataset. Practically, buy amounts you will finish in about a month and keep the bag sealed and away from heat and light.
A Simple Buying Framework
If you are shopping rather than troubleshooting, three decisions cover most of it: capacity, carafe type, and programmability. The table below is a decision aid, not a ranking, and no model here has been tested.
| Factor | What to Look For | Who It Fits |
|---|---|---|
| Capacity | 4-cup vs 12-cup | One or two drinkers: 4-cup. Family or office: 12-cup. |
| Carafe Type | Glass with hot plate vs thermal | Glass is usually cheaper. Thermal holds heat without a hot plate. |
| Programmability | Timer and auto-start settings | Useful if you want coffee ready when you wake up. |
Two more questions worth asking before you buy: does the manual document a descaling method you are willing to follow, and does the footprint fit your counter with the carafe fully extended? Measure the space first.
The Short Version
Fresh cold water, a level bed of medium-ground coffee at roughly 1:16 to 1:18 by weight, and a machine you actually clean and descale will outperform any equipment upgrade. When something goes wrong, check the ratio, the grind, the scale, and the water temperature in that order before you shop for a replacement.




