Most espresso machines perform best when the brew water hits between 195°F and 205°F (90°C to 96°C) at the group head. Light roasts typically need the higher end of this range to extract sweetness, while dark roasts taste smoother at the lower end to avoid bitterness. If your shots taste sour, raise the temperature; if they taste bitter or ashy, lower it.
Getting the right espresso machine temperature is often more important than buying expensive beans or a fancier grinder. Many home baristas chase pressure profiles or puck prep techniques while ignoring thermal stability. Water that is too cool fails to dissolve sugars and lipids, leaving you with a thin, acidic cup.
Water that is too hot scorches delicate aromatics and extracts harsh tannins. This guide breaks down how to manage heat across different machine types, from single boilers to dual boiler systems, so you can stop guessing and start brewing consistently.
Why Temperature Matters More Than Pressure
Extraction is a chemical process driven primarily by heat. While nine bars of pressure forces water through the coffee puck, temperature determines what actually dissolves. According to research from the Specialty Coffee Association, water temperature directly influences extraction yield and sensory balance.
Acids extract quickly even at lower temperatures. Sugars and complex oils require more thermal energy to dissolve fully. Bitter compounds release rapidly once water exceeds 205°F.
This means temperature acts as a flavor dial. A shot pulled at 194°F might highlight bright citrus notes but lack body. That same coffee at 202°F could reveal chocolate undertones and a syrupy mouthfeel.
Push it to 208°F and those pleasant flavors get buried under dry, astringent bitterness.
Grind size and dose affect flow rate, but temperature controls solubility. You cannot fix a sour shot caused by low heat simply by grinding finer. A finer grind increases surface area and contact time, which helps, but if the water lacks the thermal energy to dissolve sugars, the cup remains unbalanced.
Conversely, lowering temperature is often a better fix for bitterness than coarsening the grind, especially with dark roasts where solubility is already high.
Understanding this relationship saves money. Before upgrading your grinder or buying premium accessories, verify your machine is hitting the correct thermal target. Just as you would check the correct fluid level before operating any kitchen appliance, confirming your brew temperature should be step one in troubleshooting.
Target Temperatures by Roast Level
There is no single perfect setting. The ideal espresso machine temperature depends entirely on the bean density and roast development. Use these ranges as starting points, then adjust based on taste.
| Roast Level | Temp Range (°F) | Temp Range (°C) | Flavor Goal | Adjustment Tip |
|---|---|---|---|---|
| Light / Nordic | 200–205°F | 93–96°C | Sweetness, clarity | Go higher if sour or tea-like |
| Medium | 195–200°F | 90–93°C | Balance, body | Start here for most blends |
| Medium-Dark | 190–195°F | 88–90°C | Smoothness, low acid | Drop temp if bitter finish appears |
| Dark / Italian | 185–192°F | 85–88°C | Richness, no ash | Lower temp prevents scorching |
Light roasts are denser and harder to extract. They need aggressive heat to break down cell structures and release sugars. If your light roast Ethiopian tastes like lemon juice without the supporting sweetness, your water is likely too cool.
Increase temperature in 2°F increments until the acidity integrates into a pleasant fruitiness.
Dark roasts are porous and highly soluble. High heat over-extracts them almost instantly, pulling out carbonized compounds that taste like burnt rubber or ash. Many commercial machines run too hot for dark roasts straight out of the box.
Dropping the setpoint to 188°F can transform a harsh, biting shot into something rich and velvety.
Medium roasts occupy the safe zone. Most factory presets land around 197°F, which works well for medium blends. If you switch between roast levels frequently, consider a machine with adjustable PID control rather than relying on fixed thermostats.
How Different Machine Types Handle Heat
Your ability to control espresso machine temperature depends heavily on the hardware inside your chassis. Not all machines allow precision tuning, and knowing your system’s limits prevents frustration.
Single Boiler Machines
These entry-level machines use one heating element for both brewing and steaming. They rely on mechanical thermostats that cycle on and off within a wide band, often swinging 10°F to 15°F during operation. You cannot adjust the brew temperature directly on most models.
To manage heat on a single boiler, use timing. After the ready light turns on, wait 30 seconds to let residual heat stabilize. Flush a small amount of water through the group head to warm the portafilter and reduce thermal shock.
If the machine has been idle, the first shot may run cool. The second shot usually hits closer to target. For darker roasts, flush more aggressively to bleed off excess steam heat before brewing.
Heat Exchanger (HX) Machines
HX machines maintain steam pressure continuously and flash-heat brew water through a tube inside the boiler. They tend to run hot because the brew path sits inside a vessel at 250°F+. These machines excel at back-to-back shots but struggle with low-temperature brewing for dark roasts.
Temperature surfing is essential here. Perform a cooling flush before every shot to purge superheated water from the heat exchanger tube. Listen to the water sound.
It will hiss violently at first, then settle into a steady stream. The moment the hissing stops is roughly when brew temperature stabilizes. Wait 5 to 10 seconds after silence returns, then lock in your portafilter.
Longer waits equal cooler brew temps. Shorter waits equal hotter temps. Consistency comes from repeating the exact same flush routine every time.
Dual Boiler Machines
Dual boilers separate brew and steam functions entirely. Each boiler has its own heating element and sensor. This design offers the most precise espresso machine temperature control available for home use.
Most include a PID controller that lets you set brew temperature to within 1°F.
PID machines remove guesswork. Set 200°F for your morning medium roast, then drop to 188°F for an afternoon dark blend. The machine holds that temperature regardless of ambient conditions or recovery time.
Even with dual boilers, allow 15 minutes of warm-up time for the entire metal mass to reach equilibrium. The display may read target temperature quickly, but the group head needs longer to soak up heat.
Thermoblock and Thermojet Systems
Modern thermoblocks heat water on demand as it passes through a metal block. They reach brew readiness in under three minutes but have less thermal mass than boilers. Early generations suffered from wild fluctuations, but newer thermojet designs pulse water through multiple heating zones for improved stability.
Thermoblocks respond instantly to PID adjustments, making them surprisingly capable for temperature profiling. However, they lose heat faster during long pre-infusion phases. Keep pre-infusion under 8 seconds unless your manufacturer specifies otherwise.
These systems work best with lighter roasts that benefit from rapid heat delivery and shorter total brew times.
Diagnosing Problems by Taste
Your palate is the most accurate thermometer. Electronic sensors measure water at the boiler or block, not at the coffee puck. Thermal loss through the group head, portafilter, and basket means actual brew temperature is always lower than the displayed setpoint.
Trust your tongue over the screen.
Sour, Salty, or Thin Shots
Underextraction causes sourness. If increasing dose or grinding finer does not fix it, raise the brew temperature by 3°F to 5°F. Also check that your portafilter is hot to the touch before dosing.
A cold portafilter steals up to 10°F from the first few seconds of water contact, killing extraction before it starts. Leave the portafilter locked into the group head during warm-up.
Bitter, Dry, or Hollow Shots
Overextraction creates lingering bitterness that coats the back of the throat. Lower the temperature by 3°F to 5°F. If bitterness persists at 190°F, the issue may be channeling or stale beans rather than heat.
Rule out puck defects first. If the shot runs fast yet still tastes bitter, temperature is almost certainly too high for that particular roast.
Inconsistent Results Shot to Shot
If identical settings produce different flavors, your machine lacks thermal stability. Single boilers and HX machines commonly show this pattern. Standardize your flush routine and wait times.
For single boilers, pull practice shots with blank baskets to map the heating cycle. Note how many seconds after the ready light the temperature peaks. Build muscle memory around that rhythm.
Burnt or Ashy Flavors Only in Dark Roasts
Your machine likely defaults to a medium-roast profile. Drop the setpoint to 185°F minimum. On non-PID machines, perform an extended cooling flush or leave the machine idle with the group head exposed to air for two minutes before brewing.
Some machines simply cannot brew dark roasts properly without modification. Recognizing this limit saves wasted beans.
Tools for Measuring Real Brew Temperature
Guessing works eventually, but measurement accelerates learning. Several tools help verify what is actually happening at the puck.
Scace Device
A Scace thermofilter replaces the basket in your portafilter with a calibrated thermocouple. It measures water temperature as it flows through, simulating real brew conditions. This is the gold standard for diagnosing thermal performance.
Readings account for group head losses that boiler sensors miss.
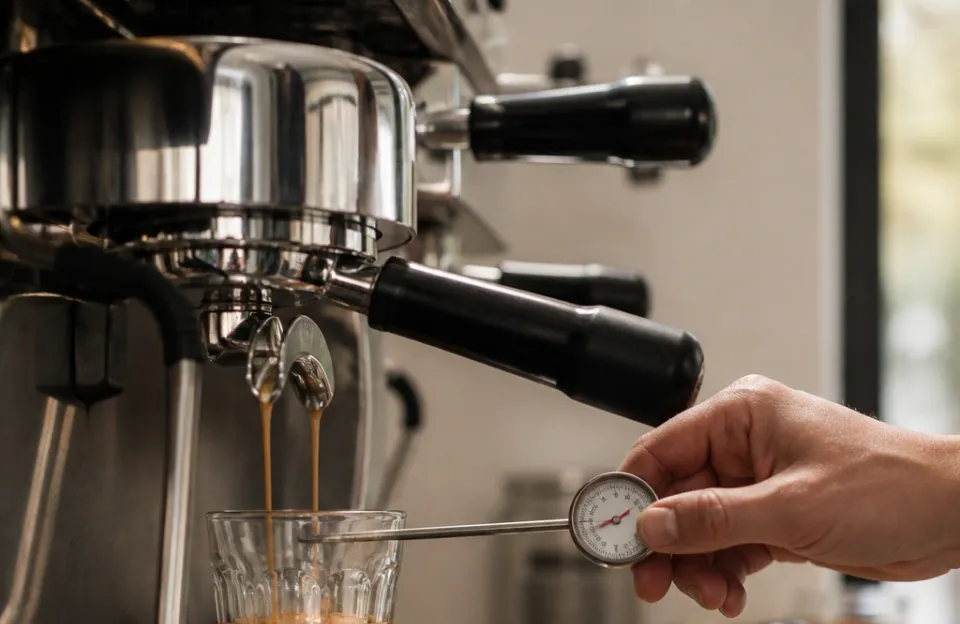
Instant-Read Thermometer
Less precise but affordable. Place the probe in the stream during a water-only flush. Note that open-air measurements read lower than pressurized brew temps due to evaporative cooling.
Add 5°F to 8°F to estimate actual puck temperature. Useful for spotting major deviations but not fine-tuning.
Infrared Thermometer
Points at the group head or portafilter exterior. Measures surface temperature only, not water temperature. Helpful for verifying warm-up completion or checking portafilter heat retention.
Cannot diagnose brew issues directly.
Built-In PID Displays
Convenient but misleading. The sensor sits at the boiler outlet, not the group. Expect a 5°F to 15°F offset depending on machine design.
Calibrate your mental model by comparing PID readings against Scace data once, then apply that offset going forward.
Investing in measurement pays off faster than buying new grinders or tampers. Knowing your true brew temperature eliminates variables and makes every other adjustment more meaningful.
Practical Tips for Better Thermal Stability
Even with limited equipment, small habits improve consistency. Thermal management is part technique, part patience.
Always keep the portafilter locked in during warm-up. A cold portafilter acts as a heat sink, dragging brew temperature down precisely when extraction matters most. Wipe it dry after flushing to prevent wet grounds from sticking, but never leave it sitting on the counter.
Flush before brewing on HX and single boiler machines. The flush serves two purposes: clearing overheated water and warming the group head. Make the flush volume consistent.
Count seconds or use a scale to measure output weight. Random flushing introduces random temperature variation.
Allow adequate warm-up time. Fifteen minutes minimum for dual boilers. Twenty to thirty minutes for E61 groups and heavy brass components.
The PID may show ready in eight minutes, but saturated metal takes longer. Pulling early shots wastes coffee and trains bad habits.
Store cups away from the top of the machine if using a single boiler. Cup warming racks on single boilers sit directly above the brew boiler. Excessive top heat can raise internal temperatures beyond thermostat control.
Move cups to a separate shelf during dial-in sessions.
Descale regularly. Mineral buildup insulates heating elements and blocks flow paths. Scale acts as a thermal barrier, causing sensors to misread and heaters to overshoot.
Follow manufacturer descaling intervals based on your local water hardness. Preventive maintenance preserves thermal accuracy longer than any upgrade.
Consider your environment. Machines in cold garages or drafty kitchens lose heat faster than those in climate-controlled spaces. Allow extra warm-up time in winter.
Avoid placing machines near open windows or AC vents. Ambient temperature swings of 10°F can shift brew temperature by several degrees in poorly insulated machines.
Frequently Asked Questions
Can I use boiling water for espresso?
No. Boiling water at 212°F scorches coffee grounds and produces overwhelmingly bitter, astringent shots. Espresso requires controlled heat below boiling to extract balanced flavors.
Even dark roasts rarely need above 195°F. If your machine only outputs near-boiling water, perform cooling flushes or consider upgrading to a temperature-adjustable model.
Why does my machine take so long to heat up?
Thermal mass determines warm-up time. Machines with large brass groups, saturated boilers, or copper components absorb significant heat before reaching equilibrium. Fast-heating machines often sacrifice stability for speed.
Accept longer warm-ups as the trade-off for consistent shots. Rushing the process guarantees poor extraction.
Should I adjust temperature for different origins?
Yes. Origin affects density and processing method, which change extraction behavior. Washed Ethiopians often need higher heat than natural Brazilians at the same roast level.
Treat origin as a secondary variable after roast level. Start with roast-based guidelines, then tweak upward for washed or dense beans and downward for naturals or soft beans.
Does pre-infusion change temperature needs?
Long pre-infusion cools the puck slightly as water saturates grounds before full pressure engages. Machines with programmable pre-infusion may need a 2°F to 3°F higher setpoint to compensate. Fixed mechanical pre-infusion on E61 groups has minimal thermal impact.
Test by comparing shots with and without pre-infusion at the same temperature setting.
Is temperature more important than grind size?
Both matter, but temperature sets the ceiling for what grind size can achieve. Perfect grind cannot fix fundamentally wrong temperature. Dial in temperature first using a medium-fine baseline grind.
Once flavor balance improves, refine grind size for flow rate and texture. Temperature addresses chemistry. Grind addresses physics.
Chemistry comes first.
Mastering espresso machine temperature transforms home brewing from frustrating experimentation into repeatable craft. Start with the recommended ranges for your roast level, listen to what your cup tells you, and adjust incrementally. The difference between a good shot and a great one often lives in those final five degrees.
As an Amazon Associate, we earn from qualifying purchases.