Air fryers with interior lights let you watch your food cook without pulling the basket out. That single change stops heat from escaping every time you check on dinner. You get a steadier temperature inside the cooking chamber, which means more even browning and fewer surprises when the timer goes off.
This article explains how the lighting works, why it matters for everyday cooking, what to look for if you want this setup in your kitchen, and where the design still falls short. We will also cover maintenance tips that keep the bulb or LED strip working long after the warranty expires.
How Interior Lighting Works Inside an Air Fryer
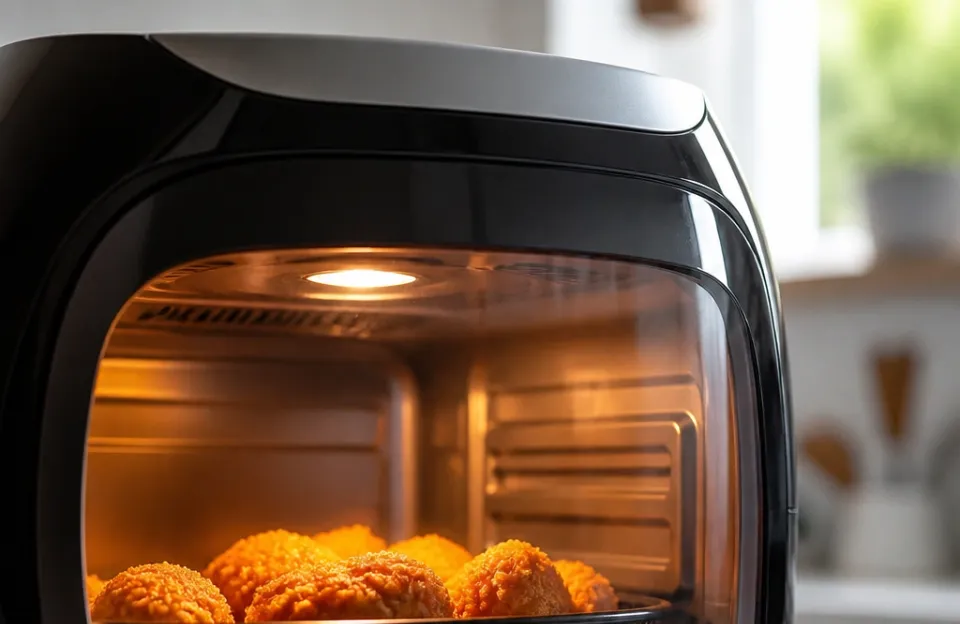
Most air fryers with interior lights use a small LED module mounted near the top or back wall of the cooking chamber. The light turns on automatically when you close the drawer, or you press a dedicated button on the control panel. LEDs are standard here because they produce very little heat.
A traditional incandescent bulb would add unwanted thermal energy to a space already running at 400°F.
The power for the light comes straight from the appliance's main board. In basket-style models, the wiring runs through the hinge area or along the back housing where it stays away from the heating element. Oven-style air fryers usually mount the LED behind a tempered glass shield.
That glass protects the diode from grease splatter and direct airflow.
Lighting placement changes how well you can see the food. A top-mounted light casts shadows directly downward. A rear-mounted light illuminates the whole tray evenly.
Some higher-capacity units put two small LEDs on opposite sides to eliminate dark spots entirely. If you cook large batches, dual lighting makes a real difference.
Why Seeing Your Food Changes the Cooking Process
Air frying relies on rapid hot air circulation. Opening the basket interrupts that flow. Every time you slide the drawer out to peek at your chicken, the internal temperature drops by 20 to 50 degrees.
The fan has to work harder to recover, and the total cook time stretches out.
With a lit window, you leave the drawer shut. You can see the Maillard reaction happening in real time. You know exactly when the edges start to crisp.
This applies heavily when timing matters, like getting the skin perfectly browned on poultry. You stop guessing and start reacting to visual cues.
Steady heat is the whole point of convection cooking. Keeping the chamber sealed preserves the environment the manufacturer designed. Food cooks faster, uses less electricity, and dries out less often.
The light itself costs almost nothing to run. An LED draws under a watt of power.
The Difference Between Window Lights and Open-Drawer Lights
Some budget models claim to have an interior light, but the bulb only activates when you open the basket. That design helps you load or unload food safely. It does absolutely nothing for monitoring the cook.
You still lose all your heat if you want to check progress halfway through.
True air fryers with interior lights illuminate the chamber while it remains fully closed. The light pairs with a transparent viewing window. Without both parts working together, the system fails its primary purpose.
Always verify that the light stays on during the active cooking cycle before buying.
Oven-style models handle this differently. They use a door switch similar to a standard kitchen oven. The light might turn off when you open the door and on when you close it, or vice versa depending on the brand.
Basket styles need a manual override button because there is no traditional door frame to house a switch.
What to Look for When Buying Air Fryers With Interior Lights
Finding a model with reliable lighting requires checking a few specific details beyond the basic spec sheet. Wattage and capacity matter, but the window quality and light type dictate your actual daily experience.
First, confirm the light source is LED. Halogen bulbs appear in some older or cheaper imports. Halogens get extremely hot.
They shorten the lifespan of surrounding plastic components and increase the risk of warping the viewing window over time. Stick to LED modules rated for high-heat environments.
Second, examine the window material. Tempered glass handles thermal shock far better than acrylic or polycarbonate plastic. Plastic windows scratch easily when you wipe away condensation.
After a few months of greasy cooking, a scratched plastic window scatters the light and makes the interior look cloudy. Glass stays clear.
Third, consider the size of the viewing area. A tiny porthole limits your field of vision. You might see the center of the basket but miss the edges where food tends to burn first.
Wide, wraparound windows paired with bright LEDs give you full coverage. This is especially helpful when roasting vegetables or timing thicker cuts of fish.
| Attribute | Basic Models | Premium Models |
|---|---|---|
| Light Source | Halogen or single LED | Dual LED strips |
| Window Material | Acrylic / Polycarbonate | Tempered Glass |
| Activation | Manual button only | Auto-on or manual button |
| Visibility Range | Center of basket only | Full basket coverage |
| Heat Resistance | Moderate | High |
Fourth, check how the light activates. Auto-on systems tied to the cooking cycle are convenient. You set the timer, and the light kicks in.
Manual buttons give you control. You can turn the light off if it bothers you in a dark kitchen late at night. Both approaches work; preference depends on your habits.
Finally, look at the overall build quality around the hinge and seal. Adding a window and wiring a light introduces new points of failure. Cheap seals leak hot air.
Poorly routed wires melt. Read user feedback specifically about the window staying fog-free and the light surviving past the first year. Brands known for solid construction, like those discussed in reviews of popular countertop cookers, tend to handle these additions better.
Where the Viewing Window Design Falls Short
Interior lighting solves one problem and creates a few minor ones. Grease accumulation is the biggest daily annoyance. As the fan circulates air, fine oil droplets hit the inside of the glass.
Over a week of heavy use, that film thickens. The light struggles to punch through the grime, defeating the purpose of having it.
You have to clean the inside of the window regularly. That means reaching into the cooking chamber with a damp cloth while avoiding the heating element. It adds a step to your post-dinner routine.
Models with removable inner glass panels make this easier. Fixed glass requires careful wiping around sharp metal edges.
Condensation is another issue. Moisture escaping from vegetables or frozen foods hits the cooler glass surface and fogs up. Even with the light on, a heavy layer of steam blocks your view.
Higher-end units vent moisture away from the window, but budget models trap it right against the glass. You might still end up opening the basket just to wipe the fog away.
Durability concerns exist too. LEDs last tens of thousands of hours under normal conditions. Inside a 400°F chamber, their lifespan shrinks.
Heat degrades the solder joints and the phosphor coating on the diode. If the light burns out, replacing it usually requires disassembling the outer shell. Most manufacturers do not sell replacement LED modules separately.
You either send the unit in for repair or live without the light.
How Capacity Changes the Lighting Needs
A 2-quart personal air fryer rarely needs a powerful light. The basket is small enough that heat distribution stays even without constant monitoring. You shake the basket once, and everything moves around sufficiently.
Larger units, particularly dual-basket or 8-quart oven styles, benefit heavily from illumination. Food sitting in the back corner of a wide tray receives different airflow than food in the front center. Watching the browning pattern tells you when to rotate the tray.
If you frequently cook large batches, pairing a spacious model with good lighting prevents burnt edges and raw centers.
Multi-rack oven designs complicate things further. A single light at the top leaves the bottom rack in shadow. Manufacturers address this by angling the LED downward or adding secondary lights near the base.
If you plan to dehydrate fruit or bake multiple trays of cookies simultaneously, verify that the lighting reaches every shelf level.
Cleaning and Maintaining the Interior Light
Keeping the window clear requires the right approach. Never spray cold water directly onto a hot glass panel. Thermal shock can crack tempered glass, though it takes a severe temperature swing.
Wait until the unit cools completely before wiping it down.
Use a soft microfiber cloth and warm soapy water. Avoid abrasive sponges or harsh chemical degreasers. Ammonia-based cleaners can damage the silicone gasket holding the glass in place.
Baking soda paste works well for baked-on grease spots. Apply it gently, let it sit for five minutes, and wipe it away.
Check the light function weekly. Turn the unit on without food and activate the LED. Look for flickering or dimming.
A flickering light usually indicates a loose wire connection near the hinge rather than a dead bulb. If you feel comfortable unplugging the machine and inspecting the housing, you might spot a pinched cable. Otherwise, contact the manufacturer.
Pay attention to the exterior seal around the window. Over time, heat cycles cause rubber gaskets to harden and shrink. A compromised seal lets hot air escape toward the control panel electronics.
If you notice excessive heat radiating from the front face of the appliance, the window gasket likely needs replacing.
Proper maintenance extends the life of the entire appliance. Taking care of the viewing area goes hand in hand with general upkeep, such as knowing how long certain foods need so you aren't constantly adjusting settings mid-cycle. Less tampering means less wear on the hinges and seals.
Does the Light Actually Save Energy?

People assume keeping the drawer closed saves electricity. The math supports that assumption, though the savings per meal are small. An air fryer heating element typically draws between 1400 and 1700 watts.
When you open the basket, the temperature drops rapidly. The thermostat signals the element to run continuously until the target heat returns.
That recovery period consumes extra power. Opening the drawer three times during a 20-minute cook adds roughly two to four minutes of continuous high-wattage draw. Over a year of daily use, that adds up to several kilowatt-hours.
The LED light drawing half a watt offsets none of that cost directly, but preventing the drawer openings saves the larger amount.
More importantly, steady heat improves food texture. Constant temperature fluctuations cause proteins to seize unevenly. Vegetables steam instead of roast if the chamber keeps cooling down.
Leaving the drawer shut and relying on the illuminated window produces better results. Energy savings are a bonus. Texture improvement is the real payoff.
If you are conscious about power usage, combining the interior light with precise timing helps. Knowing exactly how much time bacon requires means you set the dial once and walk away. The light confirms the progress without you touching the controls or the basket.
Safety Standards Around Illuminated Chambers
Any electrical component inside a high-heat cooking zone must meet strict safety standards. In North America, appliances sold legally carry certification from testing laboratories like UL (Underwriters Laboratories) or ETL (Intertek). These organizations test the wiring insulation, the heat tolerance of the LED housing, and the shatter resistance of the glass.
When shopping for air fryers with interior lights, look for the certification mark on the box or the rating plate underneath the unit. Uncertified imports might use substandard wiring that melts or shorts out. A short circuit near the heating element presents a fire hazard.
The light itself operates on low voltage, but the path from the wall outlet to the LED passes through the main power board.
The FDA regulates materials that contact food, but the glass window sits slightly removed from direct food contact. Still, the adhesive and gaskets used must not off-gas toxic fumes at 400°F. Reputable brands use food-grade, high-temperature silicone for these seals.
Cheap adhesives smell strongly during the first few uses and degrade quickly afterward.
If you ever replace a power cord or attempt a DIY repair on the lighting circuit, disconnect the plug first. The capacitor inside the control board holds a charge even after unplugging. Working on the light assembly without proper knowledge risks electric shock.
Leave internal repairs to authorized service centers.
Frequently asked questions
Can I add an interior light to my existing air fryer?
Drilling into the housing to install an aftermarket LED voids your warranty and creates serious safety risks. You would expose the internal electronics to grease and compromise the structural integrity of the heat shield. Buy a model that comes with the light factory-installed instead.
Do air fryers with interior lights cost significantly more?
The light itself adds very little to the manufacturing cost. However, brands that include an LED usually pair it with a tempered glass window and upgraded build quality. You pay more for the overall premium package rather than the bulb alone.
Expect to spend moderately more compared to basic opaque models.
Does the viewing window make the outside of the appliance hotter?
Glass conducts heat differently than double-walled insulated plastic. The area immediately around the window may feel warmer to the touch during operation. Manufacturers account for this by adding air gaps or heat-resistant bezels.
Keep the unit pulled slightly away from walls or cabinets to allow proper ventilation.
Will the LED light affect the taste or chemistry of my food?
Standard white LEDs emit visible light in wavelengths that do not alter food chemistry or cause nutrient degradation during typical 30-minute cooking sessions. UV light damages food, but appliance LEDs do not produce meaningful UV radiation. Your meals taste exactly the same as they would in a dark chamber.
How do I choose between a basket style and an oven style with a light?
Basket models save counter space and heat up faster. Oven styles offer multiple racks and better visibility across a wider area. If you mostly cook single-layer items like fries or wings, a lit basket works perfectly.
For roasting whole chickens or baking multiple trays simultaneously, an oven style with top and bottom lighting provides superior monitoring.
Is the light covered under the standard manufacturer warranty?
Yes, the LED module falls under the standard appliance warranty, usually lasting one to two years. If the light fails due to a manufacturing defect within that window, the company will repair or replace the unit. Damage caused by scraping the glass with metal utensils or using unauthorized cleaning chemicals voids that coverage.
Worth remembering
Air fryers with interior lights solve a genuine frustration in daily cooking. Stopping the habit of yanking the basket open every five minutes keeps your food crisper and your kitchen cooler. The technology is simple, relying on basic LEDs and tempered glass, yet it changes how you interact with the appliance.
Pay attention to the window material and the light activation method when you shop. Glass beats plastic every time for longevity and clarity. And remember that a bright light means nothing if grease buildup blocks your view after three uses.
Routine wiping keeps the system doing its job.
If you enjoy experimenting with different recipes, seeing the browning process happen in real time builds confidence. You learn what properly roasted vegetables look like at minute twelve versus minute fifteen. That visual feedback loop makes you a better cook.
Whether you are preparing quick weeknight dinners or testing out new techniques for poultry, watching the process unfold through a clear, lit window removes the guesswork entirely.




