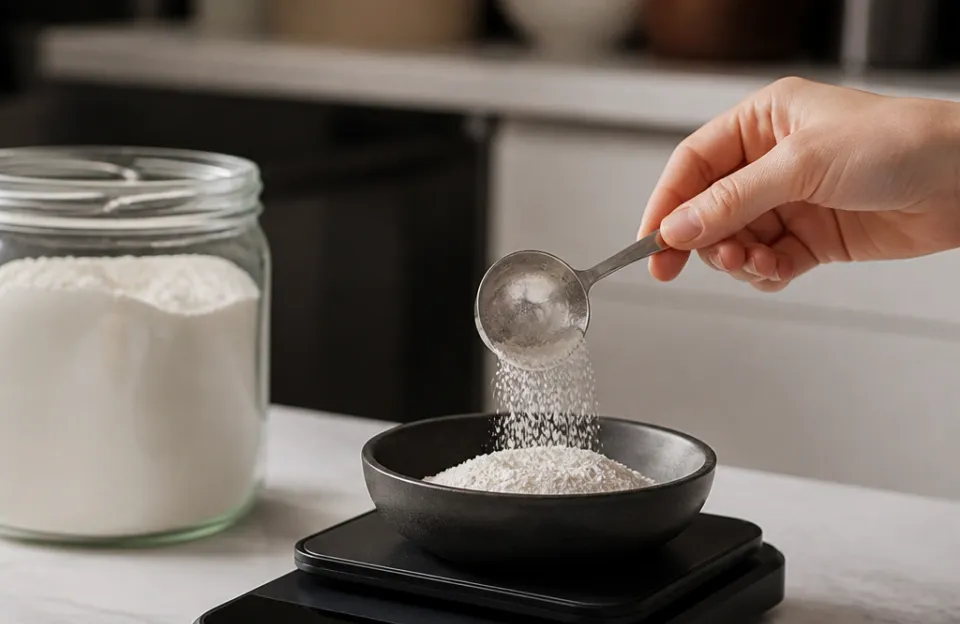
Using a food scale for baking means placing your mixing bowl on the scale, pressing the tare button to zero it out, and adding ingredients until you hit the exact gram weight your recipe calls for. You repeat this process for every ingredient in the same bowl or a separate one. That is the entire method.
Learning how to use a food scale for baking takes about two minutes. The payoff lasts as long as you bake. Volume measurements like cups vary wildly depending on how tightly you pack flour or how humid your kitchen is.
Grams stay the same every time. This guide covers setting up your scale, weighing dry and wet ingredients, handling multiple items in one bowl, and fixing the small mistakes that throw off a batch of cookies or bread.
Setting Up Your Baking Scale Before Adding Ingredients
A digital food scale needs a flat, hard surface to read accurately. Placing it on a silicone mat, a folded towel, or near the edge of a counter can cause the load cell underneath to register uneven pressure. Put the scale directly on your countertop.
Turn it on and wait for the display to settle at zero before doing anything else.
Check which unit of measurement the scale is using. Most models toggle between grams, ounces, pounds, and milliliters. For baking, set it to grams.
Professional bakers and recipe developers write formulas in grams because the metric system breaks down into smaller, more precise units than ounces. One ounce equals roughly 28.35 grams, meaning a single ounce is too large a jump for measuring small amounts of salt or yeast.
If your scale has been sitting in a drawer for a while, wipe the platform clean. Flour dust or dried sugar syrup stuck under the weighing pad creates friction. That friction prevents the pad from moving freely, giving you a reading that drifts or stays slightly off.
A quick wipe with a damp cloth solves this.
Zeroing Out the Bowl Weight With the Tare Function
The tare button is the most important control on the device. It subtracts the weight of whatever container sits on the platform so the display only shows the weight of the food you add. Without it, you would have to do mental math for every ingredient, adding the bowl’s weight to your target number.
Place your empty mixing bowl on the center of the scale. Wait for the number to stop changing. Press the tare button.
The screen should drop back to zero. If it flashes an error or goes negative, take the bowl off, let the scale reset to zero on its own, put the bowl back, and press tare again.
You can use any container. Glass bowls, metal mixing tins, and plastic prep containers all work. Just keep in mind that very heavy vessels eat into the scale’s maximum capacity.
If your scale maxes out at 5 kilograms (about 11 pounds) and your glass bowl weighs 1.5 kilograms, you only have 3.5 kilograms of headroom left for dough. For large batches of bread, switch to a lighter bowl.
Weighing Dry Ingredients Like Flour and Sugar Directly
Spoon your flour directly from the bag or canister into the bowl on the scale. Stop when you reach the target weight. There is no need to sift the flour first, fluff it up, or level it off with a knife.
Those steps exist to fix the inconsistencies of volume measuring. When you weigh flour in grams, a cup packed tight and a cup loosely scooped both weigh exactly what they weigh. The recipe developer already accounted for this when they wrote the formula.
Sugar works the same way. Granulated sugar, brown sugar, and powdered sugar can all go straight into the bowl. Brown sugar tends to clump, but those clumps do not change the mass.
One hundred grams of clumpy brown sugar is still one hundred grams. Break the clumps up later during mixing if the recipe requires it.
Cocoa powder, cornstarch, and ground spices follow the same rule. Pour them in until the numbers match. Precision matters here because cocoa powder is light and airy.
A tablespoon of cocoa powder can weigh anywhere from 5 to 7 grams depending on humidity and brand. On a scale, 6 grams is always 6 grams.
Measuring Liquids by Mass Instead of Using Cups
Liquids are often measured in milliliters or fluid ounces, but a food scale measures them in grams. Water has a density where 1 milliliter equals exactly 1 gram. Milk is slightly heavier, around 1.03 grams per milliliter.
Oil is lighter, closer to 0.92 grams per milliliter.
Most standard baking recipes written for scales already convert these liquids into gram weights for you. If a recipe calls for 240 grams of milk, pour milk into your tared bowl until the scale reads 240. You don’t need to calculate density conversions unless you are converting a volume-only recipe into weights yourself.
Pour slowly as you get close to the target number. Liquids slosh, and the scale’s display might bounce around for a second before settling. Wait for the number to stabilize before deciding if you need to add more.
Spilling liquid over the side of the bowl onto the scale’s buttons can damage the electronics, so keep your pouring hand steady.
Adding Multiple Ingredients to a Single Mixing Bowl
This is where weighing ingredients speeds up your workflow and reduces dishwashing. You can layer several ingredients into the same bowl without dirtying extra measuring cups.
Put the bowl on the scale and press tare. Add your flour until you hit the target weight. Press tare again.
The display drops to zero, locking in the flour’s weight. Now add your sugar until you hit its target weight. Press tare again.
Add your cocoa powder. Repeat this for every dry ingredient that goes into the same mixing stage.
Be careful with the order. Always add the largest quantity first. If you need 300 grams of flour and 2 grams of baking soda, add the flour first.
If you accidentally pour 305 grams of flour, you can easily scoop out 5 grams. If you add the 2 grams of baking soda first and accidentally pour 5 grams, trying to fish out 3 grams of fine white powder from a large bowl is nearly impossible.
If you make a mistake and overshoot a small ingredient, it is usually faster to start over in a new bowl than to try and extract a tiny amount of powder from a pile of other ingredients. Save the ruined mix for a recipe where exact ratios matter less, like pancakes.
Switching Between Grams and Ounces During a Recipe
Stick to one unit of measurement for the entire recipe. Switching back and forth between grams and ounces introduces rounding errors. A recipe calling for 4 ounces of butter translates to 113.4 grams.
If your scale rounds to the nearest whole gram, you are slightly off. Over multiple ingredients, those fractions add up.
Grams are the standard for baking worldwide. If you find a recipe written in ounces, convert the whole thing to grams before you start. Multiply every ounce measurement by 28.35.
Write the new numbers down. Set your scale to grams and follow your converted list.
Some older American cookbooks use pounds and ounces together, like “1 pound 4 ounces.” Convert the pounds to ounces first (16 ounces plus 4 ounces equals 20 ounces), then convert the total to grams (20 times 28.35 equals 567 grams). Doing the math before you start baking keeps your hands free for mixing.
| Measurement Type | Best Unit for Baking | Why It Works Better |
|---|---|---|
| Dry bulk (flour, sugar) | Grams | Eliminates packing inconsistencies found in cups |
| Small dry (yeast, salt) | Grams | Ounces are too large to measure 2-3g amounts accurately |
| Liquids (milk, water) | Grams | Faster than reading meniscus lines on a liquid cup |
| Fats (butter, shortening) | Grams | Avoids guessing stick markings or dealing with messy cups |
Handling Very Small Amounts of Yeast, Salt, or Extracts
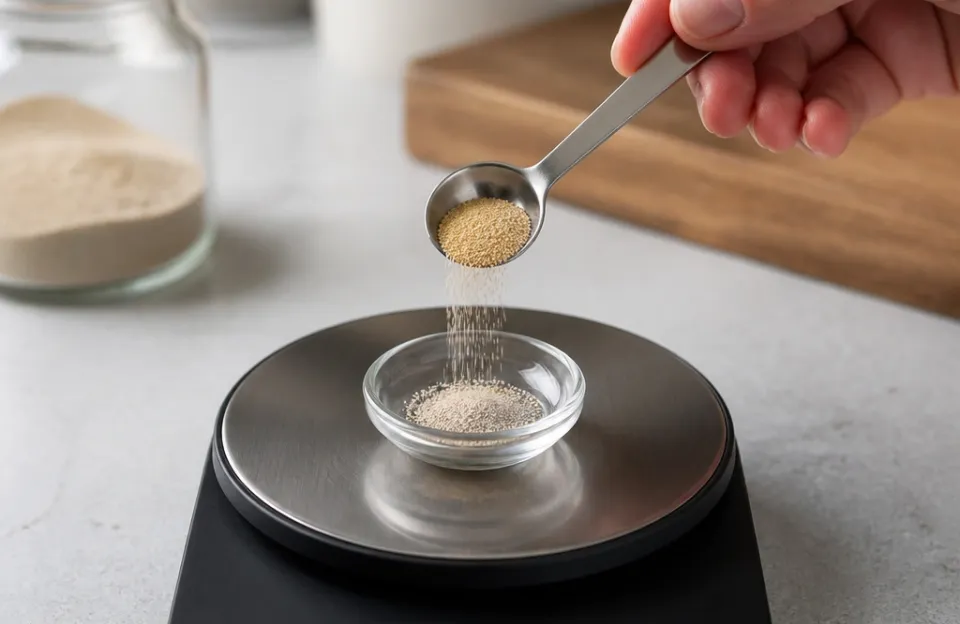
Standard kitchen food scales usually have a readability of 1 gram. This means the display moves in whole numbers: 1g, 2g, 3g. If a recipe calls for 1.5 grams of instant yeast, a standard scale will round up or down, leaving you guessing.
For ingredients under 5 grams, a pocket jewelry scale with 0.1g or 0.01g precision solves the problem. These cost very little and take up minimal drawer space. Place your small prep dish on the pocket scale, tare it, and measure your yeast, salt, or baking powder.
Vanilla extract and food coloring are often added by the drop or fraction of a teaspoon. You can weigh these on a precision scale, but many bakers just use measuring spoons for extracts since a slight variance in vanilla does not alter the chemical structure of a cake the way excess baking soda would. Salt, however, should be weighed.
Different brands of kosher salt have wildly different crystal sizes, making volume measurements unreliable. Diamond Crystal kosher salt is much lighter by volume than Morton kosher salt. Weighing salt in grams removes this variable entirely.
Baking relies on specific chemical reactions. Too much leavening causes a cake to rise rapidly and collapse. Too little leaves it dense.
Getting accurate temperature readings inside your oven is part of this same precision mindset, similar to why bakers check their equipment calibration regularly.
Troubleshooting Drifting Numbers and Calibration Issues
If the numbers on your display keep climbing or dropping while nothing is being added, your scale is experiencing drift. This happens for a few reasons.
Drafts from an open window, a ceiling fan, or an air conditioning vent blowing directly on the scale can push down on the weighing platform enough to register as weight. Move the scale away from airflow. Vibrations from a running dishwasher or stand mixer on the same counter also cause drift.
Isolate the scale on a different surface if possible.
Low batteries are the most common cause of erratic behavior. As the voltage drops, the load cell cannot maintain a stable baseline. Replace the batteries before assuming the scale is broken.
Rechargeable scales need to be topped up regularly for the same reason.
If the scale reads incorrectly even when stable and fully powered, it needs calibration. Many digital scales have a calibration mode accessed by holding a specific button combination. You need a known weight to calibrate it.
A standard US nickel weighs exactly 5.00 grams. Five nickels equal 25 grams. Ten nickels equal 50 grams.
Place the coins on the scale during calibration mode to set the baseline. According to guidelines from the National Institute of Standards and Technology, regular verification of weighing instruments against known standards maintains accuracy over time.
Cleaning the Scale Platform Without Damaging the Sensor
Flour gets everywhere. It settles into the seams of the scale platform and under the buttons. Never submerge a digital food scale in water or run it under the faucet.
The internal circuitry and the load cell are not waterproof unless specifically rated as such.
Wipe the platform with a barely damp cloth after each use. Dry it immediately. If sticky dough or melted chocolate gets on the surface, use a cloth with a small amount of warm soapy water, wring it out completely so no drips fall into the casing, and wipe the spot clean.
Follow up with a plain damp cloth to remove soap residue.
Avoid spraying cleaning solutions directly onto the scale. The mist seeps into the gaps around the display screen and buttons. Spray the cloth instead, then wipe the machine.
Store the scale flat. Stacking heavy cutting boards or cast iron pans on top of the weighing platform puts constant pressure on the load cell, which can permanently bend the sensor and ruin its accuracy.
Adjusting Recipes Written Only in Volume Measurements
Many family recipes or older cookbooks only list cups and spoons. You can convert these to weights to use your food scale. Standard conversion charts exist for common baking ingredients.
One cup of all-purpose flour generally weighs 120 to 125 grams. One cup of granulated sugar weighs 200 grams. One cup of packed brown sugar weighs 220 grams.
These conversions are averages. The actual weight of a cup of flour depends on the protein content and milling process of the specific brand you buy. King Arthur Baking Company publishes detailed weight charts for their specific flours, noting that their all-purpose flour weighs 120 grams per cup.
If you want perfect accuracy when converting a legacy recipe, weigh one cup of your specific flour once, write down the number, and use that as your personal conversion factor going forward.
Converting a recipe takes a few minutes of math upfront. Once you write the gram equivalents in the margins of your recipe card, you never have to use measuring cups for that recipe again. This applies well beyond basic cakes; having reliable weights helps when preparing components for layered desserts or adjusting pastry doughs.
When a Food Scale Won’t Fix a Baking Problem
A scale guarantees accurate ratios. It does not guarantee a perfect bake if other variables are wrong. If your oven runs 25 degrees hotter than the dial indicates, your cookies will burn regardless of whether you weighed the flour perfectly.
Monitoring heat output with reliable tools, such as checking your setup alongside a good dial thermometer for ovens, catches issues a scale cannot.
Ingredient temperature matters. Butter meant to be softened for creaming will not incorporate air properly if it is weighed perfectly but pulled straight from the refrigerator. Yeast will not activate in ice water even if you measured exactly 200 grams of it.
Mixing technique remains manual. Overmixing a muffin batter develops gluten and creates tough textures. Undermixing leaves pockets of dry flour.
The scale gets the ingredients into the bowl correctly. Your hands and eyes take over from there. Understanding the physical limits of your tools, much like knowing when to swap out a probe on a digital kitchen thermometer that has seen better days, keeps your overall process sharp.
Frequently Asked Questions
Do I really need a food scale for baking?
You can bake without one, but volume measurements introduce guesswork. Flour compacts differently based on humidity, how long it sat in the bag, and how aggressively you scoop. A scale removes this variation.
If you struggle with inconsistent results, dry textures, or flat cakes, switching to weight measurements is the first troubleshooting step.
Can I use a food scale to measure teaspoons of baking powder?
Yes, but you need a scale that reads in 0.1-gram increments. A standard kitchen scale that jumps by 1 gram is too imprecise for small amounts. One teaspoon of baking powder weighs about 4 to 5 grams.
If your scale only reads whole grams, you might be off by 20 percent, which alters how a cake rises. Use a pocket scale for anything under 10 grams.
What happens if I accidentally add too much flour on the scale?
Scoop it out with a spoon until the display returns to the target number. Because you are watching the live weight, you can correct the mistake instantly. This is much harder with cups, where you have to estimate how much you over-scooped.
If you overshoot by a massive amount, transfer the bowl contents to a larger container, tare the scale, and re-weigh the exact amount you need into a fresh bowl.
Should I weigh my eggs for baking?
Professional pastry chefs weigh eggs because egg sizes vary even within the same carton. A recipe calling for 100 grams of whole eggs might take two large eggs or three medium ones. Crack the eggs into a small bowl on the scale, whisk them lightly, and pour out exactly what you need.
Home bakers following standard recipes usually stick to the “large egg” count, but weighing is safer for delicate items like macarons or sponge cakes.
Does the type of food scale matter for home baking?
Any digital scale with a tare function and a capacity of at least 5 kilograms (11 pounds) works for home baking. Look for a platform large enough to hold a mixing bowl without blocking the display screen. Mechanical dial scales lack the precision needed for baking and do not have a tare button, making them impractical for multi-ingredient recipes.
Keeping your workspace organized, perhaps storing gear neatly if you are also updating things like cabinet layouts or pantry shelves, makes room for the right tools.
How do I know if my baking scale is losing accuracy?
Test it with a known weight. A new, unopened roll of US nickels or a factory-sealed bag of sugar with a printed net weight works well. Place the item on the tared scale.
If the display matches the printed weight within 1 or 2 grams, the scale is functioning normally. If it is consistently off by a wide margin and recalibration does not fix it, the load cell is likely damaged and the scale needs replacing.
Before You Start Your Next Batch
Weighing ingredients changes how fast you move through a recipe. You stop hunting for nested measuring cups, scraping sticky honey out of spoons, and wondering if you leveled the flour correctly. You put a bowl on the platform, hit tare, pour until the number matches, and move on.
Keep the scale flat, replace the batteries when the screen dims, and use a precision scale for yeast and salt. Once you build the habit of learning how to use a food scale for baking, returning to cups and spoons feels unnecessarily slow. The consistency you get in your bread crumb, cookie spread, and cake layers comes directly from removing the guesswork before the mixing even starts.