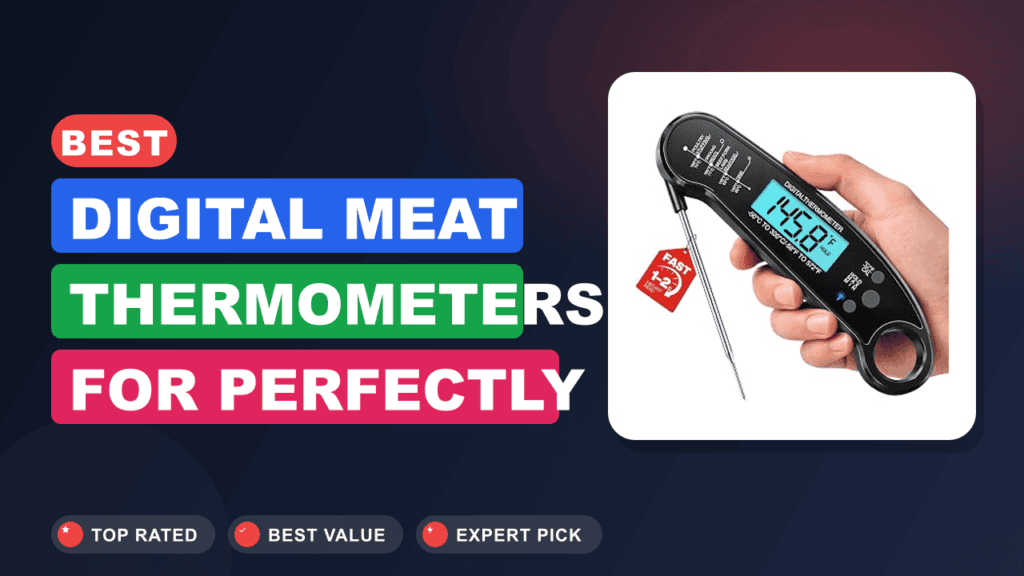
Maintaining an accurate meat thermometer is crucial for food safety and perfect cooking results. If you suspect your ThermoPro TP03 isn't reading correctly, it's a good idea to calibrate it. This process is fairly simple and mainly uses the ice bath method to check and adjust your device's accuracy.
Getting your TP03 calibrated correctly ensures you can trust its readings every time you cook.
Why Accurate Temperature Readings Are So Important
A thermometer like the ThermoPro TP03 provides an instant read, which is incredibly helpful when you're cooking meat, poultry, or other foods that need specific internal temperatures. Its whole job is to tell you exactly how hot the inside of your food is. If it's off by even a few degrees, you could end up with undercooked meat, risking foodborne illness, or overcooked food, leading to a dry, unappetizing meal.
Precision gives you confidence in the kitchen, letting you pull food off the heat at just the right moment.
When your thermometer is accurate, you don't have to guess. This means less stress, less wasted food, and safer meals for everyone. For example, the USDA recommends cooking ground beef to 160°F (71°C) and poultry to 165°F (74°C).
If your thermometer reads 5 degrees low, you might think your chicken is done when it's still at 160°F, leaving it unsafe. On the flip side, if it reads 5 degrees high, you might overcook a steak, missing that perfect medium-rare you were aiming for. Regularly checking and adjusting your device, which we'll cover for your specific ThermoPro TP03, keeps those readings reliable.
The Role of Instant-Read Thermometers in Kitchen Safety
Instant-read thermometers are designed for quick checks, offering a temperature within a few seconds. This speed is vital because it minimizes the time your food is exposed to cooler air while you're checking it. Their accuracy, when calibrated, directly contributes to preventing foodborne illnesses.
Cooking food to its proper internal temperature kills harmful bacteria.
Beyond safety, accuracy also impacts the quality of your cooking. When you're following a recipe that calls for a specific doneness, say a medium-rare roast at 130-135°F (54-57°C), a correctly calibrated thermometer helps you hit that target every time. It takes the guesswork out of cooking, especially with expensive cuts of meat.
How Different Temperatures Affect Food
The way different temperatures affect food structure, texture, and safety is fascinating. For instance, muscle fibers in meat start to contract at lower temperatures and continue to firm up as the temperature rises. Fats render and collagen breaks down, influencing juiciness and tenderness.
Eggs coagulate, and starches gelatinize. Each food item has a "sweet spot" temperature range for flavor, texture, and safety.
Understanding these changes highlights why a precise thermometer is an indispensable tool. It lets you manipulate these variables with control, moving beyond simply "done" or "not done" to achieving specific culinary outcomes. Without knowing the true internal temperature, you're essentially cooking blind.
How to Know if Your TP03 Needs Calibration
Even though digital thermometers like the ThermoPro TP03 are quite reliable, they can drift out of calibration over time. Several things might hint that your TP03 needs a check-up. If your food often comes out undercooked or overcooked, despite you thinking you hit the right temperature, that's a big sign.
Another clue is if you've dropped the thermometer recently, or if it's been exposed to extreme temperatures outside of normal use. Any significant impact can affect the sensitive electronics inside.
I always recommend checking calibration every six months or so, especially if you use your thermometer often. It's a quick process that gives you peace of mind. Think of it like tuning a guitar, it might sound fine for a while, but eventually, it needs a little adjustment to hit the perfect notes.
The same goes for your thermometer, making sure its readings are always spot on. If you've ever had inconsistent readings, that's another reason to do a calibration check, as even minor discrepancies can affect your cooking results. Ensuring your device is functioning correctly helps prevent issues like those covered in our article on inconsistent thermometer readings.
Signs of an Uncalibrated Thermometer
- Food consistently undercooked or overcooked: This is the most common and frustrating sign. If you're cooking to what you believe is the correct internal temperature, but the results are always off, your thermometer might be lying to you.
- Recent drops or impacts: Digital thermometers have delicate components. A hard fall can shift internal sensors, throwing off readings.
- Erratic readings: If the temperature jumps around wildly or settles on an unusually high or low number that doesn't make sense for the food you're cooking, it's time for a check.
- Age and frequent use: Like any electronic device, components can degrade or drift with age and heavy use. Regular checks are good practice.
- Comparison with a known accurate thermometer: If you have another thermometer you trust, checking them side-by-side in the same food or medium can quickly reveal if one is off.
Understanding the ThermoPro TP03's Design for Calibration
The ThermoPro TP03 is known for its simplicity and quick response. It typically features a fold-out probe and a clear digital display. Unlike some older analog thermometers that require twisting a nut under the dial, digital thermometers usually have a specific calibration mode, often accessed by holding down a button.
For the TP03, this is usually achieved via a specific sequence with the "CAL" button or similar function.
When the TP03 enters calibration mode, it expects to read a known reference temperature. The ice bath method provides a very stable and universally accepted reference point: 32°F (0°C). This makes it easy for the thermometer's internal software to adjust its readings to match that exact value.
The design keeps things user-friendly while still allowing for necessary accuracy adjustments.
What You'll Need for Calibration
Calibrating your ThermoPro TP03 is straightforward and only requires a few common items you probably already have in your kitchen.
- A large glass or insulated mug: A taller glass is better than a shallow bowl, as it allows you to immerse the thermometer probe fully without it touching the bottom or sides.
- Crushed ice: This is important. Cubed ice leaves too much air space. Crushed ice, or finely cracked ice, ensures maximum contact between the ice and water, creating a more stable temperature environment.
- Cold tap water: You'll use this to fill the glass with the crushed ice.
- Your ThermoPro TP03 thermometer: The star of the show!
That's it. No special tools or solutions are needed, just these basic items to create a reliable reference point for accuracy.
The Ice Bath Method: Step-by-Step for Your ThermoPro TP03
The ice bath method is the gold standard for calibrating most kitchen thermometers, including your ThermoPro TP03. It's safe, reliable, and uses a universally consistent temperature: the melting point of ice, which is 32°F (0°C). Here’s how to do it properly.
Step 1: Prepare Your Ice Bath
Start by filling your large glass or insulated mug completely with crushed ice. I mean completely, pack it in as much as you can. The more ice you have, the more stable the temperature will be.
Next, add cold tap water to the glass, filling it almost to the top. You want enough water to fill the gaps between the ice, creating a slushy mixture. Stir this mixture gently for about 30 seconds with a spoon or even the thermometer probe (but don't activate the calibration yet).
This helps the temperature stabilize throughout the bath.
Let the ice bath sit for about 3-5 minutes. This crucial waiting period allows the ice and water to reach a consistent 32°F (0°C). Don't skip this part, as a rushed ice bath might give you an inaccurate reference point.
A properly prepared ice bath is key to getting a precise reading for your device.
Step 2: Insert the Thermometer Probe
Now, unfold the probe of your ThermoPro TP03. Carefully insert the tip of the probe into the center of the ice bath, making sure it's fully submerged and not touching the bottom or sides of the glass. The probe should be suspended in the slushy mixture, surrounded by both ice and water.
Keep the thermometer steady and allow the reading to stabilize. This might take 15-30 seconds. A digital thermometer needs a moment to register the change and settle on a final temperature.
Watch the display for it to stop changing.
Step 3: Check the Reading
Once the reading has stabilized, it should ideally show 32.0°F (0.0°C).
- If it reads 32.0°F (0.0°C): Great! Your ThermoPro TP03 is already calibrated and accurate. You don't need to do anything else.
- If it reads something else (e.g., 30°F, 34°F, or anything outside of +/- 1°F): Your thermometer needs adjustment. Most instant-read thermometers are considered accurate if they read within plus or minus 1°F (0.5°C) of the true temperature. However, for precise cooking, you want it as close to 32°F as possible.
Step 4: Calibrate Your ThermoPro TP03
This is where you adjust the thermometer. For the ThermoPro TP03, the calibration process typically involves pressing and holding a "CAL" button.
- Locate the "CAL" button: On most ThermoPro TP03 models, this button is usually on the back of the unit or near the battery compartment, and it might be recessed, requiring a paperclip or a thin tool to press. If your model doesn't have a visible "CAL" button, check the user manual for instructions on how to enter calibration mode. Sometimes it's a combination of pressing other buttons like "HOLD" and "MIN/MAX" simultaneously.
- Enter Calibration Mode: With the probe still in the ice bath and the reading stabilized (even if it's off), press and hold the "CAL" button for about 3-5 seconds. The display might flash, or show "CAL" or "000" to indicate it's in calibration mode.
- Adjust the Temperature: While still in calibration mode and the probe remains in the ice bath, the thermometer should automatically adjust its reading to 32.0°F (0.0°C). Some models might allow you to manually nudge the temperature up or down with arrow buttons, but many newer ThermoPro models perform this step automatically once you engage calibration mode in the correct environment.
- Confirm and Exit: Once the display shows 32.0°F (0.0°C), release the "CAL" button. The thermometer should save this setting and exit calibration mode.
Step 5: Verify the Calibration
After you've performed the calibration, remove the probe from the ice bath for a few seconds, then re-insert it. Let the reading stabilize again. It should now consistently read 32.0°F (0.0°C).
If it does, you've successfully calibrated your ThermoPro TP03.
If it's still off, repeat the process. Sometimes it takes a couple of tries to get it just right, or your ice bath might not have been stable enough on the first attempt. Keep your ThermoPro TP03 in good working order by performing this check regularly.
Important Notes on the Ice Bath Method
- Temperature Stability: The key to a successful ice bath calibration is a stable 32°F (0°C). If your ice starts melting too quickly, or if there's too much water and not enough ice, the temperature can creep up. Ensure a good ice-to-water ratio.
- Probe Placement: Always keep the probe in the center of the ice and water mixture. If it touches the bottom or sides of the container, it can pick up ambient temperatures from the glass itself, leading to an inaccurate reading.
- Avoid Salt: Do not add salt to your ice bath. While salt lowers the freezing point of water, it creates an unpredictable temperature that won't be a reliable 32°F (0°C) for calibration purposes. We're looking for the pure melting point of water.
- Temperature Range: The ThermoPro TP03 typically operates within a broad temperature range, often from -58°F to 572°F (-50°C to 300°C). Calibrating at 32°F (0°C) helps ensure accuracy across this entire range by setting a correct baseline.
The Boiling Water Method: When to Use It
While the ice bath method is the most common and generally recommended for its ease and safety, the boiling water method is another option for checking your thermometer's accuracy. It uses the boiling point of water as its reference. However, this method comes with a few important caveats that make it less ideal for home use and often unnecessary for simple digital thermometers like the ThermoPro TP03.
How the Boiling Water Method Works
Water boils at 212°F (100°C) at sea level. The method involves bringing a pot of water to a rolling boil, then inserting your thermometer probe into the boiling water, ensuring it doesn't touch the bottom or sides of the pot. You wait for the reading to stabilize, and it should ideally read 212°F (100°C).
If it's off, you'd then adjust the thermometer in calibration mode, similar to the ice bath method.
Why the Ice Bath Method Is Usually Better
- Safety: Boiling water presents a burn risk. An ice bath is much safer to handle.
- Consistency: The boiling point of water changes with altitude. For every 550 feet (about 168 meters) above sea level, the boiling point drops by approximately 1°F (0.6°C). Unless you know your exact altitude and can calculate the precise boiling point for your location, you won't have an accurate reference temperature. The melting point of ice, however, remains a constant 32°F (0°C) regardless of altitude. This is a critical factor for precision.
- Sensor Protection: Extreme heat from boiling water can sometimes be hard on the thermometer's sensor over time, especially if the probe isn't designed for prolonged immersion in very high temperatures. While instant-read thermometers handle high heat for quick checks, sustained immersion for calibration might not be ideal.
- Practicality: It's often quicker and easier to set up a proper ice bath than to boil a pot of water and wait for it to stabilize at a rolling boil.
When You Might Consider the Boiling Water Method
Despite its drawbacks, the boiling water method can be useful in specific situations:
- Verifying at a higher temperature range: If you primarily use your thermometer for very high-temperature cooking, like deep-frying or candy making, and you want to ensure accuracy at that end of the spectrum.
- No access to ice: In a rare scenario where you don't have access to sufficient ice, the boiling water method might be your only option.
- Cross-checking: If your ice bath calibration yields a suspicious result, using the boiling water method (with altitude adjustment in mind) can serve as a secondary check.
For the ThermoPro TP03, I generally recommend sticking to the ice bath method. It's simpler, safer, and provides a universally accurate reference point without the complications of altitude adjustments.
Understanding Your Thermometer's Specifications
Every thermometer, including your ThermoPro TP03, comes with certain specifications regarding its accuracy and operating range. Knowing these helps you understand what to expect from your device and how to interpret its readings. It also helps set realistic expectations for calibration.
Accuracy Range
Most digital instant-read thermometers, like the TP03, have an advertised accuracy range. This is usually expressed as a plus or minus (±) degree figure. For many quality digital thermometers, this might be ±0.9°F (±0.5°C) to ±1.8°F (±1°C).
This means that even when perfectly calibrated, the thermometer's reading could naturally vary slightly within this range and still be considered "accurate."
For example, if your TP03 has an accuracy of ±1°F and your ice bath reads 32.5°F, it's technically still within spec. However, during calibration, you're aiming to bring it as close to the true 32°F as possible to maximize precision. This inherent tolerance is why some slight variations might occur even after calibration.
Temperature Range
The ThermoPro TP03 has a wide temperature range, typically from -58°F to 572°F (-50°C to 300°C). This broad range makes it versatile for everything from checking frozen foods to high-temperature searing or deep-frying. Calibration at one point (like 32°F) helps ensure accuracy across this entire spectrum.
The linear response of the sensor should keep the thermometer accurate at higher temperatures if it's correct at a known lower point.
Knowing the full range also helps you understand its capabilities. You wouldn't use this thermometer for oven calibration or prolonged leave-in monitoring (for which devices like the ThermoWorks Signals BBQ Thermometer are designed), but for instant checks, it's ideal.
Response Time
The "instant-read" claim is also part of its specifications. The TP03 is known for its fast response, often providing a stable reading within 3-5 seconds. While this isn't directly related to calibration, a fast response time makes the thermometer more practical and user-friendly.
When you're calibrating, allow the full response time for the reading to settle before making any adjustments.
Materials and Durability
The probe stem of the ThermoPro TP03 is usually made of food-grade stainless steel. This material is chosen for its durability, resistance to corrosion, and ability to transfer temperature efficiently to the internal sensor. The handle is often made of a durable, heat-resistant plastic.
Understanding these materials helps you with proper cleaning and care, which also contributes to the longevity and continued accuracy of your device. Learning what meat thermometer stems are made of can help you appreciate their design.
Common Calibration Mistakes and How to Avoid Them
Even though calibrating your ThermoPro TP03 is a relatively simple task, it's easy to make small mistakes that can throw off your results. Being aware of these common pitfalls can help you achieve a truly accurate reading the first time around. I've seen many people rush through the ice bath preparation, which is probably the most frequent error.
Taking a little extra time here makes all the difference.
Not Using Enough Ice
Mistake: Using too few ice cubes or a shallow amount of ice.
Why it's a problem: A sparse amount of ice won't create a truly stable 32°F (0°C) environment. The water will warm up too quickly, or there will be inconsistencies in temperature throughout the bath.
How to avoid it: Pack your glass full of crushed ice. The more ice, the better. You want a dense mixture of ice and water, not just a few cubes floating in a lot of water.
Not Using Crushed Ice
Mistake: Using whole ice cubes.
Why it's a problem: Whole cubes create large air pockets and less surface area for ice-to-water contact. This leads to a less consistent and stable temperature in the bath.
How to avoid it: Always use crushed ice. If you only have whole cubes, give them a quick bash in a bag with a meat mallet, or use your blender's ice crush setting. The goal is small pieces of ice that can pack together tightly.
Not Waiting for the Ice Bath to Stabilize
Mistake: Preparing the ice bath and immediately inserting the thermometer and calibrating.
Why it's a problem: It takes a few minutes for the ice and water to reach a true and consistent 32°F (0°C). Rushing this step means you're calibrating against an unstable or incorrect reference temperature.
How to avoid it: After preparing your ice bath, stir it gently for about 30 seconds and then let it sit undisturbed for at least 3-5 minutes before inserting your thermometer probe. This allows the temperature to equalize.
Probe Touching the Sides or Bottom of the Container
Mistake: Letting the thermometer probe rest against the glass or the bottom of the mug.
Why it's a problem: The glass itself will likely be at ambient room temperature, or it could be slightly warmer or colder than the ice bath. If the probe touches it, it will pick up the temperature of the glass, not the pure ice-water mixture.
How to avoid it: Hold the probe in the center of the ice bath, suspended in the slushy mixture, ensuring it doesn't touch any part of the container.
Not Letting the Thermometer Reading Stabilize
Mistake: Activating calibration mode as soon as you insert the probe, or when the numbers are still fluctuating.
Why it's a problem: Digital thermometers need a few seconds for their sensors to register the temperature and for the display to settle on a final, stable reading. If you try to calibrate while it's still moving, you'll be setting it to an inaccurate point.
How to avoid it: Insert the probe, then wait patiently for 15-30 seconds until the numbers on the display stop changing and hold steady. Only then should you initiate the calibration process.
Calibrating with a Dirty Probe
Mistake: Attempting to calibrate with food residue or grime on the probe.
Why it's a problem: Any build-up on the probe can act as an insulator or interfere with the sensor's ability to accurately detect temperature.
How to avoid it: Always clean your thermometer probe thoroughly before calibration. Wipe it down with a damp cloth and mild soap, then rinse and dry it completely. Keeping your thermometer probe clean also helps maintain its accuracy and hygiene.
Incorrect Button Sequence for Calibration
Mistake: Pressing the wrong button, or not holding the "CAL" button for the correct duration.
Why it's a problem: Every digital thermometer has a specific way to enter calibration mode. If you don't follow the instructions for your specific ThermoPro TP03 model, it won't calibrate correctly, or it won't enter calibration mode at all.
How to avoid it: Always refer to your ThermoPro TP03's user manual for the exact calibration button and procedure. If you don't have the manual, a quick online search for "ThermoPro TP03 calibrate" usually provides the steps.
By avoiding these common mistakes, you'll be much more likely to achieve a precise and accurate calibration for your ThermoPro TP03, ensuring reliable temperature readings every time you cook.
Troubleshooting Persistent Accuracy Issues
Even after careful calibration attempts, you might find that your ThermoPro TP03 still isn't giving accurate readings, or it drifts quickly. This can be frustrating, especially when you rely on it for cooking safety. When the standard calibration steps don't seem to work, it's time to dig a little deeper into potential underlying issues.
Sometimes the problem isn't the calibration process itself, but the thermometer hardware or its environment.
Check the Battery Life
Problem: A weak or low battery can sometimes cause erratic or inaccurate readings in digital thermometers. As the battery power drops, the sensor and display might not function optimally.
Fix: Replace the battery with a fresh one. The ThermoPro TP03 usually uses a CR2032 button cell battery. This is a simple fix that often resolves unexpected accuracy issues.
A fully powered device performs better.
Inspect the Probe for Damage
Problem: The metal probe is a crucial part of the thermometer. Bends, kinks, or visible damage to the probe stem, especially near the tip where the sensor resides, can compromise its accuracy. A damaged seal where the probe enters the handle could also allow moisture in, affecting internal electronics.
Fix: Visually inspect the probe carefully. Look for any visible signs of damage. If the probe itself is bent or compromised, calibration might not fully correct the issue.
In such cases, the thermometer might need replacement, or if applicable, a probe replacement (though the TP03's probe is integrated).
Ensure a Stable Environment for Calibration
Problem: Ambient temperature fluctuations, drafts, or even direct sunlight during calibration can slightly affect the ice bath's stability or the thermometer's internal components.
Fix: Perform calibration in a stable indoor environment, away from direct heat sources, open windows, or strong drafts. A consistent room temperature helps ensure your ice bath remains at a true 32°F (0°C) for the duration of the process.
Cross-Reference with Another Thermometer
Problem: Sometimes, you might doubt your calibration technique or even your ice bath.
Fix: If you have another thermometer that you know is accurate (perhaps a new one out of the box, or one that has been professionally calibrated), use it to cross-reference. Check both thermometers in the same ice bath or even in a piece of food. If both read similarly after your TP03's calibration, it confirms your TP03 is likely fine.
If they consistently differ, it points to a problem with your TP03. For alternatives, check out alternatives to other popular thermometers, which might provide a good reference point.
Contact ThermoPro Support
Problem: If you've tried all the troubleshooting steps and your ThermoPro TP03 still shows persistent accuracy issues, it might indicate a manufacturing defect or a more significant internal fault.
Fix: Reach out to ThermoPro's customer support. They can provide specific troubleshooting advice for your model, information on warranty coverage, or guide you through a replacement process if the unit is faulty. Always have your purchase information handy when contacting support.
Consider Sensor Degradation
Problem: Over a very long period of use, or if the thermometer has been repeatedly exposed to temperatures beyond its recommended limits (e.g., left in a very hot oven for too long, or repeatedly dropped), the internal temperature sensor itself can degrade. This isn't common for instant-read thermometers under normal use, but it can happen with abuse or extreme age.
Fix: Unfortunately, if the sensor itself has degraded, it's typically not repairable. This would usually necessitate replacing the entire unit.
By systematically working through these troubleshooting steps, you can often identify and resolve accuracy issues with your ThermoPro TP03, or at least determine if it's time for a replacement.
Maintaining Your ThermoPro TP03 for Long-Term Accuracy
Beyond calibration, proper care and maintenance play a huge role in keeping your ThermoPro TP03 accurate and extending its lifespan. A thermometer that's well-cared for will naturally hold its calibration better and provide reliable readings for years. These simple habits can make a big difference.
Clean the Probe After Every Use
Food residue and grease can build up on the probe, potentially affecting future readings or harboring bacteria. Always clean the stainless steel probe with warm, soapy water after each use. Wipe it down thoroughly with a damp cloth, then rinse and dry completely.
Be careful not to submerge the main unit (the display and handle), as most instant-read thermometers like the TP03 are splash-resistant but not fully waterproof. Keeping the probe clean helps ensure the sensor makes good contact with the food and prevents insulating layers from forming.
Store It Properly
How you store your thermometer matters. The TP03 usually comes with a protective sleeve for the probe or has a folding design. Use these features.
Storing it in a drawer where it can be jostled, bent, or impacted by other utensils can damage the probe or the internal electronics. Keep it in its original sleeve, a dedicated spot in a drawer, or hang it if it has a magnetic back. Protecting the probe from physical trauma is key to maintaining its structural integrity and, therefore, its accuracy.
Avoid Extreme Temperatures (Beyond Cooking Use)
While the TP03 can handle a wide range of cooking temperatures, avoid exposing the main unit or the probe to extreme heat or cold when not in use. Don't leave it next to a hot stove burner, on a sunny windowsill, or in a freezing garage. Extreme ambient temperatures can stress the electronic components.
Similarly, never leave an instant-read thermometer inside an oven, grill, or smoker for extended periods, even if it has a high temperature rating. The display unit is not designed for that kind of sustained heat exposure, and it's a common way to damage these devices. For such applications, specific wireless meat thermometers are designed to be left in food during cooking.
Replace Batteries Regularly
A fresh battery ensures optimal performance. Even if your thermometer seems to be working, a low battery can lead to dim displays, slow readings, or even inaccurate results over time. It's a good practice to replace the battery every 6-12 months, or whenever you notice the display becoming faint.
Handle with Care
Treat your ThermoPro TP03 as a precision instrument, which it is. Avoid dropping it, tossing it, or using excessive force when inserting it into food. Sudden impacts can damage the sensitive internal components or bend the probe, both of which will compromise its accuracy.
By following these simple maintenance tips, you can significantly extend the life and ensure the consistent accuracy of your ThermoPro TP03, meaning fewer recalibrations and more perfectly cooked meals.
When to Consider a Replacement
Even with the best care and regular calibration, there comes a point when a thermometer might be beyond reliable use. Knowing when to replace your ThermoPro TP03 can save you from inconsistent cooking results and potential food safety issues. No kitchen tool lasts forever, and thermometers are no exception, especially when they're crucial for accurate measurements.
One of the biggest indicators that it's time for a new thermometer is if it consistently fails calibration. If you follow the ice bath method precisely multiple times, replacing the battery, and checking for damage, yet the reading remains significantly off (more than ±2°F or 1°C) and won't adjust, the internal sensor or electronics may be faulty. At that point, further calibration attempts are probably fruitless, and it's not worth the risk of undercooked food.
Another sign is physical damage that affects functionality. A severely bent probe that prevents it from inserting correctly, a cracked display that makes readings hard to see, or a handle that's broken and won't hold the probe securely can all mean it's time for a replacement. Sometimes, the probe might struggle to go deep enough into meat, which can be an issue if the tip is damaged or dull, as discussed in our article, "Why Won't Your Meat Thermometer Go Deep Enough?".
Water damage, if the unit was submerged despite being only splash-resistant, can also ruin the internal components permanently.
Slow response times can also signal an aging or failing thermometer. If your "instant-read" TP03 starts taking 10-15 seconds or more to give a stable reading, its internal sensor might be degrading. This slows down your cooking process and increases the time food is exposed to cooler air, which isn't ideal.
Finally, if you find yourself constantly troubleshooting issues like those detailed in our meat thermometer error codes guide, or if it simply feels unreliable, it's often more practical to invest in a new one. The cost of a new ThermoPro TP03 is relatively low compared to the value of food safety and perfectly cooked meals. It's better to replace a questionable thermometer than to risk illness or ruin an expensive cut of meat.
Frequently asked questions
How often should I calibrate my ThermoPro TP03?
I recommend checking the calibration of your ThermoPro TP03 every six months or so, especially if you use it frequently. It's also a good idea to check it if you've dropped the thermometer, if it's been stored in extreme temperatures, or if you notice your cooking results are consistently off.
Can I calibrate my ThermoPro TP03 without a "CAL" button?
Most ThermoPro TP03 models do have a recessed "CAL" button. If yours doesn't seem to have one, check the user manual. Some digital thermometers might have a different method to enter calibration mode, such as holding down a combination of other buttons, but for the TP03, the "CAL" button is standard.
What if my TP03 still reads inaccurately after calibration?
First, try replacing the battery. A low battery can cause inaccurate readings. Then, re-do the ice bath calibration carefully, making sure the ice bath is stable and the probe is correctly positioned.
If it still reads off, inspect the probe for any visible damage. If the issues persist, it might indicate a fault with the thermometer itself, and contacting ThermoPro support or considering a replacement would be the next steps.
Why is an ice bath better than boiling water for calibration?
The ice bath method is generally preferred because the melting point of ice (32°F or 0°C) is a constant temperature, unaffected by altitude. The boiling point of water (212°F or 100°C) changes with altitude, making it an unreliable reference unless you know your exact local boiling point. The ice bath is also safer and easier to prepare consistently.
Can I use any type of ice for the ice bath?
Crushed ice is best for an ice bath. It packs together more tightly than whole ice cubes, creating more contact between the ice and water. This helps to achieve a more stable and consistent 32°F (0°C) temperature throughout the bath, which is crucial for accurate calibration.
Keeping Your Readings True
An accurate thermometer is more than just a convenience in the kitchen; it's a fundamental tool for food safety and culinary success. Calibrating your ThermoPro TP03 using the ice bath method is a simple, effective way to ensure its reliability. By taking a few minutes to perform this check periodically and following good maintenance practices, you're investing in consistently delicious and safe meals.
When you trust your thermometer, you cook with confidence.