Clean your air fryer after every use by unplugging it first and letting it cool completely. Then remove the basket, tray and pan and wash them in warm, soapy water with a soft sponge. Wipe the interior with a damp cloth, clean the heating element gently with a soft brush or damp cloth, and dry every part completely before you put the unit back together.
That is the whole routine. The rest of this guide explains how to do each step without scratching the nonstick coating or pushing water into the electronics, and what to do when grease has already baked on.
Safety First: Unplug and Cool Before You Touch Anything
Unplug the air fryer after each use. This stops accidental startups while you work and cuts standby draw. Do this before you remove any part, not after.
Then let the unit cool. The interior, the heating element and the metal around the basket stay hot well after the cooking cycle ends, and the exact cooling time varies by model. Rather than guessing a fixed number of minutes, let the appliance rest until the housing and interior feel cool, and check your manual if it specifies a wait.
Two habits prevent most cleaning injuries and most water damage:
- Never run water over the main housing, the cord or the plug.
- Never immerse the body of the appliance, even briefly, to loosen grime.
Supplies That Protect the Nonstick Basket
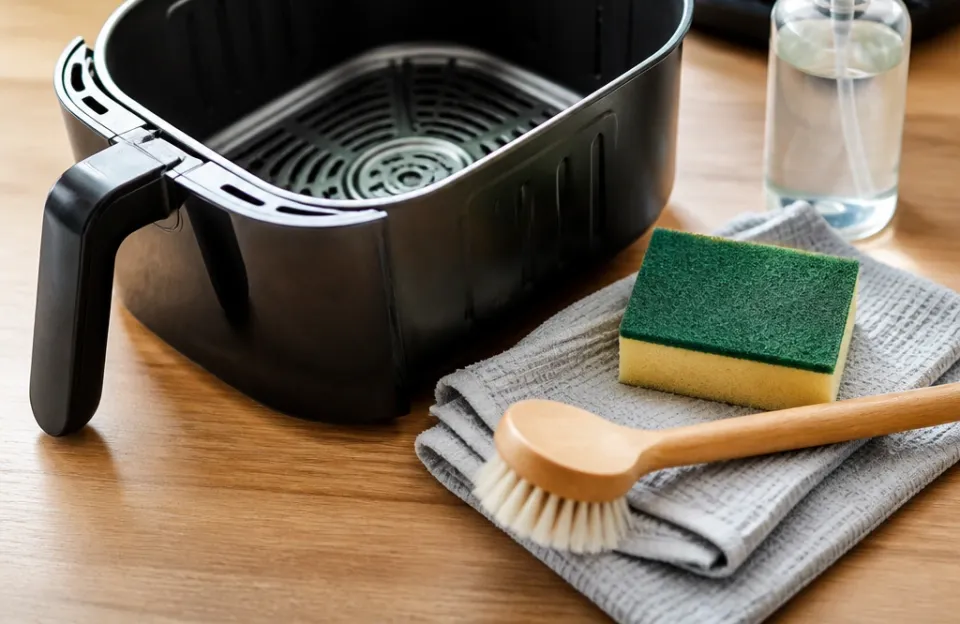
Most air fryer baskets use either a PTFE-based nonstick coating or a ceramic-style coating applied over metal. Both are damaged by abrasion, so the tools you choose matter more than the cleaner.
!Supplies that protect the nonstick basket
Use these:
- Warm water and a small amount of mild dish soap
- A soft sponge or dishcloth
- A soft-bristled nylon brush or silicone scraper for corners and grooves
- Baking soda for stubborn spots
Skip these:
- Steel wool, scouring pads and abrasive cleansers, which scratch nonstick surfaces
- Metal utensils and metal scrubbers, which can gouge the coating
- Oven cleaner and other harsh chemical sprays
The reason is mechanical rather than chemical. PTFE coatings mainly fail through abrasion: a tool harder than the coating creates micro-scratches that trap food and widen over time until the surface peels. Soft nylon and silicone sit below that threshold, so they lift residue without scratching.
How to Clean an Air Fryer After Every Use, Step by Step
1. Unplug and Let It Cool
Pull the plug and wait until the unit is cool to the touch, as described above. Cleaning a hot basket makes food residue harder to remove and puts your hands near the heating element.
2. Take Out the Removable Parts
Remove the basket, tray and pan. If your model has a separate crisper plate or rack, lift it out too, and check the manual for any part your specific model treats differently.
3. Wash the Removable Parts in Warm Soapy Water
Wash the basket, tray and pan in warm, soapy water with a soft sponge. Pay attention to the perforated base of the basket, where oil collects, and to the groove where the crisper plate sits.
For light daily residue, a quick wash is enough. For heavier film, fill the basket with warm water and a drop of dish soap and let it sit for 10 to 15 minutes. Caramelized sugar or burnt cheese may need up to 30 minutes.
Dishwasher suitability differs between models. If your manual allows the basket and tray in the dishwasher, follow it; if it does not say, hand washing is the safer default.
4. Wipe Down the Main Cooking Chamber
Wipe the interior walls with a damp cloth when splatter has built up. Work around the heating element rather than pressing into it, and rinse the cloth often so you are removing grease rather than spreading it. Never pour water into the chamber.
5. Clean the Heating Element Gently
Clean the heating element with a soft brush or a damp cloth, and never use metal tools on it. A soft brush lifts loose crumbs and oil film from around the coils; a barely damp cloth handles the rest.
The internal fan assembly is not covered by general cleaning guidance, and the sources behind this guide do not establish a safe procedure for reaching it. If you suspect grease has built up inside the fan area, check your model’s manual or contact the manufacturer rather than probing inside the housing.
6. Dry Everything Completely
Dry the removable parts completely before reassembling the air fryer. Towel-dry the basket, tray and pan, then let them air for a few minutes so moisture in the perforations and seams can escape. Wipe the interior dry as well.
Removing Stubborn Baked-on Residue
Baked-on grease needs time and a mild abrasive, not force. Scrubbing hard with the wrong tool is how most coating damage happens.
For sticky film and burnt bits, mix baking soda with water to make a paste, apply it to the affected area, let it sit, then gently scrub with a non-abrasive sponge. A soft cloth or nylon brush works the paste into textured areas without scratching.
For polymerized oily buildup, the same baking soda paste applied gently with a soft cloth or nylon brush helps lift the layer. Give it several minutes of contact time before you scrub.
For general softening, soak in warm water with a drop of dish soap for 10 to 15 minutes, extending to about 30 minutes for sugar-based or cheese residue.
If a stain survives a soak and a paste treatment, leave it and repeat after the next use. Repeated gentle cycles remove residue that one aggressive session would only spread, or scratch away along with the coating.
Drying and Reassembly Checklist
Run through this list before the air fryer goes back on the counter:
- Basket, tray and pan are fully dry, including the perforations.
- The interior chamber and heating element area are dry.
- No water has entered the housing, vents or cord connection.
- The basket seats fully in place.
- The unit is unplugged until the next use.
Preventing Buildup and Knowing When to Replace Parts
Consistent cleaning prevents smoke, uneven cooking and unwanted smells. Residue buildup can also reduce airflow and extend cooking time, which quietly erodes the performance you bought the appliance for.
A few habits cut down on how much cleaning you face:
- Avoid overfilling the basket, which causes oil splatter and residue buildup.
- Empty crumbs after every session rather than letting them collect under the crisper plate.
- Wipe the interior at the end of each use so grease never gets a chance to polymerize.
When to Stop Using the Basket
An intact coating used within the manufacturer’s temperature and cleaning instructions is a different situation from a basket that is peeling, bubbling or exposing bare metal. If the nonstick coating is peeling, replace the basket.
Troubleshooting
The air fryer smokes during cooking. Smoke usually means leftover oil or food bits are burning, which points to a deep clean rather than a fault. Check the basket base, the crisper plate groove and the area around the heating element.
The unit will not start after cleaning. Some models will not run unless the basket is properly seated. Reinsert it firmly and check that the tray and crisper plate are in their correct positions before you assume an electrical problem. If the appliance still will not start, or you notice a burning smell that is not explained by food residue, stop using it and consult the manufacturer or a qualified repair service.
Making the Routine Stick
The daily version of this routine takes only a few minutes: unplug, cool, wash the removable parts, wipe the interior, dry and reassemble. Save the soaking and baking soda paste for the days when you cook something sticky or notice film building up.
Keep one soft sponge, one nylon brush and a small box of baking soda within reach of the air fryer. When the right tools are already there, the two-minute clean becomes the default, and the coating stays intact far longer than it would with occasional deep scrubs.