How long you cook chicken drumsticks in an air fryer is the most common question for anyone trying to get that perfect crispy skin without turning on the oven. The short answer is that they generally take between 20 and 25 minutes at 400°F (200°C). This timing gives you juicy meat on the inside and a golden, crunchy exterior.
Since air fryers circulate hot air rapidly, they are much faster than conventional ovens and require less prep time.
Getting this right isn't just about the timer. You need to consider the size of the drumsticks, how crowded your basket is, and whether you are using a breading or a simple dry rub. This article covers exactly how to time your cook, why temperature matters more than the clock, and how to troubleshoot the most frequent issues with air-fried chicken.
Understanding the Air Fryer Process for Drumsticks
The air fryer works like a powerful convection oven. It forces hot air into the basket, which draws moisture out of the surface of the skin while simultaneously cooking the meat inside. Because the heating element is very close to the food, the surface cooks much faster than it would in a standard oven.
This is why you get such impressive results with drumsticks in about 20 to 25 minutes.
If you set your temperature too high, say 450°F, you will burn the skin before the meat near the bone is safe to eat. If you go too low, like 350°F, the skin will stay rubbery rather than crispy. The sweet spot for almost all chicken leg preparations is 400°F.
At this temperature, the fat renders out of the skin, creating that signature crunch, while the interior remains succulent.
Most people find that 22 minutes is the perfect starting point for average-sized drumsticks. If yours are particularly large or you have crowded the basket, you may need to add an extra 3 to 5 minutes. Always remember that the air fryer needs space to circulate.
If the drumsticks are stacked on top of each other, the air cannot reach the middle, and you will end up with unevenly cooked, steamed-looking chicken.
Temperature and Food Safety
When cooking poultry, visual cues are not enough. The only way to know if your chicken is done is to check the internal temperature. The United States Department of Agriculture (USDA) recommends an internal temperature of 165°F (74°C) for all poultry to ensure safety https://www.usda.gov.
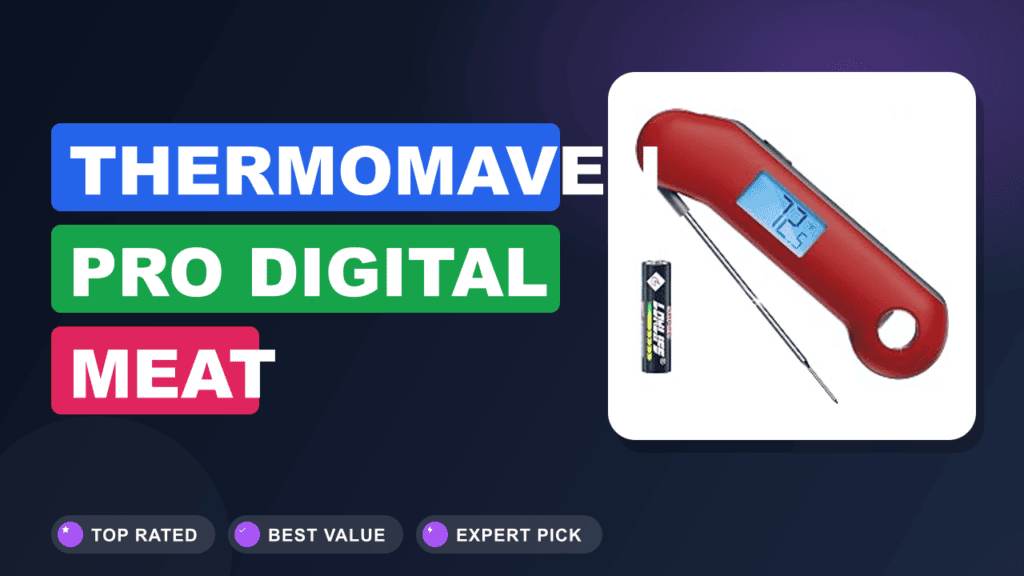
Using a digital meat thermometer is the most reliable way to verify this.
To test your drumsticks, insert the probe into the thickest part of the meat, being careful not to hit the bone. If you touch the bone, the reading may be artificially high because the bone conducts heat differently than the meat. If you see the temperature hit 165°F, your chicken is safe to pull out of the air fryer.
Many people actually prefer to take them to 175°F or 180°F for dark meat, as this allows the connective tissues to break down further, making the meat pull away from the bone much easier.
Don't be afraid to pull the basket out halfway through to check on things. Most air fryers have a timer that pauses when you remove the basket, but even if it doesn't, losing a few seconds of heat is worth the peace of mind. Checking your progress at the 15-minute mark allows you to see how the color is developing and decide if you need to shake the basket or rotate the drumsticks.
Factors Influencing Cooking Time
While 20 to 25 minutes is the standard range, several variables will shift your required time. You should always adjust your expectations based on your specific kitchen setup.
- Size of the Drumsticks: Large, meaty legs will naturally take longer than smaller, thinner ones. If you are buying "jumbo" packs at the store, plan for the full 25 minutes or even a little longer.
- Frozen vs. Fresh: You can absolutely cook frozen drumsticks, but they require a different approach. You will need to drop the temperature to 375°F to ensure the center thaws and cooks before the outside burns. You should also add about 5 to 10 minutes to the total cooking time.
- The Air Fryer Model: A small, compact air fryer with a tight basket will cook differently than a large oven-style air fryer with multiple racks. The more cramped the space, the more the air circulation is restricted.
- Amount of Oil: A light coating of oil helps conduct heat to the skin, which speeds up the crisping process. If you skip the oil entirely, the skin might take longer to turn golden, and it will be less crispy overall.
Why Basket Arrangement Matters
The biggest mistake beginners make is overcrowding the air fryer. The device works by blowing hot air over the surface of the food. If your drumsticks are packed in like sardines, the air hits only the top layer.
The sides that are touching other pieces of chicken will not crisp up; they will stay pale and soft.
For best results, place the drumsticks in a single layer. They can touch slightly, but you should still be able to see the bottom of the basket between them. If you are cooking for a crowd and have more chicken than your air fryer can hold at once, it is much better to cook in two smaller batches than to shove everything in at once.
You will get a much better result in the end.
If you have an oven-style air fryer with multiple racks, ensure you are not blocking the airflow between levels. If you notice the top rack is getting crispy while the bottom rack is still raw, swap the racks halfway through the cooking process. This manual intervention is the secret to getting a consistent batch when cooking a larger quantity.
The Importance of Patting Chicken Dry
Moisture is the enemy of crispiness. Before you season your drumsticks, take a paper towel and pat them dry. If the surface of the chicken is wet, the air fryer has to spend the first several minutes of the cooking cycle just evaporating that surface water.
This creates steam. By starting with dry skin, the air fryer can get straight to rendering the fat and crisping the skin.
This is true whether you are using a simple salt-and-pepper rub or a more elaborate marinade. If you are marinating the chicken, let it drip dry for a few minutes or pat it off before placing it into the basket. If you are using a dry rub, the dry skin will help the seasoning adhere much better, and you won't end up with a pile of flavor at the bottom of your air fryer basket.
Comparison of Cooking Times and Temperatures
To help you get the best results, use this table to determine the best approach based on your specific needs. Note that these are approximations and a meat thermometer should always be your final judge.
| Preparation Method | Temperature | Estimated Time | Result |
|---|---|---|---|
| Fresh, Skin-on | 400°F (200°C) | 20–25 Minutes | Crispy skin, juicy meat |
| Fresh, No Oil | 400°F (200°C) | 22–26 Minutes | Less crispy skin |
| Frozen, Raw | 375°F (190°C) | 30–35 Minutes | Fully cooked, soft skin |
| Breaded/Coated | 380°F (193°C) | 20–22 Minutes | Golden crunch |
When using a breading or coating like flour or breadcrumbs, it is helpful to drop the temperature slightly to 380°F. Breading is prone to burning if the temperature is too high, and the slightly lower setting gives the breading enough time to set and turn golden without turning bitter or dark brown.
Common Mistakes to Avoid
Even with a simple process like air frying chicken, a few common pitfalls can ruin the final result. Understanding these mistakes can save you from a disappointing meal.
- Not Flipping the Chicken: Even with powerful fans, the bottom of the drumstick will almost always lag behind the top. Flipping the pieces halfway through ensures that both sides get equal exposure to the heat.
- Ignoring the Rack: If your air fryer came with a rack or a trivet, use it. It lifts the chicken off the base of the basket, which allows hot air to circulate underneath the food. This creates 360-degree crisping.
- Too Much Sauce Too Soon: If you are using a barbecue sauce or a glaze, do not add it at the beginning of the cook. The sugars in most sauces will burn and turn black long before the chicken is cooked through. Instead, cook the chicken for the first 20 minutes, then brush on your sauce for the final 3 to 5 minutes.
- Over-seasoning with Sugar: Similar to the sauce rule, rubs that have a high sugar content will caramelize and burn quickly. Keep your high-sugar rubs for the final few minutes, or choose herb-based rubs for the main cooking period.
Troubleshooting Your Cook
If you find that your chicken is consistently finishing too quickly or too slowly, you likely need to adjust your air fryer's placement or load. If the chicken is burning on the outside but raw on the inside, your temperature is likely set too high. Drop it by 25 degrees and add 5 minutes to the total time.
This gives the heat more time to penetrate the thickest part of the drumstick without scorching the exterior.
If you find the chicken is fully cooked but looks pale and unappealing, you are not getting enough "fry." Try using a light spray of cooking oil before putting the chicken in the basket. The oil is a medium for heat transfer, and it is crucial for that golden-brown color. You can also finish the chicken by turning the temperature up to 400°F for the final 2 minutes of the cycle to help "flash" the skin.
Another issue is uneven cooking. If you notice that some drumsticks are overdone while others are underdone, it means your drumsticks vary significantly in size. Try to group similar-sized pieces together in your batches.
If you have some tiny legs and some massive ones, it is best to pull the smaller ones out earlier to prevent them from drying out while waiting for the larger ones.
Maintaining Your Air Fryer
The lifespan and performance of your air fryer depend on how well you keep it clean. After cooking drumsticks, there is often rendered fat and seasoning residue at the bottom of the basket. If you don't clean this, it will smoke the next time you turn the device on.
Most air fryer baskets are dishwasher safe, but even if yours is, washing it by hand is usually better for the non-stick coating. Use a soft sponge and mild soap. Never use metal scouring pads or harsh scrubbers, as these will scratch the surface, and once the non-stick coating is damaged, food will begin to stick to the basket, making cleanup even harder next time.
If you have stubborn, stuck-on grease, soak the basket in warm, soapy water for 15 minutes before scrubbing. This is usually enough to lift the residue without needing to scrape the surface. Keeping the heating element clear is also a must.
Every few uses, check the top of the air fryer near the heating element to make sure no oil splatters have built up, as this can cause a burning smell during operation.
How to Get the Best Flavor
Beyond just timing, the flavor profile of your drumsticks comes down to your prep. Because the air fryer is efficient, you don't need a heavy batter. A simple mix of salt, black pepper, garlic powder, and paprika provides a fantastic flavor base.
If you want a little extra zing, add a touch of cayenne pepper or onion powder.
If you want a classic fried chicken style, you can use a light dusting of cornstarch or potato starch on the drumsticks. The starch draws out remaining moisture from the skin during the air frying process, resulting in a much crunchier exterior. You only need a thin layer, too much, and it will taste powdery.
Finally, let the chicken rest for 3 to 5 minutes after you take it out of the air fryer. This allows the juices to redistribute back into the meat. If you cut into the chicken immediately, the juices will run out, and the meat will be less tender.
Resting is a small step that makes a noticeable difference in the final quality of your meal.
Frequently Asked Questions
How do I know when the drumsticks are definitely done?
The only foolproof way is to use a digital meat thermometer. You are looking for an internal temperature of 165°F (74°C) in the thickest part of the meat. If you don't have a thermometer, you can poke the meat with a fork or skewer near the bone.
If the juices run clear rather than pink or red, the chicken is usually cooked through, though a thermometer remains the only way to be 100% certain.
Should I preheat my air fryer?
Most air fryer models don't require preheating, but it can help if you want an extra-crispy exterior. If you choose to preheat, 3 to 5 minutes at 400°F is plenty. When you add the cold, raw chicken to a preheated basket, the surface begins to crisp up immediately, which can save a minute or two of total cooking time.
Can I stack drumsticks to fit more in the basket?
No, stacking is the biggest cause of uneven cooking. Because the air fryer relies on airflow, any chicken that is covered by another piece will not crisp properly and will likely stay undercooked or soggy. If you have a large amount of chicken, cook it in batches or use a rack system if your specific air fryer model supports it.
My drumsticks are burning on the outside but raw inside, what happened?
Your temperature was likely too high. This often happens if the air fryer is placed too close to a wall or if you have set the heat to 400°F or higher for pieces that are very thick. Try lowering the heat to 375°F and adding 5 minutes to the cook time to allow the heat to travel to the center of the bone without burning the skin.
Can I leave the skin on?
Yes, and you should. The skin is what gets crispy and delicious in the air fryer. If you remove the skin, you lose the primary source of fat that helps the meat stay moist and provides the texture most people enjoy.
If you prefer to avoid the skin for dietary reasons, it is better to remove it after cooking rather than before.
Is it safe to cook frozen drumsticks?
Yes, it is perfectly safe as long as the internal temperature reaches 165°F. You must lower the temperature to about 375°F and cook them for significantly longer, usually 30 to 35 minutes. Always ensure the center of the meat is piping hot before you eat it to avoid any food safety issues associated with undercooked poultry.
The Bottom Line
Cooking chicken drumsticks in an air fryer is a reliable way to get a great result in about 20 to 25 minutes. By keeping the temperature at 400°F, patting the skin dry, and avoiding overcrowding the basket, you will get crispy, juicy chicken every time. Always prioritize internal temperature over the timer, and don't be afraid to pull the basket out early to check your progress.
As you get more comfortable with how your specific machine heats, you will find that these basic guidelines provide a consistent foundation for your meals. Stick to these core principles, use a thermometer to be certain of your results, and you'll have no trouble mastering this common kitchen task.