You’ve just pulled a beautiful, expensive prime rib out of the oven. The dial says 135°F for a perfect medium-rare, but when you slice into it, the center is grey, overcooked, and dry. Or maybe you’re checking a roast chicken and the needle won’t budge, leaving you wondering if the meat is actually safe to eat.
When your tools lie to you, dinner is at risk.
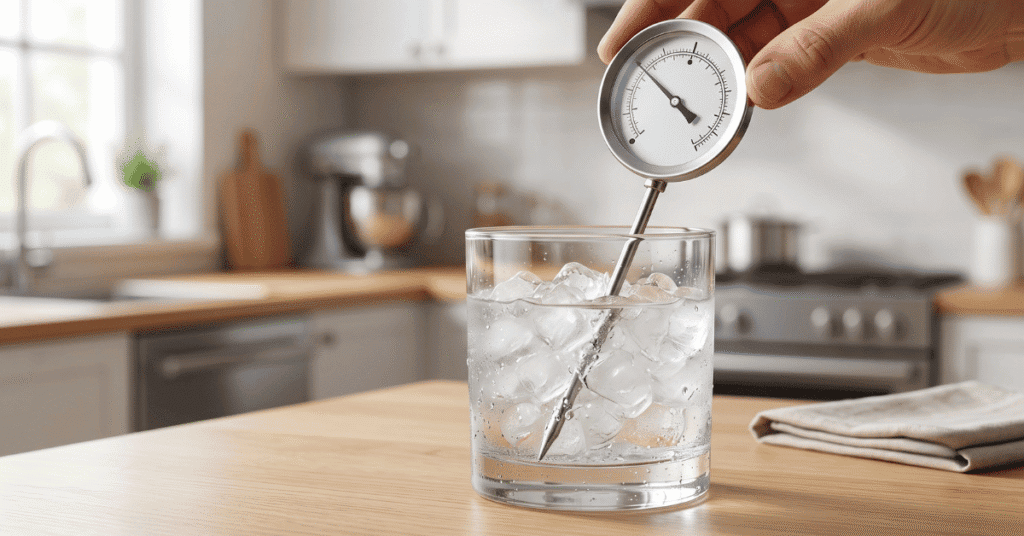
Quick Answer: To calibrate a Taylor meat thermometer, use the ice point method by filling a glass with crushed ice and just enough water to create a slush. Insert the probe at least two inches deep without touching the sides or bottom, wait for the reading to stabilize, and use a small wrench or pliers to turn the nut behind the dial until it points exactly to 32°F (0°C).
Why Accuracy and Calibration Matter
A thermometer that is off by even five degrees can be the difference between a juicy steak and a tough one. More importantly, it is a matter of food safety. According to USDA food safety guidelines, poultry must reach an internal temperature of 165°F to kill harmful bacteria like Salmonella.
If your Taylor thermometer is reading high, you might pull that chicken out while it is still in the “danger zone.”
Most Taylor analog (dial) thermometers use a bimetallic coil. This is a strip made of two different metals welded together that expands or contracts at different rates when heated. This physical movement turns the needle on the face of the tool.
Because this is a mechanical process, drops, bumps, or even extreme temperature shifts can knock the coil out of alignment. Calibration resets that physical relationship so the needle reflects the true temperature.
Knowing Which Models Can Be Adjusted
Not every Taylor thermometer is adjustable. Most classic Taylor dial thermometers have a small hex nut located directly underneath the head of the dial. This nut allows you to “re-zero” the needle.
On the other hand, many digital Taylor thermometers do not have a physical calibration nut. Instead, they may have a “CAL” button. If your digital model lacks this button, it likely cannot be calibrated manually.
In those cases, you simply have to note the offset (for example, knowing it always runs 2 degrees hot) or replace the unit if the gap is too wide.
Frequency of Testing
You don’t need to calibrate every time you cook, but there are specific moments when it is necessary. You should test your Taylor meat thermometer if:
- You dropped it on a hard floor.
- You are measuring a drastic temperature change (like going from a freezer to a hot grill).
- You haven’t used it in several months.
- You suspect your recent meals aren’t coming out at the expected doneness.
The Ice Point Method: The Easiest Way to Calibrate
The ice point method is the gold standard for home calibration. It is safer than using boiling water because you aren’t dealing with steam or splashing liquids. It is also more consistent because boiling points change based on your altitude, whereas the freezing point of water stays at 32°F (0°C) regardless of whether you are in Denver or Miami.
Preparing the Slush
The biggest mistake people make is using a cup of water with a few ice cubes floating in it. That isn’t an ice bath; that’s just cold water. To get a true 32°F environment, you need a high ice-to-water ratio.
Fill a tall glass to the very top with crushed ice. Crushed ice is better than cubes because it leaves fewer air pockets. Add clean tap water until it just reaches the top of the ice.
Let it sit for about three minutes. This allows the temperature to stabilize throughout the container. If the ice starts to float, pour out some water and add more ice.
You want a thick, heavy slush.
Taking the Reading
Insert the probe of your Taylor thermometer into the center of the glass. You need to submerge the “dimple” on the side of the stem, which is usually about two inches up from the tip. This dimple marks the end of the internal sensor.
Make sure the tip of the probe does not touch the bottom or the sides of the glass, as the glass itself might be slightly warmer than the slush. Hold it still for at least 30 seconds. On an analog dial, watch the needle.
Once it stops moving for a full ten seconds, you have your current reading.
Making the Adjustment
If the needle points exactly to 32°F, you are good to go. If it reads 34°F or 30°F, keep the probe in the ice water. Use a small adjustable wrench or the calibration tool that sometimes comes attached to the Taylor storage sheath.
Grip the nut behind the dial firmly. While holding the dial face with your other hand, turn the nut. You will see the needle move.
Slowly rotate it until the needle rests directly on the 32°F mark. Remove the probe, let it come back to room temperature, and then re-test it in the ice bath one more time to confirm the setting held.
The Boiling Water Method (Alternative)
While less common due to safety risks and altitude variables, you can calibrate using boiling water. This is helpful if you primarily use your thermometer for high-heat tasks like frying or candy making, as it tests the upper end of the scale.
At sea level, water boils at 212°F (100°C). However, for every 500 feet you rise above sea level, the boiling point drops by about one degree. If you live in a high-elevation area, your water might boil at 202°F.
You must know your local boiling point for this method to work.
- Bring a deep pot of water to a rolling boil.
- Insert the probe at least two inches into the water.
- Keep the tip away from the metal bottom of the pot, which is hotter than the water itself.
- Wait for the needle to stop.
- Adjust the nut until the dial shows 212°F (or your local adjusted boiling point).
Calibrating Digital Taylor Models
Digital thermometers are slightly different. Many Taylor digital models are “factory calibrated,” meaning they are designed to be accurate for the life of the product without user input. However, some higher-end Taylor digital models include a “CAL” or “Reset” feature.
To check a digital model, use the same ice slush method described above. If the reading is off and your model has a “CAL” button:
- Hold the probe in the ice slush.
- Press and hold the “CAL” button (usually for 2, 5 seconds).
- The display will often flash and then jump automatically to 32°F.
- Release the button.
If your digital Taylor thermometer doesn’t have a calibration button and gives an incorrect reading in ice water, try changing the battery. Low battery power often causes the sensors to lag or provide erratic numbers. If a fresh battery doesn’t fix a 5-degree discrepancy, it is time to replace the thermometer.
Troubleshooting Difficult Calibrations
Sometimes the nut behind the dial is stuck. This usually happens because of “kitchen gunk”, a mix of dried grease and smoke residue that builds up over years. Don’t force it with heavy pliers, or you might snap the stem.
A small drop of penetrating oil or even a bit of warm soapy water on a cloth can help loosen the debris around the nut.
Another common issue is a fogged-up dial. If moisture gets inside the glass head, it can be hard to read the numbers. This often happens if the thermometer is submerged in a sink or put in the dishwasher (most Taylor analog thermometers are not dishwasher safe).
If this happens, place the thermometer in a jar of dry rice for 24 hours to draw out the moisture before you try to calibrate it.
When to Retire Your Thermometer
Calibration can fix a lot, but it can’t fix a broken bimetallic coil. If you find that you calibrate the thermometer to 32°F in ice water, but it’s wildly off (more than 10 degrees) in boiling water, the coil is likely damaged or fatigued. In that case, the tool is no longer linear and cannot be trusted at any range.
Also, check the probe for bends. A permanent kink in the metal stem can interfere with how the internal coil expands. If the stem is significantly warped, the readings will never be truly reliable again.
Common Mistakes to Avoid
Many people treat calibration as a “one and done” task for the life of the tool. In reality, it is a maintenance habit. Avoid these pitfalls:
- Using warm ice: If your ice has been sitting out and is “wet” or transparent, it is likely closer to 35°F or 40°F. Use fresh ice straight from the freezer.
- Touching the container: If the probe rests on the bottom of a metal pot during a boil test, you are measuring the temperature of the stove burner, not the water.
- Ignoring the offset: If you have a digital thermometer that is off by 1 degree and can’t be calibrated, don’t throw it away. Just write “+1” on the back with a marker so you remember to adjust your target temp.
- Over-tightening: When turning the calibration nut, use small, micro-movements. A tiny turn of the nut moves the needle significantly on the dial.
Quick Reference: Boiling Points by Altitude
If you choose the boiling water method, use this table to find your target temperature based on your elevation.
| Elevation (Feet) | Boiling Point of Water |
|---|---|
| 0 (Sea Level) | 212°F (100°C) |
| 1,000 | 210°F (99°C) |
| 2,000 | 208°F (98°C) |
| 5,000 | 203°F (95°C) |
| 8,000 | 197°F (92°C) |
Frequently Asked Questions
Can I calibrate a Taylor thermometer in the oven?
No, you shouldn’t use an oven for calibration. Household ovens fluctuate wildly in temperature, clicking on and off to maintain an average. They also have “hot spots.” Use ice water or boiling water, as these provide a scientifically “fixed” temperature point that doesn’t change based on your appliance’s settings.
Why does my Taylor thermometer have a nut on the back?
That nut is specifically designed for calibration. It connects to the internal bimetallic coil. When you turn the nut, you are manually rotating the needle to align it with the correct temperature on the face, effectively “resetting” the tool’s accuracy.
Is my Taylor thermometer dishwasher safe?
Most Taylor analog meat thermometers are not dishwasher safe. The high heat and intense water pressure can break the seal around the dial face, leading to fogging or internal rust. Always hand-wash the stem with warm, soapy water and wipe the head with a damp cloth.
How do I know if my thermometer is digital or analog?
Analog thermometers have a physical needle that sweeps across a printed dial, looking much like a clock or a speedometer. Digital thermometers have an LCD screen that shows numbers. Analog models almost always have a calibration nut, while digital ones usually rely on factory settings or a “CAL” button.
Worth Remembering
A Taylor meat thermometer is one of the most useful tools in your kitchen, but it only works if you can trust the number on the screen or dial. Regularly checking your thermometer against an ice bath takes less than five minutes but can save a hundred-dollar holiday roast from the trash can. If you find your analog needle is off, don’t panic, just grab a wrench and the ice tray.
Most Taylor models are built to last for years as long as you give them this simple tune-up once or twice a year. Keep your probe clean, store it in its protective sleeve, and always double-check the 32°F mark before a big cooking project.




